Content here can be considered incomplete until expertise is given.
You can help by editing it.
Matchups
- Replay Theater is a great resource to find high-level matchup footage.
- High-level replays may also be found in-game (Main Menu > Collection > Replay > Search).
- The Counterstrategy page will generally have some basic counterstrategy against each character in the game.
- Please keep in mind that matchup charts are subjective and not all players may agree on them.
Anji Mito
Dealing with fuujin and its follow ups
- Fuujin's main flaw is that 3 of it’s 4 follow-ups can be dealt with on reaction, so anji players will try to make you overwhelmed in order to not react properly.To avoid getting confused and scrambly, try to default to downbacking when he does fuujin, and reacting to his other follow ups, as the low is the fastest one.
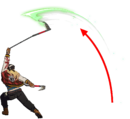
- Fuujin > Shin Ichishiki: Anji jumps up and throws a fan, he is +7 if you blocks, and it builds a lot of risc. That said, it has a lot of startup, and Millia can air to air with her j.S for a big counter hit. From here millia can either go for a damage route or oki.
- example route: j.S > Turbo Fall > c.S 6H Mizrah Haircar
- Fuujin > Issokutobi: Anji hops near the opponent after Fuujin. Anji players almost always will follow this up with throw. The hop is pretty slow and can be interrupted, but the safest option is usually to throw in reaction as you'll either grab him before he's actionable or if your reaction is a bit late you'll tech most of the time. He can do other options, just throw is his fastest and therefore most common on an already gimmicky reset.
- Fuujin > Nagiha: Anji does a sweep that is -7 on block. If the Anji misspaces it, Millia can score a 2K > 2D, but stronger Anji players will intentionally go for it from a further range to make it difficult to punish. This is a larger reason why you should intentionally not FD vs anji if you expect fujin, as he usually wants to be spaced from you. Even if he spaces it properly he is still very minus, and Millia can take her turn back so it’s not a bad situation for her at all.
- Fuujin > Rin: Anji does a somewhat fast overhead that causes a soft knockdown, but is very negative on block. Blocking and punishing is ideal, but takes some practice to get consistent at reacting and is probably the move most likely to hit you. To make up for that, make sure it hurts for anji when blocked, ideally with a c.S starter but at least get a 2K > 2D knockdown if that's all that's possible with the spacing.
- Fuujin > Shin Ichishiki: Anji jumps up and throws a fan, he is +7 if you blocks, and it builds a lot of risc. That said, it has a lot of startup, and Millia can air to air with her j.S for a big counter hit. From here millia can either go for a damage route or oki.
Overview | Frame Data | Matchups | Counterstrategy | Reverse Matchup Return to Top
Round Start
Neutral
Don't be too jumpy as anji's anti air Kou kills millia very quick. baiting it with neutral jumps or instant airbackdashes may be useful as millia can tend to whiff punish it with c.s very well. Once you're both playing on the ground, don't press buttons too wildly, as his spin can catch them and punish you. instead, play more conservatively with just approaching via dash blocking or standing right outside the range of certain buttons to try and make him whiff, or getting so close that he can't do much about your buttons. Grabbing may be more useful than you think due to it grabbing him out of his spins, and millia's speed.
Offense
Anji Doesn't have anything too unique on defense besides his parry super. Hdisc will indeed trigger it, and even though anji will likely whiff millia herself if you're doing the correct type of setup, you need to go hit anji during his attack sequence or else he gets off scot free. make sure to practice this, as it's embaressing to try to hit him during it and instead eat a counterhit and lose for it.
Defense
Anji thrives off counterhits, so avoid mashing almost always, and rely on jumping out, or dashblocking and backdashing certain moves to deal with his offense. eventually he'll have to use fujin to enforce his pressure, so refer to that paragraph above
Asuka R
Round Start
| Asuka's Button | Loses To | Beats | Trades | Whiffs |
|---|---|---|---|---|
Neutral
Offense
Defense
Axl Low
Short Summary Goes Here.
Overview | Frame Data | Matchups | Counterstrategy | Reverse Matchup Return to Top
Round Start
Neutral
Offense
Defense
Baiken
Short Summary Goes Here.
Overview | Frame Data | Matchups | Counterstrategy | Reverse Matchup Return to Top
Round Start
Neutral
Offense
Defense
Bedman
Round Start
| Bedman's Button | Loses To | Beats | Trades | Whiffs |
|---|---|---|---|---|
Neutral
Offense
Defense
Bridget
Short Summary Goes Here.
Overview | Frame Data | Matchups | Counterstrategy | Reverse Matchup Return to Top
Round Start
| Bridget's Button | Loses To | Beats | Trades | Whiffs |
|---|---|---|---|---|
Neutral
Offense
Defense
Chipp Zanuff
Short Summary Goes Here.
Overview | Frame Data | Matchups | Counterstrategy | Reverse Matchup Return to Top
Round Start
Neutral
Offense
Defense
Elphelt Valentine
Round Start
| Elphelt's Button | Loses To | Beats | Trades | Whiffs |
|---|---|---|---|---|
Neutral
Offense
Defense
Faust
Short Summary Goes Here.
Overview | Frame Data | Matchups | Counterstrategy | Reverse Matchup Return to Top
Round Start
Neutral
Offense
Defense
Giovanna
Short Summary Goes Here.
Overview | Frame Data | Matchups | Counterstrategy | Reverse Matchup Return to Top
Round Start
Neutral
Offense
Defense
Goldlewis Dickinson
Short Summary Goes Here.
Overview | Frame Data | Matchups | Counterstrategy | Reverse Matchup Return to Top
Round Start
Neutral
Offense
Defense
Happy Chaos
Short Summary Goes Here.
Overview | Frame Data | Matchups | Counterstrategy | Reverse Matchup Return to Top
Round Start
Neutral
Offense
Defense
I-No
Short Summary Goes Here.
Overview | Frame Data | Matchups | Counterstrategy | Reverse Matchup Return to Top
Round Start
Neutral
Offense
Defense
Jack-O
Short Summary Goes Here.
Overview | Frame Data | Matchups | Counterstrategy | Reverse Matchup Return to Top
Round Start
Neutral
Offense
Jack-O's 6P can attack out of H Disc setups more than most. Be mindful of this abare option and her potential to option select.
Defense
Johnny
Round Start
| Johnny's Button | Loses To | Beats | Trades | Whiffs |
|---|---|---|---|---|
Neutral
Offense
Defense
Ky Kiske
Short Summary Goes Here.
Overview | Frame Data | Matchups | Counterstrategy | Reverse Matchup Return to Top
Round Start
Neutral
Offense
Defense
Leo Whitefang
- keep an eye out for his 236HS crossup attempts and learn to throw on reaction. Safejumps are essential in dealing with Leo's flashkicks. With this in mind Throw > c.S OTG > IAD j.S is one such safejump that will help force your opponent to commit to blocking your pressure
Overview | Frame Data | Matchups | Counterstrategy | Reverse Matchup Return to Top
Round Start
Neutral
Offense
Defense
May
Short Summary Goes Here.
Overview | Frame Data | Matchups | Counterstrategy | Reverse Matchup Return to Top
Round Start
Neutral
Offense
Defense
Millia Rage
Short Summary Goes Here.
Overview | Frame Data | Matchups | Counterstrategy | Reverse Matchup Return to Top
Round Start
Neutral
Offense
Defense
Nagoriyuki
Against Nagoriyuki, your main goal is to survive his blood specials early into the round. Once he's at high blood you can freely move around the screen and attempt to bait buttons.
- Don't ever let a Nago whiff 2h in neutral for free. Whiff punish it or get in close and start your pressure.
- NEVER let him fukyo into your face for free. If you do not react and punish this, it will be almost impossible for you to win. (2k > 2d is a good punish)
Overview | Frame Data | Matchups | Counterstrategy | Reverse Matchup Return to Top
Round Start
Round start is an extremely crucial part of every round against Nagoriyuki. Surviving this will greatly increase your chances of winning that round.
- our f.s beats ALL his bloodspecials
- his 5k beats our f.s, which will lead to a huge amount of damage.
- jump back puts you into an advantageous position if he does beyblade, But his dp will catch you, leading into his pressure.
- microwalk back > low block. Evades his dp and blocks his 2s and beyblade.
Neutral
Offense
Defense
Potemkin
Short Summary Goes Here.
Overview | Frame Data | Matchups | Counterstrategy | Reverse Matchup Return to Top
Round Start
Neutral
Offense
Defense
Ramlethal Valentine
Short Summary Goes Here.
Overview | Frame Data | Matchups | Counterstrategy | Reverse Matchup Return to Top
Round Start
Neutral
Offense
Defense
Sol Badguy
Short Summary Goes Here.
Overview | Frame Data | Matchups | Counterstrategy | Reverse Matchup Return to Top
Round Start
Neutral
Offense
Defense
Testament
Short Summary Goes Here.
Overview | Frame Data | Matchups | Counterstrategy | Reverse Matchup Return to Top
Round Start
Neutral
Offense
Defense
Zato-1
Short Summary Goes Here.
Overview | Frame Data | Matchups | Counterstrategy | Reverse Matchup Return to Top
Round Start
Neutral
Offense
Defense


