BBCF/Bullet: Difference between revisions

From Dustloop Wiki
Line 1,610: Line 1,610:
  |hitbox=
  |hitbox=
  |description=
  |description=
*It has poor damage for an engage, but it's still a combo tool.
*Used for midscreen H2 combos
*Use if you can finish the round with it.
 
Because of the changes to Flechette Engage making it hard to combo from in CF, Explode Engage has become the new drive followup of choice to spent your H2 on midscreen.  
}}
}}
}}
}}
====== <font style="visibility:hidden" size="0">Miquelet Capture</font> ======
{{MoveData
{{MoveData

Revision as of 23:56, 8 June 2016

Bullet
BBCF Bullet Portrait.png

Health: 11,500
Combo Rate: 65%
Prejump:
Backdash Time 22 / Invul: 1-7


Movement Options
1 Double Jump/Airdash, Step-Dash
Play-style
Rushdown/Grappler Hybrid, Situational (dependent on Heat Up level)
  

Overview

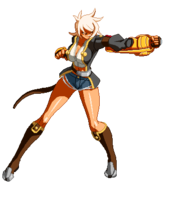
Bullet is a member of a mercenary force who appears to be against Sector Seven. Having been raised by mercenaries since she was young, she fights from one battlefield to another. Bullet has a candid attitude and she doesn't sweat small details. She is the type to always keep a promise to someone no matter what. She is slightly ignorant of the world around her due to her upbringing in an all-male environment.
Aside from the battle knowledge she's acquired, she doesn't know much. She is always ready to fight and usually applies her knowledge of the battlefield to everything. She is also aggressive, but has a 'big sis' sort of appearance.

Drive: Lock-On

  • By holding down the D button, Bullet creates a growing orange circle around her. If the opponent is inside this circle, they are "locked on" with a special crosshair. By releasing the D button, Bullet launches herself at the opponent she locked on to with an attack (if she didn't lock on to them, she simply cancels the stance).
  • If Bullet lands a hit with her Drive, she gains one Heat Up level. She can have up to two (starting with none), with the first one denoted by an orange shade and the second one by a larger red one.
  • Heat Up levels last for 900 frames; the timer resets each time she gains another level. Gaining levels when you're already at Lv2 doesn't do anything but reset the timer.
  • Heat Up levels have many different effects on Bullet's moves. Some moves revert her to Lv0, usually leading into a combo that lets her regain at least one level.
  • At Lv1 and Lv2, Bullet's ground and aerial dashes become faster and cover more distance. The circle produced by the Drive also gets larger.
  • In previous versions, If Bullet doesn't land a hit with her Drive after launching herself (by getting it blocked or having the opponent dodge or stuff it), she would lose a Heat Up level instead. However, in CF, Bullet no longer loses Heat Up levels on block or whiff
  • By locking on to the enemy for long enough, the crosshair becomes red and makes a beeping noise. If Bullet attacks with her Drive in this "Red Lock" state, the properties of her moves change, dealing more damage, gaining invulnerability, and being more advantageous on block. The time required to get the Red Lock is reduced if Bullet has extra Heat Up levels.


Overdrive: Heat the Beat

  • After using Overdrive, Bullet immediately gains a single Heat Up level.
  • During Overdrive, Bullet does not lose any Heat Up levels, whether the opponent blocks your D attacks or you use the D follow-ups of special moves.
  • After leaving the Overdrive state, Bullet retains the Heat Up level she gained while entering it.
  • The Heat Up level timer freezes while in Overdrive, and resets after Bullet leaves the Overdrive state.

Bullet's Overdrive can be used in many different ways. You can use it for extremely damaging unburstable combos, even entering it mid-combo. You can use it at the beginning of the match to get yourself a guaranteed Heat Up level (for example, if you expect your opponent to outrun you). Lastly, you may use it as an impromptu reversal, perhaps even buffering 720A during its start-up animation.

Pros/Strengths

  • Has many different tools for any situation, including a projectile, a reversal move, and a command grab super
  • Strong pressure at close range with tight blockstrings, high/low mixups, and frame traps
  • Capable of extremely strong combos that don't require Heat
  • Drive provides good mobility to stay on your opponent for the whole match
  • Easy to learn, the combos are easy to execute


Cons/Weaknesses

  • Her dashes are short and slow on Heat Up Lv0, making it difficult to close in on mobile characters
  • Even with the various ways of getting in, she depends on being close to the opponent, so zoners may be difficult to deal with
  • Her high-damage combos require Heat Up levels, which should be gained while you're at the disadvantage
  • Most of her grabs are blockable, limiting her mix-up to highs, lows, and an occasional cross-up
  • Performs poorly on the defensive, making it very important to block well


Ambox warning.png This data is all copied over from BBCPE 1.1. Replace with 2.0 data as it becomes available (and delete this warning)

Normal Moves

5A
5A
BBCP Bullet 5A.png
Just another punch.
Damage Cancel Guard Startup Active Recovery Frame Adv Attribute Invul
300 CSOJR All 6 3 9 0 HB -
  • Just an average jab with a fast startup. 2A is marginally better because of the extra frame of advantage and because it's able to hit all crouchers, so use it if you can.
  • Can be used occasionally as an anti air
  • Combos from M.Capture in the corner
  • Gatlings into 6A or 2B for high/low mixup, and can be jump cancelled.
5B
5B
BBCP Bullet 5B.png
The best non-Drive poke you got.
Damage Cancel Guard Startup Active Recovery Frame Adv Attribute Invul
550 SOJR HL 10 3 15 -1 HB -
  • Good poke
  • Good point to vary up your pressure or catch people trying to jump out of pressure

5B has decent range for a poke, so use it if you are just outside 2B range. It also gatlings into 6A or 2B for high/low mixup, and can be jump cancelled so it's a pretty good point to vary your pressure.

5C
5C
BBCP Bullet 5C.png
Flamey punch brings satisfaction.
Damage Cancel Guard Startup Active Recovery Frame Adv Attribute Invul
800 SOR HL 13 5 13 -1 HBP -
  • Pushes Bullet forward, making it useful for frametraps
  • Forces FC on Counter Hit

One of Bullet's best starters, so use it for a high damage punish. In CF, it has given back it's ability to force Fatal Counter on Counter Hit so punishes will hurt a bit more than they did in CPEX.

5[C] has been removed in CF, making this the only version of 5C. However, even without the presence of 5[C], 5C can still be a good place to reset pressure sparingly by taking advantage of people expecting you to cancel into 2C, Flint Shooter or Charged Flint Shooter.

2A
2A
BBCP Bullet 2A.png
poke poke poke dash* poke poke
Damage Cancel Guard Startup Active Recovery Frame Adv Attribute Invul
300 CSOJR All 6 3 8 +1 F -
  • Great in pressure or to catch people trying to roll, delay or no tech

Just an average jab with a fast startup. Marginally better than 5A because of the extra frame of advantage and because it's able to hit all crouchers, so use it if you can.

Gatlings into 6A or 2B for high/low mixup. You can also do a tick throw setup by doing 2a > delay microdash Throw or Crossfire Wheel as an alternate mixup.

66 > 2a > 4ab after knockdown is an option select that hits or misses with 2a due to tech and then either barriers if they tech or confirms your pick up combo with 5b. Extremely useful for if your pressure is being disrespected. Also works well with the 2a serpentine setup, which looks extremely similar to this.

2B
2B
BBCP Bullet 2B.png
Best low normal and not that bad of a poke, too.
Damage Cancel Guard Startup Active Recovery Frame Adv Attribute Invul
500 SOR L 9 5 18 -9 L -
  • Possibly best poke

Like 5B, but with a slightly shorter range and hits low. However, 2B might all around be better as a poke compared to 5B in neutral. 2B's hurtbox being closer to the ground puts her at less immediate risk of getting whiff punished by an opponent who decided to jump over the poke. Also because people tend to default to blocking stuff standing in neutral situations, 2B's low property can end up opening opponents up where 5B would have been blocked.

2B can't be jump cancelled, so gatling into 5B for that.

2C
2C
BBCP Bullet 2C.png
Criss-cross!
Damage Cancel Guard Startup Active Recovery Frame Adv Attribute Invul
400,700 R L 14 3(12)3 19 -5 L -
  • Sometimes useful in mixup and pressure

Can be a surprise low or catch people trying to mash/jump out of Flint Shooter or charged Flint Shooter when delayed. Has poor frame advantage on block but in CF, the pushback on the second hit has been altered to put you at a safer distance after being blocked. You also have the option to special cancel both hits to vary your pressure. Still 2C should be used sparingly and definitely not in neutral.

Because 5D can no longer be comboed into normally, 2C has become a more common combo piece in ground combos in order to get an Afterburner ender instead.

6A
6A
BBCP Bullet 6A.png
It's an overhead.
Damage Cancel Guard Startup Active Recovery Frame Adv Attribute Invul
800 SOR H 24 3 19 -3 HB -
  • Good overhead
  • Common combo piece

Bullet's overhead. It can be canceled into after 5A, 2A, 5B, or a jump-in for mixup. However, 6A has lost its ability to gatling into 5C in CF. It can now gatling into 6C and 3C instead. On hit, you can still convert 6A into a combo by gatling into 3C directly now but a blocked 6A doesn't have as much options to salvage the situation and maintain pressure as before.

6B
6B
BBCP Bullet 6B.png
Pretty good as far as anti-airs go.
Damage Cancel Guard Startup Active Recovery Frame Adv Attribute Invul
650 SOJR HL 12 3 18 -4 HB 5-14H
  • Good Anti-air in pressure
  • Launches opponent on hit

Bullet's anti-air. Due to its limited horizontal range, it tends to work best at preventing opponents from jumping back in to reset pressure when you're on the defensive.

In CF, 6B now launches opponents even without a counter hit and is useful in some midscreen combo routes to get a better j.D combo ender instead of a 2C > Afterburner ender

6C
6C
BBCP Bullet 6C.png
Knee of Justice?
Damage Cancel Guard Startup Active Recovery Frame Adv Attribute Invul
1100 SOJR HL 23 6 14+8 -9 H 5-42F
  • It has a large startup and limited options if blocked, so it's not very useful outside of combos.
3C
3C
BBCP Bullet 3C.png
Sweep the leg.
Damage Cancel Guard Startup Active Recovery Frame Adv Attribute Invul
700 SOR L 21 3 21 -7 F 4-21B
  • Good for low profiling some pokes
  • Forces FC on Counter Hit

Typically used as a way for Bullet to beat pokes with greater range than hers because of its ability to low profile body attribute attacks, the distance it travels and how it can be easily converted into a full combo on Counter Hit. It can also just be useful as a surprise low in neutral though. In CF, it has been given the ability to Fatal Counter on Counter Hit for better punishes.

j.A
j.A
BBCP Bullet jA.png
jump* poke poke poke
Damage Cancel Guard Startup Active Recovery Frame Adv Attribute Invul
300 CSOJR HA 7 3 8 - H -
  • Good Air to Air up close

A fast air jab, but not great for combos. Jump up j.A can be a great way to deal with an air approach because it'll leave you less vulnerable on whiff compared to 6B and it'll hit opponents in that awkward area where most AAs will whiff.

j.B
j.B
BBCP Bullet jB.png
Kick em in the face.
Damage Cancel Guard Startup Active Recovery Frame Adv Attribute Invul
500 SOJR HA 10 3 15 - H -
  • An air-to-air kick with fair range.
  • Use if you need the range over speed.
  • Jump cancels
j.C
j.C
BBCP Bullet jC.png
Basically does everything.
Damage Cancel Guard Startup Active Recovery Frame Adv Attribute Invul
700 SOR HA 13 3 15 - H -
  • Has range, and a sexy meaty hitbox, making it an ideal jump in.
  • Knocks them to the ground with untech time on counter hit. Can be picked up for a combo.


Drive Moves

5D
5D
BBCP Bullet 5D.png
zoop.
Version Damage Cancel Guard Startup Active Recovery Frame Adv Attribute Invul
Lv0 300, 0x2, 700 R*, -, Rx2 All 10+8 18 20+10 -10 H 1-19P
Lv0 (Red Lock) 700, 0x2, 700 R*, -, Rx2 All 29+8 18 20+10 +2 H 1-19 All
Lv1 300, 0x2, 700 R*, -, Rx2 All 10+6 18 20+10 +4 H 1-19P
Lv1 (Red Lock) 700, 0x2, 700 R*, -, Rx2 All 24+6 18 20+10 +6 H 1-19 All
Lv2 300, 0x2, 700 R*, -, Rx2 All 10+4 18 20+10 +6 H 1-19P
Lv2 (Red Lock) 700, 0x2, 700 R*, -, Rx2 All 15+4 18 20+10 +9 H 1-19 All

In CF, 5D's circle is huge, spanning about 1/2 to 2/3rds of the screen. However, it also has a longer startup.

Because of its slower startup, it no longer can be used in most combos anymore and because of the changes to frame advantage and pushback on block from a blocked drive attack, it's not very advisable to use it too often in neutral either. You'll still want to use 5D in neutral sparingly just to make sure your opponent hasn't forgotten that you have this option.

j.D
j.D
BBCP Bullet 5D.png
zoop.
Version Damage Cancel Guard Startup Active Recovery Frame Adv Attribute Invul
Lv0 300, 0x2, 700 R*, -, Rx2 All 10+8 18 20+10 -10 H 1-19P
Lv0 (Red Lock) 700, 0x2, 700 R*, -, Rx2 All 29+8 18 20+10 +2 H 1-19 All
Lv1 300, 0x2, 700 R*, -, Rx2 All 10+6 18 20+10 +4 H 1-19P
Lv1 (Red Lock) 700, 0x2, 700 R*, -, Rx2 All 24+6 18 20+10 +6 H 1-19 All
Lv2 300, 0x2, 700 R*, -, Rx2 All 10+4 18 20+10 +6 H 1-19P
Lv2 (Red Lock) 700, 0x2, 700 R*, -, Rx2 All 15+4 18 20+10 +9 H 1-19 All
  • Essential for combos, and can be special cancelled now.
  • Holding the button will charge the ring, giving it a larger ring. If you wait for the target to turn red, you get extra damage and invincibility.

Higher heat levels give more frame advantage on block, but if it is blocked, you lose a heat level. Don't waste it.

  • Hitting back while holding will cancel it.
  • Chases the hell out of them if used for oki, and can beat reversals if you use the red ring. IAD over their head for a crossup.
2D
2D
BBCP Bullet 2D.png
A mix-up tool with confusing animation.
Version Damage Cancel Guard Startup Active Recovery Frame Adv Attribute Invul
Lv0 800 R L 17+31 3 26 -10 F 6-24FT
Lv0 (Red Lock) 1000 R L 36+31 3 26 -8 F 6-24FT
Lv1 800 R L 15+28 3 26 0 F 6-24FT
Lv1 (Red Lock) 1000 R L 29+28 3 26 +2 F 6-24FT
Lv2 800 R L 13+23 3 26 +2 F 6-24FT
Lv2 (Red Lock) 1000 R L 29+28 3 26 +2 F 6-24FT

While slow, the change to Bullet's grounded drive circle makes this a decent ranged low option, especially because 6D and 2D are probabaly her best starters and the only drive attacks still + on block now.

6D
6D
BBCP Bullet 6D.png
A mix-up tool with less confusing animation.
Version Damage Cancel Guard Startup Active Recovery Frame Adv Attribute Invul
Lv0 800 R HA 17+29 3 26 -10 H 6-32FT
Lv0 (Red Lock) 1000 R HA 36+29 3 26 -8 H 6-32FT
Lvl 800 R HA 15+26 3 26 0 H 6-32FT
Lv1 (Red Lock) 1000 R HA 29+26 3 26 +2 H 6-32FT
Lv2 800 R HA 13+21 3 26 +2 H 6-32FT
Lv2 (Red Lock) 1000 R HA 18+21 3 26 +4 H 6-32FT

While slow, the change to Bullet's grounded drive circle makes this a decent ranged overhead option, especially because 6D and 2D are probabaly her best starters and the only drive attacks still + on block now.


Universal Mechanics

Forward Throw
Forward Throw
6B+C
BBCP Bullet BC.png
Bounces them off the wall.
Damage Cancel Guard Startup Active Recovery Frame Adv Attribute Invul
0, 1400 -, SOR 80 7 3 16 - ground throw -
  • Wall Bounces Midscreen
  • Wall Splats in the corner

Both forward and back throw are good for combos. use the one that brings them closer to the corner. In CF, her forward throw will now wall splat in the corner and be picked up with Miquelet Capture.

Backward Throw
Backward Throw
4B+C
BBCP Bullet 4BC.png
Drops them to the ground.
Damage Cancel Guard Startup Active Recovery Frame Adv Attribute Invul
0, 1400 -, SOR 80 7 3 16 - ground throw -
  • Both forward and back throw are good for combos. use the one that brings them closer to the corner.
  • Combos directly into instant kill.
Air Throw
Air Throw
j.B+C
BBCP Bullet jBC.png
Similar to the ground forward throw.
Damage Cancel Guard Startup Active Recovery Frame Adv Attribute Invul
0, 1400 -, SOR 120 7 3 15+3 - air throw -
  • A standard air throw, making it a handy air-to-air when they're close.
Counter Assault
Counter Assault
6A+B during blockstun w/50%
BBCP Bullet 6B.png
Don't get yourself in situations when you have to use this.
Damage Cancel Guard Startup Active Recovery Frame Adv Attribute Invul
0 R all 13 3 30 -14 HB 1-20 All
  • It's got a bleh hitbox, but the startup is alright for what it is.
Crush Trigger
Crush Trigger
A+B w/25%
BBCP Bullet AB.png
There's never enough ways to crack the enemy open.
Damage Cancel Guard Startup Active Recovery Frame Adv Attribute Invul
1000 R B 30-60 1 24 +4 BP -
  • That startup is huge! But can be used if they are respecting you hard.


Specials

Wadcut Engage
Wadcut Engage
D during a D normal
BBCP Bullet 5DD.png
Never a bad idea to use this in the corner.
Version Damage Cancel Guard Startup Active Recovery Frame Adv Attribute Invul
Lv1 0, 1000 -, R - - - Total 55 - HB -
Lv2 0, 2000 -, R - - - Total 55 - HB -
  • One of the better engages for both midscreen and corner combos.
Flint Shooter
Flint Shooter
236A
BBCP Bullet 236A.png
Not for, but against zoning.
Version Damage Cancel Guard Startup Active Recovery Frame Adv Attribute Invul
Lv0 350 R All 17 36 Total 46 -5 HBP* -
Lv1 500 R All 17 69 Total 46 -5 HBP* -
Lv2 700 R All 17 Whole screen Total 46 -5 HBP* -
  • Gets additional hits with higher heat levels. H1 Flint Shooter = 2 hits, H2 Flint Shooter = 3 hits.
  • Counterhit gives you an easy combo

In CF, Bullet's Flint shooter will now always go full screen regardless of your current heat level, making it always great for controlling space on the ground and covering an approach. If opponents try to jump over flint shooter, you can try and intercept them with jump up j.A , j.B, air throw or even scoop them out of the air by doing ground Snaphance Fist if they're going to try and jump over it at the right angle for Snaphance fist to grab them.

Instead of going further at higher heat levels, Flint shooter will instead get an additional hit added to it with each heat level in CF. These additional hits are very useful in many ways. When clashing with projectiles, it's possible that the first hits will cancel out an opponent's projectile and allow flint shooter keep going without being destroyed itself. Against dolls like Nirvana and Ignis, the multiple hits will eat away at more of their doll meter than the single hit used to.

Flint Shooter (Charged)
236[A]
BBCP Bullet 236A charged.png
A great combo tool. Now with neutral!
Damage Cancel Guard Startup Active Recovery Frame Adv Attribute Invul
1200 R All 25 9 Total 58 +3 HBP* -
  • Hits a little higher than the uncharged version.
  • Goes farther with higher heat levels.
  • Gives you an easy combo on hit.
Cutting Shear
Cutting Shear
623B
BBCP Bullet 623B.png
Has a penchant for missing.
Damage Cancel Guard Startup Active Recovery Frame Adv Attribute Invul
0x2, 1400 -x2, R All 15 2 37 -29 HB 1-16 All
  • Reversal
  • Combo Ender for shorter combos
  • Can convert to a combo on CH without using Drive Followup

Bullet's DP. You can use it as a reversal. It got a slight buff to its horizontal range in CF but it still has limited horizontal range so you need to be careful of people trying to outspace it. You mostly want to use it in situations such as the opponent trying to do 2A on your wakeup where they're pretty close to you.

In CF, Cutting Shear no longer gives guaranteed untechable knockdown and in longer combos will cause opponents to air tech before hitting the ground. As a result, you won't be using Shear as a combo ender as often.

Explode Engage
Explode Engage
22D during Cutting Shear
BBCP Bullet 22D.png
A rare sight to see, but a cool one.
Version Damage Cancel Guard Startup Active Recovery Frame Adv Attribute Invul
Lv1 0, 1600, 100 -, Rx2 - - - Total 68 - HB -
Lv2 0, 3200, 100 -, Rx2 - - - Total 68 - HB -
  • Used for midscreen H2 combos

Because of the changes to Flechette Engage making it hard to combo from in CF, Explode Engage has become the new drive followup of choice to spent your H2 on midscreen.

Miquelet Capture
Miquelet Capture
41236C
BBCP Bullet 41236C.png
Just don't use it as a command dash.
Damage Cancel Guard Startup Active Recovery Frame Adv Attribute Invul
0, 1500 -, R Unblockable 5 3 20~37 - ground throw 8-until recovery P
  • Unblockable, but hits standing or aerial opponents only. Has projectile invuln.
  • You can use it as a preemptive anti-air, or to punish projectile zoning, but because it's highly punishable on whiff, use only when you are sure it'll work.
  • Useful for combos, use after 5D or 5C on standing opponents, or 5C > 3C on crouching opponents (One doesn't work against the other).
Brake
Brake
B during Miquelet Capture's run
Damage Cancel Guard Startup Active Recovery Frame Adv Attribute Invul
- - - - - - - - -
  • List what the move is used for
  • List interesting properties in bullet points like invul, floating opponents on CH, etc.

Follow the Help:Writing_Character_Pages guidelines

Piercing Engage
Piercing Engage
236D during Miquelet Capture
BBCP Bullet 236D.png
This baby hurts.
Version Damage Cancel Guard Startup Active Recovery Frame Adv Attribute Invul
Lv1 800 R - - - Total 49 - HBP* -
Lv2 2400 R - - - Total 49 - HBP* -
  • A good Engage for combos, wall sticks in the corner.
Snaphance Fist
Snaphance Fist
623C, air OK
BBCP Bullet 623C.png
Barely even an anti-air.
Version Damage Cancel Guard Startup Active Recovery Frame Adv Attribute Invul
Ground 0, 1700 -, R Unblockable 13 4 29+9 - Throw 4-16H
Air 0x2, 1700 R*, -, R All 13 2 30 - H -
  • The ground version has a little head invuln, but it's hitbox sucks. Keep it for combos.
Flechette Engage
Flechette Engage
623D during Snaphance Fist
BBCP Bullet 623D.png
Catch and boom.
Version Damage Cancel Guard Startup Active Recovery Frame Adv Attribute Invul
Lv1 0, 900 -, R - - - Total 72 - HB -
Lv2 0, 2500 -, R - - - Total 72 - HB -
  • Another damaging engage. Combos.
Crossfire Wheel
Crossfire Wheel
360B
Damage Cancel Guard Startup Active Recovery Frame Adv Attribute Invul
- - - - - - - - -
  • List what the move is used for
  • List interesting properties in bullet points like invul, floating opponents on CH, etc.

Follow the Help:Writing_Character_Pages guidelines

???
???
63214D during Crossfire Wheel
Version Damage Cancel Guard Startup Active Recovery Frame Adv Attribute Invul
Lv1 - - - - - - - - -
Lv2 - - - - - - - - -
  • List what the move is used for
  • List interesting properties in bullet points like invul, floating opponents on CH, etc.

Follow the Help:Writing_Character_Pages guidelines

Afterburner
Afterburner
214D
BBCP Bullet 214D.png
For when they try to make fun of your stubby dash.
Damage Cancel Guard Startup Active Recovery Frame Adv Attribute Invul
- - - - - Total 55~79 - - 7-26~49PGP
  • Can be charged for 2 heat, but it's pretty risky.
  • Projectile invuln, but you'll need to get used the timing. It's a bit strange.
  • If you need the heat after a burst or 6AB hit, use this.


Distortion Drives

Rage Aggressor
Rage Aggressor
2363214C
BBCP Bullet 2363214C.png
The ultimate combo ender.
Version Damage Cancel Guard Startup Active Recovery Frame Adv Attribute Invul
Normal 200x3, 600x2, 300x7, 3000 R All 1+14~23 3x3 11+20 -15 HB -
Overdrive 200x3, 600x2, 300x7, 500, 2800x5 R All 1+14~23 3x3 11+20 -15 HB -
  • Never use this outside of combos. It doesn't even have invuln. Really, don't try it.
Serpentine Assault
Serpentine Assault
720A
BBCP Bullet 720A.png
And they said she's not a grappler.
Damage Cancel Guard Startup Active Recovery Frame Adv Attribute Invul
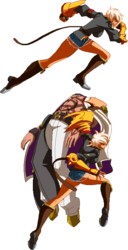
0xn, 320x2, 1520 —, Rxn 150 5+0 5 42 - ground throw 1-10 All
  • Some say using meter for a command grab is a waste and too risky. Give them the flamey-fist of doom.
  • Carries them to the corner.
  • Spin on wakeup, spin after a double jump, spin after an airdash, spin after blocked 2C, start a 5D over their head, cancel it, and spin...
Frangible Engage
Frangible Engage
720D during Serpentine Assault
BBCP Bullet 720D.png
It's not over yet!
Damage Cancel Guard Startup Active Recovery Frame Adv Attribute Invul
0, 350 - - - - - Total 81 HB -
  • You've already been spinning for a awhile, why stop now? You need a heat level to use this. (actually, there's a good reason. It carries them midscreen)
  • You can pick up a combo after this hit or keep spinning...
  • spinning... spinning...
Blackout
Blackout
1080D during Frangible Engage
BBCP Bullet 1080D.png
Lights out!
Version Damage Cancel Guard Startup Active Recovery Frame Adv Attribute Invul
Normal 100x4, 2110 - - - - - Total 158 HB -
Overdrive 100x10, 2110 - - - - - Total 164 HB -
  • After all that spinning you deserve a reward. More spinning! As long as you are at heat level 2, you can pretend you are Tager. It does an exorbitant amount of damage, and can easily end the round.


Astral Heat

Hard Kill Bringer
632146D
BBCP Bullet AH.png
Actually not that hard to kill with.
Damage Cancel Guard Startup Active Recovery Frame Adv Attribute Invul
Death - All 4+21 3 31 -13 HB 1-26 All
  • Lots of invuln and a huge hitbox, but you are a scrub if you use it outside of combos.
  • ...Ok, really I just mean you should back throw before you IK them. Then you don't have to worry about them blocking their fiery fate.


External References