| Overview | Combos | Strategy/Counter Strategy | Full Frame Data | Discord | Forums | Videos |
| Lore: | Hades Izanami is an immortal being, death incarnate, and the true main antagonist of the BlazBlue series, as well as the former Imperator of the Novus Orbis Librarium. Using Ragna's sister, Saya, as a vessel, her goal is to reduce everything in the universe to nothing. She first appears as a playable character in BlazBlue: Central Fiction. |
| Izanami | |
|---|---|
 |
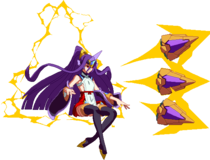
Izanami's drive is the Yasanaki no Magatama, the three large triangular pieces (nicknamed "bits") that float behind her. She uses these to block and also perform various attacks. Izanami has two modes, and can switch between them by pressing the D button:
- Normal Mode: In this mode, she has access to followups after C attacks by pressing C again, gains access to j.2C, and can block normally.
- Active Mode: In this mode, Izanami activates her special unit, Yasakani No Magatama. However, she cannot block at all
- She gains the ability to shoot bits with 2D, 4D and 6D. There is a short recharge time before they reappear. During this time she cannot perform actions that require bits, such as Drive attacks and specials, blocking, and switching back to normal mode.
- Drive special moves can be activated without a startup animation from Izanami herself, allowing her to use them while performing other actions.
- If Izanami is hit, Active Mode immediately ends (Meaning you will be able to block normally once the combo against you finishes).
Upon activation, her Exodus Arc immediately stops any action and returns to Izanami's back in normal mode, even if it is recharging.
During overdrive Izanami has full access to the abilities of both modes at the same time and shortens the recharge time on her D attacks and specials. She can also perform her D special moves during her attacks. However there is a limitation: Her Exodus arc weapon cannot do two things at the same time. For instance, if you use 6D, you cannot use your C followup attacks or block until the projectiles have disappeared from the screen.Unlike most characters, instead of a double jump, pressing up for the first time when midair will make Izanami float for a period of time. The float time is affected by Izanami's height once it's activated. Simply put, float activations high in the air = reduced float time. While floating, Izanami can use her ground normals, special moves & even dash.
Pressing jump while floating will make Izanami do a short hop and fall. Performing a super jump input will cause Izanami to immediately fall to the ground. Exiting the float state will refresh Izanami's air dash. This means that you can use movement sequences like IAD > Float > Cancel Float (Jump) > Air Dash. While floating at any height, all of Izanami's standing moves can be blocked with any block. During this time she is still considered airborne for the purposes of moves that check the player's state, so moves that only affect grounded opponents (e.g universal throws) will not affect her, and vice versa. Getting hit ends float state and is considered an air hit. Certain moves also will immediately end the float.
Attacks that End Float:
- 6A
- 6B
- 214B
Normal Moves
5A

5B

- Hitbox fully extends on frame 9
- Hurtbox extends to full size on frame 8 (leads to being stuffed in footsies)
Quick and far reaching poke, similar to Ragna's 5B, though with a much less generous hitbox. It's still useful for the same reasons and it's also a useful air to air when floating.
5C

- Surprisingly quick 5C, but has pretty awful recovery
- Jump cancellable on hit only
- Izanami's best starter alongside 2C, use when you need something faster than 2C to punish with.
5CC

- Only usable when Sharin is present
- Makes 5C slightly safer, but there's a reversal window if 5C is instant blocked
- Can only be special cancelled, unlike the impressive array of cancels 5C has.
Uses Izanami's bits to drag the opponent back towards her. Under regular circumstances this move doesn't actually combo from 2C. On hit, the opponent will crumple. You can restand them with most normal attacks afterwards.
2A

- Does not cancel into itself
Faster than the average 2A. Because it can't cancel into itself, standard 2A > 2A stagger pressure will lose to instant blocks. However, this move is even on block and one of Izanami's few jump cancellable normals on block.
2B

Izanami's standing low. 2B lowers Izanami's hurtbox to an absurd extent, making this move wonderful for counterpoking at a midrange. It also slides Izanami forward slightly.
2C

- Fatal Counter
Boasts Izanami's best stats for an opening hit including a fatal counter, making it her go-to punish attack.
2CC

- Only usable in Normal Mode
Vacuums on hit or block, spins opponent on CH.
6A

Main anti-air.

- Anti air
- While floating, cancels float
- Gatlings from most of Izanami's normals
- Launches opponent on hit
On hit or block Izanami can use her float ability during recovery if done from the ground, which allows her to perform follow up combos. While floating,
6B

- 110% bonus proration
- As of CF2, is a mid from float
Leaps into the air slightly, if used when floating, Izanami will cancel the float and drop to the ground. If it hits an opponent during the fall, Izanami can cancel it into her air normals. Can be done with relative impunity when Shield of Dreams is up due to it also hopping over most throw moves.
6C

The first strike hits low, and the second strike is an overhead. Can be used as a tricky Oki tool where it's not obvious to your opponent if the first low will hit or not, causing them to have to guess which way to block first. This move has a deceptively short range, however. The hitbox is almost entirely enclosed in Izanami's hurtbox.
6CC

- Only usable in Normal Mode and when the Sharin is available
- Knocks airborne opponents downwards.
- Looks like another overhead to follow 6C, but isn't.
3C

- No cancels on block
- Very punishable
Izanami slides incredibly close to the ground and hits her opponent. This move has a low hurtbox with amazing range and speed, but suffers from slow startup, a lack of cancel options, and bad frame advantage on block. Useful as combo filler in float combos. While this move stops being a low attack while floating, it still causes crumple (which can look a little strange).
j.A

Great for setting up High/Low mixups from float. Fast enough that you can use the super jump float cancel and still land this while you fall. Because 2A is jump cancellable, you can potentially use this for instant overheads on tall characters. This requires you to condition them to stand, however.
j.B

j.C


j.2C

- Only available when her Magatama weapon is available and in normal mode.
- Spins her magatama projectiles around her while in midair.
- Hits multiple times and lasts until landing.
- Significantly reduces her aerial momentum during use.
Drive Moves
With the exception of 5D, All drive moves may be performed at any time while active mode is enabled and her Sharin is available. (Note that being hit disables active mode immediately)
5D/j.D

Switches between Normal and Active mode. In normal mode you can use any directional inputs since no other D commands are possible.
4D/j.4D

6D/j.6D

- Only usable in Active Mode
- Disppears if Izanami is hit
- Surprisingly good starter hit
Unlike 4D, the projectiles are closer together and there is a small delay before the projectiles start moving forward. Useful as an Okizeme tool to keep your opponent blocking while you pressure them. Also very good to start and continue combos when you can due to its excellent P1/P2 combo.
2D/j.2D
Sonic Sabre?

- Only usable in Active Mode
- Disppears if Izanami is hit
Covers a lot of space
3D/j.3D

- Only usable in Active Mode
- Disppears if Izanami is hit
Covers a lot of space, very useful when trying to zone from the ground.
1D/j.1D

- Only usable in Active Mode
- Disppears if Izanami is hit
Covers a lot of space. Generally only useful while airborne.
Universal Mechanics
Forward Throw
5/6B+C

- 100% minimum damage
- Can be used while floating, can only catch airborne opponents during this time.
- Hard knockdown
Back Throw
4B+C

- 100% minimum damage
- While floating, catches airborne opponents instead of grounded opponents.
Always wall bounces regardless of positioning, making this throw very awkward when your back is in the corner. Directly combos into 6A for a float combo.
Air Throw
j.B+C

- 100% minimum damage
- Replaced with her grounded throws while Izanami is floating.
Kicks the opponent downward and ground bounces. You can cancel this into float immediately to followup.
Counter Assault
When blocking 6A+B
Standard counter assault, uses her 5B animation. One of Izanami's few defensive options, and a good defensive tool overall.
Crush Trigger
5A+B (Chargeable)

| Uncharged |
|---|
| Charged |
On air hit, wall bounces. If the opponent hits the corner of the stage, they'll wallstick instead. Great for corner carry combos.
Ghost Peak Strike
Special Moves
236A

DINOSAUR KING IS WHAT YOU WANNA BE, YEAH

Similar to Ragna's dead spike but with less range. Mostly used in combos to add damage.
Thunderbolt Lance
214A/B


| A |
|---|
| B |
- Fatal Counter
- Izanami disappears for a split second, then performs a palm thrust.
- Blows the opponent back
- Wall bounces in the corner
214A is used as a combo ender in most cases, can also be used to frame trap predictable attacks due to its invulnerability.
- Izanami disappears for a split second, then performs a sliding kick.
- If used while Izanami is floating, she will reappear in the ground.
214B is one of the reasons your opponent needs to remain cautious while you are floating, since it gives you access to a low attack from anywhere (Albeit somewhat slow) and also gives you a tool to beat out standing anti air attacks, since it will low profile many of them and cares not for Head attribute invulnerability. However, at -6 it is punishable by most standing jabs because Izanami briefly stands after the attack. On instant block it's punishable by most of the cast's 2As.
Shield of Dreams
623B

Super armor for one of the most mobile characters in the game. What could be more reasonable than that, I ask you?

- This move creates a ribcage-like purple energy shield that blocks all attacks for a short time.
- Behaves like a high/low/barrier guard point, Izanami will experience hitstop from moves, but no blockstun.
- Provides no protection against throws, bursts and unblockables, ends immediately if caught by any attack that it cannot block.
- Uses up a small portion of barrier to activate and Drains Barrier meter rapidly during use, ends immediately and causes Danger State if Barrier is used up.
- Moves that it blocks will consume a small amount of barrier, no matter the move. Crush trigger moves are blocked like any other, they do not consume additional barrier when they are blocked.
Part of what makes Izanami so damn scary. Can be used in order to take control of the match if you find yourself pushed against the wall and also just forces your opponent to try to block or evade you during this time. It also gives you a way to block while you're in active mode, mitigating some of the risk, particularly to guard cancel Exceed Accels. While it isn't completely invulnerable, opponents trying to grab you in this time are easy to prevent since they have no other options to mix it up with, and can be mitigated by using a low hover or moves like 6B.
While active, you must consider how you wish to dispel Shield of Dreams before it forces danger state. This is accomplished by using Distant affection, Stake of Supremacy or Bulwark, each of which carries their own risk. If you do get danger state, remember that you can use overdrive to prematurely end it as long as you've recovered at least some barrier.
Bulwark
623B

Deactivate

- Invincible until frame 16
- Unusually long active time
Behaves much like other reversals, except your opponent is unlikely to be mashing attack buttons anyway with shield of dreams out, however this does mean that using it as late as possible to prevent danger state will be very predictable for your opponent, although it is not as punishable as other reversals. Sometimes you will need to force your combos short to use this to avoid danger state, so be aware of this.
Flaming Dome
41236C (Chargeable)


Holding down the button increases the fireball's size and damage. Worth noting is that the fireball is still active while Izanami is preparing it above her head, a feature exploited in a number of her combos.
Distant Affection
63214C

Restores barrier/health on hit.

A short ranged command grab where Izanami grabs the opponent and performs a darkness-empowered double claw slash. Restore a portion of her health and barrier and dispels Shield of Dreams if successful, making it a powerful way to end shield of dreams pressure. If performed during danger state, it will not gain additional barrier.
Droplet
41236D

- Izanami's magatama surrounds the opponent before firing off lasers that electrocute them.
- If Izanami is in active mode, she does not perform a startup animation herself and can perform the move while also performing other actions. Otherwise Izanami performs a startup animation
- Izanami cannot block until the move completes
Orchid
63214D

If Izanami is in active mode, she does not perform a startup animation herself and can perform the move while also performing other actions. Just like Droplet, you cannot block until the move completes.
Arms of Sympathy
j.63214B

Attacks the opponent with a ghostly face while in midair. Very long active time and great for covering approaches from above and stopping jumpouts in response to your approach.
Distortion Drives
Stake of Supremacy
236236B

- Invincible from startup until end of active frames
- General purpose combo-ending distortion and Izanami's only real reversal.
Izanami kicks the opponent on startup, then performs a series of midair dash attacks that end with her dragging the opponent along the ground and knocks them towards the edge of the screen, making it good for corner carrying. The Overdrive version adds more midair dashes. Used as a reversal since Izanami doesn't have immediate access to one in most cases and can also be used to add damage to most combos. Also useful when combined with Shield of Dreams to end it before danger state, and also at the end of time stop combos to try and maximise the free damage it gives.
Hour of Nihility
214214C

ZA WARUDO! TOKI WO TOMARE!

- Command Throw
- Fixed 100 damage, occurs at the end of timestop.
- 0 Frame move akin to Tager Buster, meaning your opponent cannot prevent the attack after superflash.
- On hit, Time is frozen for opponent for 3 seconds. During this time Izanami can freely attack and her opponent will be unable to block and will be completely rooted to the spot for the duration.
- During timestop, the round timer is frozen and no gauges that normally increase or deplete with time of any kind will do so (I.e. Burst, Overdrive (!) barrier, heat when low on health, character specific gauges etc...)
- Hitting your opponent with a Distortion or Exceed Accel ends the time stop and performs the attack as normal.
- Throws performed during time stop will simply miss, with the exception of another Hour of Nihility, which will refreeze time for another 3 seconds.
- All hits during frozen time are considered one combo regardless of the moves used.
- Afterwards, opponent crumples to the floor.
- Dispels Shield of Dreams on hit.
A fairly terrifying command throw when combined with shield of dreams due to your opponent being forced to go on the defensive while it lasts. If you do manage to hit with it you'll preserve your remaining barrier without needing to risk using bulwark. Like other command throws, this can be baited in similar ways and has an awful recovery if you miss. This move's properties barely change during overdrive, however since your remaining overdrive freezes during time stop, you can perform a much more damaging combo than normally.
Moment of Benevolence
720A, air ok

ROADA ROLLA DA!

- Requires 100% heat. Heat is only consumed upon successful activation
- Izanami gathers energy then performs a pose that freezes time around the opponent rendering them unable to move or block in any way, allowing her to deal extra hits.
- Cancels float state on startup, but Izanami fall slower than normal if she was airborne.
- After time starts again, grounded opponents will collapse as if hit with a stagger move, airborne opponents will be launched backwards and wallbound.
- Listed recovery time is the time freeze period caused by the attack.
- During timestop, the round timer is frozen and no gauges that normally increase or deplete with time of any kind will do so (I.e. Burst, Overdrive (!) barrier, heat when low on health, character specific gauges etc...)
- Hitting your opponent with a distortion drive or exceed accel ends the time stop.
- Throws of any kind performed during time stop will simply miss.
- In Overdrive, the time for activation is noticeably shorter.
- Unblockable and unavoidable, not even invulnerability protects against it. Your opponent must notice the startup for this move and stuff it to avoid taking damage.
- Counterhit state for entire move
Highly matchup specific move, against slower characters that you can lock down with a drive move first, it can be useful particularly in overdrive. However against characters with easy access to long range moves or high mobility, this move is almost entirely useless as you're just handing your opponent a free counterhit combo. The time freeze is the same as Hour of Nihility, however since you aren't guaranteed to be near your opponent when this move activates, you'll get less damage since you need to spend time getting into range after time stops.
Exceed Accel
Melancholy Death (Arc Drive)
ABCD during Overdrive

Spooky scary skeletons.

- Does not cost Heat, but immediately ends Overdrive if used
- Becomes stronger and flashier with Active Flow
Izanami kicks the opponent on startup, then entraps the opponent in a ring of skulls. A horrifying scream rings out as the screen turns black and white and Izanami dons a skull mask. She then impales the opponent with her hand. On Active Flow, chains are added to the ring of skulls and the screen turns red when Izanami impales the opponent.
Puts Izanami in Active Flow if she hasn't already been in it already. Has full invuln and is safe on block, but it has no minimal damage and cannot be rapid-canceled.
Astral Heat
Eternal Darkness
1632143D

HEEEEEERE'S JOHHNY!

- Hitbox encompasses Izanami's entire Body and quite a volume around her (Especially upwards)
- Very long invulnerable time, and even longer active time.
Izanami uses her magatama to create a whirlwind of souls that launches the opponent into the air, then leaps after them. Still holding onto the opponent, she sends them plummeting to the ground as seven giant, ghostly skulls surround them both. The skulls converge on the opponent, sending them into the underworld while leaving Izanami unharmed.
External References
move and the move Full sections. One is shown on the character page, while the other is shown on the frame data page. Amane Nishiki [★]
 Arakune [★]
 Azrael [★]
 Bang Shishigami [★]
 Bullet [★]
 Carl Clover [★]
 Celica A. Mercury [★]
 Es [★]
 Hakumen [★]
 Hazama [★]
 Hibiki Kohaku [★]
 Iron Tager [★]
 Izanami [★]
 Izayoi [★]
 Jin Kisaragi [★]
 Jubei [★]
 Kagura Mutsuki [★]
 Kokonoe [★]
 Lambda-11 [★]
 Litchi Faye Ling [★]
 Mai Natsume [★]
 Makoto Nanaya [★]
 Mu-12[★]
 Naoto Kurogane [★]
 Nine the Phantom [★]
 Noel Vermillion [★]
 Nu-13 [★]
 Platinum the Trinity [★]
 Rachel Alucard [★]
 Ragna the Bloodedge [★]
 Relius Clover [★]
 Susano'o [★]
 Taokaka [★]
 Tsubaki Yayoi[★]
 Valkenhayn R. Hellsing [★]
 Yuuki Terumi [★]
Click [★] for character's full frame data
• HUD •
Controls •
Frame Data & System Data •
Patch Notes •
• Movement/Canceling •
Offense •
Defense •
Damage/Combo •
Attack Attributes •
Gauges •
Misc •