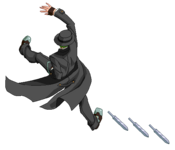
BBCP/Hazama

From Dustloop Wiki
Hazama

Overview

***From the BlazBlue wikia***
Hazama is a captain of the Novus Orbis Librarium's Intelligence Department and the main antagonist of the series. In reality, he is Yuuki Terumi, a former member of the Six Heroes and the creator of the Azure Grimoire and by extension the Black Beast.
Hazama maintains a calm and quiet demeanor around most people, pretending to be harmless as a member of the Intelligence Department. He claims to hate fighting and prefers to avoid conflict. This, however, is simply a guise to his true nature. When people see through it, he shows his true colors as selfish and manipulative; destroying other people's lives and twisting their beliefs for his own gain. He has no qualms with killing those who get in his way, and does not seem to show any kind of remorse for his actions.

Health: 11000
Play-style: Offensive, Zoning, Rushdown
Movement Options: Hop Dash, One Double Jump/Air Dash, Drive

Drive: Ouroboros
Named after a snake that eats it's own tail, Hazama's Drive is manifested as a stretching chain in the shape of a snake. He can cover many different angles and distances by shooting a drive move. What's more is that, at any point during the chain's travel, Hazama can follow up by either retracting the chain (~A) or using the snake head as an anchor point to perform unique maneuvers (~B, ~C, or ~D). Most of the time, if the snake head hits the opponent, you can follow up by zipping in with ~D and linking an air normal to convert into a combo. However, there are certain distances, and it differs for each drive move, where the chain will cause minimal hit or block stun, so you must be careful not to try and hit your opponent with chains up close or in the particular chain's "dead zone."

Overdrive: Jörmungandr
When Hazama enters overdrive, the limiter on his chains is released, eliminating the aforementioned "dead zone" and also gives his chains double damage. He also gains a life-stealing ring that encompasses a large radius around him, meaning that anybody close to you will have their health slowly leeched away. The life-steal ring does not persist while you are in hitstun (i.e., being combo'd).

Pros/Strengths:

  • Fast projectile that covers many angles
  • Multiple movement options allowing for varied approaches
  • Solid mix-up tools: command grabs, standing overheads and lows, safe-on-block normals
  • Good, stable damage conversion that can be attained from most any hit


Cons/Weaknesses:

  • Not much in the way of mid-range pokes outside of 2B or 3C
  • No meterless reversal


External References:


Move List

See also: Hazama Full Frame Data

Normal Moves

5A
BBCS Hazama 5A.png
High, fast jab.
Damage Cancel Guard Startup Active Recovery Frame Adv Attribute Invul Hitbox
300 CSOJR All 5 3 9 ±0 B - -
  • Fast, anti-air useful against deep jump-ins.
  • Whiffs on all crouching hit-boxes excluding Tager and Haku-men.
  • Can occasionally hit Relius while crouch-blocking.


The priority and long reach of this normal makes it a very useful tool in many situations. The opponent can never carelessly jump in on Hazama, along with the ability to out-prioritize the cast's standing normals.

5B
BBCS Hazama 5B.png
Fast, close-ranged knee.
Damage Cancel Guard Startup Active Recovery Frame Adv Attribute Invul Hitbox
550 SOR HL 8 3 12 +2 B - -
  • Much shorter range than most of the cast's 5Bs.
  • High frame advantage makes this move a staple in pressure strings.


5B, even with its short range is a very, very good normal. This normal allows Hazama to use stagger pressure like no other and turns him into a frame trap monster.

5C
BBCS Hazama 5C.png
Short-range, two hit swing of his knives.
Damage Cancel Guard Startup Active Recovery Frame Adv Attribute Invul Hitbox
400*2 SO(J)R HL 10 1(1)6 28 -15 B - -
  • Jump cancelable, very useful in pressure strings.
  • Okay anti-air in some situations, because it has a high vertical hit-box.


5C has relatively short range, but is a great punishing tool as well as pressure tool.

2A
BBCS Hazama 2A.png
Fast, crouching jab.
Damage Cancel Guard Startup Active Recovery Frame Adv Attribute Invul Hitbox
300 CSOR All 6 2 9 +1 F - -
  • High-priority jab.
  • Faster than most of the cast's 2As.
  • +1 with a low attack level means that this normal is great for frame-trapping or tick-throwing with grab or command grab.


A very useful normal in pressure, with a lot of priority makes this normal very good. Probably one of the better 2As in the game. An insanely good pressure tool, useful for stagger pressure. The speed also helps Hazama get out of gaps in an opponents pressure strings.

2B
BBCS Hazama 2B.png
Hazama has legs.
Damage Cancel Guard Startup Active Recovery Frame Adv Attribute Invul Hitbox
450 SOR L 10 2 13 -1 F - -
  • Very fast, low recovery.
  • One of Hazama's longest reaching normals.
  • Good for tick-throws.
  • Makes Hazama's hurt-box shrink.


2B has good reach for how fast the normal is with relatively no risk throwing it out. The move recovers very fast and most any opponents button being pressed within the same range will be beat by 2B; however, the range is not great so you'll have to know your spacing. In pressure, it is a very fast low that is a essential tool in his mix-up. Not only because of the fast low, but because it is very easy to throw a very sneaky tick-throw if you 2B in deep. Finally it makes Hazama's hurt-box very small, which aids it in beating many more normals that one might not think it would.

2C
BBCS Hazama 2C.png
The god anti-air.
Damage Cancel Guard Startup Active Recovery Frame Adv Attribute Invul Hitbox
660 SO(J)R HL 13 3 37 -11 B - -
  • Head Invuln 8-15.
  • A true anti-air with very large reward.
  • Also useful in pressure.


Aside from being a very good anti-air with a great hit-box, 2C is useful in pressure strings as well. The move is jump-cancelable and also useful in some frame traps.

6A
BBCS Hazama 6A.png
No one blocks this.
Damage Cancel Guard Startup Active Recovery Frame Adv Attribute Invul Hitbox
600 DrR H 22 3 17 -3 B - -
  • 110% bonus proration
  • Overhead that is very hard to see.


This overhead is very hard to react to, and has great reward off it when he has 50 meter.

6B
BBCS Hazama 6B.png
Watch your shins.
Damage Cancel Guard Startup Active Recovery Frame Adv Attribute Invul Hitbox
600 DrR L 25 3 13 +3 F - -
  • Slow normal used in pressure that when blocked puts Hazama in a great position.
  • Can catch yomi blockers attempting to block 6A.
  • Fatal counter on counter-hit.


If an opponent blocks this move, they have no other option afterwards but to block, or mash some kind of reversal. +3 is very strong and can definitely be very useful; however, this move is very slow and Hazama can be easily mashed out on before it connects, so use it sparingly.

6C
BBCS Hazama 6C.png
Pin 'Em Down
Damage Cancel Guard Startup Active Recovery Frame Adv Attribute Invul Hitbox
400*3 R ALL 20 7,6,5 54T -4 FP - -
  • Okay frame-trap tool.
  • Very good combo-filler.


This move is used in Hazama's more damaging combos. Outside of combo filler, it's an okay frame trap, but really it's good to create space with.

3C
BBCS Hazama 3C.png
His only good mid-screen poke.
Damage Cancel Guard Startup Active Recovery Frame Adv Attribute Invul Hitbox
700 SOR L 14 4 21 -6 F - -
  • Great reach, with great reward makes this a good poke.
  • Not that fast, and with a lot of recovery, it is also very risky.
  • Useful to end block strings.


As a poke it has deceptively long reach, and is a very good starter. Counter-hit guarantees a good combo even without meter. 3C has many uses in block-strings. Generally it is just used as a block-string ender; its primary use is to do 3C>Jabaki as a way to create space so you can return to neutral. When you've become mix-up heavy on someone this normal can surprise them, and catch them trying to jump or mash.

J.A
BBCS Hazama jA.png
Safe air poke
Damage Cancel Guard Startup Active Recovery Frame Adv Attribute Invul Hitbox
300 SOJR HA 7 3 8 -- H - -
  • Good priority.
  • Useful as a rising anti-air.
  • Priority can make certain chain approaches safe, depends on distance.


J.B
BBCS Hazama jB.png
Good air to air.
Damage Cancel Guard Startup Active Recovery Frame Adv Attribute Invul Hitbox
450 SOJR HA 10 4(2)2 14 -- H - -
  • Great air to air.
  • Long untechable time.
  • Proper spacing can make certain chain approaches safe.


J.C
BBCS Hazama jC1.png
CCCCC...
Version Damage Cancel Guard Startup Active Recovery Frame Adv Attribute Invul Hitbox
j.C (1) 600 SOJR HA 10 2 23 -- H - -
j.C (2) 300 SOJR HA 5 2 23 -- H - -
j.C (3) 300 SOR HA 5 2 23 -- H - -
j.C (4) 300 SOR HA 8 3 21 -- H - -
j.C (5) 500 SOR HA 8 2 26 -- H - -
  • Combo-Filler.
  • Okay as approach sometimes.
  • 50% Heat gain decay to combo per hit.


J.2C
BBCS Hazama j2C.png
Death from above
Damage Cancel Guard Startup Active Recovery Frame Adv Attribute Invul Hitbox
620 SOJR HA 14 4 23 -- H - -
  • Good cross-up tool.
  • Hazama's primary jump-in tool in pressure.


Counter Assault
BBCS Hazama 5B.png
Damage Cancel Guard Startup Active Recovery Frame Adv Attribute Invul Hitbox
0 R All 13 4 33 -18 B - -


Crush-Trigger
Damage Cancel Guard Startup Active Recovery Frame Adv Attribute Invul Hitbox
1000 R B 30~59 1 24 4 B - -
  • Crush-trigger breaks guard without being barrier blocked.
  • Depletes opponents barrier gauge on a successful block.
  • Can charge to deplete more of the opponents barrier gauge on block.


Drive Moves

Ouroboros Maximum of 2 stocks at a time. 180F cooldown to regain 2 stocks after last stock consumed. 1 stock regained on block, 2 stocks regain on hit. Stocks are consumed upon using either B, C, or D cancels. All of Hazama's Drive moves add 200% meter gain to the combo. B cancel 27~ possible to cancel into various aerial moves. C cancel 26F~ possible to cancel into various aerial moves. D cancel 12F~ possible to cancel into various aerial moves.

5D
BBCS Hazama 5D.png
Horizontal chain.
Version Damage Cancel Guard Startup Active Recovery Frame Adv Attribute Invul Hitbox
5D (/OD) 250/500 SOR all 16 -- 29 -- BP* - -
5D far (/OD) 500/1000 SOR all -- -- 29 -- BP* - -

Not the best of the chains that you can use, but good nonetheless. Really good for harassing characters without much air mobility. You can also use it on opponents who have been knocked away by midscreen Jabaki.

Most often, this chain can combo into Jabaki if you are far enough away from the corner, but still close enough to where Jabaki wallbounces.

A Follow-up
BBCS Hazama AFollowup.png
Having second thoughts?
Damage Cancel Guard Startup Active Recovery Frame Adv Attribute Invul Hitbox
- - - - - - - - - -

Sometimes, it's best not to chain in, especially on block where your opponent could punish you with an anti-air. Also good to use for further harassment at long distances or to play lame when you have a life lead.

Staple follow-up in combos in order to combo into another chain hit or Jakou.

B Follow-up
BBCS Hazama BFollowup.png
Angled approach for baiting and other options.
Damage Cancel Guard Startup Active Recovery Frame Adv Attribute Invul Hitbox
- - - - - - - - - -

Primarily an evasive follow-up. Can be used to evade projectiles (save for really large ones like Jin's 632146C) and bait anti-airs. Because of the trajectory, Hazama will end up coming down right on top of the opponent by the end of this follow-up's animation.

Can also be used to set up fancy high-low mix-ups in the corner with 2D~B

C Follow-up
BBCS Hazama CFollowup.png
Confusing and tricky maneuver.
Damage Cancel Guard Startup Active Recovery Frame Adv Attribute Invul Hitbox
- - - - - - - - - -

On hit or block, this chain can be used to appear behind the opponent and bait anti-airs as well. Make sure to use this follow-up every once in a while to mix up your opponent.

D Follow-up
BBCS Hazama DFollowup.png
WOOHOO!
Damage Cancel Guard Startup Active Recovery Frame Adv Attribute Invul Hitbox
- - - - - - - - - -

Your staple approach/combo chain. This chain gets you to the opponent quick and straightfoward. It's like having a super IAD but in many directions.

Used in combos so you can follow up with normals.

2D
BBCS Hazama 2D.png
Vertical chain.
Version Damage Cancel Guard Startup Active Recovery Frame Adv Attribute Invul Hitbox
2D (/OD) 400/800 SOR all 11 -- 24 -- BP* - -
2D far (/OD) 800/1600 SOR all -- -- 24 -- BP* - -

This chain is good for evasive maneuvers. 2D~D will launch you sky high, and 2D~B will slingshot you from one side of the stage to the other.

In combos, you'll usually only see this chain used after Jayoku Houtenjin in the corner to keep the combo burst safe. Said type of combo is usually seen at the end of a match.

6D
BBCS Hazama 6D.png
30 degree angle chain.
Version Damage Cancel Guard Startup Active Recovery Frame Adv Attribute Invul Hitbox
6D (/OD) 300/600 SOR all 16 -- 27 -- BP* - -
6D far (/OD) 600/1200 SOR all -- -- 27 -- BP* - -

Good for keeping opponents on the ground or intercepting air-dashing opponents from afar.

After you hit with this chain, doing either Jakou or 4D is a good idea. If the opponent is close to the corner, though, you could always chain in and follow up with some air normals into Hirentotsu. Can also lead into a couple of j.C loops if confirmed correctly.

4D
BBCS Hazama 4D.png
70 degree angle chain.
Version Damage Cancel Guard Startup Active Recovery Frame Adv Attribute Invul Hitbox
4D (/OD) 300/600 SOR all 13 -- 27 -- BP* - -
4D far (/OD) 600/1200 SOR all -- -- 27 -- BP* - -

This chain is not all that good for zoning outside of a combo, and much like 2D it is good for running away.

4D~D after landing 5C or 2C on an airborne opponent, as this is your staple anti-air hitconfirm. Typically used to add damage before the last j.C loop of a given combo.

J.D
BBCS Hazama jD.png
Horizontal chain.
Version Damage Cancel Guard Startup Active Recovery Frame Adv Attribute Invul Hitbox
j.D (/OD) 250/500 SOR all 13 -- 40 -- HP* - -
j.D far (/OD) 500/1000 SOR all -- -- 40 -- HP* - -

This chain is fairly good. It has longer reach than ground 5D and isn't as fixed as 5D either (i.e. you can use it at different heights). Good for pressing grounded or aerial opponents. Can use to either keep opponents away or go in on them. Since chain follow-ups can be canceled faster now, j.5D~D into another aerial chain like j.6D or j.4D is quite the slick maneuver if you want to close the gap between you and your opponent.

Don't see this used in combos much, but if you land it on an opponent as a starter, don't be afraid to chain in.

J.2D
BBCS Hazama j2D.png
Directly downward chain.
Version Damage Cancel Guard Startup Active Recovery Frame Adv Attribute Invul Hitbox
j.2D (/OD) 250/500 SOR all 13 -- 40 -- HP* - -
j.2D far (/OD) 500/1000 SOR all -- -- 40 -- HP* - -

This chain is good for those times that you're really high up in the air and you want to get back on the ground quicker or hit the opponent if they're directly under you. This chain has a deceptive horizontal hitbox, or rather, you wouldn't think it would hit opponents below you at certain positions to the left or right but it does.

This chain is used the least in terms of combos, but just like j.5D, be sure chain in if you land a good hit.

J.6D
BBCS Hazama j6D.png
-30 degree angle chain.
Version Damage Cancel Guard Startup Active Recovery Frame Adv Attribute Invul Hitbox
j.6D (/OD) 250/500 SOR all 16 -- 40 -- HP* - -
j.6D far (/OD) 500/1000 SOR all -- -- 40 -- HP* - -

This chain is frequently used to approach/pressure opponents on the ground. Like j.5D it is also one of your best mobility options.

In combos, this chain is most commonly used after tossing an opponent into the corner with Jakou > RC or after Jabaki wallbouncing (far away).

J.4D
BBCS Hazama j4D.png
-70 degree angle chain.
Version Damage Cancel Guard Startup Active Recovery Frame Adv Attribute Invul Hitbox
j.4D (/OD) 250/500 SOR all 13 -- 40 -- HP* - -
j.4D far (/OD) 500/1000 SOR all -- -- 40 -- HP* - -

This chain can be used to catch opponents who are dashing in on you and are close enough to where j.6D would not hit with maximum hitstun or would whiff entirely. It can also be used like j.2D to catch opponents while you are at high altitudes.

Also not seen in combos that much, but like j.5D and j.2D, it is completely valid as a starter.

J.8D
BBCS Hazama j8D.png
30 degree angle chain.
Version Damage Cancel Guard Startup Active Recovery Frame Adv Attribute Invul Hitbox
j.8D (/OD) 400/800 SOR all 13 -- 40 -- HP* - -
j.8D far (/OD) 800/1600 SOR all -- -- 40 -- HP* - -

Good runaway chain, but it is unlikely that this chain will connect outside of an OD combo.

j.C x 5 j.8D~D > j.2D xx j.214B during OD is where this chain can be used to tack on some damage at the end of a combo.


Throws

Forward Throw
BBCS Hazama FThrow.png
And the kick is good!
Damage Cancel Guard Startup Active Recovery Frame Adv Attribute Invul Hitbox
1400 SOR -- 7 3 17 -- T - -
  • 100% minimum damage


Back Throw
BBCS Hazama BThrow.png
Now wallbounces anywhere
Damage Cancel Guard Startup Active Recovery Frame Adv Attribute Invul Hitbox
1400 SOR - 7 3 17 -- T - -
  • 100% minimum damage


Air Throw
BBCS Hazama AThrow.png
GO TO HELL
Damage Cancel Guard Startup Active Recovery Frame Adv Attribute Invul Hitbox
1400 SOR - 7 3 12+3 -- T - -
  • 100% minimum damage


Specials

Jabaki
236D
BBCS Hazama jabaki.png
Damage Cancel Guard Startup Active Recovery Frame Adv Attribute Invul Hitbox
- - - - - - - - - -
Jasetsu
214D
BBCS Hazama jasetsu.png
Damage Cancel Guard Startup Active Recovery Frame Adv Attribute Invul Hitbox
- - - - - - - - - -
Jakatsu
214D~66/44
Damage Cancel Guard Startup Active Recovery Frame Adv Attribute Invul Hitbox
- - - - - - - - - -
Ressenga
214D~A
BBCS Hazama ressenga.png
Version Damage Cancel Guard Startup Active Recovery Frame Adv Attribute Invul Hitbox
Ressenga - - - - - - - - - -
Ressenga (S) - - - - - - - - - -


Gashoukyaku
214D~B
BBCS Hazama gashoukyaku.png
Version Damage Cancel Guard Startup Active Recovery Frame Adv Attribute Invul Hitbox
Gashoukyaku - - - - - - - - - -
Gashoukyaku (S) - - - - - - - - - -


Zaneiga
214D~C
BBCS Hazama zaneiga.png
Version Damage Cancel Guard Startup Active Recovery Frame Adv Attribute Invul Hitbox
Zaneiga - - - - - - - - - -
Zaneiga (S) - - - - - - - - - -


Stance Cancel
214D~D
Damage Cancel Guard Startup Active Recovery Frame Adv Attribute Invul Hitbox
- - - - - - - - - -
Hirentotsu
j.214B
BBCS Hazama hirentotsu.png
Damage Cancel Guard Startup Active Recovery Frame Adv Attribute Invul Hitbox
- - - - - - - - - -
Gasaishou
236C
BBCS Hazama gasaishou.png
Damage Cancel Guard Startup Active Recovery Frame Adv Attribute Invul Hitbox
- - - - - - - - - -
Jakou
623D
BBCS Hazama jakou.png
Damage Cancel Guard Startup Active Recovery Frame Adv Attribute Invul Hitbox
- - - - - - - - - -


Distortion Drives

Jayoku Houtenjin
236236B
BBCS Hazama Jayoku Houtenjin.png
Damage Cancel Guard Startup Active Recovery Frame Adv Attribute Invul Hitbox
- - - - - - - - - -
Mizuchi Rekkazan
632146C
BBCS Hazama Mizuchi Rekkazan.png
Damage Cancel Guard Startup Active Recovery Frame Adv Attribute Invul Hitbox
- - - - - - - - - -
Orochi Burensou
214D~632146D
Version Damage Cancel Guard Startup Active Recovery Frame Adv Attribute Invul Hitbox
Orochi Burensou - - - - - - - - - -
(OD) Orochi Burensou - - - - - - - - - -
Orochi Burensou (S) - - - - - - - - - -
(OD) Orochi Burensou (S) - - - - - - - - - -


Astral Heat


Strategy

Offense

In this part, you can talk about anything you feel like beginner players should know.

Split up your topics like this

  • And even further split it up
  • Like this.

Add more asterisks to further indent your text as necessary.

The categories are split into Offense, Defense, and Neutral, but you can change these categories as you see fit for your character.


Defense


Neutral

Combos

Combo Notation Guide:
If there is empty space between normals, assume you are cancelling directly into the next normal.
xx = cancel into a special or super
> = link the next attack after preceding move's recovery
, = a slight pause or delay before linking
jc = jump cancel
hjc = high jump cancel
~ = cancel into follow-up to some special or drive move
OD = cancel into overdrive
CT = crush trigger. treated like a special move, so if cancelled into, it will be noted as 'xx CT' or 'xx 6A+B'
(N) = only use the Nth hit of the move (for example, if 5C(1) is written, you only use the first hit of 5C, otherwise assume both hits)
(move) = whatever's listed in the parentheses is optional
move x # = repeat said move # times, only used for j.C x #
[sequence] x # = repeat sequence of moves # times

Midscreen

This combo section is designed on a "move starter" basis. However, you can use whatever kind of organization you prefer, as long as it is readable and efficient.

*insert move name* Starter
Notes: In case these combos need notes. If they do not, you can remove this line.
Point 1

  • move > move > special >> special NOTE: this is only a base. your combos do not have to follow this format.
Requirements: -- (ex: 50 heat, Overdrive, crouching opponent. if no requirements, leave as is)
Damage: ----, Heat Gain: --
+ move = Damage: ----, Heat Gain: -- NOTE: if a necessary combo is very similar to a previous one, you can add options like this.
Notes: Write notes for the combo if necessary.

Point 2

Copy and paste the code from Point 1 to Point 2 as many times as you need to.

Midscreen to Corner

Corner Only


BlazBlue: Chrono Phantasmae
Click [*] for character's frame data
System Explanations

HUDControlsFrame DataSystem Data


Movement/CancelingOffenseDefenseDamage/ComboAttack AttributesHeat/Barrier/Burst GaugeMisc