
Who put lows in an autocombo?

| (320 intermediate revisions by 36 users not shown) | |||
| Line 1: | Line 1: | ||
{ | {{BBTag_Construction_Card}} | ||
| | ==Overview== | ||
{{BBTag/CharacterLinks}} | |||
| | <div id="home-content" class="home-grid"> | ||
|| | {{card|width=4 | ||
[[ | |header=Overview | ||
|- | |content=Tager is the quintessential grappler. He has slow and limited movement, having no run, double jump, or airdash. However, he has several ways to bring the opponent to him. His [[#5B|5B]] is a forward moving attack with projectile {{Keyword|guard point}}, and [[#Spark Bolt|Spark Bolt]] is a fast, full screen projectile that leads to a full combo. Additionally, his Drive, Voltic Battler (colloquially referred to as {{Tt|magnetism|Pulls the opponent towards Tager by adding (not overriding) forces to their existing momentum}}), lets him pull his opponents to him, indirectly manipulating their position. | ||
| | |||
: | Once close, Tager has a number of command grabs that can either be very damaging on their own or which can lead to an even more damaging combo. | ||
}} | |||
* | {{BBTag/Infobox | ||
|} | | fastestAttack = [[#4A|4A]] (8F) | ||
| reversal = [[#Charged Lightning|A+D]] (16F)<br/>[[#Magna Tech Wheel|236B+C]] (13F)<br/>[[#Genesic Emerald Tager Buster|214B+C]] (10F) | |||
{{ | }} | ||
{{ProsAndCons | |||
{{ | |intro=is a slow moving grappler with high front-loaded damage and a call-out option for every situation. | ||
| | |pros= | ||
| | *'''Durable:''' has 20k health; highest tier of health in the game. | ||
*'''Consistent Front-loaded Damage:''' His command grabs do the most damage in the in the game, allowing Tager to consistently threaten large chunks of unburstable damage. This, combined with his hard hitting normals and [[#Spark Bolt | Spark Bolt]], makes every interaction threatening. | |||
*'''Strong Defense:''' Can use moves with {{Keyword | guard point}} and {{Keyword | invulnerability}} such as [[#A+D|Charged Lightning]] and [[#Wedge Catapult|Wedge Catapult]] to punish offense that is usually safe. | |||
*'''Zonebreaker:''' Can blow through projectiles with [[#5B|5B]] or at the cost of 1 skill gauge with [[#Spark Bolt|Spark Bolt]]. | |||
*'''Knowledge Check:''' Strong {{Keyword|okizeme}} and {{Keyword|reset}} potential thanks to {{Tt|magnetism|Pulls the opponent towards Tager by adding (not overriding) forces to their existing momentum}}. | |||
|cons= | |||
*'''Low Mobility:''' Tager cannot run, air dash or double jump | |||
*'''Highly Committal:''' His meterless options for approaching are all very telegraphed and can be cleanly countered by a knowledgeable opponent. | |||
*'''Tall and vulnerable:''' His large size makes it more difficult for him to avoid the opponent's attacks, and his height exposes him to character specific instant overheads and combo routes. | |||
*'''Niche Assists:''' His [[#4P|4P]] and [[#6P|6P]] have very slow startup, making his assist kit very situational and teammate dependent. | |||
*'''Meter Hungry:''' Needs to constantly spend meter on [[#Spark Bolt|Spark Bolt]] to consistently convert his hits into damage, corner carry, and his trickier mixups. | |||
}} | }} | ||
</div> | </div> | ||
'' | {{card|width=6 | ||
|header=Drive: Voltic Battler | |||
|content= | |||
Some of Tager's normals, specials, and supers automatically pull the opponent towards him with {{Tt|magnetism|Pulls the opponent towards Tager by adding (not overriding) forces to their existing momentum}}, giving his attacks more range as well as messing with the opponent's sense of spacing. | |||
Tager's magnetism cannot force enemies into an airborne state if they're currently grounded, and the forces applied by magnetism add (rather than override) the opponent's current momentum. This leads to unpredictable, humorous, and unfortunate situations. | |||
Characters performing Distortion Drives and executing throws that have successfully connected are completely unaffected by magnetism. | |||
}} | |||
=== | ==Normal Moves== | ||
===<big>{{clr|A|4A}}</big>=== | |||
{{BBTag Move Card|game=BBTag | |||
|input=4A,4AA,4AAA | |||
|versioned=input | |||
|frameChart=auto | |||
|description= | |||
{{clr|A|4A}} is Tager's fastest ground poke. Slower than {{clr|A|214A}} but with more horizontal range, making it better for safely controlling space. Great recovery, making it a cornerstone of his mixup game with tick throw {{clr|A|214A}}/{{clr|C|C}}/{{clr|B|B}}+{{clr|C|C}}. | |||
* Jump cancellable on hit and on block. | |||
* On counterhit, combos into {{clr|A|5A}}. | |||
---- | |||
* {{clr|A|4AA}} hits low and has the same great qualities as {{clr|A|4A}}. Be careful using this when connecting {{clr|A|4A}} against aerial opponents or at longer ranges where it might whiff. Chain into {{clr|C|2C}} instead in those situations. | |||
* Jump cancellable on hit and on block. | |||
---- | |||
* {{clr|A|4AAA}} has slight {{Tt|magnetism|Pulls the opponent towards Tager by adding (not overriding) forces to their existing momentum}}, pulling opponents in for tick throw resets. | |||
* Special cancelable and chainable into {{clr|C|2C}}. | |||
}} | |||
Tager | ===<big>{{clr|A|5A}}</big>=== | ||
{{BBTag Move Card|game=BBTag | |||
|input=5A,5AA,5AAA,5AAAA | |||
|versioned=input | |||
|description= | |||
{{clr|A|5A}} is Tager's longest ranged jump cancelable normal, making it a prime point in his blockstrings to reset pressure. Safe on block, giving him a low commitment way to disengage from a blockstring. | |||
---- | |||
Tager can hold this charge for {{Tt|magnetism|Pulls the opponent towards Tager by adding (not overriding) forces to their existing momentum}} and high/body/projectile armor, and extra damage on full charge. Generally used to bait pushblock attempts and fish for a juicy counter hit starter when a reversal action comes out instead. Canceling into {{clr|B|214B}} or a delayed {{clr|C|214C}} after this move is a situationally useful mixup against blocking opponents. On grounded counterhit, you can actually combo directly into {{clr|B|214B}}. | |||
* Can be held for 31f | |||
* Special cancelable into Tager's command grabs | |||
* Gapped to naturally catch jump startup after {{clr|A|5A}} | |||
---- | |||
{{clr|A|5AAA}}'s magnetism can draw opponents back in after a pushblocked {{clr|A|5AA}}, stopping some counter-attacks. Otherwise it's unremarkable combo filler. | |||
* Combos into {{clr|B|5B}} on counter hit | |||
* Gapped to naturally catch jump startup after {{clr|A|5A}} | |||
---- | |||
Works sometimes as a suprise overhead, but generally relegated to combo filler. | |||
}} | |||
===<big>{{clr|B|5B}}</big>=== | |||
{{InputBadge|Sledgehammer}} | |||
{{BBTag Move Card|game=BBTag | |||
|input=5B,5BB | |||
|versioned=input | |||
|frameChart= | |||
{{#invoke:BBTAG-FrameChart|drawFrameData | |||
|chara=Iron Tager | |||
|input=5B | |||
|startup=32 | |||
}} | |||
{{#invoke:BBTAG-FrameChart|drawFrameData | |||
|chara=Iron Tager | |||
|input=5BB | |||
}} | }} | ||
|description= | |||
{{clr|B|5B}} is chargeable. Sledge will cover more distance and deal more damage when fully charged. Safe on block, use this move to cover distance, approach zoners, and safely end blockstrings. Chainable into {{clr|A|2A}}, {{clr|B|2B}}, {{clr|C|2C}}, and {{clr|C|5C}} on hit but not block. Thanks to head guard point, Tager can also bait Bursts with this move for a counterhit combo. | |||
* Can be held for and additional 29f. | |||
* Has head, body, and projectile guard points while charging. | |||
* Has projectile guard point while traveling. | |||
---- | |||
Easy to punish armored overhead. Surprisingly annoying to make safe with assist. Will autocorrect if an opponent crosses over Tager after he uses Sledge. | |||
Opponents can generally block high after sledge without much worry as {{clr|B|5BB}} is his only followup on block. However, if sledge hits an assist, Tager can then cancel into {{clr|C|2C}}, giving a fairly potent mixup opportunity. | |||
| | |||
| | |||
* Only combos into Gadget Finger | |||
* | |||
}} | |||
===<big>{{clr|C|5C}}</big>=== | |||
{{BBTag Move Card|game=BBTag | |||
|input=5C | |||
|frameChart=auto | |||
|description= | |||
Standard overhead. | |||
}} | |||
===<big>{{clr|A|2A}}</big>=== | |||
{{BBTag Move Card|game=BBTag | |||
|input=2A | |||
|frameChart=auto | |||
|description= | |||
Tall but committal anti-air. Has poor head invulnerability, but generally trades in Tager's favor. An important combo tool for Tager, letting him get full combos from {{clr|A|4A}} and Sledge when right next to the opponent. On a clean counterhit, leads to very rewarding combos with {{clr|B|236B}} or Sledge. | |||
}} | }} | ||
===<big>{{clr|B|2B}}</big>=== | |||
{{ | {{BBTag Move Card|game=BBTag | ||
| | |input=2B | ||
| | |frameChart=auto | ||
| | |description= | ||
| | Rather slow to start and easily stuffed in neutral, but leaves Tager plus on block, allowing him to run a mixup or rest pressure. Useful in some juggle combos as it is chainable into Sledge, {{clr|A|2A}}, and {{clr|C|2C}}. | ||
* Has {{Tt|magnetism|Pulls the opponent towards Tager by adding (not overriding) forces to their existing momentum}} | |||
* Special cancelable | |||
{{ | }} | ||
===<big>{{clr|C|2C}}</big>=== | |||
{{BBTag Move Card|game=BBTag | |||
|input=2C | |||
|frameChart=auto | |||
|description= | |||
Decently quick and mostly safe low poke. Special cancelable and chainable into Gadget Finger. | |||
}} | }} | ||
===<big>{{clr|A|j.A}}</big>=== | |||
{{ | {{BBTag Move Card|game=BBTag | ||
| | |input=j.A,j.AA | ||
| | |versioned=input | ||
| | |frameChart=auto | ||
|description= | |||
{{clr|A|j.A}} is quick and has a lot of active frames, making it a solid jump-in normal. {{clr|A|j.A}} -> rising {{clr|A|j.A}} can fuzzy most of the cast. | |||
{{clr|A|j.AA}} is mostly used in combos. Chainable into {{clr|B|j.B}} or {{clr|C|j.C}} | |||
}} | }} | ||
===<big>{{clr|B|j.B}}</big>=== | |||
{{BBTag Move Card|game=BBTag | |||
{{ | |input=j.B | ||
| | |frameChart= | ||
| | {{#invoke:BBTAG-FrameChart|drawFrameData | ||
| | |chara=Iron Tager | ||
|input=j.B | |||
|recovery=18 | |||
|specialRecovery=7 | |||
}} | }} | ||
|description= | |||
A slow, large {{Tt|magnetized|Pulls the opponent towards Tager by adding (not overriding) forces to their existing momentum}} attack. Used in aerial combos, and can be used as an air to air. Has high frame advantage on hit and block against grounded opponents. | |||
When done while rising with a super jump, it can be tricky for the opponent to anti-air. Air-to-air and airborne anti-air moves can trade in Tager's favor, as the pull from the magnetism can ruin a followup combo, while potentially pulling the opponent into the corner. Meanwhile, grounded anti-airs have to contend with the possibility of {{clr|C|j.C}} delaying Tager's fall, as well the tug of {{clr|B|j.B}} pulling them in range a potential assist call. | |||
{{ | |||
| | |||
* Very attractive against aerial opponents | |||
* Can be low profiled by some moves and some crouching opponents [ie. Linne, other Under Night Characters] | |||
* Poor inner hitbox will cause the move to whiff unexpectedly when the opponent gets close. | |||
}} | }} | ||
===<big>{{clr|C|j.C}}</big>=== | |||
{{ | {{InputBadge|Crimson Punisher}} | ||
| | {{BBTag Move Card|game=BBTag | ||
| | |input=j.C | ||
| | |frameChart= | ||
{{#invoke:BBTAG-FrameChart|drawFrameData | |||
|chara=Iron Tager | |||
|input=j.c | |||
|recovery=16 | |||
|specialRecovery=3 | |||
}} | }} | ||
|description= | |||
Tager's makeshift float. A two stage attack, if the initial arm sweep hits, his opponent is hit straight down with a hard knockdown and Tager immediately follows up with a bellyflop on the stricken opponent. The opponent cannot burst until the belly flop connects. | |||
During the initial arm sweep, Tager is launched slightly upwards and forwards and loses all previous jumping momentum, enabling it to easily hit enemies slightly above him. Conversely, this makes landing it against standing opponents very tricky. | |||
Can perform this move an indefinite number of times, allowing Tager to air stall, cross over the opponent, and bait out anti-air attacks. | |||
* Around 0 on block after making contact, making jc into ja a strong option do to ja's 7f startup. | |||
* Recovers fast enough to use ja before landing when not at minimum height. | |||
* '''Cannot hit assists.''' | |||
}} | }} | ||
<br style="clear:both;"/> | |||
====== < | ==Universal Mechanics== | ||
{{ | ===<big>Ground Throw</big>=== | ||
| | {{InputBadge|{{clr|B|5B}}+{{clr|C|C}}}} | ||
| | {{BBTag Move Card|game=BBTag | ||
| | |input=BC | ||
|frameChart= | |||
{{#invoke:BBTAG-FrameChart|drawFrameData | |||
|chara=Iron Tager | |||
|input=BC | |||
|startup=7 | |||
}} | }} | ||
|description= | |||
A below average throw because of Tager's poor walkspeed and subpar options for canceling into it. Combos into {{clr|B|236B}} giving it high, frontloaded burst-safe damage. Generally redundant due to Tager's potent set of command grabs. | |||
| | |||
}} | }} | ||
===<big>Charged Lightning</big>=== | |||
{{ | {{InputBadge|{{clr|A|5A}}+{{clr|4|D}}}} | ||
| | {{BBTag Move Card|game=BBTag | ||
| | |input=AD | ||
| | |frameChart=auto | ||
| | |description= | ||
An very good Reversal Action. The large hitbox makes it a potent anti-air, and because it hits all around Tager, it easily stops most crossup attempts. It is also one of the most damaging reversal options, further skewing the risk-reward of challenging a defending Tager. | |||
The guardpoint property of the moves also allows it to defeat many typical safejumps, as opponents will remain airborne slightly longer when their attack makes contact with the guardpoint, preventing them from being able to block. | |||
Has relatively few active frames, making it surprisingly poor at punishing bursts. | |||
* Big vertical hitbox all around Tager's body. | |||
}} | }} | ||
<br style="clear:both;"/> | |||
==Skills== | |||
===<big>Atomic Collider</big>=== | |||
{{InputBadge|{{clr|A|236A}}/{{clr|B|B}}}} | |||
{{BBTag Move Card|game=BBTag | |||
|input=236A,236B | |||
|versioned=input | |||
|description= | |||
;{{clr|A|236A}} | |||
Thanks to the head invulnerability and deceptively large hitbox this move can occasionally be an effective anti-air, though for relatively damage. It recovers very quickly, which can be used to bait Tager's opponent into approaching. Generally speaking this move is best used at the end of a combo. Tager is +41 upon landing, letting him can safejump 9+f reversals. | |||
* No magnetism | |||
* Can only grab airborne opponents. | |||
* Moves opponent to the other side of Tager. | |||
* Only combos into Gadget Finger. | |||
* Has head attribute invulnerability frames 4-15. | |||
---- | |||
;{{clr|B|236B}} | |||
The more committal and riskier anti-air grab. The {{Tt|magnetism|Pulls the opponent towards Tager by adding (not overriding) forces to their existing momentum}} is fairly finicky, and when used poorly, opponents can land and punish Tager before the move recovers. In certain cases, the opponents can avoid the grab long enough to hit Tager after the end of the move's head attribute invulnerability. | |||
Generally speaking, this move is used as a combo extender. | |||
* Extremely attractive to airborne targets, grounded opponents will slide along the floor slowly. | |||
* Can only grab airborne opponents. | |||
* Hold button to extend active frames. | |||
* Can be held for 42f. | |||
* Moves opponent to the other side of Tager. | |||
* Ground bounces allowing for extended combos. | |||
* Has head attribute invulnerability frames 5-34 | |||
}} | }} | ||
===<big>Gigantic Tager Driver</big>=== | |||
{{ | {{InputBadge|{{clr|A|214A}}}} | ||
| | {{BBTag Move Card|game=BBTag | ||
|input=214A | |input=214A | ||
| | |frameChart=auto | ||
|description= | |||
Technically Tager's fastest move in terms of startup. The highest damaging meterless command grab in the game. A lynchpin of Tager's mixup. Is +35 upon landing, allowing Tager to safejump 15f+ reversals, but only applicable on forward tech/corner. | |||
* No magnetism | |||
* Only combos into Gadget Finger | |||
}} | |||
===<big>Wedge Catapult</big>=== | |||
{{InputBadge|{{clr|B|214B}}}} | |||
{{BBTag Move Card|game=BBTag | |||
|input=214B | |||
|frameChart=auto | |||
|description= | |||
Has invulnerability and {{Tt|magnetism|Pulls the opponent towards Tager by adding (not overriding) forces to their existing momentum}} early in the move up to the point right before Tager grasps at this opponent. Be wary of very active moves as Tager is vulnerable for 1 frame before the grab hitbox is active. The damage scaling on this move is very good, allowing for some of Tager's most damaging combos upon a successful grab. While uncommon and largely impractical, it is also possible to combo grounded opponents directly into this grab via assists or counterhit {{clr|A|5AA}} and {{clr|B|j.B}}. | |||
* Wall Bounces, convert into a combo by linking {{clr|A|5A}}, {{clr|B|2B}}, {{clr|A|j.A}} | |||
* Has full body invulnerability on frames 6-29 | |||
}} | }} | ||
===<big>Air Driver</big>=== | |||
{{ | {{InputBadge|{{clr|A|j.214A}}/{{clr|B|B}}}} | ||
| | {{BBTag Move Card|game=BBTag | ||
|input=214B | |input=j.214A,j.214B | ||
| | |versioned=input | ||
| | |frameChart= | ||
|description= | |||
;{{clr|A|j.214A}} | |||
Tager's fast air grab. This move is best used as a hard read due to it's lackluster hitbox. | |||
* No magnetism | |||
* | * Can only grab airborne opponents | ||
* Only combos into Gadget Finger | |||
---- | |||
;{{clr|B|j.214B}} | |||
Be careful when using this. Grounded opponents will have plenty of time to get under you. While opponents who super jump will usually fly overhead and can hit you as they fly by. | |||
* Extremely attractive to airborne opponents | |||
* Grounded opponents will slide along the floor slowly | |||
* Can only grab airborne opponents | |||
* Stops all momentum when in use | |||
* Button can be held to extend active frames | |||
* Can be held for 59f | |||
* Only combos into Gadget Finger | |||
}} | }} | ||
===<big>Gadget Finger</big>=== | |||
{{ | {{InputBadge|After certain attacks -> {{clr|A|A}}/{{clr|B|B}}/{{clr|C|C}}}} | ||
| | {{BBTag Move Card|game=BBTag | ||
| | |input=Gadget Finger | ||
| | |frameChart=auto | ||
| | |description= | ||
Drops the opponent just inside {{clr|A|214A}} range with Tager at a small frame advantage. This is a very strong position for Tager where in order to avoid a properly timed command grab, the opponent must buffer a jump, reversal, or backdash. The Rock-Paper-Scissors scenario is generally as follows. | |||
* {{clr|A|4A}} catches jump startup, beats abare | |||
* {{clr|A|214A}}, {{clr|A|214C}} beats blocking. {{clr|A|214A}} has a somewhat strict timing, making it difficult to use it to hit meaty. | |||
}} | * {{clr|A|5A}}, delayed {{clr|A|4A}}, and {{clr|A|2B}} beat varying speed and distances of backdashes | ||
* Blocking beats reversal actions | |||
Though generally a scary mixup situation, not opting for gadget finger ender gives Tager additional options such as meaty assist and safejumps, which can lead to even more powerful oki. | |||
You can also consider also using Active Switch to extend combos or for better positioning in your resets when using this to end Tager's combos. | |||
* Can only be used after {{clr|A|5AAAA}}, {{clr|B|5BB}}, {{clr|C|2C}}, {{clr|A|236A}}, 214X, or j.214X successfully hit the opponent's point character. | |||
* Can be delayed to whiff after {{clr|B|5BB}}, 214X, or j.214X | |||
* 100% minimum damage | |||
* Leaves Tager close and +5 after application | |||
}} | }} | ||
<br style="clear:both;"/> | |||
==Extra Skills== | ==Extra Skills== | ||
===<big>Spark Bolt</big>=== | |||
{{InputBadge|{{clr|C|236C}}}} | |||
{{BBTag Move Card|game=BBTag | |||
|input=236C | |||
|frameChart= | |||
{{#invoke:FrameChart|drawFrameData | |||
|chara=Iron Tager | |||
|input=236C | |||
|startup = 12 | |||
|recovery = 36 | |||
|isProjectile = yes | |||
}} | |||
|description= | |||
Tager gets access to his iconic projectile at the cost of only one Skill Gauge. Just like in other BlazBlue games, this move is extremely fast and will beat other normal projectiles easily. Also an important combo extender for Tager, and always a threat that must be accounted for in neutral. | |||
* Wall Bounces | * Wall Bounces | ||
}} | |||
===<big>EX Gigantic Tager Driver</big>=== | |||
{{InputBadge|{{clr|C|214C}}}} | |||
{{BBTag Move Card|game=BBTag | |||
|input=214C | |||
|description= | |||
Has the same startup as the A version, but as this move can be held briefly as well, extending its active frames. This move has {{Tt|magnetism|Pulls the opponent towards Tager by adding (not overriding) forces to their existing momentum}}, giving it benefits from greater effective range. These attributes combined makes tick throw setups considerably easier to execute. Is +35 upon landing, allowing Tager to safejump 15f+ reversals, but only applicable on forward tech/corner. | |||
* Only grabs grounded opponents, but can be combo'd into. | |||
* Only combos into Gadget Finger | |||
}} | }} | ||
===<big>EX Air Driver</big>=== | |||
{{InputBadge|{{clr|C|j.214C}}}} | |||
{{ | {{BBTag Move Card|game=BBTag | ||
| | |||
|input=j.214C | |input=j.214C | ||
| | |description= | ||
The {{Tt|magnetism|Pulls the opponent towards Tager by adding (not overriding) forces to their existing momentum}} on this move is stronger than that of {{clr|B|j.214B}}, making the move moderately more consistent at grabbing aerial opponents. Also of note is that this grab can be comboed into, which could be considered an option as an unburstable combo ender or in active switch routes. | |||
* Extremely attractive to airborne opponents | |||
* Grounded opponents will slide along the floor slowly | |||
* Can only grab airborne opponents, but can be done mid combo | |||
* Button can be held to extend active frames for about 1 second | |||
* Only combos into Gadget Finger | |||
* Can be held for 33f | |||
}} | }} | ||
<br style="clear:both;"/> | |||
==Partner Skills== | ==Partner Skills== | ||
===<big>{{clr|5|5P}}</big>=== | |||
{{ | {{InputBadge|Sledgehammer}} | ||
| | {{BBTag Move Card|game=BBTag | ||
|input=5P | |input=5P | ||
| | |frameChart= | ||
|description= | |||
Tager's most versatile assist due to it's size and blockstun. Useful in Cross Combos due to its relatively fast startup and cooldown. | |||
* Tager's fastest assist | |||
* Launches and causes a soft knockdown | |||
}} | }} | ||
===<big>{{clr|5|6P}}</big>=== | |||
{{ | {{InputBadge|Spark Bolt}} | ||
| | {{BBTag Move Card|game=BBTag | ||
|input=6P | |||
|frameChart= | |||
|description= | |||
A highly situational assist. The extremely long startup makes it very easy to react to in neutral, but it can sometimes be uniquely advantageous in combos that have long forced animations. Unlike in other BlazBlue games, Tager's charging stance does not have protection of any kind, making him entirely vulnerable before the move activates. | |||
* Fires straight ahead | |||
* Absurdly long startup time | |||
* Wall bounces opponent to Tager's position | |||
}} | }} | ||
===<big>{{clr|5|4P}}</big>=== | |||
{{ | {{InputBadge|Up Spark Bolt}} | ||
{{BBTag Move Card|game=BBTag | |||
|input=4P | |||
| | |frameChart= | ||
|description= | |||
Shallow angle combined with Spark Bolt's large size and very fast speed makes this an ok preemptive anti-air assist. Still has extremely long startup and is easily stuffed due to Tager's large frame | |||
* Fires at a 30° angle from the ground | |||
* Much faster than his {{clr|5|6P}} | |||
* Wall bounces to Tager's position | |||
}} | }} | ||
<br style="clear:both;"/> | |||
< | ==Distortion Skills== | ||
===<big>Magna Tech Wheel</big>=== | |||
{{InputBadge|{{clr|B|236B}}+{{clr|C|C}}}} | |||
{{BBTag Move Card|game=BBTag | |||
|input=236BC | |||
|frameChart= | |||
|description= | |||
The move itself had guardpoint, allowing it to beat certain safejumps. the Followup only comes out in resonance/Cross combo. Can be used with short Distortion Skill Duos, allowing for partner combo extension. | |||
}} | |||
===<big>Genesic Emerald Tager Buster</big>=== | |||
{{ | {{InputBadge|{{clr|B|214B}}+{{clr|C|C}} (Air OK)}} {{InputBadge|{{clr|B|720B}}+{{clr|C|C}} (Air OK)}} | ||
| | {{BBTag Move Card|game=BBTag | ||
| | |input=214BC,j.214BC | ||
| | |versioned=input | ||
| | |frameChart= | ||
|description= | |||
;Ground Version | |||
If you input {{clr|B|720B}}+{{clr|C|C}} instead of {{clr|B|214B}}+{{clr|C|C}}, the damage of GETB will be increased by 500 (6620/7620). The range on this move is deceptively huge especially thanks to the generous {{Tt|magnetism|Pulls the opponent towards Tager by adding (not overriding) forces to their existing momentum}} during the startup, making it a powerful tool in footsies as well as a threatening reversal. Is +21 upon landing, but the opponent is placed far from Tager. | |||
* Extremely attractive | |||
* Can only grab grounded opponents | |||
* Invincible startup | |||
* Button can be held to extend active frames, though you are not invincible while doing this | |||
* Moves opponent to the other side of Tager | |||
---- | |||
;Air Version | |||
Be careful when using the air version. Grounded opponents will have plenty of time to get under you. While opponents who super jump will usually fly overhead and can hit you as they fly by. Is +21 upon landing, but the opponent is placed far from Tager. | |||
Thanks to the invulnerable startup and large grab hitbox, {{clr|B|j.214B}}+{{clr|C|C}} is a prime button to threaten air footsies. The {{Tt|magnetism|Pulls the opponent towards Tager by adding (not overriding) forces to their existing momentum}} doesn't start until after the super flash, making it worse than his other grabs when trying to catch faraway airborne opponents by surprise. | |||
Input {{clr|B|720B}}+{{clr|C|C}} will also give you an extra 500 damage (7350/8350). | |||
{{ | |||
| | |||
| | |||
* Extremely attractive to airborne opponents | |||
* Grounded opponents will slide along the floor slowly | |||
* Can only grab airborne opponents | |||
* Stops all momentum when in use | |||
* Invincible startup | |||
* Button can be held to extend active frames | |||
}} | |||
==Distortion Skill Duo== | |||
===<big>Terra Break</big>=== | |||
{{InputBadge|{{clr|5|P}} during Partner's Distortion Skill}} | |||
{{BBTag Move Card|game=BBTag | |||
|input=Distortion Skill Duo | |||
|frameChart= | |||
|description= | |||
* Sends opponent to far side of the screen | |||
}} | }} | ||
<br style="clear:both;"/> | |||
==Astral Heat== | |||
===<big>King of Tager</big>=== | |||
{{InputBadge|{{clr|B|222B}}+{{clr|C|C}} when [[BBTag/Mechanics#Astral Heat|Astral Conditions]] are met}} | |||
{{BBTag Move Card|game=BBTag | |||
|input=222BC | |||
|frameChart= | |||
|description= | |||
You can be hit while extending the {{Tt|magnetism|Pulls the opponent towards Tager by adding (not overriding) forces to their existing momentum}} of this move, but this shouldn't be an issue when ending the round with a hit confirm. | |||
* Unlike Tager's other command grabs, this can grab either grounded or airborne opponents | |||
* Extremely attractive | |||
* Buttons can be held to extend magnetism duration. | |||
* Easy confirm from {{clr|A|2A}}, {{clr|C|2C}}, Wedge Catapult. Confirms off gadget finger. | |||
}} | }} | ||
<br style="clear:both;"/> | |||
==External References== | |||
= | *[https://blazblue.wiki/wiki/Iron_Tager/Gameplay#Palettes Color Palettes on https://blazblue.wiki] | ||
==Navigation== | |||
<center>{{Character Label|BBTag|Iron Tager|size=36px}}</center> | |||
{{BBTag/CharacterLinks}} | |||
{{notice|To edit frame data, edit values in [[{{PAGENAME}}/Data]].}} | |||
{{BBTag/Navigation}} | |||
{{ | |||

The BBTag wiki has major gaps in information. The game has gone through numerous significant changes since its release. As a result, many BBTag pages on Dustloop Wiki are out of date or lacking important information.
We need your help expanding the content for this game. If you have knowledge to share, or know people who can help, please contribute to the wiki by editing sections where you can.Tager is the quintessential grappler. He has slow and limited movement, having no run, double jump, or airdash. However, he has several ways to bring the opponent to him. His 5B is a forward moving attack with projectile guard point An attack that automatically blocks certain attacks. Examples of this include Bang's Drive attacks, Baiken's Suzuran (63214K), and Nappa's Too Bad (214S)., and Spark Bolt is a fast, full screen projectile that leads to a full combo. Additionally, his Drive, Voltic Battler (colloquially referred to as magnetismPulls the opponent towards Tager by adding (not overriding) forces to their existing momentum), lets him pull his opponents to him, indirectly manipulating their position.
Once close, Tager has a number of command grabs that can either be very damaging on their own or which can lead to an even more damaging combo. |
| Health |
| 20,000 |
| Prejump |
| 6F |
| Backdash |
| 28F (1~20F Inv All) |
| Unique Movement Options |
| No Run No Double Jump No Air Dash |
| Fastest Attack |
| 4A (8F) |
| Reversals |
| A+D (16F) 236B+C (13F) 214B+C (10F) |
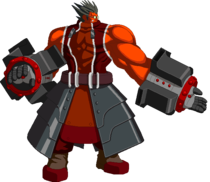
![]() Iron Tager is a slow moving grappler with high front-loaded damage and a call-out option for every situation.
Iron Tager is a slow moving grappler with high front-loaded damage and a call-out option for every situation.
Some of Tager's normals, specials, and supers automatically pull the opponent towards him with magnetismPulls the opponent towards Tager by adding (not overriding) forces to their existing momentum, giving his attacks more range as well as messing with the opponent's sense of spacing.
Tager's magnetism cannot force enemies into an airborne state if they're currently grounded, and the forces applied by magnetism add (rather than override) the opponent's current momentum. This leads to unpredictable, humorous, and unfortunate situations.
Characters performing Distortion Drives and executing throws that have successfully connected are completely unaffected by magnetism.


Who put lows in an autocombo?


| Version | Damage | Guard | Startup | Active | Recovery | On-Block | Attribute | Invuln |
|---|---|---|---|---|---|---|---|---|
| 4A | 1000 | All | 8 | 3 | 11 | 0 | B | |
| 4AA | 1000 | Low | 10 | 3 | 14 | -3 | F | |
| 4AAA | 1500 | All | 13 | 4 | 19 | -1 | B |
4A is Tager's fastest ground poke. Slower than 214A but with more horizontal range, making it better for safely controlling space. Great recovery, making it a cornerstone of his mixup game with tick throw 214A/C/B+C.
| Version | Level | P1 | P2 |
|---|---|---|---|
| 4A | 2 | 100 | 75 |
| 4AA | 2 | 90 | 75 |
| 4AAA | 3 | 100 | 80 |
4A:
4AA:
4AAA:


Second hit can be held...

before releasing


Who put highs in an autocombo?


| Version | Damage | Guard | Startup | Active | Recovery | On-Block | Attribute | Invuln |
|---|---|---|---|---|---|---|---|---|
| 5A | 1700 | All | 15 | 4 | 18 | -3 | B | |
| 5AA | 1700 [2500] | All | 21 [52] | 7 | 27 | -15 | B | 16~27 [16~58] Guard HBP |
| 5AAA | 2000 | All | 20 | 9 | 30 | -18 | B | |
| 5AAAA | 2000 | High | 24 | 2 | 33 | -14 | B |
5A is Tager's longest ranged jump cancelable normal, making it a prime point in his blockstrings to reset pressure. Safe on block, giving him a low commitment way to disengage from a blockstring.
Tager can hold this charge for magnetismPulls the opponent towards Tager by adding (not overriding) forces to their existing momentum and high/body/projectile armor, and extra damage on full charge. Generally used to bait pushblock attempts and fish for a juicy counter hit starter when a reversal action comes out instead. Canceling into 214B or a delayed 214C after this move is a situationally useful mixup against blocking opponents. On grounded counterhit, you can actually combo directly into 214B.
5AAA's magnetism can draw opponents back in after a pushblocked 5AA, stopping some counter-attacks. Otherwise it's unremarkable combo filler.
Works sometimes as a suprise overhead, but generally relegated to combo filler.
| Version | Level | P1 | P2 |
|---|---|---|---|
| 5A | 4 | 100 | 80 |
| 5AA | 4 | 90 | 80 |
| 5AAA | 5 | 100 | 85 |
| 5AAAA | 5 | 80 | 85 |
5A:
5AA:
5AAA:
5AAAA:
Sledgehammer

Can be held to increase armor


Hammer!


| Version | Damage | Guard | Startup | Active | Recovery | On-Block | Attribute | Invuln |
|---|---|---|---|---|---|---|---|---|
| 5B | 2000 [2500] | All | 32 [61] | 4 | 19 | -4 | B | 1~36 [1~65] Guard P 9-26 [9~55] Guard HBP |
| 5BB | 1700 | High | 19 | 6 | 30 | -17 | B | 1~18 Guard HBP |
5B is chargeable. Sledge will cover more distance and deal more damage when fully charged. Safe on block, use this move to cover distance, approach zoners, and safely end blockstrings. Chainable into 2A, 2B, 2C, and 5C on hit but not block. Thanks to head guard point, Tager can also bait Bursts with this move for a counterhit combo.
Easy to punish armored overhead. Surprisingly annoying to make safe with assist. Will autocorrect if an opponent crosses over Tager after he uses Sledge. Opponents can generally block high after sledge without much worry as 5BB is his only followup on block. However, if sledge hits an assist, Tager can then cancel into 2C, giving a fairly potent mixup opportunity.
| Version | Level | P1 | P2 |
|---|---|---|---|
| 5B | 4 | 80 | 85 |
| 5BB | 4 | 90 | 85 |
5B:
5BB:


| Damage | Guard | Startup | Active | Recovery | On-Block | Attribute | Invuln |
|---|---|---|---|---|---|---|---|
| 800 | High | 22 | 3 | 24 | -10 | B |
Standard overhead.
| Level | P1 | P2 |
|---|---|---|
| 3 | 100 | 100 |


| Damage | Guard | Startup | Active | Recovery | On-Block | Attribute | Invuln |
|---|---|---|---|---|---|---|---|
| 1700 | All | 13 | 2 | 29 | -12 | B | 9~12 H |
Tall but committal anti-air. Has poor head invulnerability, but generally trades in Tager's favor. An important combo tool for Tager, letting him get full combos from 4A and Sledge when right next to the opponent. On a clean counterhit, leads to very rewarding combos with 236B or Sledge.
| Level | P1 | P2 |
|---|---|---|
| 4 | 90 | 75 |

Who thought letting this be cancellable into 5C overhead was a good idea.

| Damage | Guard | Startup | Active | Recovery | On-Block | Attribute | Invuln |
|---|---|---|---|---|---|---|---|
| 2000 | All | 26 | 6 | 22 | +2 | F |
Rather slow to start and easily stuffed in neutral, but leaves Tager plus on block, allowing him to run a mixup or rest pressure. Useful in some juggle combos as it is chainable into Sledge, 2A, and 2C.
| Level | P1 | P2 |
|---|---|---|
| 5 | 80 | 90 |

TIME FOR BED

| Damage | Guard | Startup | Active | Recovery | On-Block | Attribute | Invuln |
|---|---|---|---|---|---|---|---|
| 1700 | Low | 13 | 3 | 22 | -6 | F |
Decently quick and mostly safe low poke. Special cancelable and chainable into Gadget Finger.
| Level | P1 | P2 |
|---|---|---|
| 4 | 90 | 85 |


| Version | Damage | Guard | Startup | Active | Recovery | On-Block | Attribute | Invuln |
|---|---|---|---|---|---|---|---|---|
| j.A | 1500 | High | 7 | 16 | 20 | H | ||
| j.AA | 1700 | High | 13 | 5 | 12 | H |
j.A is quick and has a lot of active frames, making it a solid jump-in normal. j.A -> rising j.A can fuzzy most of the cast.
j.AA is mostly used in combos. Chainable into j.B or j.C
| Version | Level | P1 | P2 |
|---|---|---|---|
| j.A | 3 | 80 | 80 |
| j.AA | 4 | 80 | 85 |
j.A:
j.AA:


| Damage | Guard | Startup | Active | Recovery | On-Block | Attribute | Invuln |
|---|---|---|---|---|---|---|---|
| 2000 | High | 22 | 4 | 18+7L | H |
A slow, large magnetizedPulls the opponent towards Tager by adding (not overriding) forces to their existing momentum attack. Used in aerial combos, and can be used as an air to air. Has high frame advantage on hit and block against grounded opponents.
When done while rising with a super jump, it can be tricky for the opponent to anti-air. Air-to-air and airborne anti-air moves can trade in Tager's favor, as the pull from the magnetism can ruin a followup combo, while potentially pulling the opponent into the corner. Meanwhile, grounded anti-airs have to contend with the possibility of j.C delaying Tager's fall, as well the tug of j.B pulling them in range a potential assist call.
| Level | P1 | P2 |
|---|---|---|
| 5 | 80 | 90 |
Crimson Punisher

CRIMSON PUNISH


| Damage | Guard | Startup | Active | Recovery | On-Block | Attribute | Invuln |
|---|---|---|---|---|---|---|---|
| 1700×2 | All | 15 | 3 | 16+3L | -4~0 | H |
Tager's makeshift float. A two stage attack, if the initial arm sweep hits, his opponent is hit straight down with a hard knockdown and Tager immediately follows up with a bellyflop on the stricken opponent. The opponent cannot burst until the belly flop connects.
During the initial arm sweep, Tager is launched slightly upwards and forwards and loses all previous jumping momentum, enabling it to easily hit enemies slightly above him. Conversely, this makes landing it against standing opponents very tricky.
Can perform this move an indefinite number of times, allowing Tager to air stall, cross over the opponent, and bait out anti-air attacks.
| Level | P1 | P2 |
|---|---|---|
| 4 | 80 | 85×2 |
5B+C


| Damage | Guard | Startup | Active | Recovery | On-Block | Attribute | Invuln |
|---|---|---|---|---|---|---|---|
| 0, 2000 | Throw | 7~30 | 3 | 23 | T |
A below average throw because of Tager's poor walkspeed and subpar options for canceling into it. Combos into 236B giving it high, frontloaded burst-safe damage. Generally redundant due to Tager's potent set of command grabs.
| Level | P1 | P2 |
|---|---|---|
| 0, 4 | 100 | 50 |
5A+D

Magnetic Storm

| Damage | Guard | Startup | Active | Recovery | On-Block | Attribute | Invuln |
|---|---|---|---|---|---|---|---|
| 2760 | Air Unblockable | 16 | 5 | 46 | -32 | B | 1~20 Guard All |
An very good Reversal Action. The large hitbox makes it a potent anti-air, and because it hits all around Tager, it easily stops most crossup attempts. It is also one of the most damaging reversal options, further skewing the risk-reward of challenging a defending Tager.
The guardpoint property of the moves also allows it to defeat many typical safejumps, as opponents will remain airborne slightly longer when their attack makes contact with the guardpoint, preventing them from being able to block.
Has relatively few active frames, making it surprisingly poor at punishing bursts.
| Level | P1 | P2 |
|---|---|---|
| 4 | 80 | 60 |
236A/B

Pray for your opponent to jump on wakeup.


| Version | Damage | Guard | Startup | Active | Recovery | On-Block | Attribute | Invuln |
|---|---|---|---|---|---|---|---|---|
| 236A | 0, 3500 | Air Unblockable | 16 | 4 | 19 | T | 4~15 H | |
| 236B | 0, 3500 | Air Unblockable | 29 | 4~46 | 23 | T | 5~34 H |
Thanks to the head invulnerability and deceptively large hitbox this move can occasionally be an effective anti-air, though for relatively damage. It recovers very quickly, which can be used to bait Tager's opponent into approaching. Generally speaking this move is best used at the end of a combo. Tager is +41 upon landing, letting him can safejump 9+f reversals.
The more committal and riskier anti-air grab. The magnetismPulls the opponent towards Tager by adding (not overriding) forces to their existing momentum is fairly finicky, and when used poorly, opponents can land and punish Tager before the move recovers. In certain cases, the opponents can avoid the grab long enough to hit Tager after the end of the move's head attribute invulnerability.
Generally speaking, this move is used as a combo extender.
| Version | Level | P1 | P2 |
|---|---|---|---|
| 236A | 0, 4 | 90 | 100,60 |
| 236B | 0, 4 | 90 | 100, 60 |
236A:
236B:
214A

REAL SOVIET DAMAGE

| Damage | Guard | Startup | Active | Recovery | On-Block | Attribute | Invuln |
|---|---|---|---|---|---|---|---|
| 0×3,4200 | Throw | 6 | 2 | 33 | T | 1~7 T |
Technically Tager's fastest move in terms of startup. The highest damaging meterless command grab in the game. A lynchpin of Tager's mixup. Is +35 upon landing, allowing Tager to safejump 15f+ reversals, but only applicable on forward tech/corner.
| Level | P1 | P2 |
|---|---|---|
| 0×3, 4 | 100 | 100×3, 50 |
214B


| Damage | Guard | Startup | Active | Recovery | On-Block | Attribute | Invuln |
|---|---|---|---|---|---|---|---|
| 0×2,800 | Throw | 30 | 4 | 30 | T | 6~29 All |
Has invulnerability and magnetismPulls the opponent towards Tager by adding (not overriding) forces to their existing momentum early in the move up to the point right before Tager grasps at this opponent. Be wary of very active moves as Tager is vulnerable for 1 frame before the grab hitbox is active. The damage scaling on this move is very good, allowing for some of Tager's most damaging combos upon a successful grab. While uncommon and largely impractical, it is also possible to combo grounded opponents directly into this grab via assists or counterhit 5AA and j.B.
| Level | P1 | P2 |
|---|---|---|
| 0×3 | 100 | 100 |
j.214A/B

NO JUMPING, BOY


| Version | Damage | Guard | Startup | Active | Recovery | On-Block | Attribute | Invuln |
|---|---|---|---|---|---|---|---|---|
| j.214A | 0×3,4500 | Throw | 6 | 3 | 41+12L | T | ||
| j.214B | 0×3,4500 | Throw | 23 | 10 | 42+12L | T |
Tager's fast air grab. This move is best used as a hard read due to it's lackluster hitbox.
Be careful when using this. Grounded opponents will have plenty of time to get under you. While opponents who super jump will usually fly overhead and can hit you as they fly by.
| Version | Level | P1 | P2 |
|---|---|---|---|
| j.214A | 0×3, 4 | 100 | 100×3, 50 |
| j.214B | 0×3, 4 | 100 | 100×3, 50 |
j.214A:
j.214B:
After certain attacks -> A/B/C


NOW, GET UP

| Damage | Guard | Startup | Active | Recovery | On-Block | Attribute | Invuln |
|---|---|---|---|---|---|---|---|
| 0×2,100 | 7 | 19 | 9 | +5 on hit |
Drops the opponent just inside 214A range with Tager at a small frame advantage. This is a very strong position for Tager where in order to avoid a properly timed command grab, the opponent must buffer a jump, reversal, or backdash. The Rock-Paper-Scissors scenario is generally as follows.
Though generally a scary mixup situation, not opting for gadget finger ender gives Tager additional options such as meaty assist and safejumps, which can lead to even more powerful oki.
You can also consider also using Active Switch to extend combos or for better positioning in your resets when using this to end Tager's combos.
| Level | P1 | P2 |
|---|---|---|
| 0×3 | 100 | 65 |
236C

Whose idea was this

Chest hitbox is fake, only the projectile has a hitbox
| Damage | Guard | Startup | Active | Recovery | On-Block | Attribute | Invuln |
|---|---|---|---|---|---|---|---|
| 1700 | All | 12 | Until Hit | Total: 47 | -1 | P2 |
Tager gets access to his iconic projectile at the cost of only one Skill Gauge. Just like in other BlazBlue games, this move is extremely fast and will beat other normal projectiles easily. Also an important combo extender for Tager, and always a threat that must be accounted for in neutral.
| Level | P1 | P2 |
|---|---|---|
| 4 | 80 | 85 |
214C

| Damage | Guard | Startup | Active | Recovery | On-Block | Attribute | Invuln |
|---|---|---|---|---|---|---|---|
| 0×3,4200 | Throw | 6 | 2~10 | 33 | T | 1~7 T |
Has the same startup as the A version, but as this move can be held briefly as well, extending its active frames. This move has magnetismPulls the opponent towards Tager by adding (not overriding) forces to their existing momentum, giving it benefits from greater effective range. These attributes combined makes tick throw setups considerably easier to execute. Is +35 upon landing, allowing Tager to safejump 15f+ reversals, but only applicable on forward tech/corner.
| Level | P1 | P2 |
|---|---|---|
| 0×3, 4 | 100 | 100×3, 50 |
j.214C
Aerial combo grab

| Damage | Guard | Startup | Active | Recovery | On-Block | Attribute | Invuln |
|---|---|---|---|---|---|---|---|
| 0×3,4500 | Throw | 6 | 2~35 | 41+12L | T |
The magnetismPulls the opponent towards Tager by adding (not overriding) forces to their existing momentum on this move is stronger than that of j.214B, making the move moderately more consistent at grabbing aerial opponents. Also of note is that this grab can be comboed into, which could be considered an option as an unburstable combo ender or in active switch routes.
| Level | P1 | P2 |
|---|---|---|
| 0×3, 4 | 100 | 100×3, 50 |
Sledgehammer

| Damage | Guard | Startup | Active | Recovery | On-Block | Attribute | Invuln |
|---|---|---|---|---|---|---|---|
| 2000 | All | (18)+17 | 9 | 19 | -9 | B |
Tager's most versatile assist due to it's size and blockstun. Useful in Cross Combos due to its relatively fast startup and cooldown.
| Level | P1 | P2 |
|---|---|---|
| 4 | 70 | 85 |
Spark Bolt

| Damage | Guard | Startup | Active | Recovery | On-Block | Attribute | Invuln |
|---|---|---|---|---|---|---|---|
| 1700 | All | (18)+92 | Total: (18)+127 | -1 | P2 |
A highly situational assist. The extremely long startup makes it very easy to react to in neutral, but it can sometimes be uniquely advantageous in combos that have long forced animations. Unlike in other BlazBlue games, Tager's charging stance does not have protection of any kind, making him entirely vulnerable before the move activates.
| Level | P1 | P2 |
|---|---|---|
| 4 | 70 | 85 |
Up Spark Bolt

6P, but up

| Damage | Guard | Startup | Active | Recovery | On-Block | Attribute | Invuln |
|---|---|---|---|---|---|---|---|
| 1700 | All | (18)+55 | Total: (18)+93 | -4 | P2 |
Shallow angle combined with Spark Bolt's large size and very fast speed makes this an ok preemptive anti-air assist. Still has extremely long startup and is easily stuffed due to Tager's large frame
| Level | P1 | P2 |
|---|---|---|
| 4 | 70 | 85 |
236B+C

spin2win


| Damage | Guard | Startup | Active | Recovery | On-Block | Attribute | Invuln |
|---|---|---|---|---|---|---|---|
| 250×19, 4200 [250×19, 4200, 2600] |
All | 7+(38 Flash)+6 | 4,2×18 (15) 3 [,(50) 9], | 33 | -56 | B | 1~18 Guard All 19~52 Guard P |
The move itself had guardpoint, allowing it to beat certain safejumps. the Followup only comes out in resonance/Cross combo. Can be used with short Distortion Skill Duos, allowing for partner combo extension.
| Level | P1 | P2 |
|---|---|---|
| 4 | 80 | 100×19, 60 [100×19, 60×2] |
214B+C (Air OK) 720B+C (Air OK)


WHO THOUGHT GIVING HIM THIS MOVE IN THE AIR WAS A GOOD IDEA?!


| Version | Damage | Guard | Startup | Active | Recovery | On-Block | Attribute | Invuln |
|---|---|---|---|---|---|---|---|---|
| 214BC | 0×3, 6120 [0×3, 7120] |
Throw | 10+(28 Flash)+0 | 1~52 | 41 | T | 1~11 All | |
| j.214BC | 0×3, 6120 [0×3, 7120] |
Throw | 6+(28 Flash)+0 | 1~38 | 41+12L | T | 1~6 All |
If you input 720B+C instead of 214B+C, the damage of GETB will be increased by 500 (6620/7620). The range on this move is deceptively huge especially thanks to the generous magnetismPulls the opponent towards Tager by adding (not overriding) forces to their existing momentum during the startup, making it a powerful tool in footsies as well as a threatening reversal. Is +21 upon landing, but the opponent is placed far from Tager.
Be careful when using the air version. Grounded opponents will have plenty of time to get under you. While opponents who super jump will usually fly overhead and can hit you as they fly by. Is +21 upon landing, but the opponent is placed far from Tager.
Thanks to the invulnerable startup and large grab hitbox, j.214B+C is a prime button to threaten air footsies. The magnetismPulls the opponent towards Tager by adding (not overriding) forces to their existing momentum doesn't start until after the super flash, making it worse than his other grabs when trying to catch faraway airborne opponents by surprise.
Input 720B+C will also give you an extra 500 damage (7350/8350).
| Version | Level | P1 | P2 |
|---|---|---|---|
| 214BC | 100 | 100×3, 60 | |
| j.214BC | 100 | 100×3, 60 |
214BC:
j.214BC:
P during Partner's Distortion Skill

Don't do this on block

| Damage | Guard | Startup | Active | Recovery | On-Block | Attribute | Invuln |
|---|---|---|---|---|---|---|---|
| 2000 [2500] | All | 1+(68 Flash)+1 | 9 | 42 | -32 | B | 1~7 All |
| Level | P1 | P2 |
|---|---|---|
| 4 | 100 | 100 |
222B+C when Astral Conditions are met

"Releasing Armagus!"

Buckle Up.

Cause I wanna take you for a ride.

| Damage | Guard | Startup | Active | Recovery | On-Block | Attribute | Invuln |
|---|---|---|---|---|---|---|---|
| 5+(50 Flash)+16~84 | 4 | 76 | 1~15 All |
You can be hit while extending the magnetismPulls the opponent towards Tager by adding (not overriding) forces to their existing momentum of this move, but this shouldn't be an issue when ending the round with a hit confirm.
| Level | P1 | P2 |
|---|---|---|