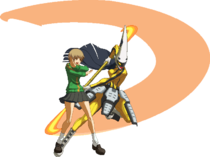
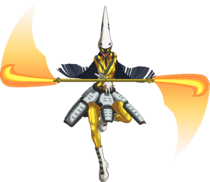
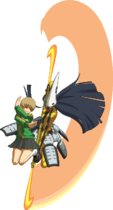
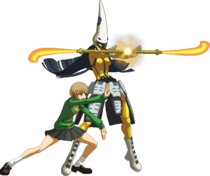
Overview
Chie's attacks will do more damage for a limited amount of time. You can perform multiple Charges to further increase the damage boost you receive (max 3). This is also used to reset pressure since you can cancel your blocked attacks into Charge to immediately return to attacking.
File:P4Arena Chie Satonaka Icon.png Chie Satonaka is a rushdown heavy character that overwhelms her opponent's defenses by never giving the opponent a chance to retaliate. She also has very high damage potential starting from just about any starter.
- Rushdown
- high damage
- very useful Supers for resetting pressure or extending combos
- Short range
- poor defense
Move List
- See also: Chie Full Frame Data
Normal Attacks
5A
| Version | Damage | Guard | Cancel | Startup | Active | Recovery | Static Diff | Attribute | Invul | Hitbox |
|---|---|---|---|---|---|---|---|---|---|---|
| 5A | 300 | All | CJO | 5 | 5 | 10 | +1 | Body | - | Click! |
| 5AA | 150, 75×5 | All | CJO | 9 | 2 | 15 | -8 | Body | - | Click! |
| 5AAA | 900, 450 | All | CJO | 9 | 2 | 22 | -3 | Body | - | Click! |
- 5A
Short, slightly angled jab that hits crouchers. It's a staple pressure tool, since it's the only jab in the game that's plus on block; input it as [4]A during pressure to block DP attempts after you recover.
- 5AA
Short flurry of multiple kicks. Mostly used for hitconfirming.
- 5AAA
Backwards cartwheel kick. Doesn't see much use outside autocomboing for meter. Pull opponent out of a corner.
5B
2A
| Damage | Guard | Cancel | Startup | Active | Recovery | Static Diff | Attribute | Invul | Hitbox |
|---|---|---|---|---|---|---|---|---|---|
| 200 | L | CO | 7 | 3 | 11 | -3 | Leg | - | Click! |
Crouching, low-hitting kick. It's arguably Chie's best poke, as it low profiles several other pokes and has better range than 5B. Additionally, it's Chie's most important low; it's used often in stagger pressure, and it's the low used in her okizeme mixups. Cancels into itself on whiff. Note that it is /not/ jump cancelable, unlike Chie's other A and B normals.
2B
j.A
j.B
j.BB
All Out Attack
A+B
| Version | Damage | Guard | Cancel | Startup | Active | Recovery | Static Diff | Attribute | Invul | Hitbox |
|---|---|---|---|---|---|---|---|---|---|---|
| All Out Attack | 300 | H | O | 23 | 1 | 41 | -21 | Body | 15-23 Guard | Click! |
| All Out Rush | 180×N | All | O | - | - | - | - | Body | - | Click! |
| All Out Finish (C) | 1800 | All | O | - | - | - | - | Body | - | Click! |
| All Out Finish (D) | 1000 | All | O | - | - | - | - | Body | - | Click! |
Chie does a front flip before slamming her heel down on her opponent. Best AoA in the game, since it's got good startup and reasonable range, and it's airborne from the sixth frame. Also, it sees some use as a combo ender, since it gives hard knockdown on airborne opponents.
Sweep
2A+B
| Damage | Guard | Cancel | Startup | Active | Recovery | Static Diff | Attribute | Invul | Hitbox |
|---|---|---|---|---|---|---|---|---|---|
| 600 | L | CJO | 9 | 6 | 15 | -8 | Leg | - | Click! |
Chie's sweep. It's a staple combo ender in the corner, and it's also surprisingly useful in pressure, since it's jump cancelable on block. Hits low, but it's nearly impossible to combo off it, since it knocks down on hit; be prepared to go into in okizeme if it hits when you're using it in your blockstring.
Guard Cancel Attack
6A+B
Persona Attacks
5C 
| Damage | Guard | Cancel | Startup | Active | Recovery | Static Diff | Attribute | Invul | Hitbox |
|---|---|---|---|---|---|---|---|---|---|
| 800 | All | CJDO | 12 | 3 | 31 | -16 | Body | - | Click! |
Decent mid-range poke for Chie. Useful in corner pressure since it can be dash/jump canceled to make it +0. Can be used to trade favorably with certain long-range pokes, but it shouldn't be relied on too heavily.
5D/2D 
| Version | Damage | Guard | Cancel | Startup | Active | Recovery | Static Diff | Attribute | Invul | Hitbox |
|---|---|---|---|---|---|---|---|---|---|---|
| 5D | 200, 100×2, 900 | All | - | 43 | 7,2,3 | 40 | +47 | Body | - | Click! |
| 2D | 200, 1400 | All | - | 26 | 7,2,3 | 40 | +27 | Body | - | Click! |
Very slow spear attack. Last hit causes launch, but is not incredibly useful outside of combos. Almost exclusively canceled into 5DD/2DD for oki.
5DD/2DD 
| Version | Damage | Guard | Cancel | Startup | Active | Recovery | Static Diff | Attribute | Invul | Hitbox |
|---|---|---|---|---|---|---|---|---|---|---|
| 5DD | 200, 100×2, 30×15, 200 | All | - | 43 | 3 | - | +88 | Body | - | Click! |
| 2DD | 200, 50×15, 300 | All | - | 26 | 3 | - | +62 | Body | - | Click! |
Tomoe spins spear. Amazing oki tool. Standing version is slower but makes Tomoe move forward, crouching starts-up immediately but Tomoe will stay in place. Use while opponent is waking up and they will be forced to block, leaving Chie free to mix-up the opponent or go for other set-ups. Tomoe can be hit if the opponent wakes up at the correct time or if they F-Action.
Note that the 2nd D can (and usually should) be delayed to force the opponent to change their wakeup timing and allow Chie more time to pressure.
j.C 
| Damage | Guard | Cancel | Startup | Active | Recovery | Static Diff | Attribute | Invul | Hitbox |
|---|---|---|---|---|---|---|---|---|---|
| 700 | All | CJO | 11 | 2 | 32 | - | Body | - | Click! |
Tomoe slashes in midair. A move with a surprising amount of utility, and Chie's best air-to-air option. It actually has a deceptively massive forward hitbox (by Chie standards) and a scrunched hurtbox, and can be canceled into D Dragon Kick for easy damage. Against a grounded opponent, it allows for ambiguous crossups in combination with air turn, and halts Chie's downward momentum which can sometimes cause AA's to whiff. Note that it does not hit overhead.
j.5/4/2/8D 
| Damage | Guard | Cancel | Startup | Active | Recovery | Static Diff | Attribute | Invul | Hitbox |
|---|---|---|---|---|---|---|---|---|---|
| 100, 50×11, 500 | All | - | 24 | 3 | 43 | - | Body | - | Click! |
Tomoe leaps up and spins her spear, followed by a downward thrust which causes knockdown. Each version summons Tomoe at a slightly different point. Primarily used in combos, but j.2D and j.5D can be useful for covering your approach or okizeme in certain matchups.
Throws
Ground Throw
C+D
Air Throw
j.C+D
Furious Action
Counter
B+D, air OK
| Version | Damage | Guard | Cancel | Startup | Active | Recovery | Static Diff | Attribute | Invul | Hitbox |
|---|---|---|---|---|---|---|---|---|---|---|
| Catch | - | - | - | - | - | 21 Total | - | - | - | Click! |
| Attack (ground) | 720, 190×4 | All | U | 7 | 3,10 | 37+9 after landing | -49 | Body | 1-22 | Click! |
| Attack (air) | 320, 160×3 | All | U | 6 | 2(6)2(6)2(6)2 | 16 after landing | - | Head | 1-7 | Click! |
Chie summons a shield, and if hit or grabbed she'll kick in the air diagonally upward. Starts up and recovers quickly, but the counter isn't active for long. This makes it harder to time than most other f-actions. Can be spammed to force awakening, giving Chie 50 SP and access to Agneyastra.
Air version does the kicks immediately, and has full invincibility on startup.
Skill Attacks
Rampage
236A/B air OK
| Version | Damage | Guard | Cancel | Startup | Active | Recovery | Static Diff | Attribute | Invul | Hitbox |
|---|---|---|---|---|---|---|---|---|---|---|
| A | 240,120×N | All | UO | 11 (6 in air) | 2(6)3(6)3... | 17 after landing | -8 | Head | - | Click! |
| B | 320,160×N | All | UO | 19 (9 in air) | 2(6)3(6)3... | 11 after landing | -4 | Head | - | Click! |
| SB | 320,160×N | All | UO | 12 (7 in air) | 2(4)2(4)2... | 11 after landing | +6 | Head | - | Click! |
- A Version
A short flurry of jump kicks. Mostly used in combos, or to cause FC under Power Charge.
- B Version
A higher flurry of jump kicks that force standing. Safe on block.
- SB Version
Startup of A Rampage with the damage of B Rampage, plus extra kicks. Can link 5A after. Very plus on block.
Skull Cracker
236A/B after Rampage
| Version | Damage | Guard | Cancel | Startup | Active | Recovery | Static Diff | Attribute | Invul | Hitbox |
|---|---|---|---|---|---|---|---|---|---|---|
| A | 400, 200 | H,L | UO | 6 | 2(9)3 | 21 | -12 | Body, Leg | - | Click! |
| B | 600, 300 | H,L | UO | 10 | 2(9)3 | 21 | -7 | Body, Leg | - | Click! |
| SB | 600, 300×4 | H,L | UO | 5 | 2(9)3 | 19 | -5 | Body, Leg | - | Click! |
- A Version
First hit overhead, second hit low. Can be followed up with Dragon Kick. Can be replaced with 2A after Rampage for a good 50/50 situation. Good use of OMC during/after Skull Cracker can create powerful mixups, and make the move safe.
- B Version
First hit overhead, second hit low. Good for combos. Doesn't combo after A version of Rampage, allowing for a reset.
- SB Version
First hit overhead, second hit low. Mostly not used unless you have meter to burn to add damage to a combo.
Dragon Kick 
236C/D air OK
| Version | Damage | Guard | Cancel | Startup | Active | Recovery | Static Diff | Attribute | Invul | Hitbox |
|---|---|---|---|---|---|---|---|---|---|---|
| Ground C | 2160 | All | UO | 23 | 18 | 23+16 after landing | -31 | Head | - | Click! |
| Air C | 1800 | All | UO | 14 | 17 | 16 after landing | - | Head | - | Click! |
| Ground D | 3000 | All | UO | 30 | 18 | 16 after landing | -31 | Head | - | Click! |
| Air D | 2520 | All | UO | 16 | 16 | 16 after landing | - | Head | - | Click! |
| Ground SB | 2400 | All | UO | 30 | 18 | 5 | +4 | Head | - | Click! |
| Air SB | 2400 | All | UO | 13 | 17 | 5 | - | Head | - | Click! |
Chie shoots off with a flying kick. High damage and a great combo ender. Occasionally useful as a surprise, or a method to punish unsafe moves in the air. SB version should be used whenever possible.
Black Spot 
214C/D
| Version | Damage | Guard | Cancel | Startup | Active | Recovery | Static Diff | Attribute | Invul | Hitbox |
|---|---|---|---|---|---|---|---|---|---|---|
| C | 800 | All | UO | 13 | 13 | 24 | -7 | Body | - | Click! |
| D | 1200 | All | UO | 26 | 12 | 18 | +12 | Body | - | Click! |
| SB | 1400 | All | UO | 21 | 12 | 26 | +6 | Body | 9-23 Guard | Click! |
Chie and her Persona do a double palm attack. C/D versions will FC on Counter Hit. SB version has super armor on frames 9-32, shielding Chie from attacks. Nice move to throw into corner pressure sometimes if you think you can get a FC off of it, and the D/SB versions are good when the enemy is approaching.
SP Skill Attacks
Power Charge
236236A/B
| Version | Damage | Guard | Cancel | Startup | Active | Recovery | Static Diff | Attribute | Invul | Hitbox |
|---|---|---|---|---|---|---|---|---|---|---|
| A | - | - | - | - | - | 6 Total Duration | - | - | 1-5 | Click! |
| B | - | - | - | - | - | 25 Total | - | - | 1-9 | Click! |
- A Version
Chie charges up, boosting the damage of her special moves. In addition, special moves will now FC on Counter Hit. This move is useful in combos or pressure as a sort of "extra" OMC, since it can be canceled into from virtually anything and has only 5 total frames (all of which have invincibility). In addition, it freezes the screen, so you can use it when you are disoriented to get your bearings, or to tell if you have clearance to go for a throw/punish a move with long startup/etc. Very useful.
- B Version
Similar to the A version, but the charge lasts much longer. This version is not very practical since the actual effects of Power Charge aren't usually worth 50 SP, and it has a very long recovery time. However, the 9 frames of invincibility might make it occasionally useful as a parry, from which you can go into a massively damaging FC combo.
God's Hand 
236236C/D
| Version | Damage | Guard | Cancel | Startup | Active | Recovery | Static Diff | Attribute | Invul | Hitbox |
|---|---|---|---|---|---|---|---|---|---|---|
| C | 3000 | All | One More Cancel | 4+11 | 6 | 42 | -16 | Head | 1-23 | Click! |
| D | 3360 | All | One More Cancel | 4+19 | 6 | 42 | -16 | Head | 1-31 | Click! |
Tomoe summons a giant golden fist to slam down onto the opponent. Chie's main combo ender when going for damage. C version is quicker and puts the fist in front of Chie, D version puts the fist mid screen. Can also be used as a strong reversal.
Awakened SP Skill Attacks
Agneyastra 
214214C/D air OK
| Version | Damage | Guard | Cancel | Startup | Active | Recovery | Static Diff | Attribute | Invul | Hitbox |
|---|---|---|---|---|---|---|---|---|---|---|
| C | 520×N | All | One More Cancel | 10+~8 | - | 34 Total | - | Body | 1-20 | Click! |
| D | 520×N | All | One More Cancel | 10+~3 | - | 34 Total | - | Body | 1-20 | Click! |
Tomoe causes a large swarm of Meteors to rain from the sky. C verion puts meteors close to Chie, D version makes meteors go full screen. This super is very useful in starting a rushdown from fullscreen or for stopping your opponent's offense or zoning. Chie's only option from full screen away.
Instant Kill
Galactic Punt 
222C+D
Strategy
Offense
Chie okizeme tutorial (Japanese)
Defense
Combos
[i] = Install Starter
Combo = Challenge Mode Combo
DM: = Damage
SP: = SP Gain
Beginner Combos
- 5AAAAA
Midscreen
Normal Starter
- Gives Knockdown
- 2A > 5AA > 5B > 2B > 2AB (983 Damage)
- AA 2B > JB > JC > 8D > 2AB (1716 Damage)
- AA 2B > JBB > 8D > 2AB (1666 Damage, switches sides)
- JB (CH) > 5B > 2B > JBB > 8D > 5AB (1976 Damage)
- JBB > 5B > 2B > 2AB (1458 Damage)
- High Damage
- AA 2B > JB > JC > 8D > 5B > 2369B (?) > 236A > 214C > 236236D (3878 Damage, Uses 50% Meter)
- JB (CH) > 5B > 5C > 236B > 236B > dash 5C > 5A > 5C > 214C > 236236D (4273 Damage, Uses 50% Meter)
- 5B > 2B > 236A > 236A OMB > 5C > 236B > 236B > dash 5C > 5A > 5C > 214C > 236236D (5023 Damage, Uses 50% Meter + Burst)
- 5B > 2B > 236A > 236B > 236D OMB > 5C > 236B > 236B > dash 5C > 5A > 5C > 214C > 236236D (6152 Damage, Uses 50% Meter + Burst, crouching only)
- 5B (CH) > 2D > dash 5B > 5C > 236B > 236B > dash 5C > 5A > 5C > 214C > 236236D (5333 Damage, Uses 50% Meter)
- 5B > 2B > 236A > 236A > 236236A > Dash 5C > 236B > 236B > 236D (4216 Damage, Uses 50% Meter)
- 5B > 2B > 236A > 236A > 236236A > 5C > 236B > 236B > dash 5C > 5A > 5C > 214C > 236236D (5399 Damage, uses 100% Meter)
- 5B > 2B > 236A > 236A > 236236A > 5C > 236B > 236B > 5C > 236B > 236B > 214D > 236236D (5718 Damage, uses 100% Meter, must be near corner when starting)
Skill Starter
- Gives Knockdown
- Charged 236A (FC) > 5B > 2AB > JC > JB > 5C > 44 5C > 5B > 5C > 2DD > 236B > 236B > dash 5C > 5B > 5C > 5AB (4740 Damage)
- High Damage
- 214D (FC) > JC > JB > 5C > 44 5C > 5B > 5C > 236B > 236B > dash 5C > 5A > 5C > 214C > 236236D (4980 Damage, uses 50% Meter)
- 236236C OMC > 2A > 2B > JB > JC > JBB > JC > 236C (4298 Damage, Uses 100% Meter)
- Charged 236A (FC) > 5B > 2AB > JC > JB > 5C > 44 5C > 66 5B > 5C > 44 5C > 66 5B > 5C > 236B > 236B > dash 5C > 5B > 5C > 214C > 236236D (6797 Damage, uses 50% meter)
System Starter
- Gives Knockdown
- 5AB-C (FC) > J.6D > dash 5B > 5C > 5AB
- High Damage
- 5AB-C (FC) > J.6D > dash 5B > 5C > 236B > 236B > 214C (D in Corner) > 236236D (4422 Damage, 50% Meter)
- Throw OMC > 5C > 236B > 236B > dash 236D (3051 Damage, uses 50% Meter)
- Throw (CH) > dash 2A > 5C > 236B > 236B > 236D (3147 Damage)
- Throw OMB > 5C > 236B > 236B > dash 5C > 5A > 5C > 214C > 236236D (4416 Damage, uses 50% Meter + Burst)
SP Skill Starter
- -
Corner
Normal Starter
- Gives Knockdown
- 2A > 5AA > 5B > 5C > 2B > 2C > 5B > 2AB (1632 Damage)
- 5B > 2B > 236A > 236A > 5B > 5C > 236B > 236B > 5C > 5AB (3129 Damage)
- 5C (CH) > 5B > 2B > 236A > 236A > 5B > 5C > 5AB (2396 Damage)
- JBB > 5B > 5C > 2B > 236A >23A > 5B > 5C >5AB (2545 Damage)
- JBB > 5B > 5C> 2B > 2C > 236B > 5AA > 5B > 5C > 2B > 2C > 5B > 2AB (3374 Damage, Crouchers only)
- High Damage
- 2A > 5B > 5C > 236A > 236A > 5B > 5C > 236B > 236B > 5B > 5C > 214C > 236236D (4000 Damage, uses 50% Meter)
- 5B > 2B > 236A > 236A > 5B > 5C > 236B > 236B > 5C > 236B > 236B > 214D > 236236D (5095 Damage, uses 50% Meter)
- 5B > 2B > 236A > 236A > 236236A > 5C > 236B > 236B > 5C > 236B > 236B > 214D > 236236D (5718 Damage, uses 100% Meter, Also works near corner)
- 5C (CH) > 5B > 2B > 236A > 236A > 5B > 5C > 236B > 236B > 5B > 5C > 214C > 236236D (4756 Damage, uses 50% Meter)
Skill Starter
- Gives Knockdown
- -
- High Damage
- 214C (FC) > 236236A > Dash 5C > 5B > 5C > 2D > Backdash 5Cx4 > 5B > 5C > 236B > 236B > 5C > 5B > 5C > 214C > 236236D (7432 Damage, uses 100% Meter)
- 214C > 236236A > 5B > 5C > JC > 8D > 236B > 236B > 5C > 236B > 236B > 236236D (5733 Damage, uses 100% Meter)
- 214D (FC) > JC > JB > 5C > 44 5C > 66 5B > 5C > 2D > J7D > 236B > 236B > 214C > 236326D (5174 Damage, uses 50% Meter)
- Charged 236A (FC) > 5B > 2AB > JC > JB > 5C > 2D >[4] 5C > 44 5C > 44 5C > 44 5C > 66 5B > 236B > 236B > 5C > 5B > 5C > 214C > 236236D (7210 Damage, uses 50% Meter)
System Starter
- Gives Knockdown
- 5AB-D (FC) > 5B > 5C > 2D > JD > 5AB (2737 Damage)
- 5BD (CH) > 5B > JC > 8D > 5AB (2671 Damage)
- High Damage
- 5AB-D (FC) > 5B > 5C > 2D > JD > 236B > 236B > 214D > 236236D (4720 Damage, uses 50% Meter)
- 5BD (CH) > 5B > JC > 8D > 236B > 236B > 214D > 236236D (4722 Damage, uses 50% Meter)
SP Skill Starter
- -


