No edit summary |
No edit summary |
||
| Line 5: | Line 5: | ||
{{FP Box | {{FP Box | ||
|header=Overview | |header=Overview | ||
|content=Broly is both a zoner ''and'' a grappler, a combination fitting for the Devil. Broly's neutral and pressure make him one of the most terrifying opponents in the game, as he can effectively control any space on the screen with his armor and projectiles. Broly's 5S is an incredible zoning tool, | |content=Broly is both a zoner ''and'' a grappler, a combination fitting for the Devil. Broly's neutral and pressure make him one of the most terrifying opponents in the game, as he can effectively control any space on the screen with his armor and projectiles. Broly's 5S is an incredible zoning tool, much larger than other Ki Blasts while also pierces through them, and can be aimed upwards to stop opponents from escaping. But it's when Broly gets close where he's at his scariest. Terrific frame data, an armored {{keyword|tick throw}} with [[DBFZ/Broly#Gigantic Claw|214L]] and a tiger-kneeable air grab, Broly can easily grapple and frame trap opponents. Even on defense, Broly is far from helpless thanks to his armor and [[DBFZ/Broly#Lariat Express|Lariat Express]]. If you like not letting other people play the game or otherwise making them feel bad, Broly is a must-play. | ||
''Note: Commonly referred to as '''Z''' Broly by the community, to differentiate him from [[DBFZ/DBS_Broly|the other Broly.]]'' | ''Note: Commonly referred to as '''Z''' Broly by the community, to differentiate him from [[DBFZ/DBS_Broly|the other Broly.]]'' | ||
| Line 17: | Line 17: | ||
| intro = {{Character Label|DBFZ|Broly}} is a massive brute who uses a combination of powerful blows and command grabs imbued with super armor to bully his victims. | | intro = {{Character Label|DBFZ|Broly}} is a massive brute who uses a combination of powerful blows and command grabs imbued with super armor to bully his victims. | ||
| pros = | | pros = | ||
* '''Fantastic Neutral:''' Neutral game is absolutely devilish, with huge normals, one of a kind [[DBFZ/Broly#5S|Ki Blast]], a counter-zoning tool in [[DBFZ/Broly#Powered Shell|Powered Shell]], many armored moves, and a very proficient anti-air grab in [[DBFZ/Broly#Gigantic Strike|Gigantic Strike]]. | |||
* '''Fantastic Neutral:''' Neutral game is absolutely devilish, with huge normals, | * '''Versatile Mix-ups:''' Strong stagger potential combined with [[DBFZ/Broly#Gigantic Claw|a fast, armored grab]] make defending against him an absolute nightmare. | ||
* '''Versatile Mix-ups:''' | |||
| cons = | | cons = | ||
* '''Resource Reliant:''' Requires resources for his stronger options and damage output. | * '''Resource Reliant:''' Requires resources for his stronger options and damage output. He will also burn through them relatively quick. | ||
* '''Size:''' Broly is more susceptible to random hits than others | * '''Size:''' Broly is more susceptible to random hits than others. | ||
}} | }} | ||
}} | }} | ||
| Line 40: | Line 38: | ||
{{FP Box | {{FP Box | ||
|header=Oops! All Armor | |header=Oops! All Armor | ||
|content=Almost all of Broly's attacks have Ki | |content=Almost all of Broly's attacks have Ki Blast guard point and at least one hit of armor, absorbing all attacks except Vanish, Supers and Sparking Blast. Though there are a few caveats: | ||
*Armor comes with higher initial proration values, reducing his overall damage potential. | *Armor comes with higher initial proration values, reducing his overall damage potential. | ||
*Normal attacks are only armored if they're the first attack of the string. He cannot utilize the armor property during a blockstring without using specials. | *Normal attacks are only armored if they're the first attack of the string. He cannot utilize the armor property during a blockstring without using specials. | ||
| Line 72: | Line 70: | ||
;5L | ;5L | ||
* Whiffs against short or crouching opponents at longer range. | * Whiffs against short or crouching opponents at longer range. | ||
Uncharacteristically high and big for a jab, can be used as a ghetto anti-air, but is also susceptible to low profile attacks | Uncharacteristically high and big for a jab, can be used as a ghetto anti-air, but is also susceptible to low profile attacks such as most 2Ms. | ||
---- | ---- | ||
;5LL | ;5LL | ||
* Steps forward during startup, increasing its range. | * Steps forward during startup, increasing its range. | ||
* | * The only attack in Broly's moveset with regular proration values, and therefore his only unscaled starter. | ||
Combined with Broly's other tools, the damage this move leads to is unholy. With resources available, it's usually a dead character. On top of that, it has great range and is -2 on block, making it a superb stagger tool. | Combined with Broly's other tools, the damage this move leads to is unholy. With resources available, it's usually a dead character. On top of that, it has great range and is -2 on block, making it a superb stagger tool. | ||
| Line 85: | Line 83: | ||
* Switches sides on hit. | * Switches sides on hit. | ||
* Cancelling into this from a blocked {{clr|2|5LL}} always leaves the opponent in too much blockstun for the throw to work. | * Cancelling into this from a blocked {{clr|2|5LL}} always leaves the opponent in too much blockstun for the throw to work. | ||
Mostly used in | Mostly used for post-Vanish extension, as he has better combo routes in other situations. | ||
With low blockstun assists, he can get a cheeky tickthrow from 5LL + Assist > 5LLL. Though the reward is not that high. | |||
</div> | </div> | ||
</div> | </div> | ||
| Line 93: | Line 93: | ||
<div class="attack-gallery"> | <div class="attack-gallery"> | ||
<gallery widths="210px" heights="210px" mode="nolines"> | <gallery widths="210px" heights="210px" mode="nolines"> | ||
DBFZ_Broly_5M.png |Chest | DBFZ_Broly_5M.png |Chest | ||
</gallery> | </gallery> | ||
</div> | </div> | ||
| Line 103: | Line 103: | ||
|} | |} | ||
==== ==== | ==== ==== | ||
* | * Long range. | ||
An unorthodox {{clr|3|5M}} that trades damage and speed for range and armor. Fairly standard use otherwise. | An unorthodox {{clr|3|5M}} that trades damage and speed for range and armor. Fairly standard use otherwise. | ||
</div> | </div> | ||
| Line 112: | Line 112: | ||
<div class="attack-gallery"> | <div class="attack-gallery"> | ||
<gallery widths="210px" heights="210px" mode="nolines"> | <gallery widths="210px" heights="210px" mode="nolines"> | ||
DBFZ_Broly_5H.png | | DBFZ_Broly_5H.png | | ||
</gallery> | </gallery> | ||
</div> | </div> | ||
| Line 122: | Line 122: | ||
|} | |} | ||
==== ==== | ==== ==== | ||
* Cannot true string from any normal, always leaving at least | * Cannot true string from any normal, always leaving at least an 1f gap. | ||
* Smash hit wall splats. | * Smash hit wall splats. | ||
* Can be charged by holding down the button. Full charge increases damage and makes Broly move forward further. | * Can be charged by holding down the button. Full charge increases damage and makes Broly move forward further. | ||
Forms a simple mix-up with {{clr|2|214L | Forms a simple mix-up with delayed {{clr|2|214L}}, since they have deceptively similar start-up animations. Reflecting will beat {{clr|5|5H}} but lose to 214L, while chicken blocking will beat 214L but lose to {{clr|5|5H}}. | ||
</div> | </div> | ||
</div> | </div> | ||
| Line 143: | Line 143: | ||
|} | |} | ||
==== ==== | ==== ==== | ||
* Any of the | * Any of the Ki Blasts can be aimed upwards with {{clr|4|5S}}[8]. | ||
* | * Pierces through other Level 1 projectiles on contact. | ||
* Last Ki | * Last Ki Blast launches on hit. | ||
* Whiffs against small or crouching opponents at close range. | * Whiffs against small or crouching opponents at close range. | ||
Broly's | A key part of Broly's neutral and maintains pressure when the opponent isn't in command grab range. The Ki Blasts are very fast, counterzone other Ki Blasts and can cover a large part of the screen when mixing between {{clr|4|5S}} and {{clr|4|5S}}[8]. | ||
It's not completely infallible though, | It's not completely infallible though, Broly still has to actively react to Super Dash for a punish, and the Ki Blasts themselves can be avoided by dash super jumps or beaten by beams. | ||
</div> | </div> | ||
</div> | </div> | ||
| Line 168: | Line 168: | ||
==== ==== | ==== ==== | ||
* Above average range. | * Above average range. | ||
Another great stagger tool along with 5L and 5LL. | |||
</div> | </div> | ||
</div> | </div> | ||
| Line 186: | Line 186: | ||
|} | |} | ||
==== ==== | ==== ==== | ||
Long range and not only is it safe on block, it also spaces the opponent out for Broly to poke with 2L or another 2M. | |||
</div> | </div> | ||
</div> | </div> | ||
| Line 195: | Line 194: | ||
<div class="attack-gallery"> | <div class="attack-gallery"> | ||
<gallery widths="210px" heights="210px" mode="nolines"> | <gallery widths="210px" heights="210px" mode="nolines"> | ||
DBFZ_Broly_2H.png | | DBFZ_Broly_2H.png | | ||
</gallery> | </gallery> | ||
</div> | </div> | ||
| Line 205: | Line 204: | ||
|} | |} | ||
==== ==== | ==== ==== | ||
* | * Short horizontal range, but very big vertically. | ||
On hit, {{clr|3|2M}} > {{clr|5|2H}} whiffs on a majority of the cast unless Broly has dash momentum. Alternatively, {{clr|3|5M}} > {{clr|5|2H}} will always connect on air hit, making {{clr|3|2M}} > {{clr|3|5M}} > {{clr|5|2H}} one of his go-to confirms. | |||
On hit, {{clr|3|2M}} > {{clr|5|2H}} whiffs on a majority of the cast unless Broly has dash momentum. Alternatively, {{clr|3|5M}} > {{clr|5|2H}} will always connect on air hit. | |||
</div> | </div> | ||
</div> | </div> | ||
| Line 225: | Line 223: | ||
|} | |} | ||
==== ==== | ==== ==== | ||
* Universal overhead | * Universal overhead with above average range. | ||
</div> | </div> | ||
</div> | </div> | ||
| Line 290: | Line 287: | ||
;j.H | ;j.H | ||
* Scratches on non-Smash hit, dunks the opponent down to the ground on Smash hit. | * Scratches on non-Smash hit, dunks the opponent down to the ground on Smash hit. | ||
Dunking can be followed up by j.214X or 214L+M due to Broly and the opponent staying airborne at the end of the move. You can also tag out and continue the combo. | Dunking can be followed up by j.214X or j.214L+M due to Broly and the opponent staying airborne at the end of the move. You can also tag out and continue the combo. | ||
</div> | </div> | ||
</div> | </div> | ||
| Line 298: | Line 295: | ||
<div class="attack-gallery"> | <div class="attack-gallery"> | ||
<gallery widths="210px" heights="210px" mode="nolines"> | <gallery widths="210px" heights="210px" mode="nolines"> | ||
DBFZ_Broly_jS.png | | DBFZ_Broly_jS.png | | ||
</gallery> | </gallery> | ||
</div> | </div> | ||
| Line 308: | Line 305: | ||
|} | |} | ||
==== ==== | ==== ==== | ||
* Any of the | * Any of the Ki Blasts can be aimed downwards with {{clr|4|j.S}}[8]. | ||
* | * Pierces through other Level 1 projectiles on contact. | ||
* Last Ki | * Last Ki Blast launches on hit. | ||
* Freezes Broly in place while preserving his momentum. | * Freezes Broly in place while preserving his momentum. | ||
Mostly combo filler | Mostly combo filler for meter gain. | ||
</div> | </div> | ||
</div> | </div> | ||
| Line 320: | Line 317: | ||
<div class="attack-gallery"> | <div class="attack-gallery"> | ||
<gallery widths="210px" heights="210px" mode="nolines"> | <gallery widths="210px" heights="210px" mode="nolines"> | ||
DBFZ_Broly_j2H.png | | DBFZ_Broly_j2H.png | | ||
</gallery> | </gallery> | ||
</div> | </div> | ||
| Line 330: | Line 327: | ||
|} | |} | ||
==== ==== | ==== ==== | ||
* Has | * Has slim horizontal range. | ||
* Smash on air-to-air hit, gives a short sliding knockdown. | * Smash on air-to-air hit, gives a short sliding knockdown. | ||
Broly's meterless corner combo ender. On Smash hit, canceling into {{clr|4|214S}} will still keep Broly plus enough for an IAD safejump. | Broly's meterless corner combo ender. On Smash hit, canceling into {{clr|4|214S}} will still keep Broly plus enough for an IAD safejump. | ||
| Line 361: | Line 358: | ||
|} | |} | ||
==== ==== | ==== ==== | ||
* Has 10 hits of armor. | |||
* Smash hit carries to the corner, corner splats. | * Smash hit carries to the corner, corner splats. | ||
* Regardless of Smash, all versions can combo directly into H+S Gigantic Meteor at low hitstun decay in the corner. | * Regardless of Smash, all versions can combo directly into H+S Gigantic Meteor at low hitstun decay in the corner. | ||
* On block, 236X > Vanish has an 1f gap. Spending a bar like this is safe against 2H, but Reflect and frame 1 anti-air/DPs will still be a threat. | |||
---- | ---- | ||
;236L | ;236L | ||
* Moves forward about half screen. | * Moves forward about half screen. | ||
Used as a meterless reversal, since it has frame 4 armor and is decently fast. | |||
The armor property is lost after the active frames end, leaving Broly vulnerable to a counter hit if he only makes contact against an assist. | The armor property is lost after the active frames end, leaving Broly vulnerable to a counter hit if he only makes contact against an assist. | ||
| Line 373: | Line 371: | ||
;236M | ;236M | ||
* Stays in place for a bit before charging fullscreen forward. | * Stays in place for a bit before charging fullscreen forward. | ||
Not recommended since it's horribly slow, allowing the opponent to react with Vanish or even Supers if they trigger his armor. | |||
---- | ---- | ||
;236H | ;236H | ||
* Similar to M version but a lot faster. Combos from {{clr|3|2M}}, allowing for full corner carry from anywhere on the screen. | * Similar to M version but a lot faster. Combos from {{clr|3|2M}}, allowing for full corner carry from anywhere on the screen. | ||
Very fair meter dump move when combined with | Very fair meter dump move when combined with Gigantic Meteor, as Broly will instantly put the opponent in the corner, take off half of their HP bar and now they're in knockdown state, assuming they're not dead. | ||
[[DBFZ/Broly/Strategy#Defense|Generally used more defensively than offensively,]] but with Sparking or Limit Break it's one of the scariest and most annoying defensive options in the game. | [[DBFZ/Broly/Strategy#Defense|Generally used more defensively than offensively,]] but with Sparking or Limit Break it's one of the scariest and most annoying defensive options in the game. | ||
| Line 388: | Line 386: | ||
<div class="attack-gallery"> | <div class="attack-gallery"> | ||
<gallery widths="210px" heights="210px" mode="nolines"> | <gallery widths="210px" heights="210px" mode="nolines"> | ||
DBFZ_Broly_GiganticClaw.png | | DBFZ_Broly_GiganticClaw.png |ZA HANDO | ||
DBFZ_Broly_GiganticClaw-2.png | | DBFZ_Broly_GiganticClaw-2.png |GOTCHA | ||
</gallery> | </gallery> | ||
</div> | </div> | ||
| Line 408: | Line 406: | ||
;214L | ;214L | ||
* Always causes a sliding knockdown. | * Always causes a sliding knockdown. | ||
An unreactable, armored command grab that works at any point in a blockstring. Due to all of Broly's button having high blockstun, you always have to delay cancel into this if you want to tick throw. | |||
Also | Frame trap vs delayed 214L is a very efficient mixup. The opponent has low chances of successfully mashing back due to Broly's armor, they can't chicken block because you can frame trap the jump's startup. And while it can only be extended with Supers on hit, 214L > 236H+S is an easy 2.9k, and if Broly's in Sparking or Limit Break, 214L > 214L+M will do a whopping 5.4k. | ||
Also used as a combo ender, e.g. corner [DR] > {{clr|2|214L}} > 236L+M. | |||
---- | ---- | ||
;214M | ;214M | ||
* Smash hit causes a wall splat. Allows for a solo combo in the corner. | * Smash hit causes a wall splat. Allows for a solo combo in the corner. | ||
* Non-Smash hit causes a sliding knockdown like | * Non-Smash hit causes a sliding knockdown like L version. | ||
* Deceptively long range, about one character length. | * Deceptively long range, about one character length. | ||
Perfect amount of startup for frame-perfect tick throw from any normals | Perfect amount of startup for frame-perfect tick throw from any normals, but inferior to the L version due to its much more reactable start-up animation. | ||
---- | ---- | ||
;214H | ;214H | ||
* Smash hit wall bounces, allows for a solo combo anywhere on the screen. | * Smash hit wall bounces, allows for a solo combo anywhere on the screen. | ||
* Non-Smash hit causes a sliding knockdown like | * Non-Smash hit causes a sliding knockdown like L version. | ||
* Huge range. Connects | * Huge range. Connects from round start position. | ||
214M with higher reward. You should probably just save the meter. | |||
</div> | </div> | ||
</div> | </div> | ||
| Line 433: | Line 431: | ||
<div class="attack-gallery"> | <div class="attack-gallery"> | ||
<gallery widths="210px" heights="210px" mode="nolines"> | <gallery widths="210px" heights="210px" mode="nolines"> | ||
DBFZ_Broly_GiganticStrike.png | | DBFZ_Broly_GiganticStrike.png | | ||
DBFZ_Broly_GiganticStrike2.png | | DBFZ_Broly_GiganticStrike2.png |Stop jumping | ||
</gallery> | </gallery> | ||
</div> | </div> | ||
| Line 451: | Line 449: | ||
|} | |} | ||
==== ==== | ==== ==== | ||
* Freezes in place before lunges upward. | |||
* All versions switch sides on hit. | |||
---- | ---- | ||
;j.214L | ;j.214L | ||
* | * Fast, but short range. | ||
Mostly used as combo filler before Vanish due to not having Smash property, while putting the opponent in a very convenient position for a grounded extension. | Mostly used as combo filler before Vanish due to not having Smash property, while putting the opponent in a very convenient position for a grounded extension. | ||
---- | ---- | ||
| Line 460: | Line 459: | ||
* Slower, but longer grab range. | * Slower, but longer grab range. | ||
* Causes a short sliding knockdown. | * Causes a short sliding knockdown. | ||
Acts as a midscreen combo ender for when you don't wanna spend any extra resources. The sliding knockdown | Acts as a midscreen combo ender for when you don't wanna spend any extra resources. The sliding knockdown allows you to dash up and meaty 5L/2L, but not much else. | ||
---- | ---- | ||
;j.214H | ;j.214H | ||
* Broly's fastest air grab, with massive range to boot. | * Broly's fastest air grab, with massive range to boot. | ||
* Causes a big ground bounce sliding knockdown. | * Causes a big ground bounce sliding knockdown. | ||
Has crazy air control, as it's super fast, deals as much damage as a | Has crazy air control, as it's super fast, deals as much damage as a Level 1 Super, and can be extended into even more damage. From a midscreen hit and at relatively low height, you can add {{clr|4|j.S}}(4) before Vanishing. {{clr|5|j.214H}} ▷ 236H+S also works anywhere on screen. With his back to the corner, Broly has combo routes that can meterlessly convert with the bounce as well. | ||
Note that at {{clr|5|2H}} height and up, {{clr|5|j.214H}} > j.214L+M isn't a reliable combo ender, as it will whiff against some characters in midscreen (e.g. A18, BRS, FRZ, KRL). | Note that at {{clr|5|2H}} height and up, {{clr|5|j.214H}} > j.214L+M isn't a reliable combo ender, as it will whiff against some characters in midscreen (e.g. A18, BRS, FRZ, KRL). | ||
| Line 476: | Line 475: | ||
<div class="attack-gallery"> | <div class="attack-gallery"> | ||
<gallery widths="210px" heights="210px" mode="nolines"> | <gallery widths="210px" heights="210px" mode="nolines"> | ||
DBFZ_Broly_EraserBlow.png | | DBFZ_Broly_EraserBlow.png | | ||
DBFZ_Broly_EraserBlow-2.png | | DBFZ_Broly_EraserBlow-2.png | | ||
</gallery> | </gallery> | ||
</div> | </div> | ||
| Line 489: | Line 488: | ||
* First part is a strike, second part is a projectile with beam properties. | * First part is a strike, second part is a projectile with beam properties. | ||
* Projectile increases in speed as it travels. | * Projectile increases in speed as it travels. | ||
* Smash hit corner splats. | * Smash hit on the strike, corner splats. | ||
Safe on block with very good pushback, but doesn't true string from any normals and always leaves a 5f gap minimum. It can be chicken blocked out of, though Broly will be +1 if they do so. | Safe on block with very good pushback, but doesn't true string from any normals and always leaves a 5f gap minimum. It can be chicken blocked out of, though Broly will be +1 if they do so. | ||
As a combo tool, it has so | As a combo tool, it has so high hitstun that essentially forces a soft knockdown. {{clr|3|2M}} > {{clr|4|236S}} into dash {{clr|2|5L}} works pretty far away from the corner, boosting his midscreen to corner damage quite a bit. | ||
</div> | </div> | ||
</div> | </div> | ||
| Line 521: | Line 520: | ||
Use this every now and then to deal with projectiles without having to commit to {{clr|4|5S}} or {{clr|4|236S}}. More useful against certain characters than others. | Use this every now and then to deal with projectiles without having to commit to {{clr|4|5S}} or {{clr|4|236S}}. More useful against certain characters than others. | ||
On corner knockdown with {{clr|5|j.2H}}, you can cancel into this and have a rather ambiguous safejump, since Broly turns into a big green ball. | On corner knockdown with {{clr|5|j.2H}}, you can cancel into this and have a rather ambiguous safejump (for the opponent but also for you...), since Broly just turns into a big green ball. Canceling from j.DR also keeps Broly advantageous, though it doesn't give him enough time to perform a safejump. | ||
</div> | </div> | ||
</div> | </div> | ||
| Line 531: | Line 530: | ||
<div class="attack-gallery"> | <div class="attack-gallery"> | ||
<gallery widths="210px" heights="210px" mode="nolines"> | <gallery widths="210px" heights="210px" mode="nolines"> | ||
DBFZ_Broly_EraserBlow.png | | DBFZ_Broly_EraserBlow.png | | ||
</gallery> | </gallery> | ||
</div> | </div> | ||
| Line 542: | Line 541: | ||
==== ==== | ==== ==== | ||
* Only the projectile has hitboxes, unlike the point version. | * Only the projectile has hitboxes, unlike the point version. | ||
* | * No armor, but keeps the Ki Blast guardpoint. | ||
Due to its rather slow speed, you can call this assist and run behind the projectile as a safe approach. | Due to its rather slow speed, you can call this assist and run behind the projectile as a safe approach. | ||
</div> | </div> | ||
| Line 552: | Line 551: | ||
<div class="attack-gallery"> | <div class="attack-gallery"> | ||
<gallery widths="210px" heights="210px" mode="nolines"> | <gallery widths="210px" heights="210px" mode="nolines"> | ||
DBFZ Broly jS.png | | DBFZ Broly jS.png | | ||
</gallery> | </gallery> | ||
</div> | </div> | ||
| Line 562: | Line 561: | ||
|} | |} | ||
==== ==== | ==== ==== | ||
* | * Performs j.[S](4) from a relatively low height. | ||
* Last Ki Blast launches on hit. | |||
A defensive assist with pretty good angle and also clears out other Ki Blasts like his point j.S. Compared to Broly's other assists, this has the highest blockstun (if respected). | |||
Overall Broly's most versatile assist, but not always his best. | Overall Broly's most versatile assist, but not always his best. | ||
| Line 574: | Line 574: | ||
<div class="attack-gallery"> | <div class="attack-gallery"> | ||
<gallery widths="210px" heights="210px" mode="nolines"> | <gallery widths="210px" heights="210px" mode="nolines"> | ||
DBFZ Broly LariatExpress.png | | DBFZ Broly LariatExpress.png |'''CHOO CHOO''' | ||
</gallery> | </gallery> | ||
</div> | </div> | ||
| Line 585: | Line 585: | ||
==== ==== | ==== ==== | ||
* Has 10 hits of armor. | * Has 10 hits of armor. | ||
* Teleports to the opponent on ground level. | |||
* On hit, teleports behind the opponent and knocks them down into a ground bounce sliding knockdown. | * On hit, teleports behind the opponent and knocks them down into a ground bounce sliding knockdown. | ||
* Values in [ ] are when the opponent is in hitstun/untech. | |||
Very fast, very active, good tracking, high vertical reach, armored and auto-confirms. It might as well be a beam assist... that can tank through other beams. | |||
</div> | </div> | ||
</div> | </div> | ||
| Line 619: | Line 621: | ||
He's at +11 if they air tech, forward tech mash will get counter hit, up tech backdash can be caught with {{clr|4|5S}}[8], and Broly is just far enough that even crouching small characters won't be able to dodge {{clr|4|5S}}. {{clr|4|236S}} will tank Super Dash attempts and either blow them up or lock them down, since Broly is +1 if they block. The best response is not air teching at all and taking the soft knockdown. | He's at +11 if they air tech, forward tech mash will get counter hit, up tech backdash can be caught with {{clr|4|5S}}[8], and Broly is just far enough that even crouching small characters won't be able to dodge {{clr|4|5S}}. {{clr|4|236S}} will tank Super Dash attempts and either blow them up or lock them down, since Broly is +1 if they block. The best response is not air teching at all and taking the soft knockdown. | ||
Broly will still do the full animation even if he's DHC'd out, allowing for | Broly will still do the full animation even if he's DHC'd out, allowing for some characters to continue the combo afterward for a bit more damage or even knockdown. | ||
---- | ---- | ||
;H+S | ;H+S | ||
| Line 659: | Line 661: | ||
Flexible DHC Super since Broly will adjust himself to where the opponent is. | Flexible DHC Super since Broly will adjust himself to where the opponent is. | ||
With certain combo routes, Broly can set up | With certain combo routes, Broly can set up Level 3 at just far enough from the corner that he can meaty {{clr|4|236S}} on oki, which: | ||
# Keeps him plus even if they block or Reflect. | # Keeps him plus even if they block or Reflect. | ||
# Lets him combo off of it with dash {{clr|2|5L}}. | # Lets him combo off of it with dash {{clr|2|5L}}. | ||
# Leaves him outside of Sparking | # Leaves him outside of Sparking Blast range, allowing him to whiff punish Spark with {{clr|2|5L}}. | ||
# Lets his assists regenerate. | # Lets his assists regenerate. | ||
The easiest way to set this up is with {{clr|2|j.214L}} > Vanish, {{clr|5|j.2H}} > 214L+M, {{clr|4|236S}}. | The easiest way to set this up is with {{clr|2|j.214L}} > Vanish, {{clr|5|j.2H}} > 214L+M, {{clr|4|236S}}. | ||
| Line 670: | Line 672: | ||
;H+S | ;H+S | ||
* Minimum damage in a combo: ~1500. | * Minimum damage in a combo: ~1500. | ||
* Throws out a smol ball that accelerates at a much slower rate than L+M version and grows in size once it connects with the opponent (on block or hit). The ball always explodes when it hits the floor even without turning big. | |||
* Broly recovers shortly after he releases the ball, allowing him to continue the combo. | * Broly recovers shortly after he releases the ball, allowing him to continue the combo. | ||
* On hit, the opponent cannot be hit with anything else until after the explosion. | * On hit, the opponent cannot be hit with anything else until after the explosion. | ||
* Ball disappears only if Broly gets hit, but not if he blocks, tags out, or if the tagged out teammate gets hit. | * Ball disappears only if Broly gets hit, but not if he blocks, tags out, or if the tagged out teammate gets hit. | ||
* Combos afterward don't receive Super Scaling. | * Combos afterward don't receive Super Scaling. | ||
* The opponent can be tech shortly after the explosion. Causes soft knockdown otherwise. | * The opponent can be air tech shortly after the explosion. Causes soft knockdown otherwise. | ||
A horrible reversal compared to L+M version since the invulnerability goes away long before the hitbox comes out, but functions as the cornerstone of Broly's most damaging combos. Without assists, there are a few common ways to combo into this Super like midscreen {{clr|3|236M}}/{{clr|5|H}}, or in the corner: {{clr|2|236L}} (at low hitstun decay) or j.214X > Vanish > j.214H+S. Combos afterward aren't affected by Super scaling, and there are many ways to extend out of it. | |||
Do note however that despite being high damaging, you should consider only using this if you have a lot of meters or you're going for the kill, as L+M version is strictly superior for oki thanks to its hard knockdown. | |||
</div> | </div> | ||
</div> | </div> | ||
Revision as of 14:36, 17 January 2021
| Overview | Combos | Strategy/Counter Strategy | Full Frame Data | Discord |
Broly is both a zoner and a grappler, a combination fitting for the Devil. Broly's neutral and pressure make him one of the most terrifying opponents in the game, as he can effectively control any space on the screen with his armor and projectiles. Broly's 5S is an incredible zoning tool, much larger than other Ki Blasts while also pierces through them, and can be aimed upwards to stop opponents from escaping. But it's when Broly gets close where he's at his scariest. Terrific frame data, an armored tick throw A throw done after attacks, very soon after if not exactly when throw invulnerability expires on the opponent. A Tick Throw take advantage of that the opponent naturally expect a Frame Trap coming, making it very hard to react to or escape from. with 214L and a tiger-kneeable air grab, Broly can easily grapple and frame trap opponents. Even on defense, Broly is far from helpless thanks to his armor and Lariat Express. If you like not letting other people play the game or otherwise making them feel bad, Broly is a must-play.
Note: Commonly referred to as Z Broly by the community, to differentiate him from the other Broly.
| "My power is rising. It's overflowing!" | |
| Lore: | The Legendary Super Saiyan born with a power level of 10,000, Broly was considered too dangerous to live by King Vegeta, and was condemned to be executed alongside his father Paragus. In an instance of sheer luck, Broly and his father survived Planet Vegeta's destruction. In order to live in secrecy, Paragus used energy-restraining technology and mind control to keep Broly from rampaging. However, Broly is always triggered by the name "Kakarot", no matter how restrained he is. Causing chaos everywhere he went, he would hunt down Kakarot, the Saiyan that cried constantly next to him in the Saiyan nursery and drove him to insanity. He would be defeated on three occasions: first by Goku (AKA Kakarot), then by Goku's sons, and finally, by Goten, Trunks, and their allies when he was resurrected as "Bio-Broly". |
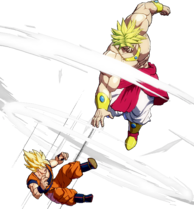
![]() Broly
Broly ![]() Broly is a massive brute who uses a combination of powerful blows and command grabs imbued with super armor to bully his victims.
Broly is a massive brute who uses a combination of powerful blows and command grabs imbued with super armor to bully his victims.
- Fantastic Neutral: Neutral game is absolutely devilish, with huge normals, one of a kind Ki Blast, a counter-zoning tool in Powered Shell, many armored moves, and a very proficient anti-air grab in Gigantic Strike.
- Versatile Mix-ups: Strong stagger potential combined with a fast, armored grab make defending against him an absolute nightmare.
- Resource Reliant: Requires resources for his stronger options and damage output. He will also burn through them relatively quick.
- Size: Broly is more susceptible to random hits than others.
| Broly | |
|---|---|
 |
Almost all of Broly's attacks have Ki Blast guard point and at least one hit of armor, absorbing all attacks except Vanish, Supers and Sparking Blast. Though there are a few caveats:
- Armor comes with higher initial proration values, reducing his overall damage potential.
- Normal attacks are only armored if they're the first attack of the string. He cannot utilize the armor property during a blockstring without using specials.
- Air normals' armor loses specifically to 2H, but not to other Head invulnerable attacks.
Normal Moves
5L

"HOW MANY PUSH-UPS DID HE DO?"

"HOW MANY SIT-UPS?"

"WHAT KIND OF JUICE DID HE DRINK?!"


| 5L |
|---|
| 5LL |
| 5LLL |
- 5L
- Whiffs against short or crouching opponents at longer range.
Uncharacteristically high and big for a jab, can be used as a ghetto anti-air, but is also susceptible to low profile attacks such as most 2Ms.
- 5LL
- Steps forward during startup, increasing its range.
- The only attack in Broly's moveset with regular proration values, and therefore his only unscaled starter.
Combined with Broly's other tools, the damage this move leads to is unholy. With resources available, it's usually a dead character. On top of that, it has great range and is -2 on block, making it a superb stagger tool.
Do not get hit by this.
- 5LLL
- Stays grounded.
- Switches sides on hit.
- Cancelling into this from a blocked 5LL always leaves the opponent in too much blockstun for the throw to work.
Mostly used for post-Vanish extension, as he has better combo routes in other situations.
With low blockstun assists, he can get a cheeky tickthrow from 5LL + Assist > 5LLL. Though the reward is not that high.
5M

Chest

- Long range.
An unorthodox 5M that trades damage and speed for range and armor. Fairly standard use otherwise.
5H

- Cannot true string from any normal, always leaving at least an 1f gap.
- Smash hit wall splats.
- Can be charged by holding down the button. Full charge increases damage and makes Broly move forward further.
Forms a simple mix-up with delayed 214L, since they have deceptively similar start-up animations. Reflecting will beat 5H but lose to 214L, while chicken blocking will beat 214L but lose to 5H.
5S

Outzone the designated zoner as the grappler

- Any of the Ki Blasts can be aimed upwards with 5S[8].
- Pierces through other Level 1 projectiles on contact.
- Last Ki Blast launches on hit.
- Whiffs against small or crouching opponents at close range.
A key part of Broly's neutral and maintains pressure when the opponent isn't in command grab range. The Ki Blasts are very fast, counterzone other Ki Blasts and can cover a large part of the screen when mixing between 5S and 5S[8].
It's not completely infallible though, Broly still has to actively react to Super Dash for a punish, and the Ki Blasts themselves can be avoided by dash super jumps or beaten by beams.
2L

- Above average range.
Another great stagger tool along with 5L and 5LL.
2M

Freestylin' damage wildin' spin cyclin' not even tryin'

Long range and not only is it safe on block, it also spaces the opponent out for Broly to poke with 2L or another 2M.
2H

- Short horizontal range, but very big vertically.
On hit, 2M > 2H whiffs on a majority of the cast unless Broly has dash momentum. Alternatively, 5M > 2H will always connect on air hit, making 2M > 5M > 2H one of his go-to confirms.
6M
- DBFZ Broly 6M.png
j.L

Not useful for jump-ins, but it's a good combo filler due to its high hitstun and Broly aiming the punch slightly upwards.
j.M

- Aimed slightly downwards.
Very good for IAD jump-ins and is especially good for midscreen IAD cross-ups.
j.H

The Broly claw

| 5LLLLLLL |
|---|
| j.H |
- 5LLLLLLL
Doesn't do anything different compared to j.H other than giving a Dragon Ball.
- j.H
- Scratches on non-Smash hit, dunks the opponent down to the ground on Smash hit.
Dunking can be followed up by j.214X or j.214L+M due to Broly and the opponent staying airborne at the end of the move. You can also tag out and continue the combo.
j.S

- Any of the Ki Blasts can be aimed downwards with j.S[8].
- Pierces through other Level 1 projectiles on contact.
- Last Ki Blast launches on hit.
- Freezes Broly in place while preserving his momentum.
Mostly combo filler for meter gain.
j.2H

- Has slim horizontal range.
- Smash on air-to-air hit, gives a short sliding knockdown.
Broly's meterless corner combo ender. On Smash hit, canceling into 214S will still keep Broly plus enough for an IAD safejump.
Another option is j.2H > 214M (whiff), IAD j.H, which is an auto-timed safejump that lets your assists regenerate.
Special Moves
Lariat Express
236L/M/H

choo choo

| L |
|---|
| M |
| H |
- Has 10 hits of armor.
- Smash hit carries to the corner, corner splats.
- Regardless of Smash, all versions can combo directly into H+S Gigantic Meteor at low hitstun decay in the corner.
- On block, 236X > Vanish has an 1f gap. Spending a bar like this is safe against 2H, but Reflect and frame 1 anti-air/DPs will still be a threat.
- 236L
- Moves forward about half screen.
Used as a meterless reversal, since it has frame 4 armor and is decently fast.
The armor property is lost after the active frames end, leaving Broly vulnerable to a counter hit if he only makes contact against an assist.
- 236M
- Stays in place for a bit before charging fullscreen forward.
Not recommended since it's horribly slow, allowing the opponent to react with Vanish or even Supers if they trigger his armor.
- 236H
- Similar to M version but a lot faster. Combos from 2M, allowing for full corner carry from anywhere on the screen.
Very fair meter dump move when combined with Gigantic Meteor, as Broly will instantly put the opponent in the corner, take off half of their HP bar and now they're in knockdown state, assuming they're not dead.
Generally used more defensively than offensively, but with Sparking or Limit Break it's one of the scariest and most annoying defensive options in the game.
Gigantic Claw
214L/M/H

ZA HANDO

GOTCHA


| L |
|---|
| M |
| H |
- 214L
- Always causes a sliding knockdown.
An unreactable, armored command grab that works at any point in a blockstring. Due to all of Broly's button having high blockstun, you always have to delay cancel into this if you want to tick throw.
Frame trap vs delayed 214L is a very efficient mixup. The opponent has low chances of successfully mashing back due to Broly's armor, they can't chicken block because you can frame trap the jump's startup. And while it can only be extended with Supers on hit, 214L > 236H+S is an easy 2.9k, and if Broly's in Sparking or Limit Break, 214L > 214L+M will do a whopping 5.4k.
Also used as a combo ender, e.g. corner [DR] > 214L > 236L+M.
- 214M
- Smash hit causes a wall splat. Allows for a solo combo in the corner.
- Non-Smash hit causes a sliding knockdown like L version.
- Deceptively long range, about one character length.
Perfect amount of startup for frame-perfect tick throw from any normals, but inferior to the L version due to its much more reactable start-up animation.
- 214H
- Smash hit wall bounces, allows for a solo combo anywhere on the screen.
- Non-Smash hit causes a sliding knockdown like L version.
- Huge range. Connects from round start position.
214M with higher reward. You should probably just save the meter.
Gigantic Strike
j.214L/M/H

Stop jumping


| L |
|---|
| M |
| H |
- Freezes in place before lunges upward.
- All versions switch sides on hit.
- j.214L
- Fast, but short range.
Mostly used as combo filler before Vanish due to not having Smash property, while putting the opponent in a very convenient position for a grounded extension.
- j.214M
- Slower, but longer grab range.
- Causes a short sliding knockdown.
Acts as a midscreen combo ender for when you don't wanna spend any extra resources. The sliding knockdown allows you to dash up and meaty 5L/2L, but not much else.
- j.214H
- Broly's fastest air grab, with massive range to boot.
- Causes a big ground bounce sliding knockdown.
Has crazy air control, as it's super fast, deals as much damage as a Level 1 Super, and can be extended into even more damage. From a midscreen hit and at relatively low height, you can add j.S(4) before Vanishing. j.214H ▷ 236H+S also works anywhere on screen. With his back to the corner, Broly has combo routes that can meterlessly convert with the bounce as well.
Note that at 2H height and up, j.214H > j.214L+M isn't a reliable combo ender, as it will whiff against some characters in midscreen (e.g. A18, BRS, FRZ, KRL).
Eraser Blow
236S

- DBFZ Broly EraserBlow-2.png

- First part is a strike, second part is a projectile with beam properties.
- Projectile increases in speed as it travels.
- Smash hit on the strike, corner splats.
Safe on block with very good pushback, but doesn't true string from any normals and always leaves a 5f gap minimum. It can be chicken blocked out of, though Broly will be +1 if they do so.
As a combo tool, it has so high hitstun that essentially forces a soft knockdown. 2M > 236S into dash 5L works pretty far away from the corner, boosting his midscreen to corner damage quite a bit.
Powered Shell
214S (Air OK)

"MY POWER IS MAXIMUMEST"

| Ground |
|---|
| Air |
- Blocks all non-Super projectiles.
- Preserves air momentum when used in the air.
- Disappears if Broly blocks, gets hit, or triggers a cinematic with most attacks (notably j.2H, Vanish and Spark won't deactivate the shell).
- While the shell is active, Broly can still use this move again to refresh it. Doing so deactivates the current shell on frame 6, leaving him briefly vulnerable.
Use this every now and then to deal with projectiles without having to commit to 5S or 236S. More useful against certain characters than others.
On corner knockdown with j.2H, you can cancel into this and have a rather ambiguous safejump (for the opponent but also for you...), since Broly just turns into a big green ball. Canceling from j.DR also keeps Broly advantageous, though it doesn't give him enough time to perform a safejump.
Z Assists
Assist A
Eraser Blow
- Only the projectile has hitboxes, unlike the point version.
- No armor, but keeps the Ki Blast guardpoint.
Due to its rather slow speed, you can call this assist and run behind the projectile as a safe approach.
Assist B
Machine Gun Shot
- Performs j.[S](4) from a relatively low height.
- Last Ki Blast launches on hit.
A defensive assist with pretty good angle and also clears out other Ki Blasts like his point j.S. Compared to Broly's other assists, this has the highest blockstun (if respected).
Overall Broly's most versatile assist, but not always his best.
Assist C
Lariat Express
CHOO CHOO
- Has 10 hits of armor.
- Teleports to the opponent on ground level.
- On hit, teleports behind the opponent and knocks them down into a ground bounce sliding knockdown.
- Values in [ ] are when the opponent is in hitstun/untech.
Very fast, very active, good tracking, high vertical reach, armored and auto-confirms. It might as well be a beam assist... that can tank through other beams.
Super Moves
Eraser Cannon
236L+M or 236H+S

L+M uppercut

HAVE IT YOUR WAY, BURGER KING


| L+M |
|---|
| H+S |
- L+M
- Minimum damage: 120, 700.
- Does an uppercut that floats the opponent for a really long time on hit before throwing the projectile, allowing both hits to combo. This uppercut won't consume Smash if Broly DHCs out before it can hit.
- Projectile wall splats on hit.
While the opponent recovers in the air on hit, in the corner, Broly is pushed back at the perfect distance for something like 5S(1) > 236S. So this is a rather good combo ender since he doesn't really lose pressure afterward.
He's at +11 if they air tech, forward tech mash will get counter hit, up tech backdash can be caught with 5S[8], and Broly is just far enough that even crouching small characters won't be able to dodge 5S. 236S will tank Super Dash attempts and either blow them up or lock them down, since Broly is +1 if they block. The best response is not air teching at all and taking the soft knockdown.
Broly will still do the full animation even if he's DHC'd out, allowing for some characters to continue the combo afterward for a bit more damage or even knockdown.
- H+S
- Only throws the projectile. Often used midscreen when L+M version won't connect.
Gigantic Meteor
214L+M or 214H+S (Air OK)

"Here's a present for you!"

"HAAAAHAHAHAHA!"


| Ground L+M |
|---|
| Air L+M |
| Ground H+S |
| Air H+S |
- L+M
- Minimum damage in a combo: ~1740.
- Always flies at a 45 degree angle. Doesn't travel offscreen.
- Ground version auto-adjusts during startup to aim the ball directly at the opponent, but there's a limit to how high he can leap up to. Air version has very little to no adjustment.
- Broly is stuck in the air until after the ball explodes. Once it does, he will teleport to the ground.
Flexible DHC Super since Broly will adjust himself to where the opponent is.
With certain combo routes, Broly can set up Level 3 at just far enough from the corner that he can meaty 236S on oki, which:
- Keeps him plus even if they block or Reflect.
- Lets him combo off of it with dash 5L.
- Leaves him outside of Sparking Blast range, allowing him to whiff punish Spark with 5L.
- Lets his assists regenerate.
The easiest way to set this up is with j.214L > Vanish, j.2H > 214L+M, 236S.
† j.214L+M air-to-ground teleportation will often not reset j.214X usage. When this happens, Broly will have to leave the ground and land again to use j.214X.
- H+S
- Minimum damage in a combo: ~1500.
- Throws out a smol ball that accelerates at a much slower rate than L+M version and grows in size once it connects with the opponent (on block or hit). The ball always explodes when it hits the floor even without turning big.
- Broly recovers shortly after he releases the ball, allowing him to continue the combo.
- On hit, the opponent cannot be hit with anything else until after the explosion.
- Ball disappears only if Broly gets hit, but not if he blocks, tags out, or if the tagged out teammate gets hit.
- Combos afterward don't receive Super Scaling.
- The opponent can be air tech shortly after the explosion. Causes soft knockdown otherwise.
A horrible reversal compared to L+M version since the invulnerability goes away long before the hitbox comes out, but functions as the cornerstone of Broly's most damaging combos. Without assists, there are a few common ways to combo into this Super like midscreen 236M/H, or in the corner: 236L (at low hitstun decay) or j.214X > Vanish > j.214H+S. Combos afterward aren't affected by Super scaling, and there are many ways to extend out of it.
Do note however that despite being high damaging, you should consider only using this if you have a lot of meters or you're going for the kill, as L+M version is strictly superior for oki thanks to its hard knockdown.
External References
move and the move Full sections. One is shown on the character page, while the other is shown on the frame data page.