< DBFZ
(→Assist) |
|||
| Line 411: | Line 411: | ||
* Can be converted into a combo by using Vanish | * Can be converted into a combo by using Vanish | ||
* Good for punishing people who spam kamehameha from long range. | * Good for punishing people who spam kamehameha from long range. | ||
* Can be used as a left/right mixup in blockstring if covered by assist. You still need vanish to convert damage off it though. But unlike IAD j.H, this allows for a 50/50 as you can teleport to either side of opponent. | |||
* Excellent gap closer to continue pressure after catching opponent blocking your assist. | * Excellent gap closer to continue pressure after catching opponent blocking your assist. | ||
* Gives slight frame advantage on block if you mash light attack after. No frame advantage if you hit blocking opponent in air. | * Gives slight frame advantage on block if you mash light attack after. No frame advantage if you hit blocking opponent in air. | ||
Revision as of 07:13, 22 May 2018
| Son Goku (SSGSS) |
|---|
|
Health: 10,000 Prejump: Assist Cooldown:
|
Navigation
Overview
After attaining the power of the Super Saiyan God during his fight with Beerus, Goku started to train with the God of Destruction to expand upon his powers. The end result of his training is a new level of power, the "Super Saiyan God Super Saiyan": a blue-haired super form that represents the greatest height of fighting prowess yet attainable by Saiyans.
In Dragon Ball FighterZ, this version of Goku fights similarly to the original, but with strong attacks that can overwhelm his opponents, offsetting them with teleports and punishing them with furious blows.
Strengths/Weaknesses
| Strengths | Weaknesses |
|---|---|
|
|
Normals
5L
| 5L UNGA |
|---|
5M
| 5M |
|---|
5H
| 5H |
|---|
5S
| 5S |
|---|
2L
| 2L |
|---|
2M
| 2M |
|---|
2H
| 2H |
|---|
6M
| 6M |
|---|
j.L
| j.L |
|---|
j.M
| j.M |
|---|
j.H
| j.H |
|---|
j.S
| j.S Shades of Akuma |
|---|
j.2H
| j.2H |
|---|
Specials
Divine Void Strike
| Divine Void Strike 236L/M/H Are we SURE Ginyu didn't swap bodies again? It looks awfully familiar... |
|---|
Super God Shock Flash
| Super God Shock Flash 214L/M/H "Hey, what's that on your shirt?" "PSYCH, GOT'EM!" |
|---|
Dragon Flash Kick
| Dragon Flash Kick j.214L/M/H "Wait a sec... This isn't Flash Kick...!" |
|---|
Instant Transmission
| Instant Transmission 236S or 214S (Air OK) *pop* "Over here!" |
|---|
Assist
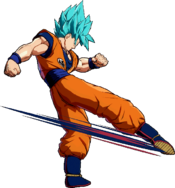
| Dragon Flash Kick A1/A2 "Geronimo...!" |
|---|
Supers
Extreme Speed Kamehameha
| Extreme Speed Kamehameha 236L+M or 236H+S (Air OK) "You're finished!" |
|---|
x10 Kaioken Kamehameha
| x10 Kaioken Kamehameha 214L+M or 214H+S "KAIOKEN!" "TIMES 10!" Discount Dragon Fist |
|---|


