< DBFZ
No edit summary |
(→2H) |
||
| (13 intermediate revisions by 7 users not shown) | |||
| Line 7: | Line 7: | ||
|- | |- | ||
|| | || | ||
{{CharData-DBFZ | {{CharData-DBFZ|SSBVegeta}} | ||
| | |||
}} | |||
;Movement Options | ;Movement Options | ||
:Double Jump, Super Jump, 1 Airdash, Dash Type: Run | :Double Jump, Super Jump, 1 Airdash, Dash Type: Run | ||
| Line 20: | Line 15: | ||
<div style="float:left; margin-right:25px;"> | <div style="float:left; margin-right:25px;"> | ||
{{TOC limit|2}} | {{TOC limit|2}} | ||
</div> | </div> | ||
==Overview== | ==Overview== | ||
| Line 41: | Line 28: | ||
| style="width: 50%;"| | | style="width: 50%;"| | ||
* Ki Blasts are very fast and surprisingly good at controlling space in neutral. | * Ki Blasts are very fast and surprisingly good at controlling space in neutral. | ||
* His ability to convert into his okizeme game is excellent, due to having | * His ability to convert into his okizeme game is excellent, due to having specials with a huge corner carry, which helps against his difficulty to cause a sliding knockdown. | ||
* Very strong pressure game with fast normals, rekkas, and command grabs. | * Very strong pressure game with fast normals, rekkas, and command grabs. | ||
* Absurdly high damage when he has the resources to burn, especially in the corner. | * Absurdly high damage when he has the resources to burn, especially in the corner. | ||
| Line 48: | Line 35: | ||
| style="width: 50%;"| | | style="width: 50%;"| | ||
* Loses to strong aerial zoning; has to take risks in order to close the distance with opponents. | * Loses to strong aerial zoning; has to take risks in order to close the distance with opponents. | ||
* Cannot inflict sliding knockdown from some of his starters, making it | * Cannot inflict sliding knockdown from some of his starters, making it sometimes difficult to maintain offensive momentum, but can find ways around it thanks to his corner carry, or end with a grab. | ||
* Stubby limbs causes him to have | * Stubby limbs causes him to have medium short range. | ||
* Because of the long startup on Big Bang Attack, he generally loses at range. | * Because of the long startup on Big Bang Attack, he generally loses at range. | ||
* Little to no defensive options | * Little to no defensive options. | ||
* | * Poor assist, and generally only a worse version of his Super Saiyan self. | ||
|- | |- | ||
|} | |} | ||
{{CharLinks-DBFZ|SSBVegeta}} | |||
<br clear=all/> | <br clear=all/> | ||
| Line 173: | Line 161: | ||
====== <font style="visibility:hidden" size="0">2H</font> ====== | ====== <font style="visibility:hidden" size="0">2H</font> ====== | ||
{{MoveData | {{MoveData | ||
|image=DBFZ_SSBVegeta__2H.png |caption= | |image=DBFZ_SSBVegeta__2H.png |caption= IMMA KICK 'IM | ||
|name=2H | |name=2H | ||
|data= | |data= | ||
| Line 340: | Line 328: | ||
|description= | |description= | ||
* Kicks forward | * Kicks forward | ||
* Considered to be airborne throughout the move | |||
* Followup attacks can be done on whiff | * Followup attacks can be done on whiff | ||
| Line 354: | Line 343: | ||
|description= | |description= | ||
* Kicks upward and travels farther than L version | * Kicks upward and travels farther than L version | ||
* Considered to be airborne throughout the move | |||
* Followup attacks can be done on whiff | * Followup attacks can be done on whiff | ||
| Line 367: | Line 357: | ||
|description= | |description= | ||
* Kicks forward and travels farther than L version | * Kicks forward and travels farther than L version | ||
* Considered to be airborne throughout the move | |||
* Followup attacks can be done on whiff | * Followup attacks can be done on whiff | ||
| Line 385: | Line 376: | ||
|description= | |description= | ||
* Hits once and moves SSGSS Vegeta slightly forward | * Hits once and moves SSGSS Vegeta slightly forward | ||
* Considered to be airborne throughout the move | |||
* Followup attacks can be done on whiff | * Followup attacks can be done on whiff | ||
* On hit, bounces SSGSS Vegeta back a small amount | * On hit, bounces SSGSS Vegeta back a small amount | ||
| Line 398: | Line 390: | ||
|description= | |description= | ||
* Hits thrice and moves SSGSS Vegeta forward | * Hits thrice and moves SSGSS Vegeta forward | ||
* Considered to be airborne throughout the move | |||
* Followup attacks can be done on whiff | * Followup attacks can be done on whiff | ||
| Line 415: | Line 408: | ||
* Hits once and moves SSGSS Vegeta forward | * Hits once and moves SSGSS Vegeta forward | ||
* Followup attacks can be done on whiff | * Followup attacks can be done on whiff | ||
* Considered to be airborne throughout the move | |||
* Can side switch after the attack if the followup is delayed | * Can side switch after the attack if the followup is delayed | ||
| Line 423: | Line 417: | ||
====== <font style="visibility:hidden" size="0">Super Dash Kick Followup 2</font> ====== | ====== <font style="visibility:hidden" size="0">Super Dash Kick Followup 2</font> ====== | ||
{{MoveData | {{MoveData | ||
|image=DBFZ_SSBVegeta_SuperDashKickFollowup2.png |caption= | |image=DBFZ_SSBVegeta_SuperDashKickFollowup2.png |caption= KUTABAREEE!! | ||
|input=Super Dash Kick Followup 1 > L/M/H | |input=Super Dash Kick Followup 1 > L/M/H | ||
|name=Super Dash Kick Followup 2 | |name=Super Dash Kick Followup 2 | ||
| Line 434: | Line 428: | ||
* On hit, flips SSGSS Vegeta above his opponent | * On hit, flips SSGSS Vegeta above his opponent | ||
* Surprisingly difficult to punish | * Surprisingly difficult to punish | ||
* Considered to be airborne throughout the move | |||
* Tracks the opponent | * Tracks the opponent | ||
| Line 450: | Line 445: | ||
* Not safe on block | * Not safe on block | ||
* Tracks the opponent | * Tracks the opponent | ||
* Considered to be airborne throughout the move | |||
Unlike the L version, SSGSS Vegeta will recover very close to the ground, providing no chance to hit an overhead. This can be beneficial; if the opponent expected the high mixup that comes with the L version, the quick landing of the M version and a low can catch them off guard. | Unlike the L version, SSGSS Vegeta will recover very close to the ground, providing no chance to hit an overhead. This can be beneficial; if the opponent expected the high mixup that comes with the L version, the quick landing of the M version and a low can catch them off guard. | ||
| Line 464: | Line 460: | ||
* On block, side swaps | * On block, side swaps | ||
* Tracks the opponent | * Tracks the opponent | ||
* Considered to be airborne throughout the move | |||
Has significant corner carry and can equal a free combo from half a screen away. The faster recovery compared to the M version along with certain assists can also take advantage of the wall bounce that occurs regardless if the enemy reaches the corner. This version allows to cross up on block outside of the corner, and using a beam assist before the kick can push the opponent at good range for a really fast 2M or a Dragon Rush. | Has significant corner carry and can equal a free combo from half a screen away. The faster recovery compared to the M version along with certain assists can also take advantage of the wall bounce that occurs regardless if the enemy reaches the corner. This version allows to cross up on block outside of the corner, and using a beam assist before the kick can push the opponent at good range for a really fast 2M or a Dragon Rush. | ||
| Line 487: | Line 484: | ||
Command grab which can catch opponents who are reflect-happy or who block high, expecting IAD oki. Can also be especially deadly as an offensive tool in pressure against low-life characters whom are desperate to tag out, but blocking low (making the grab whiff) is a natural response upon wake-up and it is very susceptible to patient and tempered opponents who can 2H in response, and, which makes this move a gamble. Due to having shorter knockdown, it lacks the oki options of stronger versions and cannot be combo'd after. Since the move doesn't put SSGSS Vegeta in a recovery state after it whiffs while leaving him at a low distance from the ground, he can either do an air dash to use j.L in a safe jump situation, or just fall and use 2L, making it an extremely scary mixup tool with an assist. | Command grab which can catch opponents who are reflect-happy or who block high, expecting IAD oki. Can also be especially deadly as an offensive tool in pressure against low-life characters whom are desperate to tag out, but blocking low (making the grab whiff) is a natural response upon wake-up and it is very susceptible to patient and tempered opponents who can 2H in response, and, which makes this move a gamble. Due to having shorter knockdown, it lacks the oki options of stronger versions and cannot be combo'd after. Since the move doesn't put SSGSS Vegeta in a recovery state after it whiffs while leaving him at a low distance from the ground, he can either do an air dash to use j.L in a safe jump situation, or just fall and use 2L, making it an extremely scary mixup tool with an assist. | ||
}} | }} | ||
| Line 502: | Line 498: | ||
* No more than one command grab can be used in a single combo | * No more than one command grab can be used in a single combo | ||
Used to catch opponents wanting to jump out of SSGSS Vegeta's pressure, and unlike the L version, can be followed up after with certain fast assists which can pick up opponents off the ground. | Used to catch opponents wanting to jump out of SSGSS Vegeta's pressure, and unlike the L version, can be followed up after with certain fast assists which can pick up opponents off the ground. Additionally, it also provides better oki. Due to the upward trajectory, it has the most use has a combo-ender after Vanish, but is also a cheeky option for incoming opponents after a forced tag-out. Allows Vegeta to directly apply pressure by jumping if the opponent up tech or back tech, with a meaty j.M and can freely move if it whiff, just like the L version. | ||
}} | }} | ||
| Line 649: | Line 645: | ||
---- | ---- | ||
{{CharLinks | {{CharLinks-DBFZ|SSBVegeta}} | ||
| | |||
}} | |||
{{Navbar-DBFZ}} | {{Navbar-DBFZ}} | ||
[[Category:Dragon Ball FighterZ]] | [[Category:Dragon Ball FighterZ]] | ||
[[Category:Vegeta]] | [[Category:Vegeta]] | ||
Revision as of 02:56, 13 August 2018
| Vegeta (SSGSS) |
|---|
|
Prejump: Assist Cooldown:
|
Overview
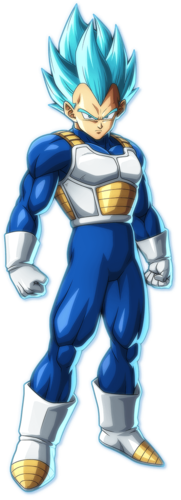
Not to be outdone by Goku, Vegeta has trained alongside his Saiyan rival under the tutelage of Beerus, the God of Destruction. Both he and Goku have attained the power of the "Super Saiyan God Super Saiyan".
In Dragon Ball FighterZ, this version of Vegeta fights similarly to his original form, attacking aggressively while closing the distance to pummel his foes into submission. However, in exchange for his increased close-range prowess, his defensive options are rather subpar.
Strengths/Weaknesses
| Strengths | Weaknesses |
|---|---|
|
|
Normals
5L
| 5L |
|---|
5M
| 5M |
|---|
5H
| 5H |
|---|
5S
| 5S |
|---|
2L
| 2L |
|---|
2M
| 2M WHAT ARE THOOOOOSE |
|---|
2H
| 2H IMMA KICK 'IM |
|---|
2S
| 2S |
|---|
6M
| 6M |
|---|
j.L
| j.L |
|---|
j.M
| j.M |
|---|
j.H
| j.H |
|---|
j.S
| j.S |
|---|
j.2H
| j.2H |
|---|
j.2S
| j.2S |
|---|
Specials
Super Dash Kick
| Super Dash Kick 236L/M/H (Air OK) |
|---|
Super Dash Kick Followup 1
| Super Dash Kick Followup 1 Super Dash Kick > L/M/H |
|---|
Super Dash Kick Followup 2
| Super Dash Kick Followup 2 Super Dash Kick Followup 1 > L/M/H KUTABAREEE!! |
|---|
On a Scale of One to Ten, I'll Give You a Three
| On a Scale of One to Ten, I'll Give You a Three 214L/M/H (Air OK) Dunk em in the TRAAAASH |
|---|
Big Bang Attack
| Big Bang Attack 236S(Air OK) |
|---|
Assist
| Big Bang Attack A1/A2 |
|---|
Supers
Niagara Pummel
| Niagara Pummel 236L+M "EEEEEEYAAAAAAAAH" "You're finished!" |
|---|
Galick Gun
| Galick Gun 236H+S "Never understimate..." "...a Saiyan's true power!" |
|---|
Final Flash
| Final Flash 214L+M or 214H+S (Air OK) "You're as good as space dust!" "WORTHLESS PIECE OF JUNK!" |
|---|


