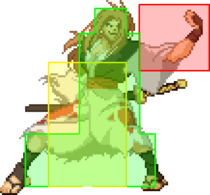
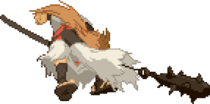
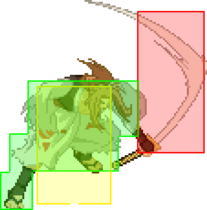
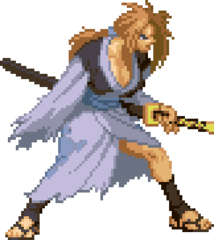
Baiken is one of the 3 unlockable boss characters in Missing Link, and holds the esteemed position of being the secret boss of the game. However, unlike an Akuma or Nightmare Geese, she's a very typical character, pr at least typical in the context of Missing Link.
Baiken is among the best characters in the game at controlling neutral. She has among the best normals in the game thanks to their combination of speed, disjoints, and conversion ability. She also has the best version of air tatami she's ever had with no recovery and no limit to how many can be on screen, allowing her to make literal walls of tatamis. Finally, she can tatami in the air indefinitely to reach the time of the screen, allowing her to air stall very effectively.
However, these powerful neutral options are limited by her inability to make a come back. She lacks the means to mixup opponents with only one overhead that's unsafe on hit, and none of her moves besides universal dash attack and her super are air unblockable, making it hard for her to mount a comeback. On top of that, characters with superior movement and neutral control, particularly the top 4, can give her a lot of issues. Still, Baiken with a life lead is one of the hardest characters to fight in the game.
![]() Baiken
Baiken ![]() Baiken controls neutral with air tatamis and disjointed pokes along with a hard to deal with timer scam strategy.
Baiken controls neutral with air tatamis and disjointed pokes along with a hard to deal with timer scam strategy.
- Youzansen Stall: Baiken can stall off of the top of the screen using Youzansen, make it difficult for opponents to hit her if she has a life lead.
- Disjointed Normals: Almost all of Baiken's normals are disjoints, making her harder to counter poke.
- Air Tatami: Air Tatami is just as good at controlling space as it always is, only there's no limit to how many she can put on screen. This allows her to wall out opponents with ease.
- Unblockable Super: While it has flaws, her super is completely unblockable, meaning if she's in a round ending position a block string into it has few counters.
- Weak Anti-Air: While she has anti-air moves, none are air unblockable, making it hard for her to deal with chicken blocking and air footsies.
- Bad Comeback Potential: Baiken lacks tools to mix up the opponent, and with the aforementioned weak anti-air, its very hard for her to mount a comeback. Even her instant kill is slow and small.
Normals
- Damage
- A quantification of how a character's health bar is reduced when they are hit.
- Guard
- The act of defending against incoming attacks. Guarding either negates the damage from an attack entirely or reduces it to minor chip damage.
- Low
- Guarded against while crouching
- Mid
- Guarded against in either the crouching or standing state, but not while airborne
- High
- Guarded against in the standing state
- All
- Guarded against while crouching, standing, or while airborne
- Throw
- Cannot be guarded against, but only applies to grounded opponents
- Unblockable
- Cannot be guarded against
- Startup
- The time before an attack is active including the first active frame. For example, an attack with 10F startup means the attack will do nothing for 9 frames, then hit the opponent on the 10th frame.
- Active
- The active frames of an attack refers to the amount of time an attack can hit the opponent.
- Recovery
- The recovery of an attack refers to the amount of time an attacker must wait before they may perform another action, even blocking.
- On-Block
- A measure of frame advantage when the opponent blocks an attack. Positive values indicate that the attacker can act first. Negative values indicate that the defender can act first.
- On-Hit
- A measure of frame advantage when the opponent is hit by an attack. Positive values indicate that the attacker can act first. Negative values indicate that the defender can act first.
- Invuln
- Short for InvulnerabilityA state where a character cannot be hit. A common component of reversal moves.
5P
| Damage | Guard | Startup | Active | Recovery | On-Block | On-Hit | Invuln |
|---|---|---|---|---|---|---|---|
| 4 | All | 6 | 4 | 9 | -5 | +2 | none |
5K
| Damage | Guard | Startup | Active | Recovery | On-Block | On-Hit | Invuln |
|---|---|---|---|---|---|---|---|
| 9 | Low | 7 | 3 | 14 | -9 | -2 | none |
c.S
| Damage | Guard | Startup | Active | Recovery | On-Block | On-Hit | Invuln |
|---|---|---|---|---|---|---|---|
| 13x2 | All | 4 | 8(4)4 | 15 | -9 | +2 | none |
f.S
| Damage | Guard | Startup | Active | Recovery | On-Block | On-Hit | Invuln |
|---|---|---|---|---|---|---|---|
| 14 | All | 13 | 12 | 17 | -19 | -8 | none |
5H
| Damage | Guard | Startup | Active | Recovery | On-Block | On-Hit | Invuln |
|---|---|---|---|---|---|---|---|
| 18 | All | 16 | 8 | 18 | -12 | +1 | none |
6P
| Damage | Guard | Startup | Active | Recovery | On-Block | On-Hit | Invuln |
|---|---|---|---|---|---|---|---|
| 5x2 | All | 8 | 4(8)13 | 0 | -5 | +2 | none |
2P
| Damage | Guard | Startup | Active | Recovery | On-Block | On-Hit | Invuln |
|---|---|---|---|---|---|---|---|
| 5 | All | 8 | 8 | 9 | -10 | -3 | none |
2K
| Damage | Guard | Startup | Active | Recovery | On-Block | On-Hit | Invuln |
|---|---|---|---|---|---|---|---|
| 9 | Low | 10 | 4 | 21 | -17 | -11 | none |
2S
| Damage | Guard | Startup | Active | Recovery | On-Block | On-Hit | Invuln |
|---|---|---|---|---|---|---|---|
| 14 | All | 16 | 8 | 9 | -9 | +3 | none |
2H
| Damage | Guard | Startup | Active | Recovery | On-Block | On-Hit | Invuln |
|---|---|---|---|---|---|---|---|
| 18x3 | All | 8 | 4,4(4)4 | 5 | -2 | +16 | none |
j.P
| Damage | Guard | Startup | Active | Recovery | On-Block | On-Hit | Invuln |
|---|---|---|---|---|---|---|---|
| 5 | Overhead | 6 | 8 | 9 | none |
j.K
| Damage | Guard | Startup | Active | Recovery | On-Block | On-Hit | Invuln |
|---|---|---|---|---|---|---|---|
| 7 | Overhead | 8 | 8 | 5 | none |
j.S
| Damage | Guard | Startup | Active | Recovery | On-Block | On-Hit | Invuln |
|---|---|---|---|---|---|---|---|
| 14 | Overhead | 10 | 14 | 4 | none |
j.H
Universal Mechanics
Dust Attack
| Damage | Guard | Startup | Active | Recovery | On-Block | On-Hit | Invuln |
|---|---|---|---|---|---|---|---|
| 14,5 | All,Low | 7 | 15 | 7 | -6 | +24 | Full 25~28 |
Despite how the move looks, it's very fast and the first hitbox comes out before the ball appears.
For some reason, the projectile is a low?Throw
| Damage | Guard | Startup | Active | Recovery | On-Block | On-Hit | Invuln |
|---|---|---|---|---|---|---|---|
| 20 | Throw | 1 | N/A | N/A | N/A | -17 | none |
Instant Kill
Single Stroke Battle
Specials
Tatami Gaeshi
| Version | Damage | Guard | Startup | Active | Recovery | On-Block | On-Hit | Invuln |
|---|---|---|---|---|---|---|---|---|
| Tatami Gaeshi | 1,14,5 | All | 12 | -32 [-10] | -33 [-2] | none | ||
| Tatami Gaeshi Level 2 | All | 12 | -38 [-31] | -7 | none | |||
| Tatami Gaeshi Level 3 | All | 47 | -38 [-36] | -11 | none |
Ground tatami is a pseudo projectile with lots of hits and priority, but since it doesn't even launch, it's hard to find a solid use for it. Air tatami on the other hand is a great pressure and neutral tool. There's no limit to how many you can have on screen and it's not hard to fill the screen with them. Charged versions increase the number of tatamis Baiken makes, 2 at level 2 and 3 at level 3. Level 3 has significantly more startup and can only be used in the air with a super jump.
- Standard advantage is for the kick portion of the attack
- Advantage in [brackets] is for the mat portion of the attack
Youzansen
| Damage | Guard | Startup | Active | Recovery | On-Block | On-Hit | Invuln |
|---|---|---|---|---|---|---|---|
| 9x2 | All | 10 | 4,16 | 0 | +4 | -5 | none |
Kamaitachi
| Damage | Guard | Startup | Active | Recovery | On-Block | On-Hit | Invuln |
|---|---|---|---|---|---|---|---|
| 9,10 | Overhead | 23 | 54 | 20 | -14 | -44 | none |
Supers
Tsurane Sanzu Watari
| Damage | Guard | Startup | Active | Recovery | On-Block | On-Hit | Invuln |
|---|---|---|---|---|---|---|---|
| 22x3 | Unblockable | 6 | 3(17)3(17)6 | 18 | N/A | -8 | none |
Baiken's typical three slash super, except it has some issues in this game. The fact it's unblockable may sound appealing and combined with it's fast startup, this can be effective for finishing off opponents. However, it has a major weakness in that the hits don't combo into each other. While this may not immediately sound like a problem, this means opponents can backdash away or do an invincible reversal to hit Baiken out of it. This still means the first hit is effective and it does fine enough damage, but it's not normally worth getting punished. In the corner against characters without invincible reversals, they will still get hit by the third hit even if they backdash generally, so if you somehow get an opponent in the corner then it's a good use for it.
- Leaves opponents standing on hit.


