< GGML
m (→Overview) |
m (→Navigation) |
||
| (85 intermediate revisions by 9 users not shown) | |||
| Line 1: | Line 1: | ||
{{ | ==Overview== | ||
{{GGML/CharacterLinks}} | |||
= | <div id="home-content" class="home-grid"> | ||
{{ | {{card|width=4 | ||
| | |header= | ||
|content=Justice is one of the 3 unlockable boss Characters in Missing Link, and serves as the main final boss. As such, she follows the typical standards of a boss, with cranked up stats, data, and abilities. She boasts some incredibly powerful normal attacks, as well as a wide toolset of specials, including the infamous {{MMC|input=641236S|label=Imperial Ray}}. On top of this, she has the unique quirk of being fully invulnerable while walking backwards, unless the opponent actives proximity guard. On paper, she is every bit deserving of her status of big-bad boss lady. | |||
The main problem with her is the game that she's in. Justice has no ability to charge, a mediocre Instant Kill, and damage output that is unintentionally kept in check by the number of infinites in this game. These things keep her honest and force her to play a more traditional fighting game than most of the cast. | |||
| | |||
| | {{Character Label|GGACR|Justice|label=Her incarnation in +R}} is a functionally completely different character. | ||
}} | |||
{{GGML/Infobox | |||
|fastestAttack={{MMC|input=2H|label=2H}} (1F) | |||
|reversal={{MMC|input=2H|label=2H}} (no invuln, 1F)<br>Backwards Walk (invuln 1F, no hitbox) | |||
}} | |||
{{ProsAndCons | |||
|intro = is a war machine befitting of her appearance. Big, evil defense, mobile, and dastardly lasers. | |||
|pros= | |pros= | ||
* '''Lasers!''': {{MMC|input=641236S|label=Imperial Ray}} is a commanding move which can dominate neutral, and will lead to touch-of-stun combos depending on the character. Many matchups are decided by how well the opponent can navigate this move. | |||
* '''Lasers!''': | *'''Belligerent Abare''': Thanks to her 1F {{clr|H|2H}}, invulnerable back-walk, and solid reversals, Justice is very dangerous to pressure. | ||
* ''' | * '''Mobility''': Justice has not 1, not 2, but 3 air-dashes! Paired with their speed, Justice is shockingly mobile once she gets into the air. On top of that, Justice has a freakishly fast forwards high jump which allows her to close in from full screen with {{clr|H|j.H}} rapidly. | ||
* ''' | * '''Scary Mixups''': Justice has good high/low mixups thanks to her overhead 6P and low Dust attack. | ||
* '''Scary Mixups''': Justice has good high/low mixups thanks to her overhead 6P and low Dust attack | * '''I Hate Blocking!''': While walking backwards, Justice does not have a hurtbox and cannot be hit. Because proximity block has a short activation range, she can just kind of moon-walk through things. | ||
* '''I Hate Blocking!''': While walking backwards, Justice does not have a hurtbox and cannot be hit. Because proximity block | |||
|cons= | |cons= | ||
* '''Can't Charge''': Being unable to Charge means that Justice misses out on Charge Cancels, which are what allow most characters in GGML to perform easy infinite combos. | * '''Can't Charge''': Being unable to Charge means that Justice misses out on Charge Cancels, which are what allow most characters in GGML to perform easy infinite combos. | ||
* '''Polar''': Justice's tools massively fluctuate in power depending on the matchup. This allows her to invalidate characters like {{Character Label|GGML|Potemkin}}, but stronger characters, like {{Character Label|GGML|Chipp}}, {{Character Label|GGML|Baldhead}}, and {{Character Label|GGML|Millia}}, are well-equipped to beat her. | |||
* '''She's a Big Girl''': which makes it counterintuitively difficult for her to avoid the opponent and projectiles. She can also be hit by some overheads, such as {{Character Label|GGML|Millia}}'s {{clr|H|j.H}}, and is subject to character-specific infinites. | |||
|footnote=Justice is tied with {{Character Label|GGML|Potemkin}} for highest defense in the game at 18. This makes her very durable against non-infinite sources of damage, but does not help against the game's common infinites.<br> | |||
}} | }} | ||
</div> | |||
==Normals== | ==Normals== | ||
| Line 26: | Line 35: | ||
{{GGML_Move_Card | {{GGML_Move_Card | ||
|input=5P | |input=5P | ||
|description=Unlike later games, the second hit isn't a low. | |description=Unlike later games, the second hit isn't a low. Still, it's range is quite good especially for its speed, making it useful for situations where 2H wouldn't reach. Leads to solid damage on hit. | ||
}} | }} | ||
| Line 38: | Line 47: | ||
{{GGML_Move_Card | {{GGML_Move_Card | ||
|input=c.S | |input=c.S | ||
|description=A pretty standard {{clr|3|c.S}}. Normally, these kinds of moves are filler for CC infinites, but Justice doesn't have one of those. | |description=A pretty standard {{clr|3|c.S}}. Normally, these kinds of moves are filler for CC infinites, but Justice doesn't have one of those. Whiffs on some crouching characters making 2S more reliable for filler. | ||
}} | }} | ||
| Line 58: | Line 67: | ||
}} | }} | ||
===<big> | ===<big>Fierce Strike</big>=== | ||
{{GGML_Move_Card | {{GGML_Move_Card | ||
|input=6P | |input=6P | ||
|description= | |description=Gigantic, high damage, lunging overhead that gatlings and combos into anything that isn't a {{clr|P|P}} button or {{clr|S|f.S}}. Really solid speed and reward, it's an attractive mixup option even without dashing. With a microdash it can easily reach halfscreen, and with a slightly longer respect slide it's a fullscreen overhead. Especially useful since most of the cast is inclined to show Justice respect at range thanks to Imperial Ray. | ||
*First hitbox comes out on frame 18. This is different from later games, where an anti-air hitbox comes out on frame 11 first. No 11f overheads on Potemkin here. | *First hitbox comes out on frame 18. This is different from later games, where an anti-air hitbox comes out on frame 11 first. No 11f overheads on Potemkin here. | ||
}} | }} | ||
| Line 80: | Line 89: | ||
{{GGML_Move_Card | {{GGML_Move_Card | ||
|input=2S | |input=2S | ||
|description= | |description=Justice's smallest button, not very attractive on hit or block and it's a tiny button on a character who mostly prefers to control neutral space. Not particularly useful, occasionally sees use in the rare combo that's not {{clr|H|2H}} > Imperial Ray/Michael Sword since it's a lot faster than {{clr|S|f.S}}. | ||
}} | }} | ||
| Line 86: | Line 95: | ||
{{GGML_Move_Card | {{GGML_Move_Card | ||
|input=2H | |input=2H | ||
|description= | |description=An incredible normal with many applications. Useful in neutral, to combo into and potentially link out of {{MMC|input=641236S|label=Imperial Ray}}, and for abare. | ||
Thanks to its instant startup and incredible active frames, {{clr|H|2H}} makes for a menacing way to approach on the ground. If the attack connects at a decently-close range, it can combo into Imperial Ray for a potential touch-of-stun if the target has 30 or less Stun Resistance. It can also be linked into after an Imperial Ray on some characters to keep the combo going, depending on Imperial Ray's on-hit advantage. Even on characters where Imperial Ray is inadvised, it combos into Michael Sword for a plus on block ender with solid damage. | |||
The lightning particles count as a projectile, and will not move relative to where Justice was when she used the normal. It will not beat other projectiles. | |||
This normal is absolutely godlike, and is rivaled by only a few normals, like {{CLabel|GGML|Baldhead}}'s {{MMC|input=2S|chara=Baldhead|label={{clr|S|2S}}}}. | |||
}} | }} | ||
| Line 96: | Line 108: | ||
|input=j.P | |input=j.P | ||
|description=Somewhat fast and mashable air-to-air jab. Bigger than most air jabs. | |description=Somewhat fast and mashable air-to-air jab. Bigger than most air jabs. | ||
Useful as an instant overhead against tall characters, namely {{CLabel|GGML|Potemkin}} and {{CLabel|GGML|Justice}} herself. | |||
}} | }} | ||
| Line 107: | Line 121: | ||
{{GGML_Move_Card | {{GGML_Move_Card | ||
|input=j.S | |input=j.S | ||
|description=Spawns a projectile at the location of Justice's chest when the button is pressed. The hitbox lingers in place even as Justice moves independently. If used as close to the ground as possible, this lets you place a projectile, recover immediately by landing, and have an independent hitbox occupy that area for a solid half a second. If done immediately in the air it works as an instant overhead on some of the cast, which can be jump canceled. | |description=Spawns a projectile at the location of Justice's chest when the button is pressed. The hitbox lingers in place even as Justice moves independently. If used as close to the ground as possible, this lets you place a projectile, recover immediately by landing, and have an independent hitbox occupy that area for a solid half a second. If done immediately in the air it works as an instant overhead on some of the cast, which can be jump canceled to stay safe. | ||
}} | }} | ||
| Line 120: | Line 134: | ||
{{GGML_Move_Card | {{GGML_Move_Card | ||
|input=S+H | |input=S+H | ||
|description=Moderate speed dust and also a really big low. Leads to alright damage, but Justice can do better with her punishes. Funnily enough it isn't disjointed but it will clash at worse outside of IKs. | |description=Moderate speed dust and also a really big low. Leads to alright damage, but Justice can do better with her punishes. Funnily enough it isn't disjointed but it will clash at worse outside of IKs and projectiles. | ||
}} | }} | ||
| Line 126: | Line 140: | ||
{{GGML_Move_Card | {{GGML_Move_Card | ||
|input=6H or 4H | |input=6H or 4H | ||
|description=Throws the opponent high into the air and bounces them off of the wall if they don't tech. Like most throws of its ilk, it can be teched almost immediately so any followups are untrue. Does lead to decent pressure since it's + | |description=Throws the opponent high into the air and bounces them off of the wall if they don't tech. Like most throws of its ilk, it can be teched almost immediately so any followups are untrue. Does lead to decent pressure since it's +6, if nothing else you can force them to block an Imperial Ray. | ||
}} | }} | ||
| Line 139: | Line 153: | ||
{{GGML_Move_Card | {{GGML_Move_Card | ||
|input=P+K > 236X | |input=P+K > 236X | ||
|description=Long-ranged instant kill, and just safe enough to be used as a deadly poke with its range. However, the startup is incredibly long for an IK, so it's easier to avoid than most, | |description=Long-ranged instant kill, and just safe enough to be used as a deadly poke with its range. However, the startup is incredibly long for an IK, so it's easier to avoid than most, the invuln isn't spectacular, and the hitbox isn't as good for anti-airs as many other IKs. | ||
}} | }} | ||
| Line 159: | Line 173: | ||
|description=In later games, this move got nerfed and turned into a super. In this game it's a standard special move. Let that sink in. | |description=In later games, this move got nerfed and turned into a super. In this game it's a standard special move. Let that sink in. | ||
It sweeps across the entire screen incredibly fast, does ridiculous damage even on chip, boxes opponents out, and builds a dumb amount of meter. If your character can't get past the combination of this move and back-walk, they lose the matchup. This move can be used in combos, notably from {{Clr|H|2H}} and from dash bug, to quickly stun characters with 30 or less stun resist. | |||
It's only limited by its ''horrible'' frame advantage up close (except against {{CLabel|GGML|Potemkin}}). | |||
<table class="wikitable sortable" style="width: fit-content; margin: 0 auto;"> | |||
<caption>Advantage at point-blank range:</caption> | |||
<tr><th>Victim</th><th>Crouching-hit</th><th>Standing-hit</th><th>Crouching-block</th><th>Standing-block</th></tr> | |||
<tr><td style="text-align: left;"> {{CLabel|GGML|Axl}}</td> <td> -12 </td><td> -8 </td><td> -28 </td><td> -22 </td></tr> | |||
<tr><td style="text-align: left;"> {{CLabel|GGML|Baiken}}</td> <td> -21 </td><td> -6 </td><td> -38 </td><td> -30 </td></tr> | |||
<tr><td style="text-align: left;"> {{CLabel|GGML|Baldhead}}</td><td> -18 </td><td> -8 </td><td> -36 </td><td> -26 </td></tr> | |||
<tr><td style="text-align: left;"> {{CLabel|GGML|Chipp}}</td> <td> -12 </td><td> {{clr|S|Stun}}<ref>Consistently stuns and re-stuns at point-blank range</ref> </td><td> -33 </td><td> -22 </td></tr> | |||
<tr><td style="text-align: left;"> {{CLabel|GGML|Justice}}</td> <td> -8 </td><td> {{clr|S|+18}}<ref name="stun">Stuns on hit without added stun resistence</ref> </td><td> -22 </td><td> {{clr|S|+10}} </td></tr> | |||
<tr><td style="text-align: left;"> {{CLabel|GGML|Kliff}}</td> <td> -16 </td><td> -12 </td><td> -38 </td><td> -33 </td></tr> | |||
<tr><td style="text-align: left;"> {{CLabel|GGML|Ky}}</td> <td> -8 </td><td> {{clr|S|+6}} </td><td> -33 </td><td> -22 </td></tr> | |||
<tr><td style="text-align: left;"> {{CLabel|GGML|May}}</td> <td> -16 </td><td> -8 </td><td> -28 </td><td> -22 </td></tr> | |||
<tr><td style="text-align: left;"> {{CLabel|GGML|Millia}}</td> <td> -21 </td><td> -8 </td><td> -33 </td><td> -22 </td></tr> | |||
<tr><td style="text-align: left;"> {{CLabel|GGML|Potemkin}}</td><td> {{clr|S|+21}} </td><td> {{clr|S|+12}} </td><td> -12 </td><td> {{clr|S|+8}} </td></tr> | |||
<tr><td style="text-align: left;"> {{CLabel|GGML|Sol}}</td> <td> -16 </td><td> {{clr|S|+2}}<ref name="stun"/> </td><td> -33 </td><td> -4 </td></tr> | |||
<tr><td style="text-align: left;"> {{CLabel|GGML|Testament}}</td><td> -8 </td><td> {{clr|S|+6}} </td><td> -28 </td><td> {{clr|S|+22}} </td></tr> | |||
<tr><td style="text-align: left;"> {{CLabel|GGML|Zato}}</td> <td> -16 </td><td> {{clr|S|+4}} </td><td> -33 </td><td> -11 </td></tr> | |||
</table> | |||
Note that because this frame data is measured at point-blank range, Justice's frame advantage will change, usually for the better, as she gets further away from her opponent. This is because it will take longer for the projectiles to reach the opponent. Due to travel time and her instantly invuln back-walk, Justice can be safe in many cases, even if the point-blank frame data might imply otherwise. | |||
Notably, if it's blocked or hits at specific anti-air angles where every single hit of Imperial Ray lands, the block/hitstun is so long that it infinitely loops into itself. While not common, this does come up enough for it to be relevant. | |||
}} | }} | ||
<references /> | |||
===<big>Valkyrie Arc</big>=== | ===<big>Valkyrie Arc</big>=== | ||
{{GGML_Move_Card | {{GGML_Move_Card | ||
|input=236P | |input=236P | ||
|description=Counter move. Unlike in later games, where it counters mids and highs, it counters any move that touches the activation box which is above her knees. This means there are some crouching mids that will hit it. Unfortunately because she is so tall, a lot of standing moves will go under her knees and still hit her making it somewhat unreliable. Decent reward on hit and can lead to a followup. | |description=Counter move. Unlike in later games, where it counters mids and highs, it counters any move that touches the activation box which is above her knees. This means there are some crouching mids that will hit it. Unfortunately, because she is so tall, a lot of standing moves will go under her knees and still hit her, making it somewhat unreliable. Decent reward on hit and can lead to a followup. | ||
}} | }} | ||
| Line 175: | Line 209: | ||
{{GGML_Move_Card | {{GGML_Move_Card | ||
|input=41236S | |input=41236S | ||
|description=Incredibly funky despite being pretty simple conceptually. The move is technically active on frame 1 and all the way to the end of the animation, and even after the move recovers. The thing is, the hitboxes that are present for the first 9 frames are so deep inside Justice that they can't hit anyone. | |description=Incredibly funky despite being pretty simple conceptually. The move is technically active on frame 1 and all the way to the end of the animation, and even after the move recovers. The thing is, the hitboxes that are present for the first 9 frames are so deep inside Justice that they can't hit anyone. | ||
This is her primary combo and blockstring ender point blank thanks to its very solid frame advantage. | |||
*Hits behind justice on frame 10 | *Hits behind justice on frame 10 | ||
*Hits in front of justice on frame 20 | *Hits in front of justice on frame 20 | ||
*2nd hit is air unblockable | *2nd hit is air unblockable | ||
*hitboxes linger for | *hitboxes linger for 3 frames after Justice becomes actionable | ||
}} | }} | ||
| Line 188: | Line 223: | ||
{{GGML_Move_Card | {{GGML_Move_Card | ||
|input=46463214H | |input=46463214H | ||
|description=The fat laser of doom. Slow to start up but extremely rewarding on hit. When in desperation mode, this move is incredibly obnoxious. While astute opponents will be able to punish it on reaction, it can be difficult especially if you're stuck in the air. You don't even want to block it since the chip damage is obscene and it's plus on block. | |description=The fat laser of doom. Slow to start up, but extremely rewarding on hit. When in desperation mode, this move is incredibly obnoxious. While astute opponents will be able to punish it on reaction, it can be difficult, especially if you're stuck in the air. You don't even want to block it, since the chip damage is obscene and it's plus on block. Instantly stuns the opponent, even as a restun, making it a useful tool for getting extra damage out of stun. | ||
Of note is that this move can whiff over {{Character Label|GGML|Dr Baldhead}}, so in such a situation you might want to stick to using [[{{PAGENAME}}#Imperial Ray|Imperial Ray]]. | Of note is that this move can whiff over {{Character Label|GGML|Dr Baldhead}}, so in such a situation you might want to stick to using [[{{PAGENAME}}#Imperial Ray|Imperial Ray]]. | ||
| Line 196: | Line 231: | ||
==Colors== | ==Colors== | ||
{{GGMLColors|Character=Justice|Size= | {{GGMLColors|Character=Justice|Size=220}} | ||
==Navigation== | ==Navigation== | ||
{{notice|To edit frame data, edit values in [[{{#titleparts:{{PAGENAME}}| 1 | 1}}/{{#titleparts:{{PAGENAME}}| 1 | 2 }}/Data]].}} | |||
{{# | {{GGML/Navigation | ||
{{ | |summary=GGML's Justice is a blatantly overpowered boss character who spams Imperial Ray so hard she finds herself banned in a game where almost everyone can do an infinite off of any hit. | ||
}} | |||
[[Category:Guilty Gear|Justice]] | |||
Latest revision as of 03:57, 24 December 2023
Overview
Justice is one of the 3 unlockable boss Characters in Missing Link, and serves as the main final boss. As such, she follows the typical standards of a boss, with cranked up stats, data, and abilities. She boasts some incredibly powerful normal attacks, as well as a wide toolset of specials, including the infamous Imperial Ray GuardAllStartup3Recovery0AdvantageVaries. On top of this, she has the unique quirk of being fully invulnerable while walking backwards, unless the opponent actives proximity guard. On paper, she is every bit deserving of her status of big-bad boss lady.
The main problem with her is the game that she's in. Justice has no ability to charge, a mediocre Instant Kill, and damage output that is unintentionally kept in check by the number of infinites in this game. These things keep her honest and force her to play a more traditional fighting game than most of the cast.
Justice
 |
| Defense |
| 180%Raw Value: 18 |
| Jump Startup |
| 10f |
| Backdash |
| 22f |
| Meter Gain Mod |
| 150%Raw Value: 15 |
| Charge Time |
| N/A |
| Forward Walk Speed |
| 133%Raw Value: 1024 |
| Backward Walk Speed |
| 122%Raw Value: 716 |
| Dizzy Resistance |
| 117%Raw Value: 35 |
| Fastest Attack |
2H GuardAllStartup1Recovery11Advantage-12 (1F) GuardAllStartup1Recovery11Advantage-12 (1F) |
| Reversals |
| 2HGuardAllStartup1Recovery11Advantage-12 (no invuln, 1F) Backwards Walk (invuln 1F, no hitbox) |
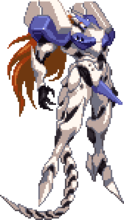
![]() Justice is a war machine befitting of her appearance. Big, evil defense, mobile, and dastardly lasers.
Justice is a war machine befitting of her appearance. Big, evil defense, mobile, and dastardly lasers.
Pros
Cons
- Lasers!: Imperial Ray
 GuardAllStartup3Recovery0AdvantageVaries is a commanding move which can dominate neutral, and will lead to touch-of-stun combos depending on the character. Many matchups are decided by how well the opponent can navigate this move.
 - Belligerent Abare: Thanks to her 1F 2H, invulnerable back-walk, and solid reversals, Justice is very dangerous to pressure.
- Mobility: Justice has not 1, not 2, but 3 air-dashes! Paired with their speed, Justice is shockingly mobile once she gets into the air. On top of that, Justice has a freakishly fast forwards high jump which allows her to close in from full screen with j.H rapidly.
- Scary Mixups: Justice has good high/low mixups thanks to her overhead 6P and low Dust attack.
- I Hate Blocking!: While walking backwards, Justice does not have a hurtbox and cannot be hit. Because proximity block has a short activation range, she can just kind of moon-walk through things.
- Can't Charge: Being unable to Charge means that Justice misses out on Charge Cancels, which are what allow most characters in GGML to perform easy infinite combos.
- Polar: Justice's tools massively fluctuate in power depending on the matchup. This allows her to invalidate characters like
 Potemkin, but stronger characters, like
  Chipp,
  Baldhead, and
  Millia, are well-equipped to beat her.
 - She's a Big Girl: which makes it counterintuitively difficult for her to avoid the opponent and projectiles. She can also be hit by some overheads, such as Millia's j.H, and is subject to character-specific infinites.
Note: Justice is tied with Potemkin for highest defense in the game at 18. This makes her very durable against non-infinite sources of damage, but does not help against the game's common infinites.
Normals
How to Read Frame Data
- Damage
- A quantification of how a character's health bar is reduced when they are hit.
- Guard
- The act of defending against incoming attacks. Guarding either negates the damage from an attack entirely or reduces it to minor chip damage.
- Low
- Guarded against while crouching
- Mid
- Guarded against in either the crouching or standing state, but not while airborne
- High
- Guarded against in the standing state
- All
- Guarded against while crouching, standing, or while airborne
- Throw
- Cannot be guarded against, but only applies to grounded opponents
- Unblockable
- Cannot be guarded against
- Startup
- The time before an attack is active including the first active frame. For example, an attack with 10F startup means the attack will do nothing for 9 frames, then hit the opponent on the 10th frame.
- Active
- The active frames of an attack refers to the amount of time an attack can hit the opponent.
- Recovery
- The recovery of an attack refers to the amount of time an attacker must wait before they may perform another action, even blocking.
- On-Block
- A measure of frame advantage when the opponent blocks an attack. Positive values indicate that the attacker can act first. Negative values indicate that the defender can act first.
- On-Hit
- A measure of frame advantage when the opponent is hit by an attack. Positive values indicate that the attacker can act first. Negative values indicate that the defender can act first.
- Invuln
- Short for InvulnerabilityA state where a character cannot be hit. A common component of reversal moves.
5P
5P


| Damage | Guard | Startup | Active | Recovery | On-Block | On-Hit | Invuln |
|---|---|---|---|---|---|---|---|
| 9x2 | All | 4 | 5,12 | 10 | +6 | -7 | none |
Unlike later games, the second hit isn't a low. Still, it's range is quite good especially for its speed, making it useful for situations where 2H wouldn't reach. Leads to solid damage on hit.
5K
5K

You go girl! Shake that tail! Show off those thrusters!


| Damage | Guard | Startup | Active | Recovery | On-Block | On-Hit | Invuln |
|---|---|---|---|---|---|---|---|
| 11 | All | 9 | 5 | 11 | -25 | -18 | none |
A good balance of speed and range, with the ability to cancel into itself on whiff. Good poke overall, just make sure you cancel it.
c.S
c.S


| Damage | Guard | Startup | Active | Recovery | On-Block | On-Hit | Invuln |
|---|---|---|---|---|---|---|---|
| 14 | All | 4 | 10 | 29 | -29 | -18 | none |
A pretty standard c.S. Normally, these kinds of moves are filler for CC infinites, but Justice doesn't have one of those. Whiffs on some crouching characters making 2S more reliable for filler.
f.S
f.S


| Damage | Guard | Startup | Active | Recovery | On-Block | On-Hit | Invuln |
|---|---|---|---|---|---|---|---|
| 16 | All | 18 | 6 | 17 | -13 | -2 | none |
Big, relatively slow poke with a respectable hitbox. Has a shit ton of recovery too so it's not too safe to whiff. Not very good, you have better options.
- Not a multi-hit like in later games.
5H
5H

this hitbox is just criminal


| Damage | Guard | Startup | Active | Recovery | On-Block | On-Hit | Invuln |
|---|---|---|---|---|---|---|---|
| 22 | All | 13 | 18 | 8 | -16 | +1 | none |
Very big button. Faster than f.S, and covers more area too. Can work as an anti-air, although it's not air-unblockable, or a general-purpose poke.
- Ungodly anti-air hitbox
- Far-reaching second hit
Fierce Strike
6P


| Damage | Guard | Startup | Active | Recovery | On-Block | On-Hit | Invuln |
|---|---|---|---|---|---|---|---|
| 14x2 | Overhead | 18 | 26 | 7 | -14 | -7 | none |
Gigantic, high damage, lunging overhead that gatlings and combos into anything that isn't a P button or f.S. Really solid speed and reward, it's an attractive mixup option even without dashing. With a microdash it can easily reach halfscreen, and with a slightly longer respect slide it's a fullscreen overhead. Especially useful since most of the cast is inclined to show Justice respect at range thanks to Imperial Ray.
- First hitbox comes out on frame 18. This is different from later games, where an anti-air hitbox comes out on frame 11 first. No 11f overheads on Potemkin here.
2P
2P


| Damage | Guard | Startup | Active | Recovery | On-Block | On-Hit | Invuln |
|---|---|---|---|---|---|---|---|
| 5 | Low | 5 | 5 | 6 | -4 | +3 | none |
It's a crouching jab, and a pretty good one at that. Big, relatively fast, and gives Justice another thing to mash if the opponent's close by. Also a low.
2K
2K


| Damage | Guard | Startup | Active | Recovery | On-Block | On-Hit | Invuln |
|---|---|---|---|---|---|---|---|
| 9 | Low | 12 | 8 | 16 | -18 | -11 | none |
Pretty unremarkable poke. Covers a similar area to 2P, but 2P is also faster and safer. 2P being a low also makes this move less attractive for mixups. Not very useful.
2S
2S


| Damage | Guard | Startup | Active | Recovery | On-Block | On-Hit | Invuln |
|---|---|---|---|---|---|---|---|
| 14 | Low | 9 | 5 | 20 | -16 | -5 | none |
Justice's smallest button, not very attractive on hit or block and it's a tiny button on a character who mostly prefers to control neutral space. Not particularly useful, occasionally sees use in the rare combo that's not 2H > Imperial Ray/Michael Sword since it's a lot faster than f.S.
2H
2H

One of the best normals in the game.


| Damage | Guard | Startup | Active | Recovery | On-Block | On-Hit | Invuln |
|---|---|---|---|---|---|---|---|
| 9x2 | All | 1 | 24 | 11 | -12 | -8 | none |
An incredible normal with many applications. Useful in neutral, to combo into and potentially link out of Imperial RayGuardAllStartup3Recovery0AdvantageVaries, and for abare.
Thanks to its instant startup and incredible active frames, 2H makes for a menacing way to approach on the ground. If the attack connects at a decently-close range, it can combo into Imperial Ray for a potential touch-of-stun if the target has 30 or less Stun Resistance. It can also be linked into after an Imperial Ray on some characters to keep the combo going, depending on Imperial Ray's on-hit advantage. Even on characters where Imperial Ray is inadvised, it combos into Michael Sword for a plus on block ender with solid damage.
The lightning particles count as a projectile, and will not move relative to where Justice was when she used the normal. It will not beat other projectiles.
This normal is absolutely godlike, and is rivaled by only a few normals, like GuardAllStartup5Recovery20Advantage-15.
j.P
j.P


j.K
j.K

footsies^2


| Damage | Guard | Startup | Active | Recovery | On-Block | On-Hit | Invuln |
|---|---|---|---|---|---|---|---|
| 7 | Overhead | 4 | 15 | 5 | none |
Actually faster than j.P on top of covering a way bigger area in front of Justice. This makes it an exceptional air-to-air option.
j.S
j.S


| Damage | Guard | Startup | Active | Recovery | On-Block | On-Hit | Invuln |
|---|---|---|---|---|---|---|---|
| 9x2 | Overhead | 1 | 24 | 2 | none |
Spawns a projectile at the location of Justice's chest when the button is pressed. The hitbox lingers in place even as Justice moves independently. If used as close to the ground as possible, this lets you place a projectile, recover immediately by landing, and have an independent hitbox occupy that area for a solid half a second. If done immediately in the air it works as an instant overhead on some of the cast, which can be jump canceled to stay safe.
j.H
j.H


| Damage | Guard | Startup | Active | Recovery | On-Block | On-Hit | Invuln |
|---|---|---|---|---|---|---|---|
| 18 | Overhead | 7 | 14 | 8 | none |
Despite how it looks, and how it behaves in later games, this move doesn't cross-up. It's still a gargantuan jump-in, though, and now you have three airdashes to use it out of. Hits two times.
Universal Mechanics
Dust Attack
S+H


| Damage | Guard | Startup | Active | Recovery | On-Block | On-Hit | Invuln |
|---|---|---|---|---|---|---|---|
| 18 | Low | 12 | 7 | 13 | -10 | +89 | none |
Moderate speed dust and also a really big low. Leads to alright damage, but Justice can do better with her punishes. Funnily enough it isn't disjointed but it will clash at worse outside of IKs and projectiles.
Throw
6H or 4H

| Damage | Guard | Startup | Active | Recovery | On-Block | On-Hit | Invuln |
|---|---|---|---|---|---|---|---|
| 20 | Throw | 1 | N/A | N/A | N/A | +6 | N/A |
Throws the opponent high into the air and bounces them off of the wall if they don't tech. Like most throws of its ilk, it can be teched almost immediately so any followups are untrue. Does lead to decent pressure since it's +6, if nothing else you can force them to block an Imperial Ray.
Dash Attack
6[6]

putting those jet engines to good use


| Damage | Guard | Startup | Active | Recovery | On-Block | On-Hit | Invuln |
|---|---|---|---|---|---|---|---|
| 1 | All | +5 | +7 |
About as unremarkable as any other dash attack. Safe on block and hit, so you won't die for using it, at least.
Instant Kill
X Razer
P+K > 236X


| Damage | Guard | Startup | Active | Recovery | On-Block | On-Hit | Invuln |
|---|---|---|---|---|---|---|---|
| FATAL | All | 17 | 12 | 14 | N/A | N/A | Above Shins 1~42 |
Long-ranged instant kill, and just safe enough to be used as a deadly poke with its range. However, the startup is incredibly long for an IK, so it's easier to avoid than most, the invuln isn't spectacular, and the hitbox isn't as good for anti-airs as many other IKs.
Specials
Strike Back Tail
421K

You know, for a giant mech, Justice is surprisingly agile


| Damage | Guard | Startup | Active | Recovery | On-Block | On-Hit | Invuln |
|---|---|---|---|---|---|---|---|
| 7x2 | Mid | 18 | 12 | 19 | -22 | -18 | All-But-Tail 1~18 |
This move has surprisingly short horizontal range. Paired with the backwards movement, and input that can be tricky on this game's input parser, hitting grounded opponents with this can be really unreliable unless they are actively extending a hurtbox towards you. Unfortunately this is your best GC option most of the time, since Imperial Ray would be better but the input is difficult to get out during blockstun and this is her only other move that can reliably avoid any continued attacks.
Launches a vertical projectile into the air that's still air-unblockable. Can help with stopping opponents from just airdashing in.
- Air Unblockable
- Justice flips backwards during the move, quickly moving her hurtbox backwards.
Imperial Ray
641236S

This one move is better than Axl and Testament combined

| Damage | Guard | Startup | Active | Recovery | On-Block | On-Hit | Invuln |
|---|---|---|---|---|---|---|---|
| 9x19 | All | 3 | 72 | 0 | Varies | Varies | none |
In later games, this move got nerfed and turned into a super. In this game it's a standard special move. Let that sink in.
It sweeps across the entire screen incredibly fast, does ridiculous damage even on chip, boxes opponents out, and builds a dumb amount of meter. If your character can't get past the combination of this move and back-walk, they lose the matchup. This move can be used in combos, notably from 2H and from dash bug, to quickly stun characters with 30 or less stun resist.
It's only limited by its horrible frame advantage up close (except against ![]() Potemkin).
Potemkin).
| Victim | Crouching-hit | Standing-hit | Crouching-block | Standing-block |
|---|---|---|---|---|
| | -12 | -8 | -28 | -22 |
| | -21 | -6 | -38 | -30 |
| | -18 | -8 | -36 | -26 |
| | -12 | Stun[1] | -33 | -22 |
| | -8 | +18[2] | -22 | +10 |
| | -16 | -12 | -38 | -33 |
| | -8 | +6 | -33 | -22 |
| | -16 | -8 | -28 | -22 |
| | -21 | -8 | -33 | -22 |
| | +21 | +12 | -12 | +8 |
| | -16 | +2[2] | -33 | -4 |
| | -8 | +6 | -28 | +22 |
| | -16 | +4 | -33 | -11 |
Note that because this frame data is measured at point-blank range, Justice's frame advantage will change, usually for the better, as she gets further away from her opponent. This is because it will take longer for the projectiles to reach the opponent. Due to travel time and her instantly invuln back-walk, Justice can be safe in many cases, even if the point-blank frame data might imply otherwise.
Notably, if it's blocked or hits at specific anti-air angles where every single hit of Imperial Ray lands, the block/hitstun is so long that it infinitely loops into itself. While not common, this does come up enough for it to be relevant.Valkyrie Arc
236P


| Damage | Guard | Startup | Active | Recovery | On-Block | On-Hit | Invuln |
|---|---|---|---|---|---|---|---|
| N/A | 7 | 21 | 11 | N/A | +4 | Counter |
Counter move. Unlike in later games, where it counters mids and highs, it counters any move that touches the activation box which is above her knees. This means there are some crouching mids that will hit it. Unfortunately, because she is so tall, a lot of standing moves will go under her knees and still hit her, making it somewhat unreliable. Decent reward on hit and can lead to a followup.
Michael Sword
41236S

That frame data isn't a typo


Frames 1~9

Frames 10~13

Frames 14~18

Frame 19

Frames 20~22

Frames 23~25

Frames 26~37

Frames 38~40


| Damage | Guard | Startup | Active | Recovery | On-Block | On-Hit | Invuln |
|---|---|---|---|---|---|---|---|
| 9,11 | All,Mid | 1* | 40 | Total Duration: 38 | 0 | +2 | none |
Incredibly funky despite being pretty simple conceptually. The move is technically active on frame 1 and all the way to the end of the animation, and even after the move recovers. The thing is, the hitboxes that are present for the first 9 frames are so deep inside Justice that they can't hit anyone.
This is her primary combo and blockstring ender point blank thanks to its very solid frame advantage.
- Hits behind justice on frame 10
- Hits in front of justice on frame 20
- 2nd hit is air unblockable
- hitboxes linger for 3 frames after Justice becomes actionable
Supers
Gamma Ray
46463214H

Fat Laser (It's called that in the code)


| Damage | Guard | Startup | Active | Recovery | On-Block | On-Hit | Invuln |
|---|---|---|---|---|---|---|---|
| 72 | All | 67 | 69 | 9 | +1 | stun | none |
The fat laser of doom. Slow to start up, but extremely rewarding on hit. When in desperation mode, this move is incredibly obnoxious. While astute opponents will be able to punish it on reaction, it can be difficult, especially if you're stuck in the air. You don't even want to block it, since the chip damage is obscene and it's plus on block. Instantly stuns the opponent, even as a restun, making it a useful tool for getting extra damage out of stun.
Of note is that this move can whiff over ![]() Dr Baldhead, so in such a situation you might want to stick to using Imperial Ray.
Dr Baldhead, so in such a situation you might want to stick to using Imperial Ray.
- Reaches full screen horizontally.
Colors
Default

Alt. 1

Alt. 2

Alt. 3

Mirror


To edit frame data, edit values in GGML/Justice/Data.

Axl

Baldhead

Chipp

Kliff

Ky

May

Millia

Potemkin

Sol

Zato

Baiken

Justice

Testament
Systems Pages