GGReload/Sol Badguy

From Dustloop Wiki
Sol Badguy
GGReload Sol Portrait.jpg

Defense Modifier: x1.00

Guts Rating: 1

Weight: Medium (x1.00)

Stun Resistance: 60

Jump Startup: 3F

Backdash Time: 16F / Invul: 1~8F

Wake-Up (Face Up/Down): 36F / 32F

Movement Options
Double Jump, 1 Airdash, Dash Type: Run
Colors
P K S H D Start
Normal
GGReload Sol P.png
GGReload Sol K.png
GGReload Sol S.png
GGReload Sol H.png
GGReload Sol D.png
GGReload Sol Start.png
SP
GGReload Sol P(Sp).png
GGReload Sol K(Sp).png
GGReload Sol S(Sp).png
GGReload Sol H(Sp).png
GGReload Sol D(Sp).png
GGReload Sol Start(Sp).png

Overview

Guilty Gear's original poster character and creator Ishiwatari's nod to the lead singer of his favorite band: Freddie Mercury of Queen. Sol "Frederick" Badguy is a hard hitting, close to mid range character with a variety of odd moves that make him deceptively tricky.

Sol thrives in the opponent's face with fast pokes, moves that go under others, and the best Dragon Punch period. His high/low mixup is very poor, but his tick throws, frame traps, and abundance of meter give him plenty of other tricky tools and means of opening up the opponent. Outside of his optimal range, he has some other decent midscreen tools, too, such as his f.S which is very fast for its range, and 5H which covers a good amount of space with an excellent hit/hurtbox ratio. Sol also has some very notably unique tools: moves that low profile or go airborne as early as frame 1, a normal which has zero recovery frames, and several normals which can be gatling'd or special cancelled during their recovery frames.

His combos generally deal high amounts of damage and are very freestyle. This makes Sol terrifying to defend against once he gets in and opens up the opponent for a beefy combination. But in order to get to those combos, Sol players will need to extend beyond the basic DP/Command Grab mixup into more layered mental territory, and/or learn to become so wild as to be impossible to predict.


 Sol Badguy -- Info Needed --

Pros
Cons

-- Info Needed --

-- Info Needed --


Normal Moves

Note: Frame data for normals is as follows, x[x] where x is the move normally and [x] is the move in Dragon Install.

5P
GGAC Sol 5P.png

GGXXACPR Sol 5P-Hitbox.png
Damage Guard Cancel Startup Active Recovery Frame Adv.
10 [12] Mid CSJR 4 [3] 4 [1] 6 [5] ±0 [+4]

5P is useful as a low-risk counter poke against attacks with extended hurtboxes. It reaches quite far horizontally for its speed. It is a strong pressure tool, leading into easy hit confirms, frame traps, and throw set-ups. On characters with smaller crouching hurtboxes, it will whiff over. Note that 5P is the only standing normal that gatlings into 2K. Due to its quick recovery, it can create Burst-safe points in combos.

Initial Prorate 80%. No Prorate during Dragon Install.
Gatling Options: 5P, 2P, 6P, 5K, 2K, c.S, f.S, 2S, 5H, 2H, 6H, 5D, 2D

5K
GGAC Sol 5K.png

GGXXACPR Sol 5K-1-Hitbox.png

1st hit (frames 3-4)

GGXXACPR Sol 5K-2-Hitbox.png

2nd hit (frames 5-6)

GGXXACPR Sol 5K-3-Hitbox.png

2nd hit (frames 7-10)

Damage Guard Cancel Startup Active Recovery Frame Adv.
14*2 Mid SJR 3 [2] 6 [1,4] 13 [3] -7 [+3]

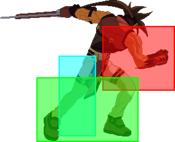
5K is one of the main reasons Sol is powerful in close quarters. As Sol’s fastest attack, it is ideal for quick punishes, closing gaps in pressure, and counter poking out of gaps in the opponent’s pressure. It leads to common combo routes on hit and multiple pressure options on block. The second hit has far vertical and horizontal reach and relatively fast recovery on whiff, which makes it extremely useful for anti-airing and catching jumps. As an anti-air, 5K will usually win unless the opponent attacks early in their descent. 5K is commonly used when option selecting forward throw as 6K+HS to perform 5K if the opponent is not throwable, and throw if they are throwable.

Gatling Options: 6P, c.S, f.S, 2S, 5H, 2H, 5D, 2D

c.S
GGAC Sol cS.png

GGXXACPR Sol cS-Hitbox.png
Damage Guard Cancel Startup Active Recovery Frame Adv.
30 [28] Mid SJR 5 [3] 2 [1] 16 [6] -4 [+3]

c.S is a strong pressure and hit confirming tool. It is one of Sol’s most damaging starters, making it a strong frame trap option and punisher on highly unsafe attacks. c.S will combo into j.D on air hit, so it can be used to set up Dustloops.

Gatling Options: 6P, f.S, 2S, 5H, 2H, 5D, 2D

f.S
GGAC Sol fS.png

GGXXACPR Sol fS-Hitbox.png
Damage Guard Cancel Startup Active Recovery Frame Adv.
30 [28] Mid SR 7 [4] 1 24 [8] -4 [+7]

f.S is Sol’s main long-range poke, it boasts an excellent combination of speed and horizontal reach. It is useful for countering attacks at long range, catching the opponent's attempts to move, and punishing unsafe attacks at a distance. On block, f.S can be cancelled to specials to apply pressure, or gatling into 2S to reset the situation. The only drawbacks to f.S are its significant recovery and extended hurtbox.

Gatling Options: 2S, 5H, 2H, 6H, 5D, 2D

5H
GGAC Sol 5H.png

GGXXACPR Sol 5H-Hitbox.png
Damage Guard Cancel Startup Active Recovery Frame Adv.
40 [44] Mid SJR 11 [6] 2 [1] 26 [8] -9 [+10]

Sol’s other long-range poke, 5HS is primarily useful in attempts to counter the opponent's attacks since it leads to Tension-free combos on Counter Hit. Its hurtbox does not extend far relative to its max range, making it strong when used in conjunction with Sol's other pokes that do greatly extend his hurtbox (such as f.S and 2D). In pressure, it can gatling from 6P as a far range frame trap. If blocked, it can be jump or special cancelled for a return to neutral or attempt to press the offensive. From farther air hits, it combos into Instant Air Dash j.P/j.K, or can be cancelled into Gunflame FRC to allow follow-up combos. 5HS will combo into j.D on air hit, so it is used frequently to set up Dustloops in corner.

Gatling Options: 2H, 5D, 2D

6P
GGAC Sol 6P.png

GGXXACPR Sol 6P-Hitbox.png
Damage Guard Cancel Startup Active Recovery Frame Adv.
32 Mid SR 9 [5] 3 [2] 20 [8] -9 [+4]

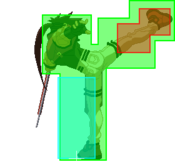
6P is strong and has a wide variety of applications. It has upper body invulnerability so it can counter higher-hitting pokes at range. For anti-airing, it is most effective against shallow angle jump angles or low air dashes, but it can also counter air attacks used early in descent (in attempts to stuff 5K anti-air). 6P is a strong pressure tool, leading to a multitude of easily hit confirmable and delayable options upon connecting. It can covert to combos even on trades, as long as it hit near corner or Counter Hit. The wall bounce on 6P also makes it a staple in corner pressure and combos. Sol can even 6P>short delay 6H for sneaky crossup setups. The main drawback of 6P is its lengthy recovery.

1~7F [1~3F] Upper body invul. 8~11F [4~6F] Above knees invul. 12~19F [7~8F] Upper body invul. Wall bounces opponent on hit. Gatling Options: c.S, f.S, 2S, 5H, 2H, 6H, 5D, 2D

6H
GGAC Sol 6H.png

GGXXACPR Sol 6H-Hitbox.png

First hit (Frame 13)

GGXXACPR Sol 6H-2-Hitbox.png

First hit (Frame 14)

GGXXACPR Sol 6H-3-Hitbox.png

First hit (Frame 15)

GGXXACPR Sol 6H-4-Hitbox.png

First hit (Frame 16)

GGXXACPR Sol 6H-5-Hitbox.png

First hit (Frame 17)

GGXXACPR Sol 6H-6-Hitbox.png

Second hit (Frame 18)

Damage Guard Cancel Startup Active Recovery Frame Adv.
40*2 Mid SR 13 [8] 5,1 30 [9] -12 [+9]

6HS is Sol’s longest range normal, but is rarely used on its own due to slow start-up, lengthy recovery, and extended hurtbox. It is useful as a frame trap gatling from 2S or 6P. 6HS causes stagger on hit, resulting in a free combo into Grand Viper from most ranges. On block, 6HS raises the guard gauge significantly but is limited to specials cancels only.

Staggers opponent on hit (max 35F). Does not stagger during Dragon Install. Dizzy modifier x1.5.

5D
GGAC Sol 5D.png

GGXXACPR Sol 5D-Hitbox.png
Damage Guard Cancel Startup Active Recovery Frame Adv.
17 Mid R 22 3 24 -13

Tied for fastest 5D in the game, but with awful range. Sol's only grounded overhead, 5D should be used sparingly, as it can be reacted to easily and is unsafe on block. Leads to significant damage and a knockdown, especially with an Impossible Dust combo.

2P
GGAC Sol 2P.png

GGXXACPR Sol 2P-Hitbox.png
Damage Guard Cancel Startup Active Recovery Frame Adv.
8 Mid CSR 5 [2] 4 [1] 4 [5] +2 [+4]

2P is a staple in Sol’s pressure game, it has similar utility to 5P but is plus on block as well. It can set up tick throws or frame traps, and can be hit confirmed easily. Due to its quick recovery, it can create Burst-safe points in combos.

Initial Prorate 80%. No prorate during Dragon Install.
Gatling Options: 5P, 2P, 6P, 5K, 2K, c.S, f.S, 2S, 5H, 2H, 5D, 2D

2K
GGAC Sol 2K.png

GGXXACPR Sol 2K-Hitbox.png
Damage Guard Cancel Startup Active Recovery Frame Adv.
12 [14] Low SR 6 [4] 3 [1] 8 [7] -1 [+2]

2K is Sol’s fastest low attack and important in pressure and okizeme. Using it will discourage opponents from trying to jump, backdash, or mash throw to escape pressure. Its quick recovery makes it a decent tick throw option. It also has decent reach for its speed, so it is useful as a standalone poke. It is useful as an empty jump low option for okizeme, and with proper spacing it can outrange throws.

Initial Prorate 70%. No prorate during Dragon Install.
Gatling Options: 6P, c.S, f.S, 2S, 2H, 5D, 2D

2S
GGAC Sol 2S.png

GGXXACPR SOL 2S-Hitbox.png
Damage Guard Cancel Startup Active Recovery Frame Adv.
25 [24] Mid SR 10 [4] 3 [1] 8 [5] +3 [+8]

2S is a strong neutral and pressure tool. It has a relatively slow start-up, but recovers incredibly fast while keeping Sol’s hurtbox far back, making it great for stopping ground approaches and countering shorter pokes. Gatling a f.S into 2S whiff is a common technique which brings Sol's hurtbox back to a safer distance, essentially resetting the situation. 2S is advantageous on block, making it a great way to safely end blockstrings or lead into extended pressure.

Gatling Options: 5H, 2H, 5D, 2D

2H
GGAC Sol 2H.png

GGXXACPR Sol 2H1-Hitbox.png

(frames 8-9)

GGXXACPR Sol 2H2-Hitbox.png

(frames 10-11)

GGXXACPR Sol 2H3-Hitbox.png

(frames 12-13)

Damage Guard Cancel Startup Active Recovery Frame Adv.
36 [40] Mid SJR 8 [4] 6 [3] 26 [8] -13 [+8]

2HS is primarily used in combos on airborne opponents, such as from anti-air 5K and corner 6P. It is rarely useful on its own due to its slow start-up, long recovery, and large hurtbox. On rare occasions it can be used in anticipation to anti-air for a rewarding counter-hit launch. 2HS can gatling from 6P as a frame trap, but is limited to jump or special cancels on block once pushed outside 2D range. From farther air hits, it combos into Instant Air Dash j.P/j.K to allow follow-up combos that result in a knockdown that would otherwise not reach. 2HS will combo into j.D on air hit, so it is used frequently to set up Dustloops in corner.

Initial Prorate 90%. Sol is in CH state during recovery.
Gatling Options: 5D, 2D

2D
GGAC Sol 2D.png

GGXXACPR SOL 2D-Hitbox.png
Damage Guard Cancel Startup Active Recovery Frame Adv.
28 [30] Low SR 7 [3] 7 [3] 20 [10] -6 [+8]

2D is a powerful normal, boasting an exceptional combination of speed, reach, evasive properties, and rewards on hit. Its low profile ability makes it useful for countering pokes that don't reach the floor. On hit it leads to multiple combo options depending on range and resources. Ground hits will frequently lead into 2D for a knockdown combo. It is a strong frame trap option as well since it can low profile many fast pokes. 2D is commonly the last normal used in a blockstring, and must be cancelled to specials in order to apply any further pressure. It is useful as an empty jump low option for okizeme since it can easily outrange throws.

2~9F Low Profile.

j.P
GGAC Sol jP.png

GGXXACPR Sol jP1-Hitbox.png

(Frames 5-7)

GGXXACPR Sol jP2-Hitbox.png

(Frames 8-12)

Damage Guard Cancel Startup Active Recovery Frame Adv.
13 [12] High, Air CSR 5 [3] 7 [6] 4 [3] -

j.P is Sol’s fastest air normal, making it ideal for close-quarters air-to-air encounters. It cancels to itself even on whiff which is useful for covering space with a long series of active hitboxes. This, along with its quick recovery, make rising j.P a low-risk space control option. j.P shifts Sol's hurtbox forward and upwards, so it can be difficult to anti-air from an air dash, and can potentially evade aerial attacks from below. Following knockdowns, j.P can be used as a safe jump and puts the opponent in short blockstun, making it a common tick throw option. In combos, j.P can be used to create Burst-safe points.

Gatling Options: j.P, j.K, j.S, j.H

j.K
GGAC Sol jK.png

GGXXACPR Sol jK-Hitbox.png
Damage Guard Cancel Startup Active Recovery Frame Adv.
22 High, Air SR [CSR] 6 6 17 [7] -

j.K is fast for its range. It can be used in long distance air-to-air situations to counter the opponent, or apply pressure on opponents attempting to jump away. In combos, j.K is frequently used from long range hits and can be used to increase corner carry in many confirms. The hitbox of j.K does not reach low, so certain characters can crouch to make it whiff.

Gatling Options: j.P, j.S, j.H

j.S
GGAC Sol jS.png

GGXXACPR Sol jS-Hitbox.png
Damage Guard Cancel Startup Active Recovery Frame Adv.
28 [25] High, Air SJR [CSJR] 10 [4] 3 [1] 23 [10] -

j.S is Sol’s best air starter for combos, so it is commonly used in okizeme as a high hit. It is also used to extend combos on airborne opponents due to being jump cancellable. j.S reaches far downward with relatively quick start-up, so it can be used after jumping or instant air dashing in to whiff punish or catch grounded opponents off guard at neutral. It is easy to anti-air, so it must be used with caution.

Initial prorate 90%. No prorate during Dragon Install. Gatling Options: j.K, j.H, j.D

j.H
GGAC Sol jH.png

GGXXACPR Sol jH-1-Hitbox.png

Frames 9-14

GGXXACPR Sol jH-2-Hitbox.png

Frames 15-18

GGXXACPR Sol jH-3-Hitbox.png

Frames 19-22

Damage Guard Cancel Startup Active Recovery Frame Adv.
24*2 [20*2] High, Air SR 9 3,11 [2,4] 0 -

j.HS has utility in a wide variety of areas; in general it is Sol’s most commonly used air normal. For okizeme, j.HS is useful as a safe jump that can hit high twice. While it doesn’t gatling to any other air normals, it recovers instantly, so it is possible to link j.P or j.K afterwards. j.HS is useful as both an air-to-air and air-to-ground attack due to its large hitbox, long active frames, and evasive hurtbox. Sol's hurtbox shifts up far above the lower limit of j.HS's hitbox, making it a great way to counter anti-airs and help approach from the air. As a jump in, the only drawback it has is that it doesn't reach quite as deep as j.S, so it can be low profiled. At neutral, rising j.HS has similar utility to rising j.P as a method of covering space. j.HS can be used to create Burst-safe points in combos due to its instant recovery.

j.D
GGAC Sol jD.png

GGXXACPR Sol jD-1-Hitbox.png

Frames 9-11

GGXXACPR Sol jD-2-Hitbox.png

Frames 12-15

Damage Guard Cancel Startup Active Recovery Frame Adv.
44 High, Air SJR 9 7 10+5L -

j.D is primarily used in combos on airborne opponents to maximize corner carry and damage, such as Dustloops near corner. It is also commonly used as a gatling from j.S to launch the opponent. On its own, j.D has limited use as an air-to-ground attack, the hitbox has more range horizontally and upward vertically than downward. In addition, it has extra landing recovery which makes follow-up pressure after it is blocked not as strong. It can occasionally be useful as an air-to-air with decent active frames and horizontal reach. On counter-hit, j.D has a massive amount of untechable time, allowing follow-up combos from nearly anywhere on the screen.

Knocks down opponent on ground hit. Wall bounces opponent on CH. Initial Prorate 90%.


Universal Mechanics

Ground Throw
GGAC Sol throw.png
Damage Guard Cancel Startup Active Recovery Frame Adv.
60 Throw: 43 Pixles - - - - -

Average throw. Unspectacular unless done in the corner. Sol’s ground throw is used much more frequently on defense than offense. Typically, using Wild Throw is a stronger and more rewarding option on offense. Throw is faster though, so it can be used in situations which the opponent makes themselves throwable for a brief period of time.
In the corner though, it can be followed up with 5K against most of the cast.

Inital Prorate 50%. Knocks down opponent on hit.

Air Throw
GGAC Sol airThrow.png
Damage Guard Cancel Startup Active Recovery Frame Adv.
60 Throw: 110 Pixels - - - - -

A decent air throw that knocks down.

  • Knocks down by itself, giving plenty of time for oki.
  • Can convert from anywhere with meter.
  • Doesn't lock the opponent's burst, but is absolutely burst safe unless done right off the ground.

Converts similarly to regular throw in the corner with 5K > BR/SW Loop/whatever, or (f.S) > FB Fafnir from midscreen or near the corner for a knockdown and some decent damage.

Knocks down face up. Floats on hit (untechable for 60F). Dizzy modifier x1.5. 50% forced proration.

Dead Angle Attack
GGAC Sol 6P.png
Damage Guard Cancel Startup Active Recovery Frame Adv.
25 All R 11 3 25 -14

Average, unsafe guard reversal.

  • Easier to use than poking or DP'ing through a gap, but still easily punished.
  • Uses 6P animation, so it can still be low profiled.
  • Can convert in the corner on counter hit or if hit on the last active frame.

Will lose to moves that very low profile, like Grand Viper and Stroke the Big Tree. Not terrible, but not great. Sol already has other ways of getting out of pressure.

Knocks down face up. Frames 1-13 invincible. Frames 14-33 invincible to throws. Frames 14-23 upper body invincibility. Wall bounces on hit (untechable on ground hit for 28F). 50% proration.


Special Moves

Gunflame
236P
GGAC Sol 236P.png
Version Damage Guard Cancel Startup Active Recovery Frame Adv.
Normal 50,42,30,30 All 20 9(1)9(1)9(1)9 Total 50 -4

Ground hugging flame projectile integral to Sol's pressure and oki game.

  • Very active move which covers space in front of Sol to about midscreen away
  • Strong oki tool which forces to the opponent to either respect or reversal.
  • Resets pressure and Sol's position when done close enough and FRC'd.
  • Covers Sol's approach when FRC'd.
  • Does high damage in combos, especially in the corner.
  • Can be jumped over, but the FRC lets you react and catch them.

Very useful tool when used properly. Must be spaced closely to prevent jump outs and allow Sol back in safely mid pressure, but sharper opponents will recognize and reversal through this. Gunflame is counter hit state for the entire duration, so learning the FRC is vital. Note that when GF is cancelled into, the FRC window will be delayed mid-string due to hit/blockstop.

Advanced tech: Gunflame can be combo'd into against a grounded, crouching opponent, by cancelling into GF from a level 5 move, FRC'ing it, and linking an, at slowest 5F normal before the Gunflame goes active.

Gunflame: floats on hit (untechable for 28F). CH state till end of recovery. Chip damage x2. FRC timing 14-15. Flame appears on frame 19. Damage, Active, and Level vary depending on which of the 4 flames hits. Flames appear on frames 21,31,39 and 42. Gunflame can only hit once.

Dragon Install 60 All - 20 6 7 +7

Regular Gunflame on roids. Has a massive hitbox, and will combo into itself.

  • Significantly larger and slightly faster than regular Gunflame.
  • Covers an anti-air angle and is all of only one hit, making pressure coverage must faster and safer.
  • Plus on block for better pressure resets.
  • Easier to use for chipping out.
  • The FRC is moved to right as it goes active, changing its use.
  • Just fast enough to combo out of grounded, crouching, Lvl.5 hits.

Great for scaring opponents in the corner, or catching bad jump out attempts. Mixed in with DI's other tools, it becomes stronger when spaced out.

Gunflame (DI): Floats on hit (untechable for 40F). CH state till end of recovery. Hit stop 6. Chip damage x2. FRC timing: 21-22. Flame goes through other projectiles.

Gunflame (Feint)
214P
GGAC Sol 214P.png

GGXXACPR Sol 214P-Hitbox.png
Damage Guard Cancel Startup Active Recovery Frame Adv.
- - - - - Total 31 -

Fake Gunflame. Has a hitbox for some reason.

  • Can make some bigger moves safer on block, or trick the opponent into thinking that you'll Gunflame.
  • Can be whiffed to build meter from afar.
  • Used sparingly, can frighten opponents at the end of blockstrings into another setup.

Not particularly useful with the hitbox attached, as it's counter hit state for the entire move. Best used when farther away for ambiguity. Killing with this OTG is extreme disrespect.

CH state till end of recovery.

Volcanic Viper
623S/H or j.623S/H
GGAC Sol 623S.png

Normal Versions:

GGXXACPR Sol 623S-1-Hitbox.png

S: 1st hit (Frames 7-9)
H: 1st hit (Frames 5-6)

GGXXACPR Sol j623S-1-Hitbox.png

j.S/H: 1st hit (Frames 5-6)

GGXXACPR Sol 623S-2-Hitbox.png

S: 2nd hit (Frames 13-23)
j.S: 2nd hit (Frames 10-18)
H/j.H: 2nd hit (Frames 10-27)


Dragon Install Version

Dragon Install Versions:

GGXXACPR Sol DI-623S-1-Hitbox.png

DI All: 1st hit (Frames 7-9)

GGXXACPR Sol DI-623S-2-Hitbox.png

DI S: 2nd/3rd hit (Frames 11-16)
DI j.S/H: 2nd/3rd hit (Frames 12-19)

GGXXACPR Sol DI-j623S-2-Hitbox.png

DI H: 2nd hit (Frames 10-63)

Version Damage Guard Cancel Startup Active Recovery Frame Adv.
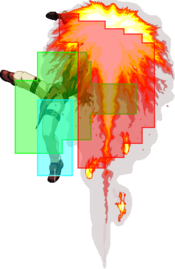
Ground Normal S 40,25 Mid R 7 3(3)11 21+8L -26

The greatest. Ever.

  • God DP. Blows through just about everything.
  • Massive hitbox that cannot be low profiled, like many other DPs
  • Can be canceled into the followup kick on whiff to mix up Sol's recovery timing.
  • Converts to knockdown about 95% of the time.
  • Fully converts if the first hit is RC'd, or if the 2nd part counter hits.
  • Tied for the slowest version of the move at 7F, but with some of the most invulnerability.

Breaks through even the smallest gaps. Safe when RC'd on the first hit. Must be given enough space, or be blocked when can't RC in order to be completely baited. Using the knockdown kick sets up oki, but on whiff/block, the followup puts you in CH state.

Note: All versions of grounded VV must be jump installed in order to airdash or double jump on RC.

Supplemental Frame Data:

VV S: Frames 1-9 invincible. Frames 10-13 invincible to strikes. Airborne from frame 10 on. Floats on hit (1st hit untechable on ground hit for 28F, 2nd hit untechable for 26F). Can follow-up to Knockdown from frames 24-40. Sol is crouching during landing recovery.
Aerial Normal S 32,20 All R 5 2(3)9 Until L+8 -

Easy air combo ender.

  • Straightforward air knockdown tool.
  • Also works as a DP in the air, but is air blockable without FD, and is only strike invuln.
  • Has the most leniency into combo'ing into the followup kick.
  • Completely cuts Sol's air momentum when you RC the first hit, leading to airdash mixups or continued strings on block.
  • Can convert to longer combos if the first hit is RC'd.

Note: the momentum cut on RC will make Sol fall straight down. You can TK this move and RC it immediately, and with some very tight timing, you can tag an opponent with a quick overhead before you hit the ground...

Supplemental Frame Data:

Air VV S: Frames 1-9 invincible to strikes. Floats on hit (1st hit untechable for 36F, 2nd hit for 27F). Can follow-up to Knockdown from 19-35. Sol is crouching during landing recovery.
Normal H 40,25 Mid R 5 2(3)18 30+8L -41

Massive DP version. Eats up the sky.

  • Big Anti-Air callout, unrivaled in combined speed and vertical reach.
  • Slightly faster and more damage than the S version.
  • Similarly converts if the 1st hit is RC'd or the 2nd part counter hits.
  • Can be difficult to punish if done with running momentum: some characters lack the means to reach Sol without meter.
  • Leniency to the followup is slightly more difficult, and must be delayed a bit.

Supplemental Frame Data:

VV H: 1-6 invincible. 7-11 invincible to strikes. Airborne from frame 7 on. Floats on hit (1st hit untechable on ground hit for 28F, 2nd hit untechable for 36F). Can follow-up to Knockdown from 28-44. Sol is crouching during landing recovery.
Aerial Normal H 40,20 All R 5 2(3)18 Until L+8 -

Situational air knockdown tool with slight more damage.

  • Higher reaching aerial VV, not as high as the grounded version.
  • Also air blockable without FD.
  • Lacks the same leniency to the followup as the ground H version.
  • Similarly to j.SVV, cuts air momentum when RC'd on the first hit.

Supplemental Frame Data:

Air VV H: Frames 1-9 invincible to strikes. Floats on hit (1st hit untechable for 38F, 2nd hit for 36F). Can follow-up to Knockdown from 32-44. Sol is crouching during landing recovery.
Dragon Install S 40,20*2 Mid R 7 3(1)4,2 21+8L -17

Weaker version of VV, but has some altered utility.

  • Similarly strong hitbox, but cannot cancel into knockdown.
  • Same speed as regular SVV, but slightly less damage overall.
  • All three hits must be FD'd if airborne.
  • Overall not the strongest version, but usable.

Supplemental Frame Data:

VV S (DI): Frames 1-9 invincible. Frame 10 invincible to strikes. Airborne from frame 10 on. Floats on hit (1st hit untechable on ground hit for 28F, 2nd/3rd hit untechable for 30F). Sol is crouching during landing recovery.
Dragon Install H 40,18*9 Mid R 7 3,54 36+8L -76

The hype machine. One of the meanest moves in the game.

  • Absolutely massive wall of hitbox. Reaches to the top of the screen.
  • Does double dizzy damage (1st hit), takes a buttload of health, and can still convert to knockdown.
  • The 1st hit does 60 damage and GB -1: one of the single strongest combo starters in the game on RC.

Use by itself with meter for a skyrocket. Despite the excessive hitstun, knockdown can become impossible to connect on too many hits due to gravity scaling, so avoid ending longer combos with it.

Supplemental Frame Data:

VV H (DI): Frames 1-9 invincible. 1st hit floats and causes knockdown. All other hits cause float (untechable for 60F) and have hit stop 0. 1st hit dizzy modifier x2.0. Can follow-up to Knockdown from frame 63. Sol is crouching during landing recovery.
Aerial Dragon Install

Similarly weaker version as DI-SVV, but the first hit is air unblockable.

  • Also doesn't cancel to knockdown.
  • First hit being air unblockable can win you air-to-air wars.
  • Fully invincible compared to normal air VVs being only strike invincible.

Will work if they don't FD while air poking in blockstrings, but otherwise you should use with meter if you want to convert.

Supplemental Frame Data:

Air VV (DI): Frames 1-9 invincible. Frames 10-11 invincible to strikes. Floats on hit (1st hit untechable on ground hit for 28F, 2nd/3rd hit untechable for 45F). Sol is crouching during landing recovery.
Knockdown
Volcanic Viper -> 214K
GGAC Sol 623S214K.png
Damage Guard Cancel Startup Active Recovery Frame Adv.
16 High, Air R 12 4 Until L+8 -

Used after VV to score a knockdown, or delay your descent.

  • Deceptively large hitbox. Can tag players pressing the wrong button.
  • Delays Sol's fall, throwing off an opponent's punish timing.
  • Use wisely on VV getting blocked/whiffing, as Sol is put in CH state.
  • Hits overhead, but won't tag anybody this way.
  • Will occasionally hit players pressing a button after VV.

Note that against heavyweight characters, Knockdown will whiff after some grounded versions of VV, depending on whether it was normal or counter hit. Know your matchups!

Plummets on hit (untechable for 30F). Sol is in CH state while falling. Sol is crouching during landing recovery.

Grand Viper
214S
GGAC Sol 214S.png

Frame Data for Maximum # of Hits

GGXXACPR Sol 214S-1-Hitbox.png

Hits 1-7 (Frames 17-41)

GGXXACPR Sol 214S-2-Hitbox.png

Last hit (Frames 62-64)

Damage Guard Cancel Startup Active Recovery Frame Adv.
8*7,18,18*2 Low R 17 6~25(4)12(2)2(2)20 36+10L -56

The ultimate callout, likeliest move in the game to blow out your speakers.

  • Extremely low profile on frame 1: goes more than 75% of moves in the game.
  • Leads into ridiculous amounts of damage on Clean Hit from anywhere on stage.
  • Number of hits changes depending on how many directions/buttons are pressed during the move.
  • Horribly unsafe on block/whiff. Cannot be RC'd if the current hit did not make contact.
  • Can go under bursts, which can score a powerful reset in the corner, but can be suicide midscreen.

Strong tool which requires finesse and recognition to use properly. Can go under things mid-pressure and lead to very damaging conversions. Has some of its best conversions near the corner, and can work midscreen with little/no mashing based on the opponent's character. Don't miss.

Frames 1-4 above the knees invincibility. While advancing, Frames 5-16 invincible above the feet. Advancing part: 1st-6th hits are untechable on air hit for 26F. Causes 24F of hit stun on a standing opponent. Hit stop 6F. Dizzy modifier x0.25. 80% proration. 7th hit of the advancing part floats on hit (untechable for 28F). Hit stop 6F. Finishing hit (the uppercut) floats on hit (untechable for 42F, 64F for Clean Hit). Listed frame data is for a Grand Viper that does the maximum number of hits.

Bandit Revolver
236K or j.236K
GGAC Sol 236K.png

GGXXACPR Sol BR-1-Hitbox.png

First hit (Frame 9-13)

GGXXACPR Sol BR-2-Hitbox.png

Second hit (Frame 24-25)

GGXXACPR Sol BR-3-Hitbox.png

Second hit (Frame 26-27)

GGXXACPR Sol BR-4-Hitbox.png

Second hit (Frame 28-30)

GGXXACPR Sol BR-5-Hitbox.png

Second hit (Frame 31-32)

Version Damage Guard Cancel Startup Active Recovery Frame Adv.
Normal, Ground 24,36 Mid R 9 5(1)9 2 -2

Knockdown tool, and catches players upbacking/fuzzy jumping without FD.

  • Primary knockdown tool out of BnBs.
  • Leads to a safejump setup.
  • Hits players in the air who don't FD.
  • Minute startup invul can make it a psuedo-reversal.

Keeps opponents grounded, though will get thrown if blocked standing. Can go through some moves, to the surprise of many. Use caution: the second hit is unsafe on hit if the opponent is grounded.

BR: Frames 1-3 invincible to strikes. Airborne from frame 9 on. 1st hit floats on hit (untechable for 26F). 2nd hit plummets and causes knockdown on air hit. Auto jump installed. Sol is crouching during landing recovery.

Normal, Air 22*4 All R 6 4(6)4,2,2,2 Until L+12 -

Combo filler for high meter gain, and tool for shooting across the stage.

  • Converts stray air hits into longer combos.
  • Loops from 5K and c.S, mainly for corner carry.
  • Builds a decent amount of meter on hit, especially when it hits three times.
  • Can be FRC'd before going active to propel Sol forward.
  • FRC also used to extend aerial pressure strings or set up mixups.

Main conversion tool out of farther hitting j.Ds where SW Loop isn't possible. When close to the opponent, can be tk'd to start a longer combo. Tends to have more utility between moves than as a move by itself.

Air BR: 1st hit floats on ground hit (untechable for 24F). Untechable on air hit for - 2nd hit: 32F, 3rd hit: 28F. FRC timing: Frames 6-8. Attack level is 1 on block. Sol is crouching during landing recovery.

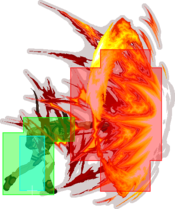
Dragon Install, Ground 20*3,50 Mid R 7 3,3,3(9)9 3 +3

Stronger hitting version of BR with flame effects. Last hit strikes overhead.

  • Easier looping tool which doesn't require a tk.
  • Larger active window which will catch jumpers.
  • Catches players low blocking if they're not paying attention.
  • Knocks down with a bit of pushback for ending combos when DI is about to run out.

Easy looping and conversion tool in DI.

BR (DI): Frames 1-3 invincible to strikes. Airborne from frame 9 on. Hits 1-3 float on hit (untechable for 26F). 4th hit plummets on air hit (untechable for 26F). Auto jump installed. Sol is crouching during landing recovery.

Bandit Bringer
236[K]
GGAC Sol 236Khold.png

GGXXACPR Sol 236K-Hold Hitbox.png
Damage Guard Cancel Startup Active Recovery Frame Adv.
50 High, Air RF 32 6 9+4L ±0

Level 6 move. Button check and big, slow overhead. Slightly plus, big damage combo tool.

  • Goes over a lot of things very, very slowly.
  • Large ground bounce makes conversions extremely easy.
  • High damage, especially in combos.
  • Plus 1 on block, must be punished alertly.
  • Has a Clean Hit, with no forced prorate.
  • Occasional FRC use leads to unusual mixups.

Clean Hit Bandit Bringer punches a heavy amount of damage and a clean hit in combos. Tends to work best in the corner out of an FRC'd Gunflame, or on CH, crouching hit 5H against some characters. Can also be RC'd on contact if Jump Installed for an airdash mixup.

BB can be backdashed, IB'd and thrown or combo'd against, and some characters can just 6P it. It's a bit risky: use BB sparingly, not frequently.

Fun Fact: Bandit Bringer will clean hit on crouching Kliff and Zappa, but Faust can crawl under it.

Frames 1-3 strike invincible. Airborne from frame 9 on. Causes ground bounce on hit (untechable for 50F, on Clean Hit for 80F, on CH for 152F). FRC timing: Frames 18-20. 66% proration. Startup of 32F to hit crouching opponent (tested on Sol). Sol is crouching during landing recovery.

Riot Stamp
214K
GGAC Sol 214K.png

GGXXACPR Sol RS-Hitbox.png
Damage Guard Cancel Startup Active Recovery Frame Adv.
40 High, Air RF Until Wall+9 - Until L+3 -4

Silly overhead transport attack. Awful move, except when it's amazing.

  • Hits on frame 14 when cornered.
  • Airborne on frame 1, gets you out of dodge when used properly.
  • Doesn't lead to anything on hit, but full conversion on midscreen counter hit.
  • Can be FRC'd right before it goes active to fake into a low.
  • 6P bait. Don't do it fullscreen or you're going to die.
  • Starts higher off the ground the further you do it from the corner. Some characters can crouch under it even if point blank.

Done with discretion, it'll get you out of jail and might lead to a combo. Hilarious when it works. Otherwise horrendous. Be careful or you're going to get counter hit and you're probably going to lose.

Airborne from frame 1 on. Wall bounces on hit (untechable for 28F). Sol is not in a CH state until the active frames start. FRC timing Frames 9-12 frames after reaching the wall. Auto jump installed. Attack startup is 9F after Sol reaches the wall. Startup of a Riot Stamp done when Sol is right next to the wall is 14F.

Wild Throw
623K
GGAC Sol 623K.png
Damage Guard Cancel Startup Active Recovery Frame Adv.
40 Throw: 70 Pixels - 5 1 Whiff 35 -

Great command grab. Sol's main mixup tool.

  • Average command throw range, but very fast.
  • Full, damaging conversions from anywhere on stage.
  • Has burst safe setups with FB Sidewinder, with free easy resets if they take the bait.
  • Also has character specific, meterless burst safe setups.
  • Only in CH state for a short segment of its recovery.

Makes people wince when it lands. Meterless conversions can do 25%-55% damage. Usually followed with dash (2H) > j.D > SW loop.
Some meterless burst safe followups include:

  • IAD j.S > Sidewinder > (empty jump) SW loop
  • 2H > late j.H/Burst Throw OS
  • late j.H/block OS > SW loop

1-14 Sol is in CH state. Whiff animation: 35F. 55% forced proration.

Fafnir
41236H
GGAC Sol 41236D.png

GGXXACPR Sol 41236H-Hitbox.png
Damage Guard Cancel Startup Active Recovery Frame Adv.
70 Mid RF 17 3 13 +3

Slow, lunging punch. Gets Sol in more safely when combo'd into.

  • Max range conversion tool and situation reset.
  • Staggers on hit while moving Sol forward, putting him closer to his optimal range.
  • Cancels into FB Tyrant Rave for bigger damage with only 25 meter.
  • Leads to bigger confirms with an RC.
  • Knocks down on air hit.
  • Can frame trap (with a wide window) due to its startup.

Most useful for getting Sol in from a faraway hit. Can combo afterward if the opponent is asleep and doesn't shake out of stagger. Slides on counter hit, but the recovery is far too high for a conversion. Not great in neutral. Exercise caution: fast mashers can recover from stagger fast enough to recover before Sol.

Staggers opponent on ground hit (Max 42F). Knocks down opponent on air hit (untechable for 24F). Slides opponent on CH (untechable for 56F, slides for 40F). Can cancel into Tyrant Rave from 20~25F. Forced prorate 70%.


Overdrives

Tyrant Rave ver.Beta
632146H
GGAC Sol 632146H.png

GGXXACPR Sol 632146H-1-Hitbox.png

1st hit (Frames 6-8)

GGXXACPR Sol 632146H-2-Hitbox.png

1st hit (Frames 9-16)

GGXXACPR Sol 632146H-3-Hitbox.png

2nd hit (Frames 33-34)

GGXXACPR Sol 632146H-4-Hitbox.png

2nd hit (Frames 35-38)

GGXXACPR Sol 632146H-6-Hitbox.png

2nd hit (Frames 39-40)

GGXXACPR Sol 632146H-7-Hitbox.png

2nd hit (Frames 41-47)

Damage Guard Cancel Startup Active Recovery Frame Adv.
80,60 Mid R 5+1 11(7)15 31 -15

High, immediate damage cash out.

  • Big hitbox reversal option. 1F post flash, so if they're dashing at you they're boned.
  • Knocks down full screen, untechable wallstick near the corner.
  • Combos into 5K when you're in the corner, and Grand Viper from a bit farther out.
  • Done from 2D or 5H as a punish, you get a quick, unburstable combo unless they burst immediately.
  • Can be done to bursts on reaction to blow through them for a big reset.
  • Pushes the opponent out fairly far, can be difficult to punish.

Hard to punish on the pushback, but can be tagged between hits. Has its plusses but TR is generally an inferior reversal to VV RC. RC'in the first hit on block can lead to mixups like dash in Wild Throw.

1-8 strike invincible, 1st hit knocks down opponent, 2nd hit wall sticks opponent (untechable for 80F, sticks for 32F), Dizzy modifier: 1st hit: x0.25, 2nd hit: x0 Chip damage: 1st hit: x1.5, 2nd hit: x2.0. 2nd hit is RCable provided the first attack hits or is blocked, 2nd hit can pass through projectiles. 2nd hit has 70% forced proration.

Dragon Install
214214S
GGAC Sol 214214S.png
Damage Guard Cancel Startup Active Recovery Frame Adv.
- - - - - 19+9 -

Ride or Die Super. Go all in. If you run out of time, you'll have to pick a god and pray.

  • Acts as a reversal and screen freeze, giving you time to react with its 21F of strike invul (first 19f are full invul).
  • Sol's mobility spikes to extreme levels.
  • Almost every move becomes faster. 5K becomes the fastest normal in the game at 2F (but loses its jump cancel).
  • Conversely, every move becomes much safer (5D becomes 18F and is 0 on block instead of -13).
  • Sol gains access to Slam, an extremely fast and safe overhead.
  • S and H normals have their recovery cut enough that other normals can be linked after dashing.
  • Can be combo'd into and out of if done from 6P.
  • Lasts longer with lower health (~6.5 seconds to ~10.5 seconds).
  • H Volcanic Viper becomes the Hail Mary.

The negatives:

  • Goes into a long recovery animation when it ends by time.
  • Drains all of Sol's tension and cuts his tension pulse when it ends.
  • Ends if Sol is knocked down (this is actually preferable to ending by the time out).
  • Additionally puts Sol close to Negative Penalty and being Dizzied (does not apply if DI ends with Sol being knocked down).

Frames 1-19 invincible. Frames 19-21 invincible to strikes. During DI, tension increases at a rate of 0.1% per frame. DI cannot be used during DI. DI duration: base time of 360F + 1F for every health point below 210. Dragon Install duration drains during hit stop and super freeze. Recovery animation: 36F total, CH state throughout. Tension reduced to 0, negative penalty effect, tension gain lowered, Sol takes extra dizzy damage, and has a lower dizzy rating.

Instant Kill

Napalm Death
in IK Mode: 236236H
GGAC Sol IK.png
Damage Guard Cancel Startup Active Recovery Frame Adv.
DESTROY All - 7+8 12 26+1L -22

Goodbye Meter.


Navigation

Guilty Gear XX ♯Reload
Click [*] for character's frame data
System Explanations

HUDControlsFrame Data & System Data


Movement/CancelingOffenseDefenseDamage/Combo SystemTension/Burst GaugeMisc