No edit summary |
Final Ultima (talk | contribs) mNo edit summary |
||
| (80 intermediate revisions by 12 users not shown) | |||
| Line 2: | Line 2: | ||
{{TOC limit|5}} | {{TOC limit|5}} | ||
</div> | </div> | ||
= Controls = | |||
=Controls= | :As with other 2D fighters, Guilty Gear -Strive- uses [[Notation#Numpad Notation|Numpad Notation]]. | ||
:As with other 2D fighters, Guilty Gear Strive uses [[Notation#Numpad Notation|Numpad Notation]] | |||
{| class="wikitable" border="1" | {| class="wikitable" border="1" | ||
| Line 22: | Line 21: | ||
Button Representations: | Button Representations: | ||
*{{Prompt| | * {{Prompt|GGST|P}} = Punch | ||
*{{Prompt| | * {{Prompt|GGST|K}} = Kick | ||
*{{Prompt| | * {{Prompt|GGST|S}} = Slash | ||
*{{Prompt| | * {{Prompt|GGST|H}} = Heavy Slash | ||
*{{Prompt| | * {{Prompt|GGST|D}} = Dust | ||
There is also a button for Taunt and Respect, albeit not having a preset location. | There is also a button for Taunt and Respect, albeit not having a preset location. | ||
Special moves used more then one directional input. For instance, rotating the stick a quarter circle to the right {{Ni|236}} is represented as 236. | Special moves used more then one directional input. For instance, rotating the stick a quarter circle to the right {{Ni|236}} is represented as 236. | ||
*{{Ni|236}} | * {{Ni|236}}{{Prompt|GGST|P}} = 236P | ||
*{{Ni|623}} | * {{Ni|623}}{{Prompt|GGST|S}} = 623S | ||
*{{Ni|41236}} | * {{Ni|41236}}{{Prompt|GGST|H}} = 41236H | ||
* {{Ni|87412}}{{Prompt|GGST|D}} = 87412D | |||
<br style="clear:both;"> | <br style="clear:both;"> | ||
==Movement== | == [[GGST/Movement|Movement]] == | ||
Hold {{Ni|6}} or {{Ni|4}} = Walk | Hold {{Ni|6}} or {{Ni|4}} = Walk | ||
:The most basic movement option. The character approaches or retreats from the opponent slowly. | :The most basic movement option. The character approaches or retreats from the opponent slowly. | ||
Hold {{Ni|1}} or {{Ni|2}} or {{Ni|3}} = Crouch | Hold {{Ni|1}} or {{Ni|2}} or {{Ni|3}} = Crouch | ||
:Put the character in a crouching position, lowering their hurtboxes. Note that the hurtboxes don't shrink immediately; the character can still be hit by moves normally whiffing on crouchers until they actually crouch. | :Put the character in a crouching position, lowering their hurtboxes. Note that the hurtboxes don't shrink immediately; the character can still be hit by moves normally whiffing on crouchers until they actually crouch. | ||
{{Ni|6}}{{Ni|6}} = Dash (or Step) | {{Ni|6}}{{Ni|6}} = Dash (or Step) | ||
:Dashes move the character forward at a greater speed than walking. Most characters can run; hold the second {{Ni|6}} to do so. Certain characters, however, cannot run; they propel themselves forward for a fixed distance. Potemkin, in particular, cannot even dash. | :Dashes move the character forward at a greater speed than walking. Most characters can run; hold the second {{Ni|6}} to do so. Certain characters, however, cannot run; they propel themselves forward for a fixed distance. Potemkin and Nagoriyuki, in particular, cannot even dash. | ||
{{Ni|4}}{{Ni|4}} = Backdash | {{Ni|4}}{{Ni|4}} = Backdash | ||
:Backdashes move the character a preset distance. There is | :Backdashes move the character back for a preset distance. There is a brief period of invincibility starting from the very first frame, making it handy against certain attacks. | ||
{{Ni|8}} = Jump | {{Ni|8}} = Jump | ||
:Makes the character jump into the air. Pressing {{Ni|7}} or {{Ni|9}} will have them jump backward or forward respectively. There are a few frames during which the character stays on the ground before they actually | :Makes the character jump into the air. Pressing {{Ni|7}} or {{Ni|9}} will have them jump backward or forward respectively. There are a few frames during which the character stays on the ground before they actually jump; they are invulnerable to throws at this time, but can still be hit by strikes and projectiles. After a jump, the character has the option to either jump again in the air or air dash (except Potemkin who can only double jump, Goldlewis who can only air dash, Bedman? who can only 8-way air dash, and Nagoriyuki who can do neither), or in the case of Chipp and Millia, both. | ||
{{Ni|2}}{{Ni|8}} = | {{Ni|2}}{{Ni|8}} = High Jump | ||
:After a | :After a High Jump, you can not double jump, but you can air dash. Pressing {{Ni|2}}{{Ni|7}} or {{Ni|2}}{{Ni|9}} will have you High Jump diagonally in the specified direction. You can use any downward direction for the {{Ni|2}} input - doing {{Ni|3}}{{Ni|8}} will still give you a High Jump. | ||
(In Air) {{Ni|8}} = Double Jump | |||
:Jump again while in the air. Alternatively you can press {{Ni|7}} or {{Ni|9}} to double jump in the specified direction. Chipp can perform a triple jump, while Nagoriyuki, Goldlewis and Bedman? cannot perform a double jump, although Bedman? can dash upward in place of a double jump. | |||
(In Air) {{Ni|6}}{{Ni|6}} or {{Ni|4}}{{Ni|4}} = Air Dash | (In Air) {{Ni|6}}{{Ni|6}} or {{Ni|4}}{{Ni|4}} = Air Dash | ||
:Dash in the specified direction in mid-air. Backward | :Dash in the specified direction in mid-air. Backward air dash is a moderate option for keeping away from the opponent. In the case of forward air dash, the character pauses in the air briefly before propelling forward; performing any other action during that will cancel the momentum, altering your angle of approach. Millia can perform two air dashes, while Potemkin and Nagoriyuki cannot perform a single air dash. Dashing in mid-air as Bedman? enters a stance that can cancel into an 8-way air dash. | ||
{{Ni|9}}{{Ni|5}}{{Ni|6}} or {{Ni|7}}{{Ni|5}}{{Ni|4}} = Instant Air Dash (IAD) | {{Ni|9}}{{Ni|5}}{{Ni|6}} or {{Ni|7}}{{Ni|5}}{{Ni|4}} = Instant Air Dash (IAD) | ||
: | :Instant Air Dash is a way to perform an air dash as soon as possible after a jump. | ||
==Offense== | == [[GGST/Offense|Offense]] == | ||
=== | === Normal Moves === | ||
==== | ==== Gatling Combination ==== | ||
Gatling combinations follow the following rules: | |||
*{{Prompt| | * {{Prompt|GGST|P}} or {{Ni|2}}{{Prompt|GGST|P}} > {{Prompt|GGST|P}} or {{Ni|2}}{{Prompt|GGST|P}} xN | ||
*{{Prompt| | Useful for tick-throwing and mashing against pressures. | ||
*{{Prompt| | * {{Prompt|GGST|P}} or {{Ni|2}}{{Prompt|GGST|P}} > any command normal | ||
*c.{{Prompt| | A low risk/low reward route, gatling into slow command normals will often result in more pushback at higher risk. | ||
* {{Prompt|GGST|K}} or {{Ni|2}}{{Prompt|GGST|K}} > {{Prompt|GGST|D}}, {{Ni|2}}{{Prompt|GGST|D}} or any command normal | |||
While less safe than {{Prompt|GGST|P}} starters, the ability to combo into {{Ni|2}}{{Prompt|GGST|D}} for knockdown permits further offensive pressure or a mix-up opportunity. | |||
* c.{{Prompt|GGST|S}} > {{Ni|2}}{{Prompt|GGST|S}}, {{Prompt|GGST|D}}, {{Ni|2}}{{Prompt|GGST|D}} or any command normal | |||
While less safe than {{Prompt|GGST|K}} starters, c.{{Prompt|GGST|S}} has increased hitstun on hit, allowing for combo routes into command normals not otherwise possible. | |||
* c.{{Prompt|GGST|S}}, f.{{Prompt|GGST|S}}, or {{Ni|2}}{{Prompt|GGST|S}} > {{Prompt|GGST|H}} or {{Ni|2}}{{Prompt|GGST|H}} | |||
The high risk/high reward route, requires some conditioning. | |||
==== Command Normals ==== | ==== Command Normals ==== | ||
A command normal is performed by pressing a specific direction with a specific button. Every character has both a {{Ni|6}} | A command normal is performed by pressing a specific direction with a specific button. Every character has both a {{Ni|6}}{{Prompt|GGST|P}} and {{Ni|6}}{{Prompt|GGST|H}} command normal, but each character has their own other command normals as well such as Sol's {{Ni|6}}{{Prompt|GGST|S}} or May's {{Ni|3}}{{Prompt|GGST|K}}. It's up to you to learn the different command normals and the properties of each for your character. | ||
[[File:GGST_Command_Normals.png|thumb|left|250px]] | [[File:GGST_Command_Normals.png|thumb|left|250px]] | ||
*Most {{Ni|6}} | * Most {{Ni|6}}{{Prompt|GGST|P}} command normals has some form of upper body invulnerability and are useful as anti-air attacks. | ||
*Most {{Ni|6}} | * Most {{Ni|6}}{{Prompt|GGST|H}} command normals are slow, far reaching attacks. | ||
<br style="clear:both;"> | <br style="clear:both;"> | ||
====Dust Attack==== | ==== Dust Attack ==== | ||
:Dust | :Dust Attacks are a special type of attack performed by pressing the {{Prompt|GGST|D}} button without inputting a direction. It hits overhead, meaning the opponent has to block it high. | ||
Dust Attack | [[File:GGST_Dust_Attack.png|thumb|left|250px]] | ||
On | |||
On a regular hit, Dust Attack causes a crumple that causes the opponent to float and then land back on their feet. | |||
On a raw, fully charged hit, press any upward direction to perform a Homing Jump, chasing your opponent into the air for an air combo with no gatling limitations. | |||
During a Homing Jump, canceling an air normal with the same input will trigger a Finish Blow, an attack that knocks the opponent down and resets both characters back to round start position in swapped positions. | |||
<br style="clear:both;"> | <br style="clear:both;"> | ||
==== Sweep ==== | ==== Sweep ==== | ||
Sweeps are the primary knockdown tool of all characters input with {{Ni|2}} | :Sweeps are the primary knockdown tool of all characters input with {{Ni|2}}{{Prompt|GGST|D}}. They must be blocked low. | ||
[[File:GGST_Sweep.png|thumb|left|250px]] | [[File:GGST_Sweep.png|thumb|left|250px]] | ||
Sweeps knock the opponent down on hit, granting the attacker significant advantage to set up okizeme. Note that they only cause a hard knockdown on grounded opponents; they cause a soft knockdown on air hit. | |||
<br style="clear:both;"> | <br style="clear:both;"> | ||
====Throw and Air Throw==== | |||
==== Throw and Air Throw ==== | |||
:To perform a throw, input {{Ni|4}}{{Prompt|GGST|D}} or {{Ni|6}}{{Prompt|GGST|D}}. | |||
[[File:GGST_Throw.png|thumb|left|250px]] | [[File:GGST_Throw.png|thumb|left|250px]] | ||
[[File:GGST_Throw_Whiff.png|thumb|left|250px]] | [[File:GGST_Throw_Whiff.png|thumb|left|250px]] | ||
Throws are strong tools against the opponent who keeps blocking for too long. You have to mind the distance between your character and the opponent, though, as using it out of range will trigger a vulnerable whiff animation, putting your character in a Counter Hit state. Note that holding diagonals will not work when attempting a throw, it ''must'' be straight left or right. | |||
<br style="clear:both;"> | |||
==== Throw Clash ==== | |||
:To perform a throw clash, input {{Ni|4}}{{Prompt|GGST|D}} or {{Ni|6}}{{Prompt|GGST|D}} as the opponent initiates a throw. | |||
[[File:GGST_ThrowEscape.png|thumb|left|250px]] | |||
When two characters attempt to throw each other at close to or exactly the same time, a throw clash will occur, pushing both characters away from each other and back into a neutral situation. If you can anticipate the throw but don't have enough time to throw out an attack, this could be a valuable tool to break the opponent's momentum. | |||
<br style="clear:both;"> | <br style="clear:both;"> | ||
=== Special | |||
Special | === Wild Assault === | ||
[[File:GGST_Sol_Badguy_236D.png|thumb|left|250px]] | |||
'''{{Ni|236}}{{Prompt|GGST|D}} (Hold OK)'''<br/> | |||
''Consumes 50% Burst Gauge'' | |||
Wild Assaults are fast, forward-moving attacks that can be canceled into from any special cancelable move. They drain 7.14% of the opponent's Burst Gauge on hit or block. A fully charged Wild Assault launches grounded opponents on hit. | |||
<br style="clear:both;"> | |||
* '''Orange''' Wild Assaults start up faster, making them excellent combo extenders, and charged hits launch more horizontally. | |||
* '''Blue''' Wild Assaults inflict stagger on an uncharged ground hit and Guard Crush on block, creating advantageous situations. | |||
* '''White''' Wild Assaults gain strike invincibility from frame 9 onwards, knock the opponent away on hit when uncharged, and inflict Guard Crush on block. | |||
Both Orange and Blue Wild Assaults can be canceled into either normals, specials, jumps, or backdash on hit or block. Doing so also grants forward momentum for any action that doesn't move backward, enabling certain combo conversions that would be otherwise impossible. Orange Wild Assaults grant a massive amount of momentum, while Blue Wild Assaults grant a small amount. | |||
When used to break the wall, opponents are in a hard knockdown state after the Area Shift, similar to when being wall broken by Overdrives. | |||
=== Special Moves === | |||
Special moves are moves that require a more elaborate command input, and have unique effects and properties. These range from standard projectiles (Ky's Stun Edge) to invincible attacks (Sol's Volcanic Viper) to command throws (Potemkin's Potemkin Buster). Special moves are free and do not require Tension, but some characters have special moves which change under certain conditions (Ky's Shock State for example). | |||
[[File:GGST_Special_Attack.png|thumb|left|200px]] | [[File:GGST_Special_Attack.png|thumb|left|200px]] | ||
One distinct difference between special | One distinct difference between normal moves and special moves is that special moves always build some Tension, even if they miss completely. Special moves that deal damage also deal chip damage on block as well. | ||
<br style="clear:both;"> | |||
=== Overdrives === | |||
Much like "Super Combos" from other fighting games, Overdrives are moves that usually cost 50% of your Tension Gauge. While most Overdrives are used to deal high amounts of unburstable damage, some may grant an advantage outside of damage. Overdrives that hit the opponent will Wall Break on the last hit if the opponent collides with the wall regardless of Wall Stick (with the opponent in a hard knockdown state after the Area Shift). | |||
Each Overdrive is character specific, and it's up to you to know what your character's variation does and what properties it contains. | |||
[[File:GGST_Overdrive_Attack.png|thumb|left|250px]] | |||
<br style="clear:both;"> | <br style="clear:both;"> | ||
== [[GGST/Defense|Defense]] == | |||
=== Blocking === | |||
Hold {{Ni|4}} or {{Ni|1}} to block high or low. Hold any backward direction to block while in mid-air. | |||
* High block will not block lows. | |||
* Low block will not block overheads. | |||
=== Instant Block === | |||
[[File:GGST_System Instant Block.png|thumb|left|250px]] | |||
'''Press {{Ni|4}} or {{Ni|1}} just before an attack hits you'''<br/> | |||
* Negates pushback, allowing you to punish things not normally punishable. | |||
* Grants a small amount of Tension on success. | |||
* Negates chip damage. | |||
* Does not negate R.I.S.C. Level gain. | |||
* Your character will flash white if you performed an Instant Block. | |||
<br style="clear:both;"> | |||
=== Faultless Defense === | |||
[[File:GGST_System Faultless Defense.png|thumb|left|250px]] | |||
'''{{Ni|4}} or {{Ni|1}} + any two attack buttons (except {{Prompt|GGST|D}})'''<br/> | |||
''Continuously consumes Tension while in use'' | |||
* Pushes the defender far away from the attacker. | |||
* Negates chip damage and R.I.S.C. Level gain. | |||
* Cancels momentum causes by movement. | |||
<br style="clear:both;"> | <br style="clear:both;"> | ||
===Faultless Defense=== | === Instant Faultless Defense === | ||
[[File: | [[File:GGST_IFD.png|thumb|left|250px]] | ||
'''{{Ni|4}} + any two attack buttons (except {{Prompt| | '''{{Ni|4}} or {{Ni|1}} + any two attack buttons (except {{Prompt|GGST|D}}) just before an attack hits you'''<br/> | ||
'' | ''Consumes Tension'' | ||
* Pushes the attacker far away from the defender, defender stays still. | |||
* Negates chip damage and R.I.S.C. Level gain. | |||
* Cancels momentum causes by movement. | |||
* Your character will flash white if you performed an Instant Faultless Defense. | |||
<br style="clear:both;"> | <br style="clear:both;"> | ||
=== | === Deflect Shield === | ||
[[File: | [[File:GGST_DeflectShield.png|thumb|left|250px]] | ||
'''{{Ni|214}}{{Prompt|GGST|D}} (Air OK)'''<br/> | |||
* | ''Consumes 50% Burst Gauge'' | ||
* | |||
* | * Deflects mids, lows and overheads. | ||
* Pushes the attacker extremely far away from the defender, defender stays still. | |||
* Negates chip damage and R.I.S.C. Level gain. | |||
* Cancels momentum caused by movement. | |||
* Has a vulnerable recovery window with Counter Hit state. | |||
<br style="clear:both;"> | <br style="clear:both;"> | ||
==Other Mechanics== | == Other Mechanics == | ||
===Roman Cancel=== | === Roman Cancel === | ||
'''Press any three attack buttons (except {{Prompt| | '''Press any three attack buttons (except {{Prompt|GGST|D}})'''<br/> | ||
''Consumes 50% Tension'' | ''Consumes 50% Tension'' | ||
Roman Cancel is a | |||
There are 4 types of Roman Cancel | Roman Cancel is a staple mechanic in Guilty Gear. It cancels everything your character is doing and pauses the screen for a brief moment so that you can seize the situation. The character releases a colored shockwave effect which causes slowdown for the opponent '''only''' if it touches them. | ||
There are 4 types of Roman Cancel: | |||
<gallery mode=packed-hover heights=200px style="text-align:center"> | <gallery mode=packed-hover heights=200px style="text-align:center"> | ||
File: | File:GGST_System_Blue Roman Cancel.png|Blue Roman Cancel | ||
File:GGST_RedRC.png|Red Roman Cancel | File:GGST_RedRC.png|Red Roman Cancel | ||
File: | File:GGST_System Purple Roman Cancel.png|Purple Roman Cancel | ||
File: | File:GGST_YellowRC.png|Yellow Roman Cancel | ||
</gallery> | </gallery> | ||
* '''Blue''' during neutral or basic movement. Has the longest slowdown period, allowing you to respond to neutral situations or enable links not normally possible. Slowdown caused by the shockwave still continues even if the opponent gets hit. | |||
* '''Red''' as a strike or throw connects. The shockwave launches the opponent on hit for easy combo extensions and grants significant advantage on block. | |||
* '''Purple''' during a move outside of the Red Roman Cancel window. Use it in conjunction with projectiles to aid your offense or after an unsafe action to make yourself safe and maybe even retaliate. | |||
During any of the above three types of Roman Cancel, you can drift in any cardinal direction by double tapping that direction or holding a direction and pressing the Dash button as you activate Roman Cancel. You can also prevent the shockwave from expanding by inputting a move during a specific window of the Roman Cancel's super freeze. This cancels directly into the inputted move, maintaining your momentum and reducing the amount of Tension spent, while still applying a reduced amount of slowdown at close range. | |||
* '''Yellow''' while in blockstun. The shockwave puts the opponent in a Guard Crush state on hit, granting the defender advantage. Applies 50% forced proration on hit. | |||
Roman Cancels may sound very expensive, but they are very versatile and very much worth the Tension cost; Roman Cancels can make unsafe attacks safe, extend combos, and be used in mix-ups or frame traps. | |||
<br style="clear:both;"> | <br style="clear:both;"> | ||
===Psych Bursts=== | === Psych Bursts === | ||
'''{{Prompt| | '''{{Prompt|GGST|D}} + any other attack button'''<br/> | ||
''Requires Full Burst Gauge'' | ''Requires Full Burst Gauge'' | ||
The Burst Gauge fills up very slowly over time or when getting hit | Psych Bursts are an attack where your character creates an energy shockwave and blows the opponent away. Bursts can be used as an offensive or defensive tool depending on the scenario. The Burst Gauge fills up very slowly over time or when getting hit, and the lower a character's life, the faster it fills. | ||
==== Blue Psych Burst ==== | |||
:Press {{Prompt|GGST|D}} + any other attack button while blocking or getting hit to perform a Blue Psych Burst. Blue Psych Bursts blow the opponent away, allowing you to interrupt an opponent's combo or reset the momentum of a match. | |||
[[File:GGST_Blue_Psych_Burst.png|thumb|left|250px]] | |||
* You cannot use a Blue Psych Burst while getting hit by throws, getting hit by Overdrives, or in a Wall Stick state. | |||
* Blue Psych Bursts are fully invincible during start-up. | |||
* You are vulnerable while recovering from a Blue Psych Burst. | |||
<br style="clear:both;"> | <br style="clear:both;"> | ||
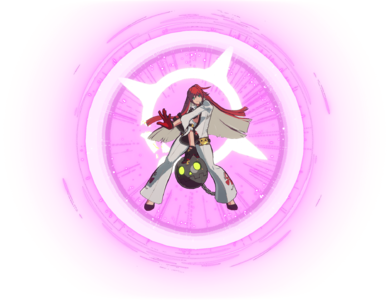
==== Gold Psych Burst ==== | |||
:Press {{Prompt|GGST|D}} + any other attack button while in a neutral state to perform a Gold Psych Burst. Gold Psych Bursts are a useful "get off me" tool on wake-up, and the reward for successfully landing one can turn the tides. | |||
[[File:GGST_System_Gold_Burst.png|thumb|left|250px]] | |||
* Hitting the opponent with a Gold Psych Burst grants Positive Bonus. | |||
* Gold Psych Bursts are fully invincible until landing. | |||
<br style="clear:both;"> | <br style="clear:both;"> | ||
===Clash=== | |||
:A clash occurs when | === Clash === | ||
:A clash occurs when the hitboxes of both players' strikes connect with one another. | |||
[[File:GGST_Clash.png|thumb|left|250px]] | [[File:GGST_Clash.png|thumb|left|250px]] | ||
* Either player can cancel the clashed attack into any other attack, dash, Faultless Defense, Gold Burst or Purple Roman Cancel. If the move was jump cancelable, it can be also canceled into a jump. | |||
<br style="clear:both;"> | <br style="clear:both;"> | ||
=== Taunts and Respects === | === Taunts and Respects === | ||
:Though it's not really "attacking", Taunt and Respect do have their uses. | ::Press the Taunt button to perform a Taunt. Press {{Ni|6}} and Taunt to perform a Respect. Though it's not really "attacking", Taunt and Respect do have their uses. | ||
[[File:GGST_Taunt.png|thumb|left|250px]] | [[File:GGST_Taunt.png|thumb|left|250px]] | ||
* Both Taunts and Respects can be canceled into any action besides movement and proximity blocking after a certain amount of time. They can be used to give a false sense of vulnerability as your opponent may be lured into attacking. | |||
* Performing a Taunt will raise your opponent's Tension Gauge by 10%. | |||
* Taunt has 120 frames of recovery while Respect has 60 frames. | |||
* You can cancel any normal directly into Taunt but not Respect. | |||
<br style="clear:both;"> | |||
==Navigation== | |||
{{GGST/Navigation}} | |||
{{ | |||
Latest revision as of 18:21, 10 December 2023
Controls
- As with other 2D fighters, Guilty Gear -Strive- uses Numpad Notation.
| 7 |
8 |
9 |
| 4 |
5 |
6 |
| 1 |
2 |
3 |
Button Representations:
 = Punch
 = Kick
 = Slash
 = Heavy Slash
 = Dust
There is also a button for Taunt and Respect, albeit not having a preset location.
Special moves used more then one directional input. For instance, rotating the stick a quarter circle to the right ![]() is represented as 236.
is represented as 236.
 = 236P
 = 623S
 = 41236H
 = 87412D
Movement
Hold ![]() or
or ![]() = Walk
= Walk
- The most basic movement option. The character approaches or retreats from the opponent slowly.
Hold ![]() or
or ![]() or
or ![]() = Crouch
= Crouch
- Put the character in a crouching position, lowering their hurtboxes. Note that the hurtboxes don't shrink immediately; the character can still be hit by moves normally whiffing on crouchers until they actually crouch.
![]()
![]() = Dash (or Step)
= Dash (or Step)
- Dashes move the character forward at a greater speed than walking. Most characters can run; hold the second
 to do so. Certain characters, however, cannot run; they propel themselves forward for a fixed distance. Potemkin and Nagoriyuki, in particular, cannot even dash.
![]()
![]() = Backdash
= Backdash
- Backdashes move the character back for a preset distance. There is a brief period of invincibility starting from the very first frame, making it handy against certain attacks.
![]() = Jump
= Jump
- Makes the character jump into the air. Pressing
 or
or  will have them jump backward or forward respectively. There are a few frames during which the character stays on the ground before they actually jump; they are invulnerable to throws at this time, but can still be hit by strikes and projectiles. After a jump, the character has the option to either jump again in the air or air dash (except Potemkin who can only double jump, Goldlewis who can only air dash, Bedman? who can only 8-way air dash, and Nagoriyuki who can do neither), or in the case of Chipp and Millia, both.
![]()
![]() = High Jump
= High Jump
- After a High Jump, you can not double jump, but you can air dash. Pressing
 or will have you High Jump diagonally in the specified direction. You can use any downward direction for the input - doing
 will still give you a High Jump.
(In Air) ![]() = Double Jump
= Double Jump
- Jump again while in the air. Alternatively you can press or to double jump in the specified direction. Chipp can perform a triple jump, while Nagoriyuki, Goldlewis and Bedman? cannot perform a double jump, although Bedman? can dash upward in place of a double jump.
(In Air) ![]()
![]() or
or ![]()
![]() = Air Dash
= Air Dash
- Dash in the specified direction in mid-air. Backward air dash is a moderate option for keeping away from the opponent. In the case of forward air dash, the character pauses in the air briefly before propelling forward; performing any other action during that will cancel the momentum, altering your angle of approach. Millia can perform two air dashes, while Potemkin and Nagoriyuki cannot perform a single air dash. Dashing in mid-air as Bedman? enters a stance that can cancel into an 8-way air dash.
![]()
![]()
![]() or
or ![]()
![]()
![]() = Instant Air Dash (IAD)
= Instant Air Dash (IAD)
- Instant Air Dash is a way to perform an air dash as soon as possible after a jump.
Offense
Normal Moves
Gatling Combination
Gatling combinations follow the following rules:
- or > or xN
Useful for tick-throwing and mashing against pressures.
- or > any command normal
A low risk/low reward route, gatling into slow command normals will often result in more pushback at higher risk.
- or > , or any command normal
While less safe than ![]() starters, the ability to combo into
starters, the ability to combo into ![]()
![]() for knockdown permits further offensive pressure or a mix-up opportunity.
for knockdown permits further offensive pressure or a mix-up opportunity.
- c. > , , or any command normal
While less safe than ![]() starters, c.
starters, c.![]() has increased hitstun on hit, allowing for combo routes into command normals not otherwise possible.
has increased hitstun on hit, allowing for combo routes into command normals not otherwise possible.
- c., f., or > or
The high risk/high reward route, requires some conditioning.
Command Normals
A command normal is performed by pressing a specific direction with a specific button. Every character has both a ![]()
![]() and
and ![]()
![]() command normal, but each character has their own other command normals as well such as Sol's
command normal, but each character has their own other command normals as well such as Sol's ![]()
![]() or May's
or May's ![]()
![]() . It's up to you to learn the different command normals and the properties of each for your character.
. It's up to you to learn the different command normals and the properties of each for your character.

- Most command normals has some form of upper body invulnerability and are useful as anti-air attacks.
- Most command normals are slow, far reaching attacks.
Dust Attack
- Dust Attacks are a special type of attack performed by pressing the button without inputting a direction. It hits overhead, meaning the opponent has to block it high.

On a regular hit, Dust Attack causes a crumple that causes the opponent to float and then land back on their feet.
On a raw, fully charged hit, press any upward direction to perform a Homing Jump, chasing your opponent into the air for an air combo with no gatling limitations.
During a Homing Jump, canceling an air normal with the same input will trigger a Finish Blow, an attack that knocks the opponent down and resets both characters back to round start position in swapped positions.
Sweep
- Sweeps are the primary knockdown tool of all characters input with . They must be blocked low.

Sweeps knock the opponent down on hit, granting the attacker significant advantage to set up okizeme. Note that they only cause a hard knockdown on grounded opponents; they cause a soft knockdown on air hit.
Throw and Air Throw
- To perform a throw, input
 or .
or .


Throws are strong tools against the opponent who keeps blocking for too long. You have to mind the distance between your character and the opponent, though, as using it out of range will trigger a vulnerable whiff animation, putting your character in a Counter Hit state. Note that holding diagonals will not work when attempting a throw, it must be straight left or right.
Throw Clash
- To perform a throw clash, input or as the opponent initiates a throw.

When two characters attempt to throw each other at close to or exactly the same time, a throw clash will occur, pushing both characters away from each other and back into a neutral situation. If you can anticipate the throw but don't have enough time to throw out an attack, this could be a valuable tool to break the opponent's momentum.
Wild Assault

![]()
![]() (Hold OK)
(Hold OK)
Consumes 50% Burst Gauge
Wild Assaults are fast, forward-moving attacks that can be canceled into from any special cancelable move. They drain 7.14% of the opponent's Burst Gauge on hit or block. A fully charged Wild Assault launches grounded opponents on hit.
- Orange Wild Assaults start up faster, making them excellent combo extenders, and charged hits launch more horizontally.
- Blue Wild Assaults inflict stagger on an uncharged ground hit and Guard Crush on block, creating advantageous situations.
- White Wild Assaults gain strike invincibility from frame 9 onwards, knock the opponent away on hit when uncharged, and inflict Guard Crush on block.
Both Orange and Blue Wild Assaults can be canceled into either normals, specials, jumps, or backdash on hit or block. Doing so also grants forward momentum for any action that doesn't move backward, enabling certain combo conversions that would be otherwise impossible. Orange Wild Assaults grant a massive amount of momentum, while Blue Wild Assaults grant a small amount.
When used to break the wall, opponents are in a hard knockdown state after the Area Shift, similar to when being wall broken by Overdrives.
Special Moves
Special moves are moves that require a more elaborate command input, and have unique effects and properties. These range from standard projectiles (Ky's Stun Edge) to invincible attacks (Sol's Volcanic Viper) to command throws (Potemkin's Potemkin Buster). Special moves are free and do not require Tension, but some characters have special moves which change under certain conditions (Ky's Shock State for example).

One distinct difference between normal moves and special moves is that special moves always build some Tension, even if they miss completely. Special moves that deal damage also deal chip damage on block as well.
Overdrives
Much like "Super Combos" from other fighting games, Overdrives are moves that usually cost 50% of your Tension Gauge. While most Overdrives are used to deal high amounts of unburstable damage, some may grant an advantage outside of damage. Overdrives that hit the opponent will Wall Break on the last hit if the opponent collides with the wall regardless of Wall Stick (with the opponent in a hard knockdown state after the Area Shift).
Each Overdrive is character specific, and it's up to you to know what your character's variation does and what properties it contains.

Defense
Blocking
Hold ![]() or
or ![]() to block high or low. Hold any backward direction to block while in mid-air.
to block high or low. Hold any backward direction to block while in mid-air.
- High block will not block lows.
- Low block will not block overheads.
Instant Block

Press ![]() or
or ![]() just before an attack hits you
just before an attack hits you
- Negates pushback, allowing you to punish things not normally punishable.
- Grants a small amount of Tension on success.
- Negates chip damage.
- Does not negate R.I.S.C. Level gain.
- Your character will flash white if you performed an Instant Block.
Faultless Defense

![]() or
or ![]() + any two attack buttons (except
+ any two attack buttons (except ![]() )
)
Continuously consumes Tension while in use
- Pushes the defender far away from the attacker.
- Negates chip damage and R.I.S.C. Level gain.
- Cancels momentum causes by movement.
Instant Faultless Defense

![]() or
or ![]() + any two attack buttons (except
+ any two attack buttons (except ![]() ) just before an attack hits you
) just before an attack hits you
Consumes Tension
- Pushes the attacker far away from the defender, defender stays still.
- Negates chip damage and R.I.S.C. Level gain.
- Cancels momentum causes by movement.
- Your character will flash white if you performed an Instant Faultless Defense.
Deflect Shield

![]()
![]() (Air OK)
(Air OK)
Consumes 50% Burst Gauge
- Deflects mids, lows and overheads.
- Pushes the attacker extremely far away from the defender, defender stays still.
- Negates chip damage and R.I.S.C. Level gain.
- Cancels momentum caused by movement.
- Has a vulnerable recovery window with Counter Hit state.
Other Mechanics
Roman Cancel
Press any three attack buttons (except ![]() )
)
Consumes 50% Tension
Roman Cancel is a staple mechanic in Guilty Gear. It cancels everything your character is doing and pauses the screen for a brief moment so that you can seize the situation. The character releases a colored shockwave effect which causes slowdown for the opponent only if it touches them.
There are 4 types of Roman Cancel:

Blue Roman Cancel

Red Roman Cancel
Purple Roman Cancel

Yellow Roman Cancel


- Blue during neutral or basic movement. Has the longest slowdown period, allowing you to respond to neutral situations or enable links not normally possible. Slowdown caused by the shockwave still continues even if the opponent gets hit.
- Red as a strike or throw connects. The shockwave launches the opponent on hit for easy combo extensions and grants significant advantage on block.
- Purple during a move outside of the Red Roman Cancel window. Use it in conjunction with projectiles to aid your offense or after an unsafe action to make yourself safe and maybe even retaliate.
During any of the above three types of Roman Cancel, you can drift in any cardinal direction by double tapping that direction or holding a direction and pressing the Dash button as you activate Roman Cancel. You can also prevent the shockwave from expanding by inputting a move during a specific window of the Roman Cancel's super freeze. This cancels directly into the inputted move, maintaining your momentum and reducing the amount of Tension spent, while still applying a reduced amount of slowdown at close range.
- Yellow while in blockstun. The shockwave puts the opponent in a Guard Crush state on hit, granting the defender advantage. Applies 50% forced proration on hit.
Roman Cancels may sound very expensive, but they are very versatile and very much worth the Tension cost; Roman Cancels can make unsafe attacks safe, extend combos, and be used in mix-ups or frame traps.
Psych Bursts
![]() + any other attack button
+ any other attack button
Requires Full Burst Gauge
Psych Bursts are an attack where your character creates an energy shockwave and blows the opponent away. Bursts can be used as an offensive or defensive tool depending on the scenario. The Burst Gauge fills up very slowly over time or when getting hit, and the lower a character's life, the faster it fills.
Blue Psych Burst
- Press + any other attack button while blocking or getting hit to perform a Blue Psych Burst. Blue Psych Bursts blow the opponent away, allowing you to interrupt an opponent's combo or reset the momentum of a match.

- You cannot use a Blue Psych Burst while getting hit by throws, getting hit by Overdrives, or in a Wall Stick state.
- Blue Psych Bursts are fully invincible during start-up.
- You are vulnerable while recovering from a Blue Psych Burst.
Gold Psych Burst
- Press + any other attack button while in a neutral state to perform a Gold Psych Burst. Gold Psych Bursts are a useful "get off me" tool on wake-up, and the reward for successfully landing one can turn the tides.

- Hitting the opponent with a Gold Psych Burst grants Positive Bonus.
- Gold Psych Bursts are fully invincible until landing.
Clash
- A clash occurs when the hitboxes of both players' strikes connect with one another.

- Either player can cancel the clashed attack into any other attack, dash, Faultless Defense, Gold Burst or Purple Roman Cancel. If the move was jump cancelable, it can be also canceled into a jump.
Taunts and Respects
- Press the Taunt button to perform a Taunt. Press and Taunt to perform a Respect. Though it's not really "attacking", Taunt and Respect do have their uses.
- Press the Taunt button to perform a Taunt. Press

- Both Taunts and Respects can be canceled into any action besides movement and proximity blocking after a certain amount of time. They can be used to give a false sense of vulnerability as your opponent may be lured into attacking.
- Performing a Taunt will raise your opponent's Tension Gauge by 10%.
- Taunt has 120 frames of recovery while Respect has 60 frames.
- You can cancel any normal directly into Taunt but not Respect.