< GGXRD-R2
No edit summary |
|||
| (208 intermediate revisions by 46 users not shown) | |||
| Line 1: | Line 1: | ||
{ | {{GGWikiBanner}} | ||
==Overview== | |||
{{GGXRD-R2/CharacterLinks}} | |||
<div id="home-content" class="home-grid"> | |||
{{card|width=4|height=1 | |||
|header=Overview | |||
|content= Potemkin is Guilty Gear's resident '''grappler''', made of large attacks, big damage, and huge throws, including his signature Potemkin Buster. As a tank, Potemkin is very slow, being unable to run or air dash. In exchange, he's given an unusually long invincibility window on his backdash, the highest health in the game, and high corner pressure potential. | |||
<div | |||
{{ | |||
His strategy revolves around finding ways to get his opponent to make mistakes, and go for big punishes. He has a useful array of big pokes like {{clr|4|5H}} and anti-airs such as Heat Knuckle, and Mega Fist lets him choose his distances a bit more easily. He also gets the jumping I.C.P.M, which can be used for unexpected mobility. | |||
He | |||
Potemkin still traditionally struggles against characters who can stay out of range, but he has some answers to them. Slide Head is a fullscreen shockwave that knocks opponents down, and F.D.B. lets him knock projectiles back at the opponent. He also gets Hammer Fall, which lets him quickly close the distance. While these tools are indeed powerful, they still have weak spots, so simply just moving forward can be quite an uphill battle for Potemkin. If you can get past his lumbering neutral experience, you'll be plowing over opponents with Potemkin's high durability and terrifying pressure. | |||
}} | |||
{{GGXRD-R2/Infobox | |||
| fastestAttack = [[#5P|5P]] (5F) | |||
| reversal = [[#Giganter Kai|632146H]] (9+8F) | |||
}} | |||
{{ProsAndCons | |||
|intro= uses short blockstrings combined with approaching moves like Hammerfall to overwhelm and confuse his opponent into making a mistake, then punishes their reaction or lack thereof. | |||
|pros= | |||
*'''Potemkin Buster:''' The command grab that defines Potemkin. Blazing fast with huge range and damage, it lends itself well for use on offense and on defence when combined with universal mechanics and his great backdash. | |||
* | *'''Powerful Backdash:''' A contender for the best backdash. A very good tool to get out of pressure situations due to being fully invincible until its final frame. | ||
* | *'''Obscene Corner Damage:''' Some of the highest damaging conversions in the game off corner hits or [[#Potemkin Buster|Potemkin Buster]]. | ||
* | *'''High Stun Potential:''' A number of Potemkin's combos use normals with high stun modifiers, making a stun a big threat. His [[#Giganter Kai|Giganter Kai]] super also has a huge stun modifier, giving him combos that stun from one touch. | ||
*'''Massive Stamina:''' The highest effective health in the game. Potemkin has a defense modifier of 0.93. He also has the highest stun resistance in the entire game, making him borderline impossible to stun. | |||
* The highest effective health in the game. Potemkin has a defense modifier of 0.93. | * '''Unique Antizoning Options:''' [[#F.D.B.|F.D.B.]] and [[#Slide_Head|Slidehead]] allow Potemkin to deal with zoning. | ||
|cons= | |||
* | *'''Corner Reliant:''' His midscreen pressure suffers from not having strong ways to discourage {{keyword|Fuzzy Jump}}s and he lacks damage without the corner. Additionally, he lacks stable ways of pushing the opponent into the corner. | ||
*'''Slow:''' Potemkin cannot run or airdash, and has 5f jump startup. This makes approaching the opponent difficult and linear, and [[#Hammer_Fall|Hammerfall]] is not a suitable replacement for these shortcomings. | |||
| | *'''Weak to Zoning:''' While he has [[#F.D.B.|F.D.B.]] and [[#Slide_Head|Slidehead]], Potemkin still struggles to deal with matchups where his opponent would rather stay out of his range. | ||
* | *'''Large:''' Big hurtbox that makes him more susceptible to instant overheads, {{keyword|F-shiki}}s, and character specific combos. | ||
* | }} | ||
* Big hurtbox | |||
|- | |||
</div> | </div> | ||
==Normal Moves== | ==Normal Moves== | ||
===<big>{{clr|1|5P}}</big>=== | |||
{{ | {{GGXRD-R2 Move Card | ||
| | |input=5P | ||
| | |description= | ||
| | Jab. While this is Potemkin's fastest normal, the punching animation is very high, causing it to whiff on crouchers. Because of this, {{clr|1|5P}} is mostly reserved for anti airing rather than abare and other typically standard {{clr|1|5P}} things. | ||
{{ | [[/Frame Data#Gatling Table|Gatling Options]]: {{clr|1|5P}}, {{clr|1|2P}}, {{clr|1|6P}}, {{clr|2|5K}}, {{clr|2|2K}}, {{clr|2|6K}}, {{clr|3|c.S}}, {{clr|3|f.S}}, {{clr|3|2S}}, {{clr|4|5H}}, {{clr|4|2H}}, {{clr|4|6H}}, {{clr|5|5D}}, {{clr|5|2D}} | ||
{{ | }} | ||
{{ | |||
{{ | ===<big>{{clr|2|5K}}</big>=== | ||
{{GGXRD-R2 Move Card | |||
|input=5K | |||
|description= | |||
Low normal that works best as an {{keyword|okizeme}} tool due to its high number of active frames making it very easy to hit {{keyword|meaty}}. Also great for catching backdashes! | |||
[[/Frame Data#Gatling Table|Gatling Options]]: {{clr|2|6K}}, {{clr|3|c.S}}, {{clr|3|f.S}}, {{clr|3|2S}}, {{clr|4|5H}}, {{clr|4|2H}}, {{clr|5|5D}}, {{clr|5|2D}} | |||
}} | }} | ||
===<big>{{clr|3|c.S}}</big>=== | |||
{{ | {{GGXRD-R2 Move Card | ||
| | |input=c.S | ||
| | |description= | ||
| | A quick, close range jump cancellable normal that sees most use as combo or blockstring filler due to its good gatlings and jump cancel. | ||
{{ | [[/Frame Data#Gatling Table|Gatling Options]]: {{clr|2|6K}}, {{clr|3|f.S}}, {{clr|3|2S}}, {{clr|4|5H}}, {{clr|4|2H}}, {{clr|5|5D}}, {{clr|5|2D}} | ||
{{ | |||
{{ | |||
{{ | |||
}} | }} | ||
===<big>{{clr|3|f.S}}</big>=== | |||
{{ | {{GGXRD-R2 Move Card | ||
| | |input=f.S | ||
| | |description= | ||
{{clr|4|5H}}'s higher hitting brother, {{clr|3|f.S}} is a long-range poke with a slight upward angle. Excellent at swatting {{keyword|IAD}}s and distant air approaches as well as controlling the ground in front of Potemkin, even if the reward isn't always high on hit. | |||
{{ | Beware low profile moves such as {{Character Label|GGXRD-R2|Sol Badguy|label=Sol}}'s {{MiniMoveCard|game=GGXRDR2|chara=Sol Badguy|input=214s|label=Grand Viper}}, which will zoom under {{clr|3|f.S}} and punish it. | ||
{{ | |||
{{ | [[/Frame Data#Gatling Table|Gatling Options]]: {{clr|3|2S}}, {{clr|4|5H}}, {{clr|4|2H}}, {{clr|5|5D}}, {{clr|5|2D}} | ||
{{ | |||
}} | }} | ||
===<big>{{clr|4|5H}}</big>=== | |||
{{ | {{GGXRD-R2 Move Card | ||
| | |input=5H | ||
|description= | |||
| | One of Potemkin's best pokes. It is huge, has solid and easy reward on counterhit at most ranges, and is mostly safe on block at -4. Has a lower hitbox than {{clr|3|f.S}}, so it's not recommended to prevent air approaches in the same manner. Can be used to keep opponents honest at range, or to keep them blocking in order to approach with {{MiniMoveCard|input=[4]6H|label=Hammerfall}}. | ||
{{ | Close hit combos directly into Hammerfall. On CH, {{clr|H|5H}} can follow up into Hammerfall from any range, though if it catches an extended hurtbox it can fail to combo. | ||
{{ | |||
{{ | Similar to {{clr|3|f.S}}, this move is susceptible to low profiles. Don't get too predictable! | ||
{{ | |||
[[/Frame Data#Gatling Table|Gatling Options]]: {{clr|5|5D}}, {{clr|5|2D}} | |||
}} | }} | ||
{{ | ===<big>{{clr|5|5D}}</big>=== | ||
| | {{GGXRD-R2 Move Card | ||
| | |input=5D | ||
|description= | |||
Universal overhead. Punish tool, combo tool, and occasional surprise mixup tool. | |||
{{ | |||
{{ | {{clr|5|5D}} has incredible reward when successful. A simple homing dash combo in the corner will deal extreme damage, and a homing jump that ends with {{MiniMoveCard|input=j.41236H|label=I.C.P.M}} has a great deal of corner carry. | ||
{{ | Much like other {{clr|5|5D}}s, it's fairly difficult to use in pressure due to its slow startup, obvious animation, and orange glow. However, its high reward on hit makes it worth going for from time to time, especially when the animation can be hidden via {{MMC|input=214K|label=Trishula}} YRC. | ||
{{ | |||
While it is +1 on block, it's easily disrespected in pressure and the pushback from {{clr|5|5D}} usually pushes Potemkin out too far to continue pressure much less run a mixup. At the very least, you won't be punished. While going for this as a mixup is tempting, don't forget {{MiniMoveCard|input=632146P|label=why you're here.}} | |||
}} | }} | ||
===<big>{{clr|1|6P}}</big>=== | |||
{{ | {{GGXRD-R2 Move Card | ||
| | |input=6P | ||
| | |description= | ||
Potemkin's go-to anti-air. It has impressive upper-body invulnerability and a sizable hitbox, which is important because it's really only any good when it counter hits. | |||
A normal hit will lead to pretty much nothing, except for a very close hit where {{clr|1|5P}} can link into {{MiniMoveCard|input=623H|label=Heat Knuckle}}. On counter hit, it can combo into Heat knuckle at most ranges or go into an air series ending with {{MiniMoveCard|input=j.41236H|label=I.C.P.M}} at certain ranges. | |||
}} | }} | ||
===<big>{{clr|2|6K}}</big>=== | |||
{{ | {{GGXRD-R2 Move Card | ||
| | |input=6K | ||
| | |description= | ||
| | An integral forward advancing normal, both in pressure and in corner combos. | ||
{{ | Since it clears lot of space in a short amount of time, this can be used to stick to the opponent in blockstrings. On normal block, cancelling to {{MiniMoveCard|input=63214S|label=Flick}} leaves a 1f gap, cancelling to {{MiniMoveCard|input=[4]6H|label=Hammerfall}} true strings but a slight delay will leave a gap, and cancelling to Hammerfall Brake will leave Potemkin at +2! When combining all these options, {{clr|2|6K}} becomes a formidable threat as a pressure tool as it becomes a prime point to tick throw, reset pressure, or do a devastating frametrap. | ||
{{ | |||
{{ | A savvy defender will look to instant block this move, as it makes the special cancel gaps larger while making Hammerfall Brake minus. In longer blockstrings, FD can also be used to push Potemkin away, causing {{clr|2|6K}} to whiff if used carelessly. | ||
{{ | |||
* | In the corner, {{clr|2|6K}} works as an excellent frametrap to catch jumps, as on air hit it causes a long enough wallsplat to loop into itself through [{{clr|2|6K}} > Hammerfall Brake]xN. These loops are a staple combo filler in the corner due to their very high damage. | ||
*Staggers on counterhit | |||
}} | }} | ||
===<big>{{clr|4|6H}}</big>=== | |||
{{ | {{GGXRD-R2 Move Card | ||
| | |input=6H | ||
| | |description= | ||
Potemkin's longest reaching normal, and his most damaging, but not suited to standard poking due to its slow startup. Instead, it can be seen as combo filler or as a situational combo starter. | |||
{{ | Midscreen, there is no meterless followup on normal or counter hit, but they are launched a far distance towards the corner. Closer to the corner, {{clr|4|6H}}'s value as a combo starter drastically increases. In the corner, a slightly spaced normal hit {{clr|4|6H}} has meterless followups on a majority of the cast that leads to dealing 50%, and a counterhit {{clr|4|6H}} will lead to a practical, meterless TOD on half the cast from slightly closer than round start spacing between characters. As a result, {{clr|4|6H}} is most commonly used to fish for counterhits, as punish against incredibly unsafe moves, or on stunned opponents. | ||
{{ | |||
{{ | |||
*On hit, blows the opponent backwards. Grounded hits float upward slightly in addition to this. | *On hit, blows the opponent backwards. Grounded hits float upward slightly in addition to this. | ||
}} | }} | ||
===<big>{{clr|1|2P}}</big>=== | |||
{{GGXRD-R2 Move Card | |||
|input=2P | |||
|description= | |||
{{clr|1|2P}} is a great normal that does just about everything you could ask of a {{clr|P|P}} normal, except anti air. | |||
It has amazing range that reaches at round start, and is only 6f {{keyword|Startup}}, making it a great abare tool when {{MiniMoveCard|input=632146P|label=Buster}} doesn't work, and it has a short total duration and good active frames making it a good low-commitment poke. It also has great gatlings making it a good pressure starter as well as being able to combo into {{clr|2|5K}} and {{clr|2|2K}} at close range, but they can whiff at max range. | |||
[[/Frame Data#Gatling Table|Gatling Options]]: {{clr|1|5P}}, {{clr|1|2P}}, {{clr|1|6P}}, {{clr|2|5K}}, {{clr|2|2K}}, {{clr|2|6K}}, {{clr|3|c.S}}, {{clr|3|f.S}}, {{clr|3|2S}}, {{clr|4|5H}}, {{clr|4|2H}}, {{clr|5|5D}}, {{clr|5|2D}} | |||
}} | |||
===<big>{{clr|2|2K}}</big>=== | |||
{{GGXRD-R2 Move Card | |||
|input=2K | |||
|description= | |||
{{clr|2|2K}} is a simple normal. It is faster than {{clr|2|5K}} and better range, making it more desirable in neutral and pressure while {{clr|2|5K}} remains preferable for oki. It has good gatlings, but it only combos into {{clr|3|c.S}}, {{clr|3|f.S}}, and {{clr|5|2D}}. | |||
[[/Frame Data#Gatling Table|Gatling Options]]: {{clr|2|6K}}, {{clr|3|c.S}}, {{clr|3|f.S}}, {{clr|3|2S}}, {{clr|4|2H}}, {{clr|5|5D}}, {{clr|5|2D}} | |||
}} | |||
===<big>{{clr|3|2S}}</big>=== | |||
{{GGXRD-R2 Move Card | |||
|input=2S | |||
|description= | |||
{{clr|3|2S}} is a fairly large button that sees use in pressure and in neutral as a poke. | |||
Lots of normals gatling into this, and it staggers on counterhit, making it a good frametrap tool. When combined with its {{clr|2|6K}} gatling, {{clr|3|2S}} being 0 on block when cancelled to Hammerfall Brake turns it into a solid point to tick throw, reset pressure, and frametrap from. Though it has less range than {{clr|3|f.S}} and {{clr|4|5H}}, it can also be used as a poke as it gatlings to {{clr|5|2D}} for a simple knockdown at all ranges | |||
[[/Frame Data#Gatling Table|Gatling Options]]: {{clr|2|6K}}, {{clr|4|2H}}, {{clr|5|5D}}, {{clr|5|2D}} | |||
}} | |||
===<big>{{clr|4|2H}}</big>=== | |||
{{GGXRD-R2 Move Card | |||
|input=2H | |||
|description= | |||
{{clr|4|2H}} is a slow but high reaching normal with short horizontal range. One of Potemkin's best counterhit starters, and decent at anti airing too. | |||
As an anti-air, this normal is not recommended over {{clr|1|6P}} as it has no upper body invuln with similar startup, but is still usable on prediction. Its high vertical reach makes it best used on hard reading an air approach, or to hit someone high in the sky | |||
On hit, {{clr|4|2H}} combos into an air series using {{MiniMoveCard|input=[4]6H|label=Hammerfall}} Brake. On counter hit, the victim is unable to tech at all, leading to big damage and corner carry, or even a stun with {{MiniMoveCard|input=632146H|label=Giganter Kai}}. When combined with Hammerfall Brake making {{clr|4|2H}} +2 on block, this normal becomes a dangerous threat when applied properly. | |||
[[/Frame Data#Gatling Table|Gatling Options]]: {{clr|5|5D}}, {{clr|5|2D}} | |||
}} | |||
===<big>{{clr|5|2D}}</big>=== | |||
{{GGXRD-R2 Move Card | |||
|input=2D | |||
|description= | |||
Complimentary low poke to {{clr|2|2K}} and key grounded knockdown button with massive range. | |||
Most grounded combos will end in this normal as it gives Potemkin a safejump on hit, or just a normal meaty. In pressure, {{clr|5|2D}}'s lack of cancel options means that it ends his pressure on block, but it's nigh unpunishable at only -2 with decent pushback. It can also be used as a meaty low on oki when out of {{clr|2|5K}} range, but it's often better to use a normal with special cancels, like {{clr|3|f.S}} to continue pressure. | |||
Thanks to its raised hurtbox, {{clr|D|2D}} can also be used as an effective counterpoke against lows that have thin, low to the ground hitboxes like {{MMC|chara=Ky Kiske|input=2D|hitboxMode=true|label=Ky's {{clr|D|2D}}}} and {{MMC|chara=Slayer|input=2K|hitboxMode=true|label=Slayer's {{clr|K|2K}}}} | |||
*Cannot be special cancelled | |||
}} | |||
===<big>{{clr|1|j.P}}</big>=== | |||
{{GGXRD-R2 Move Card | |||
|input=j.P | |||
|description= | |||
A quick elbow jab. Gatlings into all air normals including itself. Combined with its good hitbox and speed, {{clr|1|j.P}} is an ideal air-to-air and rising anti-air normal. On block, keep pressing it until you both land and you can start pressure. | |||
Potemkin's hurtbox shrinks a little when using this normal, but it's not something to rely on. | |||
[[/Frame Data#Gatling Table|Gatling Options]]: {{clr|1|j.P}}, {{clr|2|j.K}}, {{clr|3|j.S}}, {{clr|4|j.H}}, {{clr|5|j.D}} | |||
}} | }} | ||
===<big>{{clr|2|j.K}}</big>=== | |||
{{ | {{GGXRD-R2 Move Card | ||
|input=j.K | |||
| | |description= | ||
| | Potemkin's only jump cancellable air normal. Useful in air combos as it gatlings to {{clr|3|j.S}} as well as comboing into {{MiniMoveCard|input=j.41236H|label=I.C.P.M}} at low hitstun decay, but is otherwise unremarkable. | ||
{{ | [[/Frame Data#Gatling Table|Gatling Options]]: {{clr|1|j.P}}, {{clr|3|j.S}} | ||
{{ | |||
{{ | |||
}} | }} | ||
{{ | ===<big>{{clr|3|j.S}}</big>=== | ||
| | {{GGXRD-R2 Move Card | ||
| | |input=j.S | ||
| | |description= | ||
Probably Potemkin's best air normal. Has a great hitbox for covering space in front of and below him. Great for safejumps, general jump-ins, and air-to-airs. | |||
{{ | |||
{{ | As it gatlings into {{clr|1|j.P}} and {{clr|4|j.H}}, Potemkin can go for silly tick throws with {{clr|1|j.P}} and double overheads with {{clr|4|j.H}} if {{clr|3|j.S}} connects high enough | ||
{{ | |||
{{ | *Staggers on grounded counterhit | ||
[[/Frame Data#Gatling Table|Gatling Options]]: {{clr|1|j.P}}, {{clr|4|j.H}}, {{clr|5|j.D}} | |||
}} | }} | ||
{{ | ===<big>{{clr|4|j.H}}</big>=== | ||
| | {{GGXRD-R2 Move Card | ||
|input=j.H | |||
| | |description= | ||
The classic grappler body splash. Much like other body splashes, this hits both in front of and behind Potemkin. {{clr|4|j.H}} serves mostly the same purposes as {{clr|3|j.S}}, at the cost of slightly more pushback on block. | |||
{{ | |||
{{ | Combos into {{MiniMoveCard|input=j.41236H|label=I.C.P.M}} at certain heights, so a successful air-to-air with {{clr|3|j.S}} or {{clr|1|j.P}} can be highly rewarding even if the conversion can be a little finicky. | ||
{{ | |||
{{ | |||
}} | }} | ||
{{ | ===<big>{{clr|5|j.D}}</big>=== | ||
| | {{GGXRD-R2 Move Card | ||
|input=j.D | |||
| | |description= | ||
The Pot Butt. Stalls him for a moment mid-air before rapidly falling to the ground. | |||
{{ | Though his extended arms widen his hurtbox, {{clr|5|j.D}} is fully disjointed at the base. Ground bounces on counterhit, but it is extremely rare to get a meaningful conversion from this. | ||
}} | }} | ||
======< | |||
{{ | ==Universal Mechanics== | ||
===<big>Ground Throw</big>=== | |||
{{GGXRD-R2 Move Card | |||
|input=Ground Throw | |||
|description= | |||
Potemkin's standard throw. This is used nearly exclusively as a defensive tool as it's 1f and gives oki on connect, and Potemkin Buster already exists for an offensive throw. | |||
}} | }} | ||
{{ | ===<big>Air Throw</big>=== | ||
| | {{GGXRD-R2 Move Card | ||
| | |input=Air Throw | ||
|description= | |||
The air equivalent to ground throw. Works as an anti-air occasionally when {{clr|1|6P}} and other anti air normals might fail. Always grants oki on connect | |||
{{ | |||
}} | }} | ||
{{ | ===<big>Dead Angle Attack</big>=== | ||
| | {{GGXRD-R2 Move Card | ||
| | |input=DAA | ||
|description= | |||
Pretty generic mid hitting DA that uses the animation of {{clr|5|5D}}. Has a deadzone point blank, and can be {{clr|1|6P}}'d due to the extended hurtbox | |||
{{ | |||
}} | }} | ||
{{ | ===<big>Blitz Attack</big>=== | ||
| | {{GGXRD-R2 Move Card | ||
| | |input=Blitz,[Blitz]|versioned=name | ||
| | |description= | ||
Universal Blitz Attack. | |||
}} | }} | ||
======< | |||
{{ | ==Special Moves== | ||
===<big>Heat Knuckle</big>=== | |||
| | {{InputBadge|{{clr|4|623H}}}} | ||
| | {{GGXRD-R2 Move Card | ||
|input=623H,Heat Knuckle > 63214H|versioned=input | |||
|description= | |||
{{ | Potemkin's ground-to-air hitgrab. At first glance, Heat Knuckle appears to be a decent anti-air, but its true purpose lies in preventing opponents from jumping out of pressure. On hit, it blows them away and they can air tech. | ||
{{ | As Heat Knuckle is an unblockable strike, it can be blitz shielded. This is important to know both as and against Potemkin, since it can make jumping out safer to Heat Knuckle. {{MiniMoveCard|input=236236S|label=That won't always save you, though...}} | ||
*At low hitstun decay, Heat Knuckle combos into itself once in the corner for massive meter build. | |||
---- | |||
;Heat Knuckle > {{clr|H|63214H}} | |||
Heat Extend is the followup to Heat Knuckle that tacks on a chunk of damage and send the victim full screen in a hard knockdown. | |||
Since Heat Knuckle never knocks down, there's no reason not to use Extend save for those few instances where double Heat Knuckle is possible. | |||
*At high hitstun decay, Heat Extend allows them to air tech and should be avoided as a combo ender in those long combos. | |||
}} | }} | ||
{{ | ===<big>Megafist</big>=== | ||
| | {{InputBadge|{{clr|1|236P}}\{{clr|1|214P}}}} | ||
| | {{GGXRD-R2 Move Card | ||
|input=236P,214P | |||
|versioned=input | |||
|description= | |||
{{ | Potemkin leaps forward or backward with a heavy double-punch. Though he isn't airborne immediately, he does get some lower body invulnerability from frame 1 which persists all the way into Megafist's recovery. | ||
----- | |||
{{ | ;{{clr|P|236P}} | ||
Forward Megafist is a good neutral tool that can jump over many normals, particularly low pokes, with a good hitbox that's hard to contest. Unfortunately, it's held back by being minus on hit, which is punishable with a throw if spaced poorly. However, this doesn't mean Forward Megafist can't be used in pressure: properly spaced, its a good way to advance and nullify FD's pushback, or to work around otherwise-guaranteed punishes after the opponent IBs a normal. | |||
YRC can also help circumvent its poor reward - hopping over a normal with Forward Megafist, then using YRC while midair will allow Potemkin to punish with an air normal and convert into a knockdown. Forward Megafist is also a very strong option during Danger Time, since it's a fairly quick and evasive overhead that converts into {{clr|5|5D}} on mortal counter. | |||
*Air hit causes a hard knockdown | |||
----- | |||
;{{clr|P|214P}} | |||
Backwards Megafist is the defensive variant of Megafist, as it moves backwards in exchange for much better frame data and a stagger on counterhit. | |||
Combined with IB and other universal mechanics, Back Megafist can be a powerful defensive tool to get out of pressure against strings into low hitbox normals, such as gatlings into {{Character Label|GGXRD-R2|Faust|label=Faust}}'s {{clr|4|{{MiniMoveCard|game=GGXRDR2|chara=Faust|input=2h|label=2H}}}}. Back Megafist can also discourage resetting pressure, as an attacker may find themself running into its hitbox while Potemkin disengages | |||
}} | }} | ||
===<big>Slide Head</big>=== | |||
{{InputBadge|{{clr|3|236S}}}} | |||
{{ | {{GGXRD-R2 Move Card | ||
| | |input=236S | ||
| | |description= | ||
| | Slide Head is one of Potemkin's two primary anti-zoning tools, the other being {{MiniMoveCard|input=63214S|label=F.D.B.}} | ||
{{ | This attack actually has two stages. The first is a standard attack that hits low with an extra long hard knockdown on hit. Once he lands, the second part of the move is a fullscreen unblockable projectile on the ground. If the opponent is grounded and not invincible, they will be knocked down for a similarly long hard knockdown. This long knockdown allows Potemkin to link an {{keyword|IAS}} {{MiniMoveCard|input=j.41236H|label=I.C.P.M}} or {{MiniMoveCard|input=[4]6H|label=Hammerfall}} up close for a normal meaty. | ||
{{ | |||
{{ | Slide Head can also be timed so that the shockwave hits meaty. Only a reversal backdash, blitz, or another move with frame-one invuln/airborne state, will save an opponent from this. In the corner, this can be converted into an IAS I.C.P.M, or an RRC can convert into {{clr|2|6K}} loops, but anywhere else there is little reason to do this as a weak OTG hit is the only followup | ||
{{ | |||
Some characters have dashes that are considered airborne, which allow them to avoid the shockwave simply by dashing forward ({{Character Label|GGXRD-R2|I-No|label=I-No}}, {{Character Label|GGXRD-R2|Ramlethal Valentine|label=Ramlethal}}, {{Character Label|GGXRD-R2|Dizzy|label=Dizzy}}, {{Character Label|GGXRD-R2|Johnny|label=Johnny}}, and more). Generally these dashes have obvious effects, like teleportation, or make a distinctive sound when starting up to indicate their unique status. As well as this, some characters have animations that inexplicably avoid the shockwave, such as {{Character Label|GGXRD-R2|Sol Badguy|label=Sol}}'s slide when he stops running. | |||
Slide Head has some upper body invincibility as it starts up. This window of upper body invincibility is also active during the YRC window so there is value in using Slide Head as a gimmicky anti-air against air dashes, where an air normal may whiff YRCing can allow Potemkin to punish that whiff. In addition, the upper body invincibility can be used to make a fireball or mid-hitting poke whiff, but all of these "tricks" are unreliable. | |||
*Doing I.C.P.M as an OTG hit after Slide Head causes a significantly faster wakeup than the usual time after I.C.P.M, so be prepared | |||
*If the first, low hitting part of the attack connects at all, the unblockable projectile will not occur | |||
*There is a window in which Potemkin can hit the ground and create the shockwave effects, but then YRC before the actual shockwave occurs. Essentially useless, save the meter | |||
}} | }} | ||
===<big>Hammer Fall</big>=== | |||
{{ | {{InputBadge|{{clr|4|[4]6H}}}} | ||
| | {{GGXRD-R2 Move Card | ||
|input=[4]6H | |||
| | |description= | ||
Potemkin's go-to mobility and pressure tool. He lunges forward on the ground, attacking only once he's in range of the opponent. | |||
{{ | Potemkin can travel about 3/4 of a screen length like this, and the attack only goes active if the opponent is in range to be hit by it (though, if they're moving at the time, the actual attack portion's startup may still cause it to miss). While traveling forward, Potemkin has a single hit of super armor, which will absorb any attack besides Overdrives for half damage and keep on truckin'. | ||
Since it's very punishable on block, its a risky move to use without meter to RC it. Also has some utility in combos, as it floats on hit, with long untechable time on counter hit. Mostly, though, it's used for Hammerfall Brake. | |||
}} | }} | ||
===<big>Hammer Fall Break</big>=== | |||
* | {{InputBadge|{{clr|P|P}} during Hammer Fall}} | ||
{{GGXRD-R2 Move Card | |||
|input=Hammer Fall > P | |||
|versioned=input | |||
|description= | |||
By hitting {{clr|1|P}} during a Hammerfall, Potemkin comes to a sudden stop, so long as the attack hasn't started. This allows him to, for example: | |||
*Absorb the hit of an obvious attack with long recovery, Brake, and punish. | |||
*Cancel into Hammerfall during a block string, stop early, and tick grab/punish escape attempt/continue pressure. | |||
*Create combos by canceling attacks into Hammerfall, Braking, then following up. (Especially common after {{clr|4|2H}} or cornered {{clr|2|6K}}s!) | |||
{{#lst:GGXRD-R2/Potemkin/Data|HFB Table}} | |||
}} | }} | ||
===<big>F.D.B.</big>=== | |||
{{ | {{InputBadge|{{clr|3|63214S}} (Hold OK)}} | ||
| | {{GGXRD-R2 Move Card | ||
| | |input=63214S,63214[S],Reflect Projectile | ||
| | |versioned=input | ||
{{ | |description= | ||
Also known as "Flick". Potemkin kneels down and props his arm up, storing up energy and unleashing it with a quick flick. The flick itself has a massive hitbox, much larger than its animation suggests, and can stagger opponents on hit or keep Potemkin safe on block. Its fast startup creates opportunities for combos on the ground, especially after {{clr|2|6K}}. | |||
*Holding {{clr|S|S}} delays flick. | |||
---- | |||
;Reflecting | |||
While F.D.B. is starting up (frames 4~18), if a projectile attack hits Potemkin, he'll reflect it back with the flick as a screen-filling wave of explosions. This wave eats up other projectiles it meets, and if it hits the opponent on the ground, will cause them to stagger (on air hit they just get floated a bit, but the untech time is still decent). This instant flick also makes Potemkin recover ''significantly'' faster, allowing him to capitalize on this new pressure he's created. | |||
*If Potemkin reflects a projectile, he becomes strike invulnerable until he recovers. | |||
*The strength of the relfected projectile is high enough that it will usually erase any other projectile on contact. | |||
<!--table start--> | |||
{{(!}} class="mw-collapsible mw-collapsed wikitable" | |||
{{!}}- | {{!}}- | ||
! colspan=2 {{!}}'''Reflectable Projectiles Table''' | |||
{{ | |||
{{!}}- | {{!}}- | ||
!Character | |||
!Move | |||
{{!}}- | {{!}}- | ||
{{ | {{!}}{{Character Label|GGXRD-R2|Answer|label=Answer}} | ||
{{!}} | |||
{{MiniMoveCard|game=GGXRDR2|chara=Answer|input=236S|label=Business Ninpo: Caltrops}} | |||
{{MiniMoveCard|game=GGXRDR2|chara=Answer|input=421S/H|label=Business Ninpo: Under the Bus}} | |||
}} | |||
{{!}}- | {{!}}- | ||
{{ | {{!}}{{Character Label|GGXRD-R2|Axl Low|label=Axl}} | ||
{{ | {{!}} | ||
{{MiniMoveCard|game=GGXRDR2|chara=Axl Low|input=[4]6S|label=Sickle Flash}} | |||
{{MiniMoveCard|game=GGXRDR2|chara=Axl Low|input=41236H|label=Spindle Spinner}} | |||
{{!}}- | {{!}}- | ||
{{ | {{!}}{{Character Label|GGXRD-R2|Baiken|label=Baiken}} | ||
{{ | {{!}} | ||
{{MiniMoveCard|game=GGXRDR2|chara=Baiken|input=236K|label=Tatami Gaeshi}} | |||
{{MiniMoveCard|game=GGXRDR2|chara=Baiken|input=Ground Azami > D|label=Yashagatana}} | |||
{{!}}- | {{!}}- | ||
{{ | {{!}}{{Character Label|GGXRD-R2|Bedman|label=Bedman}} | ||
{{!}} | |||
{{MiniMoveCard|game=GGXRDR2|chara=Bedman|input=236P|label=Task A}} | |||
{{MiniMoveCard|game=GGXRDR2|chara=Bedman|input=236K|label=Task A'}} | |||
{{MiniMoveCard|game=GGXRDR2|chara=Bedman|input=214X|label=Deja Vu}} (All versions.) | |||
{{!}}- | |||
{{!}}{{Character Label|GGXRD-R2|Chipp Zanuff|label=Chipp}} | |||
{{!}} | |||
{{MiniMoveCard|game=GGXRDR2|chara=Chipp Zanuff|input=41236H|label=Gamma Blade}} | |||
{{MiniMoveCard|game=GGXRDR2|chara=Chipp Zanuff|input=j.214P Slow|label=Shuriken}} | |||
{{MiniMoveCard|game=GGXRDR2|chara=Chipp Zanuff|input=Wall Cling > K|label=Kunai}} | |||
{{!}}- | |||
{{!}}{{Character Label|GGXRD-R2|Dizzy|label=Dizzy}} | |||
}} | {{!}} | ||
{{MiniMoveCard|game=GGXRDR2|chara=Dizzy|input=236S|label=I used this to catch fish}} | |||
{{MiniMoveCard|game=GGXRDR2|chara=Dizzy|input=236H|label=For searing cod...}} | |||
{{MiniMoveCard|game=GGXRDR2|chara=Dizzy|input=421S|label=I used this to pick fruit}} | |||
{{MiniMoveCard|game=GGXRDR2|chara=Dizzy|input=421H|label=For roasting chestnuts...}} | |||
{{MiniMoveCard|game=GGXRDR2|chara=Dizzy|input=214P|label=We talked a lot together}} (The projectile will immediately hit the fish.) | |||
{{MiniMoveCard|game=GGXRDR2|chara=Dizzy|input=214S|label=We fought a lot together}} (Only the S/H versions.) | |||
{{MiniMoveCard|game=GGXRDR2|chara=Dizzy|input=236P|label=For putting out the light}} | |||
{{MiniMoveCard|game=GGXRDR2|chara=Dizzy|input=236K|label=The light was so small in the beginning}} | |||
{{MiniMoveCard|game=GGXRDR2|chara=Dizzy|input=j.236P|label=Please leave me alone}} (The bubble's explosion.) | |||
{{MiniMoveCard|game=GGXRDR2|chara=Dizzy|input=j.236K|label=What happens when I'm TOO alone}} (The bubble's explosion.) | |||
{{!}}- | {{!}}- | ||
{{ | {{!}}{{Character Label|GGXRD-R2|Elphelt Valentine|label=Elphelt}} | ||
{{ | {{!}} | ||
{{MiniMoveCard|game=GGXRDR2|chara=Elphelt Valentine|input=236P|label=Pineberry}} (Both the toss and the explosion.) | |||
{{MiniMoveCard|game=GGXRDR2|chara=Elphelt Valentine|input=236S|label=Miss Confire}} | |||
{{!}}- | {{!}}- | ||
{{ | {{!}}{{Character Label|GGXRD-R2|Faust|label=Faust}} | ||
{{ | {{!}} | ||
{{MiniMoveCard|game=GGXRDR2|chara=Faust|input=5D Reflect|label=5D Reflect}} (The resulting baseball from a successful reflect.) | |||
{{MiniMoveCard|game=GGXRDR2|chara=Faust|input=j.236P|label=Love}} (Only the thrown bag, not the explosion itself.) | |||
{{MiniMoveCard|game=GGXRDR2|chara=Faust|input=236P|label=What Could This Be?}}/{{MiniMoveCard|game=GGXRDR2|chara=Faust|input=236236P|label=W-W-What Could This Be?}} | |||
{{MiniMoveCard|game=GGXRDR2|chara=Faust|input=Hammer|label=Hammer}}/{{MiniMoveCard|game=GGXRDR2|chara=Faust|input=Golden Hammer|label=Golden Hammer}} | |||
{{MiniMoveCard|game=GGXRDR2|chara=Faust|input=Chibi Faust|label=Chibi Faust}}/{{MiniMoveCard|game=GGXRDR2|chara=Faust|input=Large Faust|label=Large Faust}} | |||
{{MiniMoveCard|game=GGXRDR2|chara=Faust|input=Bomb|label=Bomb}}/{{MiniMoveCard|game=GGXRDR2|chara=Faust|input=Fireworks|label=Fireworks}} | |||
{{MiniMoveCard|game=GGXRDR2|chara=Faust|input=Meteors|label=Meteors}}/{{MiniMoveCard|game=GGXRDR2|chara=Faust|input=Gigantic Meteor|label=Gigantic Meteor}} | |||
{{MiniMoveCard|game=GGXRDR2|chara=Faust|input=Poison|label=Poison}} | |||
{{MiniMoveCard|game=GGXRDR2|chara=Faust|input=100 Ton Weight|label=100 Ton Weight/10,000 Ton Weight}}<br>(Both the weight itself and the shockwave.) | |||
{{MiniMoveCard|game=GGXRDR2|chara=Faust|input=Oil Combustion|label=Oil Combustion}} | |||
{{MiniMoveCard|game=GGXRDR2|chara=Faust|input=Jump Pad|label=Jump Pad}} (After it lands.) | |||
{{!}}- | {{!}}- | ||
{{ | {{!}}{{Character Label|GGXRD-R2|I-No|label=I-No}} | ||
{{!}} | |||
{{MiniMoveCard|game=GGXRDR2|chara=I-No|input=5D|label=5D}} (Only after being YRC'd.) | |||
{{MiniMoveCard|game=GGXRDR2|chara=I-No|input=214P|label=Antidepressant Scale}} | |||
{{MiniMoveCard|game=GGXRDR2|chara=I-No|input=214K|label=Chemical Love}} | |||
{{MiniMoveCard|game=GGXRDR2|chara=I-No|input=214S|label=Chemical Love (Vertical)}} | |||
{{!}}- | |||
{{!}}{{Character Label|GGXRD-R2|Jack-O|label=Jack-O}} | |||
{{!}} | |||
{{MiniMoveCard|game=GGXRDR2|chara=Jack-O|input=j.D|label=Remove the Chain of Chiron}} | |||
{{MiniMoveCard|game=GGXRDR2|chara=Jack-O|input=Ghost 5P/K/S|label=Ghost Throw}} | |||
{{MiniMoveCard|game=GGXRDR2|chara=Jack-O|input=Organ > S|label=Explode}} | |||
All Servant attacks. | |||
{{!}}- | |||
{{!}}{{Character Label|GGXRD-R2|Jam Kuradoberi|label=Jam}} | |||
{{!}} | |||
}} | N/A | ||
{{!}}- | {{!}}- | ||
{{ | {{!}}{{Character Label|GGXRD-R2|Johnny|label=Johnny}} | ||
{{!}} | |||
{{MiniMoveCard|game=GGXRDR2|chara=Johnny|input=236H|label=Glitter is Gold}} | |||
{{MiniMoveCard|game=GGXRDR2|chara=Johnny|input=623K > K|label=Zweihander}} | |||
{{!}}- | {{!}}- | ||
{{ | {{!}}{{Character Label|GGXRD-R2|Kum Haehyun|label=Kum}} | ||
{{!}} | |||
{{MiniMoveCard|game=GGXRDR2|chara=Kum Haehyun|input=5D|label=5D}} (Only after being YRC'd.) | |||
{{MiniMoveCard|game=GGXRDR2|chara=Kum Haehyun|input=236S|label=Tuning Ball}} | |||
{{!}}- | |||
{{!}}{{Character Label|GGXRD-R2|Ky Kiske|label=Ky}} | |||
{{!}} | |||
{{MiniMoveCard|game=GGXRDR2|chara=Ky Kiske|input=5D|label=5D}} | |||
{{MiniMoveCard|game=GGXRDR2|chara=Ky Kiske|input=j.D|label=j.D}} | |||
{{MiniMoveCard|game=GGXRDR2|chara=Ky Kiske|input=236S|label=Stun Edge}} | |||
{{MiniMoveCard|game=GGXRDR2|chara=Ky Kiske|input=236H|label=Charged Stun Edge}} | |||
{{MiniMoveCard|game=GGXRDR2|chara=Ky Kiske|input=j.236S|label=Air Stun Edge}} | |||
{{!}}- | |||
{{!}}{{Character Label|GGXRD-R2|Leo Whitefang|label=Leo}} | |||
{{!}} | |||
{{MiniMoveCard|game=GGXRDR2|chara=Leo Whitefang|input=[4]6S|label=Graviert Wurde}} | |||
{{!}}- | |||
{{!}}{{Character Label|GGXRD-R2|May|label=May}} | |||
{{!}} | |||
{{MiniMoveCard|game=GGXRDR2|chara=May|input=41236P/S|label=Applause for the Victim}} (As long as she's not riding it.) | |||
{{MiniMoveCard|game=GGXRDR2|chara=May|input=214P|label=Don't Miss It!}} | |||
{{!}}- | |||
{{!}}{{Character Label|GGXRD-R2|Millia Rage|label=Millia}} | |||
}} | {{!}} | ||
{{MiniMoveCard|game=GGXRDR2|chara=Millia Rage|input=236S|label=Tandem Top}} | |||
{{MiniMoveCard|game=GGXRDR2|chara=Millia Rage|input=j.214S|label=Silent Force}} | |||
{{MiniMoveCard|game=GGXRDR2|chara=Millia Rage|input=214H|label=Secret Garden}} | |||
{{!}}- | {{!}}- | ||
{{ | {{!}}{{Character Label|GGXRD-R2|Potemkin|label=Potemkin}} | ||
{{ | {{!}} | ||
{{MiniMoveCard|game=GGXRDR2|chara=Potemkin|input=236S|label=Slide Head}} | |||
{{MiniMoveCard|game=GGXRDR2|chara=Potemkin|input=214K|label=Trishula}} | |||
{{MiniMoveCard|game=GGXRDR2|chara=Potemkin|input=Reflect Projectile|label=F.D.B. Projectile}} | |||
{{!}}- | {{!}}- | ||
{{ | {{!}}{{Character Label|GGXRD-R2|Ramlethal Valentine|label=Ramlethal}} | ||
{{ | {{!}} | ||
{{MiniMoveCard|game=GGXRDR2|chara=Ramlethal Valentine|input=2S Deployed|label=Deploy Giant Sword}} (All versions.) | |||
{{MiniMoveCard|game=GGXRDR2|chara=Ramlethal Valentine|input=214P|label=Cassius}} | |||
{{!}}- | {{!}}- | ||
{{ | {{!}}{{Character Label|GGXRD-R2|Raven|label=Raven}} | ||
{{!}} | |||
{{MiniMoveCard|game=GGXRDR2|chara=Raven|input=236P|label=Schmerz Berg}} | |||
{{MiniMoveCard|game=GGXRDR2|chara=Raven|input=j.236P/K|label=Gebrechlich Licht}} | |||
{{MiniMoveCard|game=GGXRDR2|chara=Raven|input=236H Level 0-2|label=Scharf Kugel}} | |||
{{!}}- | |||
{{!}}{{Character Label|GGXRD-R2|Sin Kiske|label=Sin}} | |||
{{!}} | |||
N/A | |||
{{!}}- | |||
}} | {{!}}{{Character Label|GGXRD-R2|Slayer|label=Slayer}} | ||
{{!}} | |||
{{MiniMoveCard|game=GGXRDR2|chara=Slayer|input=Dandy > H|label=Helter Skelter}} | |||
{{!}}- | {{!}}- | ||
{{ | {{!}}{{Character Label|GGXRD-R2|Sol Badguy|label=Sol}} | ||
{{ | {{!}} | ||
{{MiniMoveCard|game=GGXRDR2|chara=Sol Badguy|input=236P|label=Gun Flame}} | |||
{{MiniMoveCard|game=GGXRDR2|chara=Sol Badguy|input=j.214K|label=Break}} | |||
{{!}}- | {{!}}- | ||
{{ | {{!}}{{Character Label|GGXRD-R2|Venom|label=Venom}} | ||
{{!}} | |||
{{MiniMoveCard|game=GGXRDR2|chara=Venom|input=Ball Hit|label=Ball Hit}} | |||
{{MiniMoveCard|game=GGXRDR2|chara=Venom|input=41236P/K/S/H|label=QV}} | |||
{{MiniMoveCard|game=GGXRDR2|chara=Venom|input=[4]6S Level 0|label=Stinger Aim}} | |||
{{MiniMoveCard|game=GGXRDR2|chara=Venom|input=[2]8S|label=Carcass Raid}} | |||
{{!}}- | {{!}}- | ||
{{ | {{!}}{{Character Label|GGXRD-R2|Zato-1|label=Zato-1}} | ||
{{!}} | |||
{{MiniMoveCard|game=GGXRDR2|chara=Zato-1|input=22S|label=Invite Hell}} | |||
{{MiniMoveCard|game=GGXRDR2|chara=Zato-1|input=Eddie ]D[|label=Drill Special}} | |||
{{!)}} | |||
<!--table end--> | |||
}} | }} | ||
===<big>Potemkin Buster</big>=== | |||
{{ | {{InputBadge|{{clr|1|632146P}}}} | ||
{{GGXRD-R2 Move Card | |||
|input=632146P | |input=632146P | ||
| | |description= | ||
Potemkin's signature attack, and one of the scariest command grabs in all of fighting games. Deals high damage, has surprisingly long reach and incredibly fast startup. | |||
Potemkin can even leverage his incredible backdash invuln and pair it with that of Potemkin Buster's to slip through blockstrings and punish moves that are normally active enough to beat backdashes. | |||
With meter, Potemkin can combo via RCing as he throws the opponent away, jumping forward and hitting {{clr|4|j.H}} late, then following up on the ground with something like {{clr|3|c.S}} > {{clr|3|f.S}} > Heat Knuckle, or a {{clr|2|6K}} loop if in the corner. | |||
}} | }} | ||
===<big>Trishula</big>=== | |||
{{ | {{InputBadge|{{clr|2|214K}}}} | ||
{{GGXRD-R2 Move Card | |||
|input=214K | |input=214K | ||
| | |description= | ||
Potemkin hunkers down before exploding in a pillar of fire. Combo tool and situational anti-air. | |||
Has high vertical reach, far past what the animation suggests, but almost none horizontally. Trishula launches the opponent on hit and also pulls them slightly inward, with time to {{tt|air combo|usually with superjump {{clr|1|j.P}} > {{clr|2|j.K}} > {{clr|3|j.S}} > ICPM}}. Scoring a counter hit near the corner grants {{clr|4|6H}} combos. | |||
Absorbs projectiles while starting up, and has upper body invulnerability to boot. | Absorbs projectiles while starting up, and has upper body invulnerability to boot, but is mostly used as combo tool or to catch really obvious air approaches. | ||
*Potemkin is in counter hit state during recovery. | |||
}} | }} | ||
===<big>I.C.P.M</big>=== | |||
{{ | {{InputBadge|{{clr|4|j.41236H}}}} | ||
| | {{GGXRD-R2 Move Card | ||
|input=j.41236H | |input=j.41236H | ||
| | |description= | ||
| | Potemkin propels himself through the air in an arc, leaving smoke in his wake. The move is active until Potemkin hits the ground. If he hits his opponent, they're pinned to his Pickelhaube and are dragged to the ground with him. If he misses, he sticks in the ground himself and is stuck there briefly before recovering, very unsafe on block/whiff. | ||
*If YRC'd during the start of the launch, Potemkin is launched across the stage extremely fast and remains completely actionable which can lead to some silly setups or some unexpected movement/mixups | |||
*Potemkin can RRC when he has pinned his opponent and combo afterwards. | |||
Potemkin gets significant advantage on wakeup against opponents hit by ICPM, which varies based on the opponent's wake-up timing: | |||
{{(!}} class="mw-collapsible mw-collapsed wikitable stripe" | |||
! colspan="2"{{!}}'''Advantage Table''' | |||
{{!}}- | |||
{{!}} 20F {{!}}{{!}} {{CLabel|GGXRD-R2|Venom|label=VE}} | |||
{{!}}- | |||
{{!}} 22F {{!}}{{!}} {{CLabel|GGXRD-R2|Ky|label=KY}} | |||
{{!}}- | |||
{{!}} 23F {{!}}{{!}} {{CLabel|GGXRD-R2|Potemkin|label=PO}}, {{CLabel|GGXRD-R2|Bedman|label=BE}}, {{CLabel|GGXRD-R2|I-No|label=IN}} | |||
{{!}}- | |||
{{!}} 24F {{!}}{{!}} {{CLabel|GGXRD-R2|Answer|label=AN}}, {{CLabel|GGXRD-R2|Axl|label=AX}}, {{CLabel|GGXRD-R2|Baiken|label=BA}}, {{CLabel|GGXRD-R2|Chipp|label=CH}}, {{CLabel|GGXRD-R2|Dizzy|label=DI}} {{CLabel|GGXRD-R2|Faust|label=FA}}, {{CLabel|GGXRD-R2|Jack-O'|label=JC}}, {{CLabel|GGXRD-R2|Johnny|label=JO}}, {{CLabel|GGXRD-R2|May|label=MA}}, {{CLabel|GGXRD-R2|Millia|label=MI}}, {{CLabel|GGXRD-R2|Sol|label=SO}}, {{CLabel|GGXRD-R2|Ramlethal|label=RA}}, {{CLabel|GGXRD-R2|Raven|label=RV}}, {{CLabel|GGXRD-R2|Zato-1|label=ZA}} | |||
{{!}}- | |||
{{!}} 25F {{!}}{{!}} {{CLabel|GGXRD-R2|Slayer|label=SL}}, {{CLabel|GGXRD-R2|Jam|label=JA}} | |||
{{!}}- | |||
{{!}} 26F {{!}}{{!}} {{CLabel|GGXRD-R2|Elphelt|label=EL}} | |||
{{!}}- | |||
{{!}} 27F {{!}}{{!}} {{CLabel|GGXRD-R2|Leo|label=LE}} | |||
{{!}}- | {{!}}- | ||
{{ | {{!}} 29F {{!}}{{!}} {{CLabel|GGXRD-R2|Chipp|label=CH}}, {{CLabel|GGXRD-R2|Sin|label=SI}} | ||
{{!}}- | {{!}}- | ||
{{ | {{!)}} | ||
}} | }} | ||
==Overdrives== | ==Overdrives== | ||
===<big>Heavenly Potemkin Buster</big>=== | |||
{{ | {{InputBadge|{{clr|3|236236S}}\{{clr|5|236236D}}}} | ||
| | {{GGXRD-R2 Move Card | ||
| | |input=236236S | ||
| | |description= | ||
| | '''The''' anti-air grab. Potemkin launches his entire body upward at about a 45-degree angle, although the hitbox is only on the inside of his hand and arm. | ||
{{ | |||
Does good damage, and is easy to connect after virtually any ground-to-air hit, making it a reliable ender. Can also be used to punish air techs or for a hard read on a jump. Corner HPB > RRC > {{clr|4|6H}} > xx leads to huge damage. Hellfire Burst HPB is one of the highest damage attacks in the entire game (if you somehow manage to land it). | |||
}} | }} | ||
===<big>Giganter Kai</big>=== | |||
{{ | {{InputBadge|{{clr|4|632146H}}}} | ||
{{GGXRD-R2 Move Card | |||
|input=632146H | |input=632146H | ||
| | |description= | ||
Potemkin creates a field of energy that slowly floats forward. This wave of energy absorbs other projectiles that hit it, and if it hits the opponent it staggers them (if grounded) or puts them in a slow float with long untechable time (if airborne). In both instances, Potemkin is afforded plenty of time to follow up for big damage. Since it's a projectile, he isn't pushed back by the attack connecting, allowing him to make some interesting combos in the corner. In addition, the energy wave has a very high stun modifier, making it easier to dizzy the opponent. | |||
}} | |||
===<big>Gigantic Bullet Kai</big>=== | |||
{{InputBadge|Giganter Kai > {{clr|1|4123641236P}}}} | |||
}} | {{GGXRD-R2 Move Card | ||
|input=Giganter Kai > 4123641236P | |||
|description= | |||
The follow-up to Giganter. Potemkin launches himself forward after a delay. | |||
Does ''massive'' damage and blows the opponent away on hit with substantial untechable time. Unlike Giganter itself, however, it has a 0x stun modifier, so its damage isn't counted at all when determining dizzy state for the opponent. This makes the choice to use Bullet an interesting one: go for the upfront damage and potential follow-up damage, or go for the dizzy and reset into an even more damaging combo? | |||
The core factor for deciding which to use is | The core factor for deciding which to use is the opponent's current health bar - the more health they have, the more favored going for dizzy is. Positioning matters as well, since Bullet only offers the opportunity to follow up when in or very near the corner. | ||
}} | }} | ||
== | ==Instant Kill== | ||
===<big>Infernal Tour</big>=== | |||
{{InputBadge|During IK Mode: {{clr|4|236236H}}}} | |||
{{GGXRD-R2 Move Card | |||
|input=236236H |type=instantkill | |||
|description= | |||
| | Cannot be re-blitzed like other IK's, since it's a throw, and despite being a throw, can still be comboed into like a normal IK, as long as Gold IK is available. Much cooler than Magnum Opera. | ||
| | |||
{{ | |||
Cannot be re-blitzed like other IK's. Much cooler than Magnum Opera. | |||
}} | }} | ||
== | ==Colors== | ||
{{ | {{GGXRD-R2Colors|Size=120|Character=Potemkin}} | ||
==Navigation== | ==Navigation== | ||
{{ | <center>{{Character Label|GGXRD-R2|Potemkin|size=42px}}</center> | ||
{{notice|To edit frame data, edit values in [[ | {{GGXRD-R2/CharacterLinks}} | ||
{{ | {{notice|To edit frame data, edit values in [[{{PAGENAME}}/Data]].}} | ||
[[Category: Guilty Gear | {{GGXRD-R2/Navigation}} | ||
[[Category:Guilty Gear|Potemkin]] | |||
Latest revision as of 08:49, 14 April 2024
Overview
Overview
Potemkin is Guilty Gear's resident grappler, made of large attacks, big damage, and huge throws, including his signature Potemkin Buster. As a tank, Potemkin is very slow, being unable to run or air dash. In exchange, he's given an unusually long invincibility window on his backdash, the highest health in the game, and high corner pressure potential.
His strategy revolves around finding ways to get his opponent to make mistakes, and go for big punishes. He has a useful array of big pokes like 5H and anti-airs such as Heat Knuckle, and Mega Fist lets him choose his distances a bit more easily. He also gets the jumping I.C.P.M, which can be used for unexpected mobility.
Potemkin still traditionally struggles against characters who can stay out of range, but he has some answers to them. Slide Head is a fullscreen shockwave that knocks opponents down, and F.D.B. lets him knock projectiles back at the opponent. He also gets Hammer Fall, which lets him quickly close the distance. While these tools are indeed powerful, they still have weak spots, so simply just moving forward can be quite an uphill battle for Potemkin. If you can get past his lumbering neutral experience, you'll be plowing over opponents with Potemkin's high durability and terrifying pressure. Potemkin
 |
| Defense |
| x0.94 |
| Guts Rating |
| 3 |
| Weight |
| [94] Super Heavy |
| Stun Resistance |
| 80 |
| Prejump |
| 5F |
| Backdash |
| 21F (1~20F invuln) |
| Wakeup Timing |
| 24F (Face Up)/ 22F (Face Down) |
| Unique Movement Options |
| No Run Hammer Fall I.C.P.M |
| Fastest Attack |
| 5P (5F) |
| Reversals |
| 632146H (9+8F) |
![]() Potemkin uses short blockstrings combined with approaching moves like Hammerfall to overwhelm and confuse his opponent into making a mistake, then punishes their reaction or lack thereof.
Potemkin uses short blockstrings combined with approaching moves like Hammerfall to overwhelm and confuse his opponent into making a mistake, then punishes their reaction or lack thereof.
Pros
Cons
- Potemkin Buster: The command grab that defines Potemkin. Blazing fast with huge range and damage, it lends itself well for use on offense and on defence when combined with universal mechanics and his great backdash.
- Powerful Backdash: A contender for the best backdash. A very good tool to get out of pressure situations due to being fully invincible until its final frame.
- Obscene Corner Damage: Some of the highest damaging conversions in the game off corner hits or Potemkin Buster.
- High Stun Potential: A number of Potemkin's combos use normals with high stun modifiers, making a stun a big threat. His Giganter Kai super also has a huge stun modifier, giving him combos that stun from one touch.
- Massive Stamina: The highest effective health in the game. Potemkin has a defense modifier of 0.93. He also has the highest stun resistance in the entire game, making him borderline impossible to stun.
- Unique Antizoning Options: F.D.B. and Slidehead allow Potemkin to deal with zoning.
- Corner Reliant: His midscreen pressure suffers from not having strong ways to discourage Fuzzy Jump A form of defence where the defender switches from blocking to jumping at a specific time in order to block a strike then jump when there's a gap. Typically used to defend against tick throws.s and he lacks damage without the corner. Additionally, he lacks stable ways of pushing the opponent into the corner.
- Slow: Potemkin cannot run or airdash, and has 5f jump startup. This makes approaching the opponent difficult and linear, and Hammerfall is not a suitable replacement for these shortcomings.
- Weak to Zoning: While he has F.D.B. and Slidehead, Potemkin still struggles to deal with matchups where his opponent would rather stay out of his range.
- Large: Big hurtbox that makes him more susceptible to instant overheads, F-shiki Sometimes known as "Fuzzy Overhead". When you are in blockstun, you can switch high/low blocking, but your blocking animation and hurtbox does not change until you leave blockstun or block another attack. F-Shikis take advantage of this and use overheads that would miss on crouching characters, but not on standing characters.s, and character specific combos.
Normal Moves
5P


Jab. While this is Potemkin's fastest normal, the punching animation is very high, causing it to whiff on crouchers. Because of this, 5P is mostly reserved for anti airing rather than abare and other typically standard 5P things.
Gatling Options: 5P, 2P, 6P, 5K, 2K, 6K, c.S, f.S, 2S, 5H, 2H, 6H, 5D, 2D
- can whiff cancel into 5P,2P,5K,2K from frame 8
5K


| Damage | GuardHow this attack can be blocked. | StartupThe number of frames between inputting an attack and when the attack becomes active. Includes first active frame. | ActiveThe number of frames for which a move has hitboxes. Occurs after Startup. | RecoveryThe number of frames after a move's active frames during which the character cannot act assuming the move is not canceled. | On-BlockThe difference between the attacker's recovery and the period that the opponent is in blockstun. This Frame Advantage value is based off the fact that the very first active frame touches the opponent. | Invuln |
|---|---|---|---|---|---|---|
| 22 | Low | 10 | 9 | 9 | -4 |
Low normal that works best as an okizeme From Japanese "起き攻め". Attacking an opponent about to wake up after they were knocked down, usually with meaty attacks or mix-ups. tool due to its high number of active frames making it very easy to hit meaty Hitting an opponent to cover the moment as they lose invincibility. The most common one is performing an attack early on okizeme to gain frame advantage and bait reversals.. Also great for catching backdashes!
Gatling Options: 6K, c.S, f.S, 2S, 5H, 2H, 5D, 2D
| ProrationA percentage-based damage modifier applied to certain attacks independently of other forms of damage scaling. | Level
|
RISC+How much R.I.S.C. this move builds when normal or instant blocked. | RISC-How much R.I.S.C. this move removes on hit. | ||||||||||||||||||||||||||||||||||||
|---|---|---|---|---|---|---|---|---|---|---|---|---|---|---|---|---|---|---|---|---|---|---|---|---|---|---|---|---|---|---|---|---|---|---|---|---|---|---|---|
| 2 | 10 | 7 |
c.S


| Damage | GuardHow this attack can be blocked. | StartupThe number of frames between inputting an attack and when the attack becomes active. Includes first active frame. | ActiveThe number of frames for which a move has hitboxes. Occurs after Startup. | RecoveryThe number of frames after a move's active frames during which the character cannot act assuming the move is not canceled. | On-BlockThe difference between the attacker's recovery and the period that the opponent is in blockstun. This Frame Advantage value is based off the fact that the very first active frame touches the opponent. | Invuln |
|---|---|---|---|---|---|---|
| 40 | Mid | 8 | 3 | 11 | -1 |
A quick, close range jump cancellable normal that sees most use as combo or blockstring filler due to its good gatlings and jump cancel.
Gatling Options: 6K, f.S, 2S, 5H, 2H, 5D, 2D
| ProrationA percentage-based damage modifier applied to certain attacks independently of other forms of damage scaling. | Level
|
RISC+How much R.I.S.C. this move builds when normal or instant blocked. | RISC-How much R.I.S.C. this move removes on hit. | ||||||||||||||||||||||||||||||||||||
|---|---|---|---|---|---|---|---|---|---|---|---|---|---|---|---|---|---|---|---|---|---|---|---|---|---|---|---|---|---|---|---|---|---|---|---|---|---|---|---|
| 2 | 10 | 7 |
f.S


| Damage | GuardHow this attack can be blocked. | StartupThe number of frames between inputting an attack and when the attack becomes active. Includes first active frame. | ActiveThe number of frames for which a move has hitboxes. Occurs after Startup. | RecoveryThe number of frames after a move's active frames during which the character cannot act assuming the move is not canceled. | On-BlockThe difference between the attacker's recovery and the period that the opponent is in blockstun. This Frame Advantage value is based off the fact that the very first active frame touches the opponent. | Invuln |
|---|---|---|---|---|---|---|
| 36 | Mid | 11 | 7 | 18 | -11 |
5H's higher hitting brother, f.S is a long-range poke with a slight upward angle. Excellent at swatting IAD An air dash performed from a standing position as quickly and as low to the ground as possible from a jump. Done by inputting 956 754, and depending on the game, using a dash macro right after a jump.s and distant air approaches as well as controlling the ground in front of Potemkin, even if the reward isn't always high on hit.
Beware low profile moves such as ![]() Sol's Grand Viper
Sol's Grand Viper![]() GuardLowx2~6,
GuardLowx2~6,
Midx3Startup17Recovery37+10 after landingAdvantage-56, which will zoom under f.S and punish it.
Gatling Options: 2S, 5H, 2H, 5D, 2D
| ProrationA percentage-based damage modifier applied to certain attacks independently of other forms of damage scaling. | Level
|
RISC+How much R.I.S.C. this move builds when normal or instant blocked. | RISC-How much R.I.S.C. this move removes on hit. | ||||||||||||||||||||||||||||||||||||
|---|---|---|---|---|---|---|---|---|---|---|---|---|---|---|---|---|---|---|---|---|---|---|---|---|---|---|---|---|---|---|---|---|---|---|---|---|---|---|---|
| 2 | 10 | 7 |
5H

The long arm of Zeppian Law


| Damage | GuardHow this attack can be blocked. | StartupThe number of frames between inputting an attack and when the attack becomes active. Includes first active frame. | ActiveThe number of frames for which a move has hitboxes. Occurs after Startup. | RecoveryThe number of frames after a move's active frames during which the character cannot act assuming the move is not canceled. | On-BlockThe difference between the attacker's recovery and the period that the opponent is in blockstun. This Frame Advantage value is based off the fact that the very first active frame touches the opponent. | Invuln |
|---|---|---|---|---|---|---|
| 55 | Mid | 15 | 7 | 16 | -4 |
One of Potemkin's best pokes. It is huge, has solid and easy reward on counterhit at most ranges, and is mostly safe on block at -4. Has a lower hitbox than f.S, so it's not recommended to prevent air approaches in the same manner. Can be used to keep opponents honest at range, or to keep them blocking in order to approach with Hammerfall GuardMidStartup18[31]Recovery33Advantage-16.
Close hit combos directly into Hammerfall. On CH, 5H can follow up into Hammerfall from any range, though if it catches an extended hurtbox it can fail to combo.
Similar to f.S, this move is susceptible to low profiles. Don't get too predictable!
Gatling Options: 5D, 2D
| ProrationA percentage-based damage modifier applied to certain attacks independently of other forms of damage scaling. | Level
|
RISC+How much R.I.S.C. this move builds when normal or instant blocked. | RISC-How much R.I.S.C. this move removes on hit. | ||||||||||||||||||||||||||||||||||||
|---|---|---|---|---|---|---|---|---|---|---|---|---|---|---|---|---|---|---|---|---|---|---|---|---|---|---|---|---|---|---|---|---|---|---|---|---|---|---|---|
| 4 | 20 | 6 |
5D

Do not get hit by this


| Damage | GuardHow this attack can be blocked. | StartupThe number of frames between inputting an attack and when the attack becomes active. Includes first active frame. | ActiveThe number of frames for which a move has hitboxes. Occurs after Startup. | RecoveryThe number of frames after a move's active frames during which the character cannot act assuming the move is not canceled. | On-BlockThe difference between the attacker's recovery and the period that the opponent is in blockstun. This Frame Advantage value is based off the fact that the very first active frame touches the opponent. | Invuln |
|---|---|---|---|---|---|---|
| 30 | High | 27 | 2(2)2(2)2 | 8 | +1 |
Universal overhead. Punish tool, combo tool, and occasional surprise mixup tool.
5D has incredible reward when successful. A simple homing dash combo in the corner will deal extreme damage, and a homing jump that ends with I.C.P.M GuardMidStartup13Recovery29Advantage- has a great deal of corner carry.
Much like other 5Ds, it's fairly difficult to use in pressure due to its slow startup, obvious animation, and orange glow. However, its high reward on hit makes it worth going for from time to time, especially when the animation can be hidden via Trishula
GuardMidStartup13Recovery29Advantage- has a great deal of corner carry.
Much like other 5Ds, it's fairly difficult to use in pressure due to its slow startup, obvious animation, and orange glow. However, its high reward on hit makes it worth going for from time to time, especially when the animation can be hidden via Trishula GuardMidStartup25Recovery18Advantage-6 YRC.
While it is +1 on block, it's easily disrespected in pressure and the pushback from 5D usually pushes Potemkin out too far to continue pressure much less run a mixup. At the very least, you won't be punished. While going for this as a mixup is tempting, don't forget why you're here. GuardGround Throw: 308000Startup3RecoveryTotal 40Advantage+62
| ProrationA percentage-based damage modifier applied to certain attacks independently of other forms of damage scaling. | Level
|
RISC+How much R.I.S.C. this move builds when normal or instant blocked. | RISC-How much R.I.S.C. this move removes on hit. | ||||||||||||||||||||||||||||||||||||
|---|---|---|---|---|---|---|---|---|---|---|---|---|---|---|---|---|---|---|---|---|---|---|---|---|---|---|---|---|---|---|---|---|---|---|---|---|---|---|---|
| Initial: 80% | 4 | 20 | 20 |
- Maximum 1 Hit
6P


| Damage | GuardHow this attack can be blocked. | StartupThe number of frames between inputting an attack and when the attack becomes active. Includes first active frame. | ActiveThe number of frames for which a move has hitboxes. Occurs after Startup. | RecoveryThe number of frames after a move's active frames during which the character cannot act assuming the move is not canceled. | On-BlockThe difference between the attacker's recovery and the period that the opponent is in blockstun. This Frame Advantage value is based off the fact that the very first active frame touches the opponent. | Invuln |
|---|---|---|---|---|---|---|
| 42 | Mid | 11 | 7 | 19 | -9 | 1~4F Upper body 5~12F Above Knees |
Potemkin's go-to anti-air. It has impressive upper-body invulnerability and a sizable hitbox, which is important because it's really only any good when it counter hits.
A normal hit will lead to pretty much nothing, except for a very close hit where 5P can link into Heat Knuckle GuardUnblockable Hit GrabStartup12Recovery21Advantage+14. On counter hit, it can combo into Heat knuckle at most ranges or go into an air series ending with I.C.P.MGuardMidStartup13Recovery29Advantage- at certain ranges.
| ProrationA percentage-based damage modifier applied to certain attacks independently of other forms of damage scaling. | Level
|
RISC+How much R.I.S.C. this move builds when normal or instant blocked. | RISC-How much R.I.S.C. this move removes on hit. | ||||||||||||||||||||||||||||||||||||
|---|---|---|---|---|---|---|---|---|---|---|---|---|---|---|---|---|---|---|---|---|---|---|---|---|---|---|---|---|---|---|---|---|---|---|---|---|---|---|---|
| 3 | 14 | 5 |
- float opponent on hit, normal hit untechable for 30f, counter hit untechable for 39f
6K


| Damage | GuardHow this attack can be blocked. | StartupThe number of frames between inputting an attack and when the attack becomes active. Includes first active frame. | ActiveThe number of frames for which a move has hitboxes. Occurs after Startup. | RecoveryThe number of frames after a move's active frames during which the character cannot act assuming the move is not canceled. | On-BlockThe difference between the attacker's recovery and the period that the opponent is in blockstun. This Frame Advantage value is based off the fact that the very first active frame touches the opponent. | Invuln |
|---|---|---|---|---|---|---|
| 40 | Mid | 16 | 8 | 20 | -9 |
An integral forward advancing normal, both in pressure and in corner combos.
Since it clears lot of space in a short amount of time, this can be used to stick to the opponent in blockstrings. On normal block, cancelling to Flick GuardMidStartup19Recovery12Advantage+2 leaves a 1f gap, cancelling to HammerfallGuardMidStartup18[31]Recovery33Advantage-16 true strings but a slight delay will leave a gap, and cancelling to Hammerfall Brake will leave Potemkin at +2! When combining all these options, 6K becomes a formidable threat as a pressure tool as it becomes a prime point to tick throw, reset pressure, or do a devastating frametrap.
A savvy defender will look to instant block this move, as it makes the special cancel gaps larger while making Hammerfall Brake minus. In longer blockstrings, FD can also be used to push Potemkin away, causing 6K to whiff if used carelessly.
In the corner, 6K works as an excellent frametrap to catch jumps, as on air hit it causes a long enough wallsplat to loop into itself through [6K > Hammerfall Brake]xN. These loops are a staple combo filler in the corner due to their very high damage.
- Staggers on counterhit
| ProrationA percentage-based damage modifier applied to certain attacks independently of other forms of damage scaling. | Level
|
RISC+How much R.I.S.C. this move builds when normal or instant blocked. | RISC-How much R.I.S.C. this move removes on hit. | ||||||||||||||||||||||||||||||||||||
|---|---|---|---|---|---|---|---|---|---|---|---|---|---|---|---|---|---|---|---|---|---|---|---|---|---|---|---|---|---|---|---|---|---|---|---|---|---|---|---|
| 4 | 20 | 6 |
- Blows opponent away on airhit
- Wallstick(normal hit 36F/counter hit 72F)
- Ground counter hit staggers opponent. max: 29F
- Stagger recovery lv 1/2/3/max: 20/17/14/14F
6H


| Damage | GuardHow this attack can be blocked. | StartupThe number of frames between inputting an attack and when the attack becomes active. Includes first active frame. | ActiveThe number of frames for which a move has hitboxes. Occurs after Startup. | RecoveryThe number of frames after a move's active frames during which the character cannot act assuming the move is not canceled. | On-BlockThe difference between the attacker's recovery and the period that the opponent is in blockstun. This Frame Advantage value is based off the fact that the very first active frame touches the opponent. | Invuln |
|---|---|---|---|---|---|---|
| 80 | Mid | 23 | 5 | 30 | -16 |
Potemkin's longest reaching normal, and his most damaging, but not suited to standard poking due to its slow startup. Instead, it can be seen as combo filler or as a situational combo starter.
Midscreen, there is no meterless followup on normal or counter hit, but they are launched a far distance towards the corner. Closer to the corner, 6H's value as a combo starter drastically increases. In the corner, a slightly spaced normal hit 6H has meterless followups on a majority of the cast that leads to dealing 50%, and a counterhit 6H will lead to a practical, meterless TOD on half the cast from slightly closer than round start spacing between characters. As a result, 6H is most commonly used to fish for counterhits, as punish against incredibly unsafe moves, or on stunned opponents.
- On hit, blows the opponent backwards. Grounded hits float upward slightly in addition to this.
| ProrationA percentage-based damage modifier applied to certain attacks independently of other forms of damage scaling. | Level
|
RISC+How much R.I.S.C. this move builds when normal or instant blocked. | RISC-How much R.I.S.C. this move removes on hit. | ||||||||||||||||||||||||||||||||||||
|---|---|---|---|---|---|---|---|---|---|---|---|---|---|---|---|---|---|---|---|---|---|---|---|---|---|---|---|---|---|---|---|---|---|---|---|---|---|---|---|
| 4 | 20 | 6 |
- Blows opponent away on hit(knockdown)
- Counter hit roll for 82F
- Stun value: 120
2P

How to win round start


| Damage | GuardHow this attack can be blocked. | StartupThe number of frames between inputting an attack and when the attack becomes active. Includes first active frame. | ActiveThe number of frames for which a move has hitboxes. Occurs after Startup. | RecoveryThe number of frames after a move's active frames during which the character cannot act assuming the move is not canceled. | On-BlockThe difference between the attacker's recovery and the period that the opponent is in blockstun. This Frame Advantage value is based off the fact that the very first active frame touches the opponent. | Invuln |
|---|---|---|---|---|---|---|
| 12 | Mid | 6 | 4 | 6 | ±0 |
2P is a great normal that does just about everything you could ask of a P normal, except anti air.
It has amazing range that reaches at round start, and is only 6f Startup The time before an attack is active including the first active frame. For example, an attack with 10F startup means the attack will do nothing for 9 frames, then hit the opponent on the 10th frame., making it a great abare tool when BusterGuardGround Throw: 308000Startup3RecoveryTotal 40Advantage+62 doesn't work, and it has a short total duration and good active frames making it a good low-commitment poke. It also has great gatlings making it a good pressure starter as well as being able to combo into 5K and 2K at close range, but they can whiff at max range.
Gatling Options: 5P, 2P, 6P, 5K, 2K, 6K, c.S, f.S, 2S, 5H, 2H, 5D, 2D
| ProrationA percentage-based damage modifier applied to certain attacks independently of other forms of damage scaling. | Level
|
RISC+How much R.I.S.C. this move builds when normal or instant blocked. | RISC-How much R.I.S.C. this move removes on hit. | ||||||||||||||||||||||||||||||||||||
|---|---|---|---|---|---|---|---|---|---|---|---|---|---|---|---|---|---|---|---|---|---|---|---|---|---|---|---|---|---|---|---|---|---|---|---|---|---|---|---|
| 0 | 3 | 8 |
- can be self-canceled into 2P from frame 14
2K


| Damage | GuardHow this attack can be blocked. | StartupThe number of frames between inputting an attack and when the attack becomes active. Includes first active frame. | ActiveThe number of frames for which a move has hitboxes. Occurs after Startup. | RecoveryThe number of frames after a move's active frames during which the character cannot act assuming the move is not canceled. | On-BlockThe difference between the attacker's recovery and the period that the opponent is in blockstun. This Frame Advantage value is based off the fact that the very first active frame touches the opponent. | Invuln |
|---|---|---|---|---|---|---|
| 16 | Low | 7 | 4 | 14 | -6 |
2K is a simple normal. It is faster than 5K and better range, making it more desirable in neutral and pressure while 5K remains preferable for oki. It has good gatlings, but it only combos into c.S, f.S, and 2D.
Gatling Options: 6K, c.S, f.S, 2S, 2H, 5D, 2D
| ProrationA percentage-based damage modifier applied to certain attacks independently of other forms of damage scaling. | Level
|
RISC+How much R.I.S.C. this move builds when normal or instant blocked. | RISC-How much R.I.S.C. this move removes on hit. | ||||||||||||||||||||||||||||||||||||
|---|---|---|---|---|---|---|---|---|---|---|---|---|---|---|---|---|---|---|---|---|---|---|---|---|---|---|---|---|---|---|---|---|---|---|---|---|---|---|---|
| 1 | 6 | 7 |
2S


| Damage | GuardHow this attack can be blocked. | StartupThe number of frames between inputting an attack and when the attack becomes active. Includes first active frame. | ActiveThe number of frames for which a move has hitboxes. Occurs after Startup. | RecoveryThe number of frames after a move's active frames during which the character cannot act assuming the move is not canceled. | On-BlockThe difference between the attacker's recovery and the period that the opponent is in blockstun. This Frame Advantage value is based off the fact that the very first active frame touches the opponent. | Invuln |
|---|---|---|---|---|---|---|
| 36 | Mid | 14 | 3 | 20 | -6 |
2S is a fairly large button that sees use in pressure and in neutral as a poke.
Lots of normals gatling into this, and it staggers on counterhit, making it a good frametrap tool. When combined with its 6K gatling, 2S being 0 on block when cancelled to Hammerfall Brake turns it into a solid point to tick throw, reset pressure, and frametrap from. Though it has less range than f.S and 5H, it can also be used as a poke as it gatlings to 2D for a simple knockdown at all ranges
Gatling Options: 6K, 2H, 5D, 2D
| ProrationA percentage-based damage modifier applied to certain attacks independently of other forms of damage scaling. | Level
|
RISC+How much R.I.S.C. this move builds when normal or instant blocked. | RISC-How much R.I.S.C. this move removes on hit. | ||||||||||||||||||||||||||||||||||||
|---|---|---|---|---|---|---|---|---|---|---|---|---|---|---|---|---|---|---|---|---|---|---|---|---|---|---|---|---|---|---|---|---|---|---|---|---|---|---|---|
| 3 | 14 | 6 |
- stagger opponent on CH. Max Duration 29f
- Stagger recovery lv 1/2/3/max: 21/18/14/14F
2H


| Damage | GuardHow this attack can be blocked. | StartupThe number of frames between inputting an attack and when the attack becomes active. Includes first active frame. | ActiveThe number of frames for which a move has hitboxes. Occurs after Startup. | RecoveryThe number of frames after a move's active frames during which the character cannot act assuming the move is not canceled. | On-BlockThe difference between the attacker's recovery and the period that the opponent is in blockstun. This Frame Advantage value is based off the fact that the very first active frame touches the opponent. | Invuln |
|---|---|---|---|---|---|---|
| 60 | Mid | 13 | 5 | 35 | -21 |
2H is a slow but high reaching normal with short horizontal range. One of Potemkin's best counterhit starters, and decent at anti airing too.
As an anti-air, this normal is not recommended over 6P as it has no upper body invuln with similar startup, but is still usable on prediction. Its high vertical reach makes it best used on hard reading an air approach, or to hit someone high in the sky
On hit, 2H combos into an air series using HammerfallGuardMidStartup18[31]Recovery33Advantage-16 Brake. On counter hit, the victim is unable to tech at all, leading to big damage and corner carry, or even a stun with Giganter Kai GuardMidStartup9+8RecoveryTotal 50Advantage±0. When combined with Hammerfall Brake making 2H +2 on block, this normal becomes a dangerous threat when applied properly.
Gatling Options: 5D, 2D
| ProrationA percentage-based damage modifier applied to certain attacks independently of other forms of damage scaling. | Level
|
RISC+How much R.I.S.C. this move builds when normal or instant blocked. | RISC-How much R.I.S.C. this move removes on hit. | ||||||||||||||||||||||||||||||||||||
|---|---|---|---|---|---|---|---|---|---|---|---|---|---|---|---|---|---|---|---|---|---|---|---|---|---|---|---|---|---|---|---|---|---|---|---|---|---|---|---|
| 4 | 20 | 6 |
- Floats opponent on hit
- Normal hit untechable for 30f, Counter hit knockdown.
- Stun value: 82
2D

This knocked down? Congrats. You can start winning now.


| Damage | GuardHow this attack can be blocked. | StartupThe number of frames between inputting an attack and when the attack becomes active. Includes first active frame. | ActiveThe number of frames for which a move has hitboxes. Occurs after Startup. | RecoveryThe number of frames after a move's active frames during which the character cannot act assuming the move is not canceled. | On-BlockThe difference between the attacker's recovery and the period that the opponent is in blockstun. This Frame Advantage value is based off the fact that the very first active frame touches the opponent. | Invuln |
|---|---|---|---|---|---|---|
| 35 | Low | 12 | 5 | 14 | -2 |
Complimentary low poke to 2K and key grounded knockdown button with massive range.
Most grounded combos will end in this normal as it gives Potemkin a safejump on hit, or just a normal meaty. In pressure, 2D's lack of cancel options means that it ends his pressure on block, but it's nigh unpunishable at only -2 with decent pushback. It can also be used as a meaty low on oki when out of 5K range, but it's often better to use a normal with special cancels, like f.S to continue pressure.
Thanks to its raised hurtbox, 2D can also be used as an effective counterpoke against lows that have thin, low to the ground hitboxes like Ky's 2D GuardLowStartup7Recovery12Advantage-10 and Slayer's 2K
 GuardLowStartup6Recovery8Advantage+4
- Cannot be special cancelled
| ProrationA percentage-based damage modifier applied to certain attacks independently of other forms of damage scaling. | Level
|
RISC+How much R.I.S.C. this move builds when normal or instant blocked. | RISC-How much R.I.S.C. this move removes on hit. | ||||||||||||||||||||||||||||||||||||
|---|---|---|---|---|---|---|---|---|---|---|---|---|---|---|---|---|---|---|---|---|---|---|---|---|---|---|---|---|---|---|---|---|---|---|---|---|---|---|---|
| 3 | 14 | 6 |
j.P


| Damage | GuardHow this attack can be blocked. | StartupThe number of frames between inputting an attack and when the attack becomes active. Includes first active frame. | ActiveThe number of frames for which a move has hitboxes. Occurs after Startup. | RecoveryThe number of frames after a move's active frames during which the character cannot act assuming the move is not canceled. | On-BlockThe difference between the attacker's recovery and the period that the opponent is in blockstun. This Frame Advantage value is based off the fact that the very first active frame touches the opponent. | Invuln |
|---|---|---|---|---|---|---|
| 18 | High / Air | 7 | 6 | 6 |
A quick elbow jab. Gatlings into all air normals including itself. Combined with its good hitbox and speed, j.P is an ideal air-to-air and rising anti-air normal. On block, keep pressing it until you both land and you can start pressure.
Potemkin's hurtbox shrinks a little when using this normal, but it's not something to rely on.
Gatling Options: j.P, j.K, j.S, j.H, j.D
| ProrationA percentage-based damage modifier applied to certain attacks independently of other forms of damage scaling. | Level
|
RISC+How much R.I.S.C. this move builds when normal or instant blocked. | RISC-How much R.I.S.C. this move removes on hit. | ||||||||||||||||||||||||||||||||||||
|---|---|---|---|---|---|---|---|---|---|---|---|---|---|---|---|---|---|---|---|---|---|---|---|---|---|---|---|---|---|---|---|---|---|---|---|---|---|---|---|
| 0 | 3 | 8 |
j.K


| Damage | GuardHow this attack can be blocked. | StartupThe number of frames between inputting an attack and when the attack becomes active. Includes first active frame. | ActiveThe number of frames for which a move has hitboxes. Occurs after Startup. | RecoveryThe number of frames after a move's active frames during which the character cannot act assuming the move is not canceled. | On-BlockThe difference between the attacker's recovery and the period that the opponent is in blockstun. This Frame Advantage value is based off the fact that the very first active frame touches the opponent. | Invuln |
|---|---|---|---|---|---|---|
| 24 | High / Air | 10 | 8 | 13 |
Potemkin's only jump cancellable air normal. Useful in air combos as it gatlings to j.S as well as comboing into I.C.P.MGuardMidStartup13Recovery29Advantage- at low hitstun decay, but is otherwise unremarkable.
Gatling Options: j.P, j.S
| ProrationA percentage-based damage modifier applied to certain attacks independently of other forms of damage scaling. | Level
|
RISC+How much R.I.S.C. this move builds when normal or instant blocked. | RISC-How much R.I.S.C. this move removes on hit. | ||||||||||||||||||||||||||||||||||||
|---|---|---|---|---|---|---|---|---|---|---|---|---|---|---|---|---|---|---|---|---|---|---|---|---|---|---|---|---|---|---|---|---|---|---|---|---|---|---|---|
| 2 | 10 | 7 |
j.S


| Damage | GuardHow this attack can be blocked. | StartupThe number of frames between inputting an attack and when the attack becomes active. Includes first active frame. | ActiveThe number of frames for which a move has hitboxes. Occurs after Startup. | RecoveryThe number of frames after a move's active frames during which the character cannot act assuming the move is not canceled. | On-BlockThe difference between the attacker's recovery and the period that the opponent is in blockstun. This Frame Advantage value is based off the fact that the very first active frame touches the opponent. | Invuln |
|---|---|---|---|---|---|---|
| 36 | High / Air | 13 | 6 | 23 |
Probably Potemkin's best air normal. Has a great hitbox for covering space in front of and below him. Great for safejumps, general jump-ins, and air-to-airs.
As it gatlings into j.P and j.H, Potemkin can go for silly tick throws with j.P and double overheads with j.H if j.S connects high enough
- Staggers on grounded counterhit
Gatling Options: j.P, j.H, j.D
| ProrationA percentage-based damage modifier applied to certain attacks independently of other forms of damage scaling. | Level
|
RISC+How much R.I.S.C. this move builds when normal or instant blocked. | RISC-How much R.I.S.C. this move removes on hit. | ||||||||||||||||||||||||||||||||||||
|---|---|---|---|---|---|---|---|---|---|---|---|---|---|---|---|---|---|---|---|---|---|---|---|---|---|---|---|---|---|---|---|---|---|---|---|---|---|---|---|
| 2 | 10 | 7 |
- Staggers opponent on ground counter hit. Max duration 29f
- Stagger recovery lv 1/2/3/max: 23/20/17/14F
j.H


| Damage | GuardHow this attack can be blocked. | StartupThe number of frames between inputting an attack and when the attack becomes active. Includes first active frame. | ActiveThe number of frames for which a move has hitboxes. Occurs after Startup. | RecoveryThe number of frames after a move's active frames during which the character cannot act assuming the move is not canceled. | On-BlockThe difference between the attacker's recovery and the period that the opponent is in blockstun. This Frame Advantage value is based off the fact that the very first active frame touches the opponent. | Invuln |
|---|---|---|---|---|---|---|
| 45 | High / Air | 12 | 6 | 16 |
The classic grappler body splash. Much like other body splashes, this hits both in front of and behind Potemkin. j.H serves mostly the same purposes as j.S, at the cost of slightly more pushback on block.
Combos into I.C.P.MGuardMidStartup13Recovery29Advantage- at certain heights, so a successful air-to-air with j.S or j.P can be highly rewarding even if the conversion can be a little finicky.
| ProrationA percentage-based damage modifier applied to certain attacks independently of other forms of damage scaling. | Level
|
RISC+How much R.I.S.C. this move builds when normal or instant blocked. | RISC-How much R.I.S.C. this move removes on hit. | ||||||||||||||||||||||||||||||||||||
|---|---|---|---|---|---|---|---|---|---|---|---|---|---|---|---|---|---|---|---|---|---|---|---|---|---|---|---|---|---|---|---|---|---|---|---|---|---|---|---|
| 3 | 14 | 6 |
j.D


| Damage | GuardHow this attack can be blocked. | StartupThe number of frames between inputting an attack and when the attack becomes active. Includes first active frame. | ActiveThe number of frames for which a move has hitboxes. Occurs after Startup. | RecoveryThe number of frames after a move's active frames during which the character cannot act assuming the move is not canceled. | On-BlockThe difference between the attacker's recovery and the period that the opponent is in blockstun. This Frame Advantage value is based off the fact that the very first active frame touches the opponent. | Invuln |
|---|---|---|---|---|---|---|
| 50 | All | 13 | Until Grounded | 9 After Landing |
The Pot Butt. Stalls him for a moment mid-air before rapidly falling to the ground.
Though his extended arms widen his hurtbox, j.D is fully disjointed at the base. Ground bounces on counterhit, but it is extremely rare to get a meaningful conversion from this.
| ProrationA percentage-based damage modifier applied to certain attacks independently of other forms of damage scaling. | Level
|
RISC+How much R.I.S.C. this move builds when normal or instant blocked. | RISC-How much R.I.S.C. this move removes on hit. | ||||||||||||||||||||||||||||||||||||
|---|---|---|---|---|---|---|---|---|---|---|---|---|---|---|---|---|---|---|---|---|---|---|---|---|---|---|---|---|---|---|---|---|---|---|---|---|---|---|---|
| 3 | 14 | 6 |
- in counter hit state on recovery
- Knocks down opponent on hit.
- Ground Bounce on counterhit
Universal Mechanics
Ground Throw

| Damage | GuardHow this attack can be blocked. | StartupThe number of frames between inputting an attack and when the attack becomes active. Includes first active frame. | ActiveThe number of frames for which a move has hitboxes. Occurs after Startup. | RecoveryThe number of frames after a move's active frames during which the character cannot act assuming the move is not canceled. | On-BlockThe difference between the attacker's recovery and the period that the opponent is in blockstun. This Frame Advantage value is based off the fact that the very first active frame touches the opponent. | Invuln |
|---|---|---|---|---|---|---|
| 0,60 | Ground Throw: 96250 | 1 | +37 |
Potemkin's standard throw. This is used nearly exclusively as a defensive tool as it's 1f and gives oki on connect, and Potemkin Buster already exists for an offensive throw.
| ProrationA percentage-based damage modifier applied to certain attacks independently of other forms of damage scaling. | Level
|
RISC+How much R.I.S.C. this move builds when normal or instant blocked. | RISC-How much R.I.S.C. this move removes on hit. | ||||||||||||||||||||||||||||||||||||
|---|---|---|---|---|---|---|---|---|---|---|---|---|---|---|---|---|---|---|---|---|---|---|---|---|---|---|---|---|---|---|---|---|---|---|---|---|---|---|---|
| Forced: 65% | 0 | NA | 6,0 |
- Stun value: 30
Air Throw

| Damage | GuardHow this attack can be blocked. | StartupThe number of frames between inputting an attack and when the attack becomes active. Includes first active frame. | ActiveThe number of frames for which a move has hitboxes. Occurs after Startup. | RecoveryThe number of frames after a move's active frames during which the character cannot act assuming the move is not canceled. | On-BlockThe difference between the attacker's recovery and the period that the opponent is in blockstun. This Frame Advantage value is based off the fact that the very first active frame touches the opponent. | Invuln |
|---|---|---|---|---|---|---|
| 0,70 | Air Throw: 201250 | 1 |
The air equivalent to ground throw. Works as an anti-air occasionally when 6P and other anti air normals might fail. Always grants oki on connect
| ProrationA percentage-based damage modifier applied to certain attacks independently of other forms of damage scaling. | Level
|
RISC+How much R.I.S.C. this move builds when normal or instant blocked. | RISC-How much R.I.S.C. this move removes on hit. | ||||||||||||||||||||||||||||||||||||
|---|---|---|---|---|---|---|---|---|---|---|---|---|---|---|---|---|---|---|---|---|---|---|---|---|---|---|---|---|---|---|---|---|---|---|---|---|---|---|---|
| Forced: 65% | 0 | NA | 6,0 |
- Stun value: 35
Dead Angle Attack
| Damage | GuardHow this attack can be blocked. | StartupThe number of frames between inputting an attack and when the attack becomes active. Includes first active frame. | ActiveThe number of frames for which a move has hitboxes. Occurs after Startup. | RecoveryThe number of frames after a move's active frames during which the character cannot act assuming the move is not canceled. | On-BlockThe difference between the attacker's recovery and the period that the opponent is in blockstun. This Frame Advantage value is based off the fact that the very first active frame touches the opponent. | Invuln |
|---|---|---|---|---|---|---|
| 35 | All | 13 | 5 | 18 | -9 | 1~17 Full 18~32 Throw |
Pretty generic mid hitting DA that uses the animation of 5D. Has a deadzone point blank, and can be 6P'd due to the extended hurtbox
| ProrationA percentage-based damage modifier applied to certain attacks independently of other forms of damage scaling. | Level
|
RISC+How much R.I.S.C. this move builds when normal or instant blocked. | RISC-How much R.I.S.C. this move removes on hit. | ||||||||||||||||||||||||||||||||||||
|---|---|---|---|---|---|---|---|---|---|---|---|---|---|---|---|---|---|---|---|---|---|---|---|---|---|---|---|---|---|---|---|---|---|---|---|---|---|---|---|
| Initial: 50% | 2 | 10 | 7 |
- Blows opponent away on hit + wall bounce
- CH recovery state
Blitz Attack


| Version | Damage | GuardHow this attack can be blocked. | StartupThe number of frames between inputting an attack and when the attack becomes active. Includes first active frame. | ActiveThe number of frames for which a move has hitboxes. Occurs after Startup. | RecoveryThe number of frames after a move's active frames during which the character cannot act assuming the move is not canceled. | On-BlockThe difference between the attacker's recovery and the period that the opponent is in blockstun. This Frame Advantage value is based off the fact that the very first active frame touches the opponent. | Invuln |
|---|---|---|---|---|---|---|---|
| Blitz Attack | 50 | Mid | (15-48)+13 | 3 | 20 | -2 | 1~Button release: Blitz |
| Blitz Attack Max Charge | 50 | Mid | 50+13 | 3 | 20 | +5 | 1~50: Blitz |
Universal Blitz Attack.
| Version | ProrationA percentage-based damage modifier applied to certain attacks independently of other forms of damage scaling. | Level
|
RISC+How much R.I.S.C. this move builds when normal or instant blocked. | RISC-How much R.I.S.C. this move removes on hit. | ||||||||||||||||||||||||||||||||||||
|---|---|---|---|---|---|---|---|---|---|---|---|---|---|---|---|---|---|---|---|---|---|---|---|---|---|---|---|---|---|---|---|---|---|---|---|---|---|---|---|---|
| Blitz Attack | Initial: 55% | 1 | ||||||||||||||||||||||||||||||||||||||
| Blitz Attack Max Charge | 4 |
Blitz:
- Hitstop 30F
- Slighty refills own Burst and slightly drains opponent's Burst on hit
- Blows opponent away and wall sticks opponent on hit (untechable for 40F/ 80F on CH)
- Crumples opponent on ground CH (79F)
[Blitz]:
- Hitstop 30F
- Slighty refills own Burst and slightly drains opponent's Burst on hit
- Slightly blows opponent away on air hit (untechable for 50F/ 100F on CH)
- Crumples opponent on ground hit
Special Moves
Heat Knuckle
623H

Heat Knuckle

Heat... Extend!


| Version | Damage | GuardHow this attack can be blocked. | StartupThe number of frames between inputting an attack and when the attack becomes active. Includes first active frame. | ActiveThe number of frames for which a move has hitboxes. Occurs after Startup. | RecoveryThe number of frames after a move's active frames during which the character cannot act assuming the move is not canceled. | On-BlockThe difference between the attacker's recovery and the period that the opponent is in blockstun. This Frame Advantage value is based off the fact that the very first active frame touches the opponent. | Invuln |
|---|---|---|---|---|---|---|---|
| 623H | 0,15×2,40 | Unblockable Hit Grab | 12 | 2 | 21 | +14 | |
| Heat Knuckle > 63214H | 90 | +53 |
Potemkin's ground-to-air hitgrab. At first glance, Heat Knuckle appears to be a decent anti-air, but its true purpose lies in preventing opponents from jumping out of pressure. On hit, it blows them away and they can air tech.
As Heat Knuckle is an unblockable strike, it can be blitz shielded. This is important to know both as and against Potemkin, since it can make jumping out safer to Heat Knuckle. That won't always save you, though... GuardUnblockableStartup10+1Recovery10Advantage+56
- At low hitstun decay, Heat Knuckle combos into itself once in the corner for massive meter build.
- Heat Knuckle > 63214H
Heat Extend is the followup to Heat Knuckle that tacks on a chunk of damage and send the victim full screen in a hard knockdown.
Since Heat Knuckle never knocks down, there's no reason not to use Extend save for those few instances where double Heat Knuckle is possible.
- At high hitstun decay, Heat Extend allows them to air tech and should be avoided as a combo ender in those long combos.
| Version | ProrationA percentage-based damage modifier applied to certain attacks independently of other forms of damage scaling. | Level
|
RISC+How much R.I.S.C. this move builds when normal or instant blocked. | RISC-How much R.I.S.C. this move removes on hit. | ||||||||||||||||||||||||||||||||||||
|---|---|---|---|---|---|---|---|---|---|---|---|---|---|---|---|---|---|---|---|---|---|---|---|---|---|---|---|---|---|---|---|---|---|---|---|---|---|---|---|---|
| 623H | 0,4×3 | NA | 8,6×3 | |||||||||||||||||||||||||||||||||||||
| Heat Knuckle > 63214H | 4 | NA | 6 |
623H:
- Frame Adv listed is on hit
Heat Knuckle > 63214H:
- Frame Adv listed is on hit
Megafist
236P or 214P

Also known as a Potemkin Buster misinput


| Version | Damage | GuardHow this attack can be blocked. | StartupThe number of frames between inputting an attack and when the attack becomes active. Includes first active frame. | ActiveThe number of frames for which a move has hitboxes. Occurs after Startup. | RecoveryThe number of frames after a move's active frames during which the character cannot act assuming the move is not canceled. | On-BlockThe difference between the attacker's recovery and the period that the opponent is in blockstun. This Frame Advantage value is based off the fact that the very first active frame touches the opponent. | Invuln |
|---|---|---|---|---|---|---|---|
| 236P | 50 | High / Air | 24 | 8 | 8 | -4 | 1~39 Lower Body |
| 214P | 50 | High / Air | 25 | 9 | 6 | +4 | 1~39 Lower Body |
Potemkin leaps forward or backward with a heavy double-punch. Though he isn't airborne immediately, he does get some lower body invulnerability from frame 1 which persists all the way into Megafist's recovery.
- 236P
Forward Megafist is a good neutral tool that can jump over many normals, particularly low pokes, with a good hitbox that's hard to contest. Unfortunately, it's held back by being minus on hit, which is punishable with a throw if spaced poorly. However, this doesn't mean Forward Megafist can't be used in pressure: properly spaced, its a good way to advance and nullify FD's pushback, or to work around otherwise-guaranteed punishes after the opponent IBs a normal.
YRC can also help circumvent its poor reward - hopping over a normal with Forward Megafist, then using YRC while midair will allow Potemkin to punish with an air normal and convert into a knockdown. Forward Megafist is also a very strong option during Danger Time, since it's a fairly quick and evasive overhead that converts into 5D on mortal counter.
- Air hit causes a hard knockdown
- 214P
Backwards Megafist is the defensive variant of Megafist, as it moves backwards in exchange for much better frame data and a stagger on counterhit.
Combined with IB and other universal mechanics, Back Megafist can be a powerful defensive tool to get out of pressure against strings into low hitbox normals, such as gatlings into ![]() Faust's 2H
Faust's 2H GuardLowStartup14Recovery25Advantage-8. Back Megafist can also discourage resetting pressure, as an attacker may find themself running into its hitbox while Potemkin disengages
| Version | ProrationA percentage-based damage modifier applied to certain attacks independently of other forms of damage scaling. | Level
|
RISC+How much R.I.S.C. this move builds when normal or instant blocked. | RISC-How much R.I.S.C. this move removes on hit. | ||||||||||||||||||||||||||||||||||||
|---|---|---|---|---|---|---|---|---|---|---|---|---|---|---|---|---|---|---|---|---|---|---|---|---|---|---|---|---|---|---|---|---|---|---|---|---|---|---|---|---|
| 236P | 2 | 10 | 7 | |||||||||||||||||||||||||||||||||||||
| 214P | 4 | 20 | 6 |
236P:
- 3F onwards Airborne
214P:
- 5F onwards Airborne
Slide Head
236S

Only the shockwave is unblockable


Low hitbox

Hitbox extends fullscreen on both sides


| Damage | GuardHow this attack can be blocked. | StartupThe number of frames between inputting an attack and when the attack becomes active. Includes first active frame. | ActiveThe number of frames for which a move has hitboxes. Occurs after Startup. | RecoveryThe number of frames after a move's active frames during which the character cannot act assuming the move is not canceled. | On-BlockThe difference between the attacker's recovery and the period that the opponent is in blockstun. This Frame Advantage value is based off the fact that the very first active frame touches the opponent. | Invuln |
|---|---|---|---|---|---|---|
| 40[0] | Low[Unblockable] | 25[29] | 2[1] | Total 54 | -11 | 1-16 Above Knees |
Slide Head is one of Potemkin's two primary anti-zoning tools, the other being F.D.B.GuardMidStartup19Recovery12Advantage+2
This attack actually has two stages. The first is a standard attack that hits low with an extra long hard knockdown on hit. Once he lands, the second part of the move is a fullscreen unblockable projectile on the ground. If the opponent is grounded and not invincible, they will be knocked down for a similarly long hard knockdown. This long knockdown allows Potemkin to link an IAS Instant Air Special
Conceptually includes Tiger KneePerforming a special as soon as possible after becoming airborne. Usually, but not always, involves an input trick.
For Example: 2369S for a j.236S input. I.C.P.MGuardMidStartup13Recovery29Advantage- or HammerfallGuardMidStartup18[31]Recovery33Advantage-16 up close for a normal meaty.
Slide Head can also be timed so that the shockwave hits meaty. Only a reversal backdash, blitz, or another move with frame-one invuln/airborne state, will save an opponent from this. In the corner, this can be converted into an IAS I.C.P.M, or an RRC can convert into 6K loops, but anywhere else there is little reason to do this as a weak OTG hit is the only followup
Some characters have dashes that are considered airborne, which allow them to avoid the shockwave simply by dashing forward (![]() I-No,
I-No, ![]() Ramlethal,
Ramlethal, ![]() Dizzy,
Dizzy, ![]() Johnny, and more). Generally these dashes have obvious effects, like teleportation, or make a distinctive sound when starting up to indicate their unique status. As well as this, some characters have animations that inexplicably avoid the shockwave, such as
Johnny, and more). Generally these dashes have obvious effects, like teleportation, or make a distinctive sound when starting up to indicate their unique status. As well as this, some characters have animations that inexplicably avoid the shockwave, such as ![]() Sol's slide when he stops running.
Sol's slide when he stops running.
Slide Head has some upper body invincibility as it starts up. This window of upper body invincibility is also active during the YRC window so there is value in using Slide Head as a gimmicky anti-air against air dashes, where an air normal may whiff YRCing can allow Potemkin to punish that whiff. In addition, the upper body invincibility can be used to make a fireball or mid-hitting poke whiff, but all of these "tricks" are unreliable.
- Doing I.C.P.M as an OTG hit after Slide Head causes a significantly faster wakeup than the usual time after I.C.P.M, so be prepared
- If the first, low hitting part of the attack connects at all, the unblockable projectile will not occur
- There is a window in which Potemkin can hit the ground and create the shockwave effects, but then YRC before the actual shockwave occurs. Essentially useless, save the meter
| ProrationA percentage-based damage modifier applied to certain attacks independently of other forms of damage scaling. | Level
|
RISC+How much R.I.S.C. this move builds when normal or instant blocked. | RISC-How much R.I.S.C. this move removes on hit. | ||||||||||||||||||||||||||||||||||||
|---|---|---|---|---|---|---|---|---|---|---|---|---|---|---|---|---|---|---|---|---|---|---|---|---|---|---|---|---|---|---|---|---|---|---|---|---|---|---|---|
| 4[4] | 20 [NA] | 6 |
- [ ] Indicates when opponent is not near Potemkin. Slidehead shockwave is considered a projectile and can be blitzed and flicked back by potemkin
Hammer Fall
[4]6H

The closest to a dash you'll get

| Damage | GuardHow this attack can be blocked. | StartupThe number of frames between inputting an attack and when the attack becomes active. Includes first active frame. | ActiveThe number of frames for which a move has hitboxes. Occurs after Startup. | RecoveryThe number of frames after a move's active frames during which the character cannot act assuming the move is not canceled. | On-BlockThe difference between the attacker's recovery and the period that the opponent is in blockstun. This Frame Advantage value is based off the fact that the very first active frame touches the opponent. | Invuln |
|---|---|---|---|---|---|---|
| 60 | Mid | 18[31] | 2 | 33 | -16 | 1~Super Armor |
Potemkin's go-to mobility and pressure tool. He lunges forward on the ground, attacking only once he's in range of the opponent.
Potemkin can travel about 3/4 of a screen length like this, and the attack only goes active if the opponent is in range to be hit by it (though, if they're moving at the time, the actual attack portion's startup may still cause it to miss). While traveling forward, Potemkin has a single hit of super armor, which will absorb any attack besides Overdrives for half damage and keep on truckin'.
Since it's very punishable on block, its a risky move to use without meter to RC it. Also has some utility in combos, as it floats on hit, with long untechable time on counter hit. Mostly, though, it's used for Hammerfall Brake.
| ProrationA percentage-based damage modifier applied to certain attacks independently of other forms of damage scaling. | Level
|
RISC+How much R.I.S.C. this move builds when normal or instant blocked. | RISC-How much R.I.S.C. this move removes on hit. | ||||||||||||||||||||||||||||||||||||
|---|---|---|---|---|---|---|---|---|---|---|---|---|---|---|---|---|---|---|---|---|---|---|---|---|---|---|---|---|---|---|---|---|---|---|---|---|---|---|---|
| 4 | 20 | 6 |
- [ ] Indicates slowest
- 30 frames charge required
- can be cancelled to Hammer Fall Brake after first frame
Hammer Fall Break
P during Hammer Fall
6H-P.png)
6H-P_hitbox.png)
| Version | Damage | GuardHow this attack can be blocked. | StartupThe number of frames between inputting an attack and when the attack becomes active. Includes first active frame. | ActiveThe number of frames for which a move has hitboxes. Occurs after Startup. | RecoveryThe number of frames after a move's active frames during which the character cannot act assuming the move is not canceled. | On-BlockThe difference between the attacker's recovery and the period that the opponent is in blockstun. This Frame Advantage value is based off the fact that the very first active frame touches the opponent. | Invuln |
|---|---|---|---|---|---|---|---|
| Hammer Fall > P | Total 15 |
By hitting P during a Hammerfall, Potemkin comes to a sudden stop, so long as the attack hasn't started. This allows him to, for example:
- Absorb the hit of an obvious attack with long recovery, Brake, and punish.
- Cancel into Hammerfall during a block string, stop early, and tick grab/punish escape attempt/continue pressure.
- Create combos by canceling attacks into Hammerfall, Braking, then following up. (Especially common after 2H or cornered 6Ks!)
| Hammerfall Break Advantage Table | |||||
|---|---|---|---|---|---|
| Attack | Level | Block | Instant Block | Faultless Defense | Air Faultless |
| 5P | 1 | -5 | -8 | -3 | -2 |
| 2P | 0 | -7 | -9 | -5 | -5 |
| 5K | 2 | -3 | -6 | -1 | +1 |
| 2K | 1 | -5 | -8 | -3 | -2 |
| 6K | 4 | +2 | -2 | +4 | +7 |
| c.S | 2 | -3 | -6 | -1 | +1 |
| f.S | 2 | -3 | -6 | -1 | +1 |
| 2S | 3 | 0 | -4 | +2 | +4 |
| 5H | 4 | +2 | -2 | +4 | +7 |
| 2H | 4 | +2 | -2 | +4 | +7 |
| 6H | 4 | +2 | -2 | +4 | +7 |
| Version | ProrationA percentage-based damage modifier applied to certain attacks independently of other forms of damage scaling. | Level
|
RISC+How much R.I.S.C. this move builds when normal or instant blocked. | RISC-How much R.I.S.C. this move removes on hit. | ||||||||||||||||||||||||||||||||||||
|---|---|---|---|---|---|---|---|---|---|---|---|---|---|---|---|---|---|---|---|---|---|---|---|---|---|---|---|---|---|---|---|---|---|---|---|---|---|---|---|---|
| Hammer Fall > P |
Hammer Fall > P:
F.D.B.
63214S (Hold OK)

Your fireball? ...My fireball.


Reflected projectile


| Version | Damage | GuardHow this attack can be blocked. | StartupThe number of frames between inputting an attack and when the attack becomes active. Includes first active frame. | ActiveThe number of frames for which a move has hitboxes. Occurs after Startup. | RecoveryThe number of frames after a move's active frames during which the character cannot act assuming the move is not canceled. | On-BlockThe difference between the attacker's recovery and the period that the opponent is in blockstun. This Frame Advantage value is based off the fact that the very first active frame touches the opponent. | Invuln |
|---|---|---|---|---|---|---|---|
| 63214S | 40 | Mid | 19 | 3 | 12 | +2 | 4~18 Reflect |
| 63214[S] | 40 | Mid | 19~36 | 3 | 12 | +2 | 4~9 Reflect 1~9 after release Reflect |
| Reflect Projectile | 16 | All | 2 | 150 | Total 22 | 1~22 Strike |
Also known as "Flick". Potemkin kneels down and props his arm up, storing up energy and unleashing it with a quick flick. The flick itself has a massive hitbox, much larger than its animation suggests, and can stagger opponents on hit or keep Potemkin safe on block. Its fast startup creates opportunities for combos on the ground, especially after 6K.
- Holding S delays flick.
- Reflecting
While F.D.B. is starting up (frames 4~18), if a projectile attack hits Potemkin, he'll reflect it back with the flick as a screen-filling wave of explosions. This wave eats up other projectiles it meets, and if it hits the opponent on the ground, will cause them to stagger (on air hit they just get floated a bit, but the untech time is still decent). This instant flick also makes Potemkin recover significantly faster, allowing him to capitalize on this new pressure he's created.
- If Potemkin reflects a projectile, he becomes strike invulnerable until he recovers.
- The strength of the relfected projectile is high enough that it will usually erase any other projectile on contact.
| Reflectable Projectiles Table | |
|---|---|
| Character | Move |
|
Business Ninpo: Caltrops | |
|
Sickle Flash | |
|
Tatami Gaeshi | |
|
Task A | |
|
Gamma Blade | |
|
I used this to catch fish | |
|
Pineberry | |
|
5D Reflect | |
|
5D | |
|
Remove the Chain of Chiron | |
|
N/A | |
|
Glitter is Gold | |
|
5D | |
|
5D | |
|
Graviert Wurde | |
|
Applause for the Victim | |
|
Tandem Top | |
|
Slide Head | |
|
Deploy Giant Sword | |
|
Schmerz Berg | |
|
N/A | |
|
Helter Skelter | |
|
Gun Flame | |
|
Ball Hit | |
|
Invite Hell | |


| Version | ProrationA percentage-based damage modifier applied to certain attacks independently of other forms of damage scaling. | Level
|
RISC+How much R.I.S.C. this move builds when normal or instant blocked. | RISC-How much R.I.S.C. this move removes on hit. | ||||||||||||||||||||||||||||||||||||
|---|---|---|---|---|---|---|---|---|---|---|---|---|---|---|---|---|---|---|---|---|---|---|---|---|---|---|---|---|---|---|---|---|---|---|---|---|---|---|---|---|
| 63214S | 3 | 14 | 6 | |||||||||||||||||||||||||||||||||||||
| 63214[S] | 3 | 14 | 6 | |||||||||||||||||||||||||||||||||||||
| Reflect Projectile | 2 | 10 | 7 |
63214S:
- If hit with a projectile during reflect frames, a projectile will be created. Will not reflect any supers and parachuting chibi faust item.
63214[S]:
- If hit with a projectile during reflect frames, a projectile will be created. Will not reflect any supers and parachuting chibi faust item.
- Attack starts up 10F after button release
Reflect Projectile:
- Projectile will destroy other normal projectiles on contact
- Air hit is untechable
- Ground hit causes short stagger
Potemkin Buster
632146P
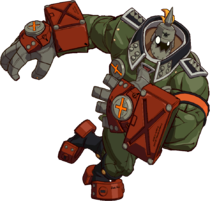
Don't let them see this

Show them this instead


| Damage | GuardHow this attack can be blocked. | StartupThe number of frames between inputting an attack and when the attack becomes active. Includes first active frame. | ActiveThe number of frames for which a move has hitboxes. Occurs after Startup. | RecoveryThe number of frames after a move's active frames during which the character cannot act assuming the move is not canceled. | On-BlockThe difference between the attacker's recovery and the period that the opponent is in blockstun. This Frame Advantage value is based off the fact that the very first active frame touches the opponent. | Invuln |
|---|---|---|---|---|---|---|
| 0,150,0 | Ground Throw: 308000 | 3 | Total 40 | +62 | 1~2 Throw 3~5 All |
Potemkin's signature attack, and one of the scariest command grabs in all of fighting games. Deals high damage, has surprisingly long reach and incredibly fast startup.
Potemkin can even leverage his incredible backdash invuln and pair it with that of Potemkin Buster's to slip through blockstrings and punish moves that are normally active enough to beat backdashes.
With meter, Potemkin can combo via RCing as he throws the opponent away, jumping forward and hitting j.H late, then following up on the ground with something like c.S > f.S > Heat Knuckle, or a 6K loop if in the corner.
| ProrationA percentage-based damage modifier applied to certain attacks independently of other forms of damage scaling. | Level
|
RISC+How much R.I.S.C. this move builds when normal or instant blocked. | RISC-How much R.I.S.C. this move removes on hit. | ||||||||||||||||||||||||||||||||||||
|---|---|---|---|---|---|---|---|---|---|---|---|---|---|---|---|---|---|---|---|---|---|---|---|---|---|---|---|---|---|---|---|---|---|---|---|---|---|---|---|
| Forced: 50% | 0 | NA | 6,0,15 |
- Stun value: 70
Trishula
214K

Very committal anti air


| Damage | GuardHow this attack can be blocked. | StartupThe number of frames between inputting an attack and when the attack becomes active. Includes first active frame. | ActiveThe number of frames for which a move has hitboxes. Occurs after Startup. | RecoveryThe number of frames after a move's active frames during which the character cannot act assuming the move is not canceled. | On-BlockThe difference between the attacker's recovery and the period that the opponent is in blockstun. This Frame Advantage value is based off the fact that the very first active frame touches the opponent. | Invuln |
|---|---|---|---|---|---|---|
| 48 | Mid | 25 | 15 | 18 | -6 | 1~39 Above Knees |
Potemkin hunkers down before exploding in a pillar of fire. Combo tool and situational anti-air.
Has high vertical reach, far past what the animation suggests, but almost none horizontally. Trishula launches the opponent on hit and also pulls them slightly inward, with time to air combousually with superjump j.P > j.K > j.S > ICPM. Scoring a counter hit near the corner grants 6H combos.
Absorbs projectiles while starting up, and has upper body invulnerability to boot, but is mostly used as combo tool or to catch really obvious air approaches.
- Potemkin is in counter hit state during recovery.
| ProrationA percentage-based damage modifier applied to certain attacks independently of other forms of damage scaling. | Level
|
RISC+How much R.I.S.C. this move builds when normal or instant blocked. | RISC-How much R.I.S.C. this move removes on hit. | ||||||||||||||||||||||||||||||||||||
|---|---|---|---|---|---|---|---|---|---|---|---|---|---|---|---|---|---|---|---|---|---|---|---|---|---|---|---|---|---|---|---|---|---|---|---|---|---|---|---|
| Forced: 80% | 2 | 10 | 7 |
- In counter hit state for the recovery
I.C.P.M
j.41236H

Hit the gym enough and you too can be classified as a WMD


| Damage | GuardHow this attack can be blocked. | StartupThe number of frames between inputting an attack and when the attack becomes active. Includes first active frame. | ActiveThe number of frames for which a move has hitboxes. Occurs after Startup. | RecoveryThe number of frames after a move's active frames during which the character cannot act assuming the move is not canceled. | On-BlockThe difference between the attacker's recovery and the period that the opponent is in blockstun. This Frame Advantage value is based off the fact that the very first active frame touches the opponent. | Invuln |
|---|---|---|---|---|---|---|
| 0,60 | Mid | 13 | Until Landing | 29 |
Potemkin propels himself through the air in an arc, leaving smoke in his wake. The move is active until Potemkin hits the ground. If he hits his opponent, they're pinned to his Pickelhaube and are dragged to the ground with him. If he misses, he sticks in the ground himself and is stuck there briefly before recovering, very unsafe on block/whiff.
- If YRC'd during the start of the launch, Potemkin is launched across the stage extremely fast and remains completely actionable which can lead to some silly setups or some unexpected movement/mixups
- Potemkin can RRC when he has pinned his opponent and combo afterwards.
Potemkin gets significant advantage on wakeup against opponents hit by ICPM, which varies based on the opponent's wake-up timing:
| Advantage Table | |
|---|---|
| 20F | |
| 22F | |
| 23F | |
| 24F | |
| 25F | |
| 26F | |
| 27F | |
| 29F | |
| ProrationA percentage-based damage modifier applied to certain attacks independently of other forms of damage scaling. | Level
|
RISC+How much R.I.S.C. this move builds when normal or instant blocked. | RISC-How much R.I.S.C. this move removes on hit. | ||||||||||||||||||||||||||||||||||||
|---|---|---|---|---|---|---|---|---|---|---|---|---|---|---|---|---|---|---|---|---|---|---|---|---|---|---|---|---|---|---|---|---|---|---|---|---|---|---|---|
| 4 | 20 | 7,6 |
- Frame advantage on hit is +37F
- Frame advantage on OTG hit is +11F
Overdrives
Heavenly Potemkin Buster
236236S or 236236D


| Damage | GuardHow this attack can be blocked. | StartupThe number of frames between inputting an attack and when the attack becomes active. Includes first active frame. | ActiveThe number of frames for which a move has hitboxes. Occurs after Startup. | RecoveryThe number of frames after a move's active frames during which the character cannot act assuming the move is not canceled. | On-BlockThe difference between the attacker's recovery and the period that the opponent is in blockstun. This Frame Advantage value is based off the fact that the very first active frame touches the opponent. | Invuln |
|---|---|---|---|---|---|---|
| 0,170,0 [0,212,0] |
Unblockable | 10+1 | 15 | 10 | +56 | 1~12 Full 13~25 Throw & Upper Body |
The anti-air grab. Potemkin launches his entire body upward at about a 45-degree angle, although the hitbox is only on the inside of his hand and arm.
Does good damage, and is easy to connect after virtually any ground-to-air hit, making it a reliable ender. Can also be used to punish air techs or for a hard read on a jump. Corner HPB > RRC > 6H > xx leads to huge damage. Hellfire Burst HPB is one of the highest damage attacks in the entire game (if you somehow manage to land it).
| ProrationA percentage-based damage modifier applied to certain attacks independently of other forms of damage scaling. | Level
|
RISC+How much R.I.S.C. this move builds when normal or instant blocked. | RISC-How much R.I.S.C. this move removes on hit. | ||||||||||||||||||||||||||||||||||||
|---|---|---|---|---|---|---|---|---|---|---|---|---|---|---|---|---|---|---|---|---|---|---|---|---|---|---|---|---|---|---|---|---|---|---|---|---|---|---|---|
| ― | 4 | NA | 6 |
- Values in [ ] are for Burst version
- Stun value: 85 [170]
- Minimum damage: 20% [50%]
Giganter Kai
632146H

| Damage | GuardHow this attack can be blocked. | StartupThe number of frames between inputting an attack and when the attack becomes active. Includes first active frame. | ActiveThe number of frames for which a move has hitboxes. Occurs after Startup. | RecoveryThe number of frames after a move's active frames during which the character cannot act assuming the move is not canceled. | On-BlockThe difference between the attacker's recovery and the period that the opponent is in blockstun. This Frame Advantage value is based off the fact that the very first active frame touches the opponent. | Invuln |
|---|---|---|---|---|---|---|
| 30 | Mid | 9+8 | 60 | Total 50 | ±0 | 1~9 Full |
Potemkin creates a field of energy that slowly floats forward. This wave of energy absorbs other projectiles that hit it, and if it hits the opponent it staggers them (if grounded) or puts them in a slow float with long untechable time (if airborne). In both instances, Potemkin is afforded plenty of time to follow up for big damage. Since it's a projectile, he isn't pushed back by the attack connecting, allowing him to make some interesting combos in the corner. In addition, the energy wave has a very high stun modifier, making it easier to dizzy the opponent.
| ProrationA percentage-based damage modifier applied to certain attacks independently of other forms of damage scaling. | Level
|
RISC+How much R.I.S.C. this move builds when normal or instant blocked. | RISC-How much R.I.S.C. this move removes on hit. | ||||||||||||||||||||||||||||||||||||
|---|---|---|---|---|---|---|---|---|---|---|---|---|---|---|---|---|---|---|---|---|---|---|---|---|---|---|---|---|---|---|---|---|---|---|---|---|---|---|---|
| ― | 4 | 20 | 10 |
- Staggers opponent on hit. Max duration 69F, Frame Adv: +16 to +51
- Stun value: 135
- Minimum damage: 20%
Gigantic Bullet Kai
Giganter Kai > 4123641236P


| Damage | GuardHow this attack can be blocked. | StartupThe number of frames between inputting an attack and when the attack becomes active. Includes first active frame. | ActiveThe number of frames for which a move has hitboxes. Occurs after Startup. | RecoveryThe number of frames after a move's active frames during which the character cannot act assuming the move is not canceled. | On-BlockThe difference between the attacker's recovery and the period that the opponent is in blockstun. This Frame Advantage value is based off the fact that the very first active frame touches the opponent. | Invuln |
|---|---|---|---|---|---|---|
| 145 | Mid | 49 | 24 | 17 | -22 |
The follow-up to Giganter. Potemkin launches himself forward after a delay.
Does massive damage and blows the opponent away on hit with substantial untechable time. Unlike Giganter itself, however, it has a 0x stun modifier, so its damage isn't counted at all when determining dizzy state for the opponent. This makes the choice to use Bullet an interesting one: go for the upfront damage and potential follow-up damage, or go for the dizzy and reset into an even more damaging combo?
The core factor for deciding which to use is the opponent's current health bar - the more health they have, the more favored going for dizzy is. Positioning matters as well, since Bullet only offers the opportunity to follow up when in or very near the corner.
| ProrationA percentage-based damage modifier applied to certain attacks independently of other forms of damage scaling. | Level
|
RISC+How much R.I.S.C. this move builds when normal or instant blocked. | RISC-How much R.I.S.C. this move removes on hit. | ||||||||||||||||||||||||||||||||||||
|---|---|---|---|---|---|---|---|---|---|---|---|---|---|---|---|---|---|---|---|---|---|---|---|---|---|---|---|---|---|---|---|---|---|---|---|---|---|---|---|
| 4 | 20 | 10 |
- Stun value: 0
- Minimum damage: 20%
Instant Kill
Infernal Tour
During IK Mode: 236236H


"The final phase!"

Clearly didn't enjoy the tour


| Damage | GuardHow this attack can be blocked. | StartupThe number of frames between inputting an attack and when the attack becomes active. Includes first active frame. | ActiveThe number of frames for which a move has hitboxes. Occurs after Startup. | RecoveryThe number of frames after a move's active frames during which the character cannot act assuming the move is not canceled. | On-BlockThe difference between the attacker's recovery and the period that the opponent is in blockstun. This Frame Advantage value is based off the fact that the very first active frame touches the opponent. | Invuln |
|---|---|---|---|---|---|---|
| DESTROY | Throw: 230000 | 9+8 [5+6] |
3 | 62 |
Cannot be re-blitzed like other IK's, since it's a throw, and despite being a throw, can still be comboed into like a normal IK, as long as Gold IK is available. Much cooler than Magnum Opera.
| ProrationA percentage-based damage modifier applied to certain attacks independently of other forms of damage scaling. | Level
|
RISC+How much R.I.S.C. this move builds when normal or instant blocked. | RISC-How much R.I.S.C. this move removes on hit. | ||||||||||||||||||||||||||||||||||||
|---|---|---|---|---|---|---|---|---|---|---|---|---|---|---|---|---|---|---|---|---|---|---|---|---|---|---|---|---|---|---|---|---|---|---|---|---|---|---|---|
| 0 | NA | 6 |
- [ ] Indicates when match point for you, opponent in Hell Fire state, and you have 50% Tension
- IK Mode Activation: 98F [5F+5F]
- During [ ], can hit opponents in hitstun
Colors
 |
 |
 |
 |
 |
 |
 |
 |
 |
 |
 |
 |
 |
 |
 |
 |
 |
 |
 |
 |
 |
 |
 |
 |
To edit frame data, edit values in GGXRD-R2/Potemkin/Data.
Answer
Axl Low
Baiken
Bedman
Chipp Zanuff
Dizzy
Elphelt Valentine
Faust
I-No
Jack-O'
Jam Kuradoberi
Johnny
Kum Haehyun
Ky Kiske
Leo Whitefang
May
Millia Rage
Potemkin
Ramlethal Valentine
Raven
Sin Kiske
Slayer
Sol Badguy
Venom
Zato-1
System Links
Mechanics
Application & Advanced Information
Archived Information