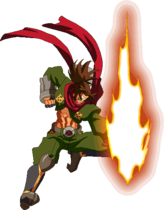
Overview
A reliable ninja who is prepared to spill his blood for love and justice. After fleeing from his home country of Ikaruga, he became a vigilante, biding his time until he could restore his country's honor. After learning of the existence of his former lord's son, he appears on the scene once again.
Bang's Drive is called "Burning Heart." Most attacks that involve "D" will have an auto-guard period, in which the attack itself can block most incoming attacks. After blocking an attack, Bang will continue with the "D" attack and can perform "Secret Art: Bang's Shadowstep Jutsu" or simply put "Teleport". Each "D" attack has different auto-guard attributes, and each button pressed (A/B/C) after an auto-guard will cause Bang to travel different distances.
Also, when any of the "D" attacks hit your opponent, an icon in the "Fu-Rin-Ka-Zan" Gauge will light up. Once all four of these icons are lit up, then Bang will be able to use his Distortion Drive: "Shishigami-style Forbidden Technique: 'Fu-Rin-Ka-Zan'." This is like a "power up" mode for Bang which gives him extreme mobility and increased power at the cost of not being able to block, he can however "Barrier" block.
- Health: 11,500
- Guard Primers: 5
- Movement Options: 1 Double Jump/ 2 Airdashes, Dash-type:Run
![]() Bang Shishigami is offensive, Heavy Rush-down, Mix-up
Bang Shishigami is offensive, Heavy Rush-down, Mix-up
- High air mobility
- Good oki game with use of nails and drives
- Drives provide guardpoints and teleports
- Can close distances with drive teleports
- Placement of nails provide extra air dashes
- Most attacks are jump cancelable making it easy for quick crossups
- Can put out a lot of pressure against opponents
- Hard to approach without nails
- Combos can be somewhat complicated
- Slow attacks
- Anti-airs are nearly non-existant
Move List
- See also: Bang Full Frame Data
Normal Moves
5A

Nice Pick Up.

5B

Nice Pick Up.

5C

Lay Down the Justice

2A

2B

Nice Pick Up.

| Damage | Heat Gain | P1 | P2 | Startup | Active | Recovery | Frame Adv | Hitbox |
|---|---|---|---|---|---|---|---|---|
| 620 | 256 | 90 | 89 | 13 | 3 | 20 | -6 | Click! |
Bang thrusts his elbow forward. 2B is mostly used in the middle of Bang's pressure strings and combos. It can also be used as a mid-range poke since it retracts Bang away after the fact or you can use it while going into 5B or 2C. 2B is also useful for punishing moves that are at high disadvantage on block (like DPs) due to it's good starting proration. Another use for 2B is to frame trap people off 5A or 2A if they are mashing.
2C

Sweep

3C

Hard Sweep

| Damage | Heat Gain | P1 | P2 | Startup | Active | Recovery | Frame Adv | Hitbox |
|---|---|---|---|---|---|---|---|---|
| 880 | 364 | 80 | 94 | 15 | 9 | 26 | -14 | Click! |
Bang does a slide kick across the ground. Low. This covers a lot of ground and can be used as a long range poke. But it is easily punishable so be careful. Usually made safe by RCing if you have the meter and can lead to decent damage off FC.
6A

Standing Low

6B

6C

Nice Pick Up.

j.A

| Damage | Heat Gain | P1 | P2 | Startup | Active | Recovery | Frame Adv | Hitbox |
|---|---|---|---|---|---|---|---|---|
| 300 | 124 | 90 | 84 | 7 | 2 | 9 | - | Click! |
Bang throws a quick air punch. Can be repeated for a couple of punches switching hands. Fast short range air poke, a way to potentially anti-air even. You can use air and ground command grabs as well as air unblockable ground normals to trap after this move.
j.B

j.C

| Damage | Heat Gain | P1 | P2 | Startup | Active | Recovery | Frame Adv | Hitbox |
|---|---|---|---|---|---|---|---|---|
| 650 | 269 | 90 | 89 | 12 | 2 | 23 | - | Click! |
Bang kicks downward. Air to ground. Occasional air to air too. Will send an aerial opponent to the ground. Can go into an ground bread and butter if hitting a grounded opponent. Can crossup, but harder to do.
j.4B

j.4C
Counter Assault
Drive Moves (Burning Heart)
5D

| Damage | Heat Gain | P1 | P2 | Startup | Active | Recovery | Frame Adv | Hitbox |
|---|---|---|---|---|---|---|---|---|
| 680[1000] | 281[414] | 70 | 80 | 19[24] | 4 | 28 | -15 | Click! |
Bang’s gauntlets glow, then he lunges with an uppercut. Only autoguards mids and highs from frames 3-11. Launches the opponent, extending his previously weak crouching combos. Gains 1 Seal on hit.
2D

6D

j.D
Nice Pick Up.

| Damage | Heat Gain | P1 | P2 | Startup | Active | Recovery | Frame Adv | Hitbox |
|---|---|---|---|---|---|---|---|---|
| 750[1000] | 310[414] | 80 | 72[92] | 24 | 1 | 24 | -5 | Click! |
Bang gathers energy into his hands and slams downward. Autoguard 4-15F against mid and high attacks. Used in some air combos as well. Downs opponent no matter where you hit them (air or ground). Gains 1 Seal on hit.
Teleport / Air Teleport (Secret Art: Bang's Shadowstep Jutsu) (A/B/C after Guard Point off Drives) When your D move autoguards an attack, pressing A, B, or C will have Bang teleport, then finish the attack. Button pressed determines distance teleported, A being the shortest, C being the longest. Typically you will teleport behind the opponent. Learn to know which to use, or even to teleport at all, depending on the situation.
Regular Throws
Ground Throw

Air Throw

Special Moves
Bang's Void Tempest Kick
623C

| Damage | Heat Gain | P1 | P2 | Startup | Active | Recovery | Frame Adv | Hitbox |
|---|---|---|---|---|---|---|---|---|
| 0×2,600,653,842 | 0×2,248,270,348 | 100 | 100×2,65,90,94 | 13 | 3 | 37 | - | Click! |
Bang grabs the opponent, sending them upward delivering a few hits before kicking them downward. Command throw, though pretty slow and doesn't have great range...Part of your mixup game, as it cannot be broken outside of hit or blockstun. You retain aerial options (such as jumping, dashing, etc.). Rapid the last launching kick to get some combo follow ups.
Bang's Void Tempest Kick EX
j.623C

| Damage | Heat Gain | P1 | P2 | Startup | Active | Recovery | Frame Adv | Hitbox |
|---|---|---|---|---|---|---|---|---|
| 0,700,785,1000 | 0,289,324,414 | 100 | 100,65,90,94 | 7 | 3 | 20 | - | Click! |
Bang grabs his opponent, kicking them up once, then downwards, followed by launching them in the air. Aerial command grab. Catch predictable techs or jumps for some solid damage. Halts momentum if whiffed. Rapid before the launch (but after Bang gets to the ground) to go for combo follow ups.
Bang's Unstoppable Double Palm Thrust
623B

Bang's Heavenly Double Palm Thrust
j.623B

| Damage | Heat Gain | P1 | P2 | Startup | Active | Recovery | Frame Adv | Hitbox |
|---|---|---|---|---|---|---|---|---|
| 1300 | 538 | 100 | 94 | 13 | 3 | Landing + 7 | -4 | Click! |
Bang lunges forward once again throwing a punch with both arms engulfed in flame. Similar to 623B. Game counts it as a different move for damage scaling purposes. Better recovery time. An opponent bouncing off the wall from outside the corner can possibly get hit with 5c or 6d to add plenty of the combo, makes this essential to learn.
Bang-style Shuriken
j.236A/B/C/D

shuriken Special!

A Nail (poison)

B Nail (explosion)

C Nail (web)

D Nail


| Version | Damage | Heat Gain | P1 | P2 | Startup | Active | Recovery | Frame Adv | Hitbox |
|---|---|---|---|---|---|---|---|---|---|
| A Version | 300 | 124 | 100 | 84 | 9 | - | 213 Total | - | Click! |
| B Version | 300×2 | 124×2 | 100 | 84, 89 | 16 | until landing (28) 3 | 36 Total | -1 | Click! |
| C Version | 300 | 124 | 100 | 70 | 18 | landing + 9 | -1 | Click! | |
| D Version | 177×3 | 73×3 | 100 | 82 | 9 | - | 23 Total | +5 | Click! |
A nails are thrown at a 30 degree angle and Bang retains his momentum. These nails poison on hit. Causes knockdown. Can be used to maintain distance from afar or approach by cancelling your airdash with one (Bang retains the momentum). Poison goes away after a set period of time or if Bang is hit.
B nails are thrown at a 45 degree angle, and Bang retains his momentum. These nails will bounce off the ground or whatever they hit and then make a small explosion. Covers some space, though not as effective as D Nails.
C nails are thrown at a 60 degree angle and Bang stays in place. These nails upon hit will ensnare the opponent in a web. Typically used for "Seal Combos" to go into FRKZ.
D nails are 3 nails thrown at a time at all 30, 45, and 60 degree angles. They halt Bang in the air, and bounce off the ground. They are also fast to come out and recover. D nails have a ton of versatile uses, such as controlling space, keeping distance, providing cover, and even resetting pressure. As expected, they consume 3 nails from your stock instead of 12 unfortunately.
Set Nail/Bumpers
214A/B/C/D air OK


Nail Set Diagram. Same when airborne.


| Version | Damage | Heat Gain | P1 | P2 | Startup | Active | Recovery | Frame Adv | Hitbox |
|---|---|---|---|---|---|---|---|---|---|
| Ground | - | - | - | - | - | - | 30 total | - | Click! |
| Air | - | - | - | - | - | - | 33 total | - | Click! |
Bang lifts his arm up and places a bumper on screen. A and B versions set bumper in front of you, C above you, D behind you. Jumping into a bumper then pressing a direction will cause you dash in that direction. Only one bumper of each version will be set at a time, setting a second say, A bumper will get rid of the old one, but setting a C bumper while an A bumper is out, will have both of them on screen.
Air version is same as the grounded version. TKing the Set Nail will alter how high or low the position is.
Nail Dash

Any direction off Set Nail

Distortion Drives
Shishigami-style Secret Technique: "Fatal Eruption" / Daifunka
2363214C

| Damage | Heat Gain | P1 | P2 | Startup | Active | Recovery | Frame Adv | Hitbox |
|---|---|---|---|---|---|---|---|---|
| 0,910×4,0,3373 | (0,209×4,0,858) | 75,100×6 | 89,92×4,100,65 | 1+17 | 24 | 20 | -27 | Click! |
Bang dashes forward, if he connects, will perform a damaging autocombo. Carries opponent to the corner. Has invincibility on dash (frames 1-24 after dash). Unsafe on block. Takes a primer off.
Shishigami-style Forbidden Technique: "Fu-Rin-Ka-Zan" / FRKZ
632146D

| Damage | Heat Gain | P1 | P2 | Startup | Active | Recovery | Frame Adv | Hitbox |
|---|---|---|---|---|---|---|---|---|
| - | - | - | - | - | - | 1 total+0 | -- | Click! |
The game will pause, Bang’s special theme will play, and Bang will pose, powering up into FuRinKaZan. Bang becomes extremely fast, with his normal movement being changed into a special 8 way dash that can go through opponents. Most normals (I believe the exceptions are 6b and 3c) become cancellable into this dash, and you can cancel the dash at certain points with a throw or attack. In the air, you can dash 3 times at most before you fall to the ground. You cannot throw nails while dashing. Activating this move will create slight frame advantage. Due to the fact that teachable time is determined by attacks, not time, you can activate mid combo and finish it with FuRinKaZan. Cannot block due to dashing, but you CAN barrier block. Attacks do 120% damage. Requires 4 Seals gained through landing Drive attacks.
Allows Bang to do strong midscreen damage and great mixup at the cost of some defense.
Shishigami-style Ultimate Technique: "Steel Rain"
632146B


| Damage | Heat Gain | P1 | P2 | Startup | Active | Recovery | Frame Adv | Hitbox |
|---|---|---|---|---|---|---|---|---|
| 220xN | (50xN) | 100 | 96 | 21+16 | 14* | 85 total | - | Click! |
Bang throws an umbrella above his opponent, causing many nails to rain from it. Consumes all nails, with more damage/hits depending on remaining nails. Slightly invincible. Generally Bang’s other supers are more viable, but this has uses too. Try using it up close to bait DPs, even if it means a trade, you’ll get the free damage in that case or a chance to start pressure.
Shishigami-style Technique: "Bang's Infinite Chaos-Fist of the Void" / Ashura
236236A

| Damage | Heat Gain | P1 | P2 | Startup | Active | Recovery | Frame Adv | Hitbox |
|---|---|---|---|---|---|---|---|---|
| 0,3126 | (0,718) | 100 | 100, 40 | 1=8 | 3 | 25 | -7 | Click! |
Bang goes into a powerup stance releasing tons of energy around him. On hit, the opponent will get sent up and 2 Bang’s will appear, attacking in an X formation, as the opponent drops down, Bang will pose like a Kamen Rider. Unlike Daifunka, covers above him. This plus the invincibility can make this a reversal of choice. Forces opponents to respect you when pressuring or getting up or get hit. You can RC this move on block or on hit after the full animation is over.
Astral Heat
Shishigami-style Forbidden Technique: "The Ultimate Bang"
j.6321463214D


| Damage | Heat Gain | P1 | P2 | Startup | Active | Recovery | Frame Adv | Hitbox |
|---|---|---|---|---|---|---|---|---|
| Death | 0 | - | - | 9+24 | 3 | until landing | - | Click! |
Bang will get the giant nail off of his back and stab. Connecting will cause Bang to go through many random old Japanese styled doorways on his way to drive the nail into his victim. Bang will then do his FuRinKaZan victory pose (crossed arms posed with the letters on the side)…without wearing anything but a scarf and underwear. No minimum height requirement allow this to be TK’d! Has lots of autoguard everywhere. Oh and it's unblockable too . If you have the heat at the end of the match, go for it! You’ll be the hero at your arcade/tournament/gathering for sure.
Strategy
Offense
For spacing, use one of the "Bang-style Shuriken." The A,B,and D versions will all do something different in regards to spacing, so keep that in mind.
The A version is very fast, making it effective for long range spacing. The B version will bounce and then explode when it either your opponent or the ground, so predict where you want the explosion to occur when you use it. The D version will throw 3 shuriken that bounce, covering a wide area. Both the B and D versions are relatively slow moving, so consider using them as cover fire while you dash towards your opponent. All of Bang's shuriken attacks will consume one of his nails; a counter for the number of nails remaining is displayed above the Heat gauge. The A,B, and C versions consume 1 nail whereas the D version will consume 3, so be careful. Including "Bang-style Shuriken," Bang has other moves that consume his remaining nails, such as "Set Nail" (1 nail) and "Shishigami-style Ultimate Technique: 'Steel Rain'" (all remaining nails).
Besides the shuriken, good moves to approach your opponent are, aerial dash>j.C or j.4B. j.4B will hit opponents from behind, so use it as you jump over an opponent.
After closing the distance, use 5A or 5B to start a string of high and low attacks to break their guard. From 5A, the low hitting 2A and the high hitting 5C are effective. From 5B, the low hitting 6A and 2C are effective. Also, if the 5C is guarded, you can also use another high attack 6B or the low 2C, to continue mixing up.
-Please see the Mix-Up Section for further details.-
Bumpers:
Although these are somewhat of a gimmick to begin with, and take from the important nail supply a well placed bumper can still lead to damage and open opponents up. Generally you’ll be placing them above your head or infront. Try to use your dash similar to a FuRinKaZan dash to catch your opponent off guard with a mixup. You can go for a crossup j.c, a 2 or 3 or dash into a mixup or pressure, or a grab. A simple example of placement is to try after a 6d that won't lead to a corner wall bounce.
Besides setting nails individually, typically you would want to set them in a pattern with two nails of the same height together but at their respective positions. So for example Set Nails A+C or B+D. This allows you to dash off one bumper straight into the next to make up a huge distance extremely fast or mix-up your movement even further.
Because you can also TK the Set Nails and do them in mid-air, you can actually make it so 3 or more are within the same height at different spots on the screen, an example would be Set Nail B+D then moving under Set Nail B and doing a TK Set Nail A. This creates a setup of 3 nails all within the same height, allowing you to have amazing mobiltiy around the screen and potentially scary mix-up against the opponent.
Another useful setup for a single nail would be at an almost specific spot near the corner. Which nail you use at the time would be dependent upon where Bang is but for ease it would normally be Set Nail "B" or Set Nail "D" due to their default low height. You want it at a range where after doing say 5A>5B>2B pressure in the corner you can then jump cancel into the Set Nail and continue your pressure/mix-up.
A more advanced use for Set Nail would actually be during one of Bang's more advanced corner combos or after ending certain corner combos while in midair. Much like the above setup, the nail has to be placed in a very specific position in midair. The function of this is that it allows Bang to go into "relaunch" combos by having Bang dash off the Bumper mid-combo and continue to do a combo for more damage. (Currently assuming this still works in Extend.) Will post a video example once confirmed that it does.
Bang Combo Tutorial - By: ?????? (Shishigami Kamen)
Bang Combo Tutorial (Part 2) - By: ?????? (Shishigami Kamen)
(Note: This covers mostly corner carry combos from P2 Starting Position, and some other ones.)
Bang Tutorial - By: ?? (Pochi)
Basic Nails/Bumpers Overview - By: Kensou
FRKZ:
Basic FRKZ Overview - By: Kensou
Please refer to the FRKZ section for more detailed information as well.
Mix-ups, Resets, Etc.
Bang's pressure is pretty good, and filled with mixup potential. The problem is that it needs nails from your ever short supply.
First a list of moves with special hit properties to get you an idea.
5A - Jump cancellable on block, neutral on block.
2A – Low
6A – Low, jump cancellable on block, +1 on block.
2C – Low
6D - Low
5C – Overhead, jump cancellable on block.
6B – Overhead. Avoids lows.
2B – Jump cancellable on block.
2D - Jump cancellable on block.
6C - Jump cancellable on block. Doesn't hit crouching.
623C – Grab – Untechable.
4/5/6BC – Grab – Techable.
2369C or D - nails close to the ground. Use after a jump cancellable move for advantage and reset/trap your mixup!
However, despite these options, let's go over some of the shortcomings.
Bang's normals and command grab lack range - this will either force the need to try reset or end your pressure, and make you more predictable.
Bang gets pushed back far from barrier guard - With problem number 1, this can cause you to whiff moves in unexpected situations. However, take advantage of barrier - they need to drop it to jump. and causes longer blockstun. It may be a good time to break out a throw if you're opponent barriers often.
Your basic pressure sequence is 5a,2a,5b,2b,2369d, and reset from there. On the reset you can do it again. On hit go into a bnb. These are your mixup options:
Adding in a 6a, 6b, 5c for an overhead/low mixup after nails or in the middle of the sequence. From there go into appropriate combos or oki sequence.
Jump cancelling into a j.c or airdash into j.4B. Hitting high and crossing up, and goes into bnb. You can also double jump into another j.c if blocked. Also on block, reset your pressure.
D moves: 2D/5D/j.D (not 6D, starts up too long) - Can be used to possibly catch people on the if you think they will attack on a pauseautoguard, or just to extend pressure, also these are jump cancellable!
Throw and command throw - Use after 2369d,5a, 2a, 6a, j.c or j.4B (these give most frame advantage, but your a moves all put you at a negative frame advantage). In addition, if you have a good hunch your opponent will attempt to jump out, tk command throw (9623C) will catch them!
Dash Under 2A>Mix-up - This is a fairly tricky option that can be used in certain instances due to the nature of Bang's combos or moves.
Example:
In the corner when Bang does a combo into j.623B the opponent wall bounces relatively high in the air above him as he is landing. From there Bang can usually "dash under" the opponent to keep them in the corner and finish the combo or just finish a combo that takes them out of the corner. By doing a dash under 2A in this instance you're in a sense mixing them up by using the momentum of the dash 2A to go under them and switching sides while they tech on the ground. From there you go into your mix-up. This is mixed up a step further by pretending to do the dash under 2A but staying on the same side.
This can also be used after Ashura to a certain extent depending on how they tech but not nearly as well.
The key to utilizing Bang's mixup is to both be innovative and diverse and potentially be repetitive at the same time. How so? Well naturally you'll need mixup and creativity to open people up. But if you find something that works, USE IT!
Okizeme
Okizeme is how you plan to follow up after a knockdown or a neutral tech near the ground. You have a lot of your mixup options from the pressure section (high/low/throw, attack into throw, bumper tricks, j.4B crossup).
After a bnb, the opponent techs neutral, measure the distance, know your options, and go from there! From the ground, be aware where your opponent can tech, and either gamble on where they go, or react to their direction.
Also beware of your opponents with dragon punches (Ragna, Jin, and Litchi with the staff), and throw in potential bait, including:
j.4B crossovers, safe jumps, fast recovery moves that will leave you safe, etc.
For higher air tech oki, the jumping command throw is a great way to punish predictable air techs.
Defense
Defensively Bang lacks solid options for dealing with the opponents offense. Bang does not have a reliable anti-air or meterless reversal and his back dash isn't all that great. Instead Bang has to mostly rely on his Drive to try and read or react to the opponents offense to get a guard point for a CH or to teleport away from pressure or out of the corner. Being able to block is extremely important in Bang's case since he can't just mash out a DP and using his Drives aren't as universal to beat the opponents options due to fact that certain attacks beat them outright. Using meter to Counter Assault and using your Burst either normally or as a wake-up Gold Burst can also be worthwhile.
Anti-Airs
For Anti-Airs, Bang's options are fairly limited. Most of the time you will be trying to use 5A or 5B but neither have any upper body invincibility so you're just trying to win with hitboxes or the opponent mistiming their attacks. Your other option will most likely be 2D because it guards against Upper and Mid attacks, but isn't reliable at all due to it's speed. You may also try to use j.A to catch them out of the air. Bang's best option is probably Ashura, as explained in the Reversals section. Using a Gold Burst against an incoming attack could be a situational option as well.
Really the best option would be to constantly be in motion so you're aren't put into a situation where you need to be worrying about Anti-Airing someone. Use Bang's mobility and extra air dash to your advantage.
Reversals
For Reversals, Bang's main option is his Drive, outside of just mashing 5A/Throw which I don't recommend. For the most part you would be using 6D/2D/5D, probably not j.D on wake-up. Off the guard points you can either teleport away potentially out of the corner or try to teleport near them to land the CH. Each of Bang's Distortions can also be used as Reversals to a certain degree. And as mentioned previously, doing wake up Gold Burst can work as well.
6D = Guards against mid and low attacks. The guard point activates on frame 1 which is why this can be a good option if you're making the right read. It gets beat by overheads/throws.
2D = Guards against upper and mid attacks. The guard point activates on frame 7, typically this would be used to react to the overheads. Other normals would probably beat it out due to the guard point not activating in time, or it being a low attack, or even if they go into a low attack after the guard point.
5D = Guards against upper and mid attacks. The guard point activates on frame 3. Because this was changed to not have full body guard point, imo this should be used less than the others and I would just use it to teleport out instead of trying to land the attack.
Daifunka = It is fully invul. from 1-24F after superflash. It also does decent damage by itself. The problem is it is easily punishable. Which means you're forced to either gamble or only use it if you have 100% Heat to RC on block. That's a huge meter issue. But if it's a close match it is still an option to consider. You could also use it to get out of the corner, but even on whiff that could very well get you punished in the process.
Steel Rain = Fully invul. 1-4F after superflash. This is more of a gimmick if anything. It CAN lead to some really good damage but it is at the cost of all your remaining nails and of course 50% Heat. It could potentially provide you with a mix-up opportunity as well. One of the major gimmicks if you land this is to then combo into Daifunka. Due to the nature of the setup and Daifunka, even if they manage to block AFTER Daifunka's initial hit, Daifunka's last attack is a grab and unblockable which leads into decent damage. The best use of this is when you're expecting the opponent to attack you during your wakeup tech. Since the invuliblity is short, you will trade with your opponent, however they will be unable to follow up due to the nails hitting them. Best if you have more health than your opponent if this is your plan.
FRKZ = While this doesn't have an invul, what it does is freeze the screen. What this means is if you do this on wake-up or really at anytime your opponent attacks, you get to see what attack they are doing and potentially go into one of your Drives to counter it or even go into Ashura if you had 100%. Depending on the attack and how early into the startup it is, you could even dash away or out of pressure. Just remember you can't block besides Barrier and you are in a CH state while dashing, so be careful.
Ashura = Bang's most reliable Anti-Air AND Reversal would be his Distortion "Ashura". At the cost of 50% Heat, this move has a relatively huge vertical hitbox while being fully invul. from 1-10F after superflash and has to be Barrier blocked. Even though it doesn't do much damage relative to the meter usage, it can be useful for turning the match around or getting the opponent off you since it typically isn't going to be punished (but it can be so be warned).
Astral = This is going in as honorable mention. From 1-26F after superflash Bang's Astral has full body guard point. What this means is if you manage to get it out on wake-up or when you think the opponent will attack, it will catch just about ANY move and allow you to teleport off it or absorb an attack which typically leads to the opponents death since it is unblockable as well.
Combos
- Please Note - Combo list is very rough at the moment.
Midscreen/Back To Corner
- 5A>5B>2B>2C>623B
- (~100%) 5A>5B>2B>3C>RC>d.5C>6D>Daifunka = [4,684?]
- (~50%) 2A>Ashura
- (~100%) (CH) 2B>Daifunka>RC>5C>6D>623B>2B>6C>j.4C>j.623B = [5,271]
- (CH) 6B>5A>5B>2B>5D>j.B>j.4C>dj.4C>dj.C>Poison Nail
- 5C>5D>j.B>j.4C>dj.B>dj.4C>dj.C
- 5C>5D>j.4C>IAD j.4C>j.C>5A>5B>j.A>j.B>j.4C>j.4C>j.C
- 5C>5D>D Nails>5B>5D>(623B) = 2 Seals
- (50%) 5C>5D>sj.B>j.4C>Web Nail>RC>j.D>Web Nail>j.D>Web Nail>5D = [1,973] + 4 Seals
- (~50%) 5C>5D>Daifunka
- 3C>d.2A>5B>j.B>j.4C>IAD dj.4C>dj.623B
- (FC or *RC*) 3C>(RC)>2B>5D>j.B>j.4C>j.4C>j.C [~2,700]
- (FC or *RC*) 3C>(RC)>2B>5B>j.B>j.4C>IAD dj.4C>dj.C>5a>5b>j.a>j.b>j.4c>dj.4c>dj.c = [3,209?]
- (FC or *RC*?) 3C>(RC?)>d.2B>5B>j.B>j.4C>IAD dj.4C>j.C>d.5A>5B>j.B>j.4C>IAD dj.4C>dj.623B>d.6C>j.4C>j.C = [3,566] / Full Corner Carry
- (CH) 2D>j.D>2B>5D>j.B>j.4C>j.C = [~2,000] / 3 Seals
- (CH) 2D>j.D>Web Nail>6D>Web Nail>5C>6D (Character Specific) = 4 Seals
- (CH) 2D>j.D>Web Nail>j.D>Web Nail>5D = 4 Seals
- (~50%) (CH) 2D>5C>6D>Daifunka = [3,972]
- (~50%) (CH) 2D>Daifunka = [3.8k]
- (CH) 6D>d.2B>5B>6C>IAD j.A>j.623B
- (CH) 6D>d.2B>5D>j.B>j.4C>j.C = [2,018] / 2 Seals
- (CH) 6D>Web Nail>j.D>Web Nail>j.D>Web Nail>5D = [1,364] / 4 Seals
- (CH) 6D>IAD cross-up j.4B>5B>j.4C>IAD dj.4C>dj.623B>X
- j.D>d.2A>5B>j.A>j.B>j.4C>dj.4C>dj.C = [1,800]
- (CH) j.D>d.5C>6D>623B = 2 Seals
- (CH) j.D>5B>2B>j.B>j.4C>dj.B>dj.C = [2,007?]
- (~50%) (CH) j.D>d.5C>6D>Daifunka
- (FC) j.623B>d.5B>2B>j.B>j.4C>IAD dj.4C>dj.C>(Poison Nail)
- Throw>Air Dash>j.4C>j.C>5A>5B>j.A>j.B>j.4C>dj.4C>dj.C
- Throw>Air Dash>j.4C>j.C>5A>2B>j.4C>X (IAD Command Throw)
- Throw>Air Dash>j.4C>Web Nail>d.5C>6D>(623B/Bumper/Mix-up)
- Throw>Air Dash>j.4C>Web Nail>j.D>Web Nail>5C>6D
- Throw>Air Dash>j.4C>Web Nail>j.D>Web Nail>j.D>Web Nail>5D
- Throw>Air Dash>j.4C>2B>5B>j.B>j.4C>dj.4C>dj.C
- Throw>Air Dash>j.4C>Web Nail>6D>j.D>Web Nail>j.D>Web Nail>5D
- (50%) Throw>Air Dash>j.4C>Web Nail>5C>6D>Daifunka [~2940]
- Back Throw>Air Dash>j.4C>5B>j.B>j.4C>IAD dj.4C>dj.C>Poison Nail
- Back Throw>Air Dash>j.4C>Web Nail>j.D>2A>X (tech)
- Back Throw>Air Dash>j.4C>j.C>5A>2B>j.4C>j.623B
- Back Throw>Air Dash>Web Nail>d.6D>Web Nail>d.6D>Web Nail>5D = [1,454?] / 3 Seals
- Air Throw>3C>d.2A>5B>j.B>j.4C>j.623B = [2,800]
- Note - You will almost always be Rapid Cancelling the 2nd "hit" of Command Throw Combos
- (~100%) 623C>RC>Air Jump Back>Daifunka = [3,705] / Unburstable
- (Air to Air) (CH) j.B>j.4C>j.623B
- (Anti-Air) 5A>5B>j.A>j.B>j.4C>dj.4C>dj.C>(Poison Nail, may cause knockdown)
- (Back to Corner) (CH) 2D>dash under>5B>6C>j.4C>j.623B>d.6C>j.D>Web Nail>d.5C>6D>(623B/Bumper/Mix-up) = [3,261?] 3,582 (3,748 with 623B)
- (Back to Corner) (CH) 2D>dash under>5B>623B>d.5B>6C>7j.4C>j.623B>5B>j.A>j.B>j.4C>(dj.4C)>dj.C = [3,623?]
- (Back to Corner) Gold Burst>dash under>5B>6C>j.4C>j.623B>2B>623B>6C>j.4C>j.C = [2,895]
- (Back to Corner) Gold Burst>dash under>5C>6D>623B>5B>6C>j.4C>j.623B> 5B>j.A>j.B>j.4C>dj.4C>dj.C = [3,445?]
- (Back to Corner) Gold Burst>”dash under”>5C>2C>623B>5B>6C>j.4C>j.623B>dash under>5A>5B>j.A>j.B>j.4C>dj.4C>dj.C = [3,453]
- Ashura>RC>j.4B>?
Standing Only
- 5A>5B>2B>6C>j.D>2B>6C>j.4C>j.C = [~2,340]
- 5A>5B>2B>6C>j.D>d.2B>5B>j.A>j.B>j.4C>dj.4C>dj.C
- 5A>5B>2B>6C>j.D>d.2B>5B>j.A>j.B>j.4C>dj.B>dj.4C>dj.623B
- 5A>5B>2B>6C>j.D>Web Nail>d.5C>6D>(623B/Bumper/Mix-up)
- 5A>5B>2B>6C>j.D>Web Nail>j.D>Web Nail>5D
- 5A>5B>2B>6C>j.D>Web Nail>d.6D>Web Nail>j.D>Web Nail>X (d.6D blue beat)
- 5A>5B>2B>6C>j.D>Web Nail>d.6D>Web Nail>5D~ (Rachel,Arakune,Tager,Valkenhayn,Jin? Specific)
- 5A>5B>2B>6C>j.D>Web Nail>Web Nail>d.6D>j.D = [1,901?] / 3 Seals
- 5A>5B>2B>6C>j.D>Web Nail>Web Nail>d.6D>j.D>Web Nail>5D = [1,919] / 4 Seals
- 5A>5B>2B>6C>j.B>j.4C>j.C>d.5A>5B>j.A>j.B>j.4C>dj.4C>dj.C
- 5A>5B>6C>j.D>2B>5D>6C>j.4C>j.C
- (50%) 5A>5B>2B>6C>j.D>Web Nail>d.5C>6D>Daifunka
- (50%) 5A>5B>2B>6C>j.D>2B>Daifunka
- 5A>2A>5B>2B>6C>IAD j.4C>j.C>d.5A>5B>j.A>j.B>j.4C>X = [2,436?]
- 2A>2A>5B>2B>6C>j.D>2B>6C>j.4C>j.C
- 2A>5B>2B>6C>j.D>2B>6C>j.4C>j.C
- 2A>5B>2B>6C>j.D>Web Nail>6D>Web Nail>5D (Character Specific)
- 2A>5B>2B>6C>j.D>Web Nail>d.5C>6D>623B = [1,973]
- 2A>5B>2B>6C>j.D>Web Nail>j.D>Web Nail>5D>X (j.4C teched)
- (CH) 6A>5A>5B>2B>6C>j.D>Web Nail>j.D>Web Nail>5D = 3 Seals
- 5B>2B>6C>j.D>2B>5B>j.A>j.B>j.4C>dj.4C>dj.C>(Poison Nail)
- 5B>2B>6C>j.D>2B>6C>j.4C>j.C = [~2,700]
- 5B>2B>6C>delay j.A>j.C>5A>5B>j.A>j.B>j.4C>j.C
- 5B>2B>6C>IAD j.4C>j.623B
- 5B>2B>6C>j.D>Web Nail>d.5C>6D>623B
- 5B>2B>6C>j.D>Web Nail>d.6D>Web Nail>d.6D>Web Nail>5D>X (tech)
- 5B>2B>6C>j.D>Web Nail>d.6D>Web Nail>d.6D>j.C
- (~50%) 5B>2B>6C>j.D>Web Nail>d.5C>6D/(5D)>Daifunka
- (CH) 6C>B Nail Cancel>C>6D>Daifunka = [~5,500]
- j.A>j.A>2A>2A>5B>2B>6C>j.623B
- (CH) j.A>2A>5B>2B>6C>j.D>Web Nail>d.5C>6D>(623B/Bumper/Mix-up)
- j.B>5A>5B>2B>6C>j.D>2B>6C>j.4C>j.C = [2,728?]
- (CH) j.B>5A>5B>2B>6C>j.D>2B>5B>j.A>j.B>j.4C>dj.4C>dj.C= [2,818?]
- (CH) j.B>5A>5B>2B>6C>j.D>Web Nail>j.D>Web Nail>5D>X (tech)
- j.4B>5A>5B>2B>6C>j.D>2B>6C>j.4C>j.C>(Poison Nail)
- j.4B>5A>5B>2B>6C>j.D>Web Nail>j.D>Web Nail>5D
- j.4B>5A>5B>2B>6C>j.D>Web Nail>Web Nail>d.6D>j.D>Web Nail>5D = [2,644] + 4 Seals
- j.4B>5A>5B>2B>6C>j.B>j.4C>j.C>d.5A>5B>j.A>j.B>j.4C>dj.4C>dj.C
- (CH) j.4B>5B>2B>6C>j.D>2B>5D>j.A>j.B>j.4C>dj.4C>dj.C = [3,321]
- j.C>5B>2B>6C>delay jc j.A>j.C>d.5A>5B>j.A>j.B>j.4C>dj.4C>dj.C = [3,098]
- (CH) j.C>5B>2B>6C>j.B>j.4C>j.C>d.5A>5B>j.A>j.B>j.4C>dj.C = [3,302]
- (~50%) j.4C>5A>5B>2B>6C>j.D>Web Nail>d.5C>6D>Daifunka
Crouching Only
- 5A>5B>2B>5D>j.B>j.4C>dj.B>dj.4C>dj.C
- 5A>5B>2B>5D>j.B>j.4C>j.623B
- 5A>5B>2B>5D>j.4C>IAD dj.4C>dj.C>X (d.5A teched)
- 5A>5B>2B>5D>j.4C>IAD dj.4C>dj.C>(Poison Nail)
- 5A>2A>5B>2B>5D>j.4C>j.B>dj.4C>dj.C>Poison Nail (knocked down)
- 5A>2A>2A>5B>2B>5D>j.A>j.B>j.4C>dj.4C>dj.C
- (CH) 5A>d.5A>2A>2A>5B>2B>5D>j.B>j.4C>j.C
- (CH) 5A>5A>2A>5B>2B>5D>j.B>j.4C>dj.B>dj.C>(Poison Nail)
- (~50%) 5A>5B>2B>Daifunka
- (~50%) 5A>5B>2B>5D>Daifunka
- 2A>2A>5B>2B>5D>j.B>j.4C>dj.B>dj.C
- 5B>2B>5D>D Nails>5B>5D>(623B)
- (CH) 5B>2B>5D>j.B>j.4C>IAD j.A>X (Purple Air Command Throw)
- (CH) 5B>2B>5D>j.4C>IAD dj.4C>dj.C>d.5A>5B>j.A>j.B>j.4C>dj.4C>dj.C = [2,875?]
- (CH) 2B>5D>j.B>j.4C>j.C>5A>2B>j.4C>IAD dj.4C>dj.C = [2,585?]
- (50%) j.B>5A>5B>2B>Daifunka = [3,555]
- j.4B>5A>5B>2B>5D>j.4C>IAD dj.4C>dj.623B
- j.4B>5A>5B>2B>5D>j.B>j.4C>dj.4C>dj.C
- j.4B>5A>5B>2B>5D>j.B>j.4C>dj.B>dj.4C>dj.C
- j.4B>5B>2B>5D>j.4C>Web Nail>RC>j.D>Web Nail>d.5C>6D>X = [2,716] / 3 Seals
P2 Starting Position/Near Corner
- 5C>5D>j.4C>IAD dj.4C>dj.623B>d.6C>j.4C>j.C>Poison Nail (knocked down)
- 3C>d.2A>5B>j.B>j.4C>IAD dj.4C>dj.623B>d.6D>623B>5B>2B>j.B>j.4C>dj.4C>dj.C
- (~50% or FC) (FC) 3C>(RC) d.2B>5B>j.4C>IAD dj.4C>dj.623B>d.6C>j.D>Web Nail>d.5C>6D>623B
- (~50% or FC) 3C>RC>d.2B>5B>j.4C>>IAD dj.4C>dj.623B>d.2B>623B>5B>j.A>j.B>j.4C>dj.B>dj.4C>dj.623B = [3,800?]
- (~50% or FC) (FC) 3C>(RC)>d.2B>5B>j.4C>IAD dj.4C>dj.623B>(d.5C)>d.6D>623B>5B>2B>j.B>j.4C>dj.4C>dj.C
- (~50% or FC) 3C>RC>d.2B>6C>j.4C>j.623B>d.5B>623B>5B>j.A>j.B>j.4C>dj.4C>dj.C
- (~50% or FC) 3C>RC>d.2B>6C>j.4C>j.623B>(d.5C)>d.6D>623B>5B>2B>j.B>j.4C>dj.4C>dj.C
- (~50%/~100%) (CH) 6C>5B>2B>j.4C>IAD dj.4C>dj.623B>Daifunka
- (CH) 6D>d.2B>6C>j.4C>j.623B>d.2B>623B>6C>j.4C>j.C
- Back Throw>Air Dash>j.C>5A>2B>j.4C>j.623B>d.6C>j.4C>j.C
- (Air to Air) j.A>j.B>j.4C>j.623B>d.6D>623B>d.5B>j.A>j.B>j.4C>dj.C = [3,016?]
Standing Only
- 5A>5B>2B>6C>IAD j.4C>j.623B>d.5C>6D/(2C)>623B>2B>6C>j.4C>j.C
- 5A>5B>2B>6C>IAD j.4C>j.623B>d.5C>6D/(2C)>623B>d.5B>2B>j.B>j.4C>dj.C
- 5A>5B>2B>6C>IAD j.4C>j.623B>d.5C>6D/(2C)>623B>2B>5B>j.A>j.B>j.4C>dj.4C>dj.C
- 5A>5B>2B>6C>j.D>d.2B>6C>j.4C>j.623B>d.6D>623B>2B>6C>j.4C>j.C
- 5B>2B>6C>j.D>Web Nail>d.2D>j.4C>j.623B>X
- (50%) j.4B>5A>5B>2B>6C>IAD j.4C>j.C>d.5A>5B>j.A>j.B>j.4C>j.623B>d.5B>Ashura = [4,302]
- (CH) j.4C>5A>5B>2B>6C>j.623B>d.6D>Web Nail>j.D>Web Nail>6D>Web Nail>5D = [3k] + 4 Seals
Crouching Only
- D-Nails>5A>5B>2B>5D>j.B>j.4C>j.623B>d.6C>j.C
- 2A>5B>2B>5D>j.4C>IAD dj.4C>dj.623B>d.6D>Web Nail>j.D>Web Nail>X = [2.6k?] + 3 Seal (maybe 4 Seals is possible?)
Near Corner/Corner
- 6A>2C>623B>d.5B>6C>j.4C>j.623B>dash under>5A>5B>j.A>j.B>j.4C>dj.4C>dj.C
- 5B>2B>2C>623B>d.5B>6C>j.4C>j.623B>dash under>5A>5B>j.A>j.B>j.4C>dj.4C>X
- (50% ) 6B>RC>”j.B”>5B>2B>623B>d.5B>6C>j.4C>j.623B>dash under>5A>5B>j.A>j.B>j.4C>dj.C
- 5C>2C>623B>d.2B>6C>j.4C>j.623B>dash under>5B>2B>j.A>j.B>j.4C>dj.C
- 5C>2C>623B>d.5B>6C>j.4C>j.623B>dash under>5A>5B>j.A>j.B>j.4C>dj.4C>dj.C
- 5C>5D>j.B>j.623B>623B>5B>2B>j.A>j.B>j.4C>dj.C
- 5C>5D>j.4C>j.623B>d.5B>623B>6C>j.4C>j.C
- (FC) 5C>5D>j.4C>j.623B>623B>5B>2B>j.A>j.B>j.4C>dj.4C>dj.C>Poison Nail (knocked down?)
- 3C>d.2A>5B>j.B>j.4C>j.623B>dash under>5A>5B>j.A>j.B>j.4C>dj.4C>dj.C
- (FC or *RC*) 3C>(RC)>2B>5B>j.4C>j.623B>d.6C>j.D>Web Nail>6D>Web Nail>6D>Web Nail>5D = [3,279] / 4 Seals
- (50-100%) (FC or *RC*) 3C>(RC)>2B>5B>j.4C>IAD dj.4C>j.623B>Daifunka = [4,282]
- (CH) 6D>623B>d.5B>6C>j.4C>j.623B>dash under>5A>5B>j.A>j.B>j.4C>dj.4C>dj.C
- (CH) 6D>623B>d.2B>6C>j.4C>j.623B>dash under>5A>5B>j.A>j.B>j.4C>dj.4C>dj.C
- 2D>j.4C>j.623B>d.5D>j.4C>j.623B>X
- (CH) 2D>j.A>j.4C>IAD dj.B>dj.4C>dj.623B>d.5A>5B>j.A>j.B>j.4C>(dj.C teched) = [2,567?]
- (CH) 2D>j.D>2B>5D>j.623B>Wall Bounce>5D = 4 Seals
- (~100%) (FC) 623B>d.5B>2B>j.4C>j.623B>RC>5C>6D>Daifunka = [4,402?]
- Throw>Air Dash>j.4C>Web Nail>j.D>Web Nail>d.6D>Web Nail>X (Blue Beat d.6D)>Web Nail>5D>X (tech)
- Throw>Air Dash>j.4C>j.623B>d.5B>623B>5B>j.A>j.B>j.4C>dj.4C>dj.C
- Throw>Air Dash>j.4C>j.C>5A>2B>j.4C>j.623B>d.6C>j.4C>j.C
- Air Throw>d.6D>623B>5B>6C>j.4C>j.623B>5B>j.A>j.B>j.4C>dj.4C>dj.C
- Air Throw>d.6D>623B>5B>6C>j.4C>j.623B>dash under>5A>5B>j.A>j.B>j.4C>dj.4C>dj.C
- Air Throw>d.6D>623B>5B>6C>j.4C>j.623B>5B>2B>j.B>j.4C>dj.4C>dj.C
- (~50%) Air Throw>d.3C>RC>d.2B>6C>j.4C>j.623B>dash under>5A>5B>j.A>j.B>j.4C>dj.4C>dj.C
- (~50%) Air Throw>d.3C>RC>d.2B>6C>j.4C>j.623B>5B>2B>j.B>j.4C>dj.4C>dj.C
- (~50%) Air Throw>d.3C>RC>d.2B>623B>d.5B>6C>j.4C>j.623B>5B>j.A>j.B>j.4C>dj.4C>dj.C
- (~50%) Command Throw>RC>5C>Web Nail>d.6C>IAD j.4C>j.623B>d.5C>6D>623B>2B>6C>j.4C>j.C>(Poison Nail) = [3,538?]
- (Air to Air) (CH) j.A>j.B>j.4C>dj.623B>5B>623B>5B>j.A>j.B>j.4C>dj.4C>dj.C>(Poison Nail)
- (Air to Air) (CH) j.A>j.B>j.4C>j.623B>d.6D>623B>2B>6C>j.C
- (Air to Air) (CH) j.A>j.A>j.623B>d.5B>623B>5B>j.A>j.B>j.4C>dj.4C>dj.C
- (~100%) (Air to Air) (CH) j.A>j.B>j.623B>d.5B>623B>5B>6C>j.4C>j.623B>RC>Reverse Ashura
- (Air to Air) (CH) j.B>5A>j.A>j.B>j.4C>dj.4C>dj.623B>d.2B>6C>j.4C>j.C
- (Air to Air) (CH) j.B>5A>j.A>j.B>j.623B>5B>623B>5B>j.A>j.B>j.4C>dj.C
- (50%) (Air to Air) j.B>j.4C>j.623B>Daifunka
- (Air to Air) j.4B>j.A>j.4C>IAD dj.4C>dj.623B>d.2B>623B>5B>j.A>j.B>j.4C>dj.C
- (Air to Air) j.4B>5B>j.B>j.4C>IAD dj.4C>dj.623B>d.5D>j.B>j.4C>dj.C = [3,279]
- (Anti-Air) (CH) 5A>5B>j.B>j.623B>623B>6C>j.D>2B>6C>j.4C>j.C
- (Anti-Air) (CH) 5B>j.A>j.B>j.4C>dj.4C>dj.623B>d.5B>j.A>j.B>j.4C>dj.C
- Gold Burst>d.5C>Web Nail>d.2B>5B>j.4C>j.623B>d.5B>j.A>j.B>j.4C>dj.4C>dj.C
Standing Only
- 5A>5B>2B>6C>j.D>d.2B>6C>j.4C>j.623B>d.6C>j.4C>j.C
- 5A>5B>2B>6C>j.D>Web Nail>d.6D>Web Nail>d.6D>Web Nail>X (5C teched before) Character Specific
- 5A>5B>2B>6C>j.623B>d.5B>623B>5B>j.A>j.B>j.4C>dj.4C>dj.C
- 5A>5B>2B>6C>j.623B>d.5C>2C/(6D)>623B>2B>6C>j.4C>j.C
- 5A>2A>5B>2B>6C>j.623B>2B>623B>6C>j.4C>j.C
- 2A>5B>2B>6C>j.623B>5C>2C/(6D)>623B>2B>5B>j.A>j.B>j.4C>dj.C
- 2A>5B>2B>6C>j.623B>d.2B>623B>5B>j.A>j.B>j.4C>dj.4C>dj.C
- 2A>5B>2B>6C>j.D>Web Nail>d.6D>Web Nail>d.6D>Web Nail>5D>X = [1,713] / 4 Seals
- 2A>2A>5B>2B>6C>j.623B>d.6D>623B>2B>6C>j.C
- 2A>2A>5B>2B>6C>IAD j.4C>j.623B>d.6C>j.4C>j.C = [2,071?]
- 5B>2B>6C>IAD j.4C>j.623B>d.6D>623B>6C>j.D>2C>623B
- (~50%) 5B>2B>6C>j.B>j.4C>j.623B>Daifunka
- (~50%) 5B>2B>6C>j.623B>d.5C>2C>623B>2B>5B>Ashura
- j.A>5A>2A>5B>2B>6C>j.623B>d.6C>j.4C>j.C = [2,357]
- j.A>5B>2B>6C>IAD j.4C>j.623B>d.6D>623B>2B>6C>j.4C>j.C
- (CH) j.B>5A>5B>2B>6C>j.623B>d.5C>6D>623B>2B>6C>j.4C>j.C
- (CH) j.B>5A>5B>2B>6C>j.623B>d.5C>6D>623B>5B>2B>j.B>j.4C>dj.4C>dj.C
- j.B>j.4C>5B>6C>j.623B>6C>j.D>Web Nail>6D>Web Nail>6D>Web Nail>5D
- j.4B>5A>5B>2B>6C>j.623B>d.5C>6D>623B>2B>6C>j.4C>j.C = [4,102]
- j.4B>5A>5B>2B>6C>j.623B>d.5C>2C>623B>2B>5B>j.A>j.B>j.4C>dj.4C>dj.C = [4,180?]
- j.4B>5A>5B>2B>6C>j.623B>5B>623B>5B>j.A>j.B>j.4C>dj.C = [3,760?]
- j.4B>5A>5B>2B>6C>j.D>d.2B>6C>j.4C>j.623B>d.6D>623B>X (whiffed 6C/tech)
- j.C>5A>5B>2B>6C>j.B>j.4C>j.623B>2B>623B>5B>sj.5A>j.B>j.4C>dj.C = [3,530]
Crouching Only
- 5A>5B>2B>5D>j.4C>IAD dj.4C>dj.623B>d.2B>623B>6C>j.4C>j.C
- 5A>5B>2B>5D>j.4C>IAD dj.4C>dj.623B>d.2B>6C>j.4C>j.C
- 5A>5B>2B>5D>j.B>j.4C>j.623B>d.6D>Web Nail>d.6D>Web Nail>5D = [2,197?] / 4 Seals
- 5A>2A>2A>5B>2B>5D>j.4C>j.623B>d.2B>6C>j.4C>j.C
- (CH) 5A>5A>5B>2B>623B>d.5B>2B>j.A>j.B>j.4C>dj.4C>dj.C
- 2A>5B>2B>j.623B>5B>2B>j.A>j.B>j.4C>dj.4C>dj.C
- 2A>2A>5B>2B>5D>j.4C>j.623B
- 5B>2B>5D>j.4C>j.623B>d.6D>623B>2B>6C>j.4C>j.C
- j.B>j.4C>5B>2B>5D>j.623B>dash under>5B>623B>2B>sj.A>j.B>j.4C>dj.C = [3,387]
- (~50%) j.B>5A>5B>2B>3C>RC>d.2B>6C>j.4C>j.623B>623B>5B>2B>6C>j.C
- j.4B>5A>5B>2B>5D>j.4C>j.623B>6C>j.4C>j.C
- j.4B>5A>2A>2A>5B>2B>5D>j.4C>j.623B>2B>6C>j.C
Corner
- 5A>5B>2B>623B>5B>6C>j.4C>j.623B>dash under>5A>5B>j.A>j.B>j.4C>dj.4C>dj.C
- 5A>5B>2B>623B>5B>6C>j.4C>j.623B>dash under>5B>2B>j.B>j.4C>dj.C
- 5A>5B>2B>623B>5B>6C>j.4C>j.623B>dash under>5B>2B>j.A>j.B>j.4C>dj.4C>dj.C
- (100%) 5A>5B>2B>623B>5B>6C>j.4C>j.623B>RC>reverse 5C>6D>Daifunka = [4,211?]
- 5A>2A>5B>2B>623B>5B>6C>j.623B>dash under>5B>2B>j.A>j.B>j.4C>X (dj.C blue beat)
- 5A>2A>5B>2B>623B>5B>6C>7j.4C>j.623B>5B>j.A>j.B>j.4C>dj.4C>dj.C
- 5A>2A>2A>5B>2B>623B>5B>2B>j.A>j.B>j.4C>dj.4C>dj.C
- (~50%) 5A>2A>2A>5B>2B>623B>5B>2B>j.B>j.4C>j.623B>reverse Ashura
- 2A>5B>2B>623B>5B>6C>7j.4C>j.623B>5B>j.A>j.B>j.4C>dj.4C>dj.C = [2,789?]
- 2A>5B>2B>623B>5B>6C>j.4C>j.623B>dash under>5A>5B>X (j.A tech)
- 2A>5B>2C>623B>5B>6C>j.4C>j.623B>dash under>5B>2B>j.A>j.B>j.4C>dj.C
- 2A>5B>2B>2C>623B>5B>2B>j.B>j.4C>j.623B>reverse 2B>backwards sj.B>j.4C>j.C
- 2A>2A>5B>2B>623B>5B>2B>j.A>j.B>j.4C>dj.4C>dj.C
- 2A>2A>5B>2B>623B>5B>2B>j.4C>j.C
- 5B>2B>2C>623B>5B>6C>j.623B>dash under>5B>2B>j.A>j.B>j.4C>dj.4C>dj.C
- 5B>2B>623B>5B>6C>j.4C>j.623B>5B>6C>j.4C>j.C>(Poison Nail) = [(3,977)]
- 5B>2B>623B>5B>6C>j.4C>j.623B>dash under>5A>5B>j.A>j.B>j.4C>dj.4C>dj.C
- 5B>2B>623B>5B>6C>j.4C>j.623B>dash under>5B>2B>j.B>j.4C>dj.A>dj.B>dj.4C>dj.623B
- 5B>2B>623B>5B>6C>j.4C>j.623B>dash under>5B>2B>j.B>j.4C>dj.4C>dj.C
- (~50%) 5B>2B>623B>5B>6C>j.4C>j.623B>Ashura or Daifunka = [~4,100 or 4,786]
- (~50%) 5B>2B>(RC) 3C>5C>6D>623B>5B>6C>j.4C>j.623B>5B>2B>j.B>j.4C>j.4C>j.C [~4,700]
- (~50%) 5B>2B>2C>623B>5B>6C>j.4C>j.623B>dash under>5B>2B>Ashura
- 2B>5B>623B>d.5B>2B>j.B>j.4C>j.623B>dash under>5A>5B>j.A>j.B>j.4C>dj.C
- 2B>5B>2C>623B>5B>6C>j.4C>j.623B>dash under>5B>2B>j.A>j.B>j.4C>dj.C
- 2B>2C>623B>5B>6C>j.4C>j.623B>dash under>5A>5B>j.A>j.B>j.4C>dj.C
- (~100%) (CH) 2B>623B>5B>6C>j.4C>j.623B>RC>reverse 5C>6D>Daifunka
- (CH or RC) (50% or 100%) 6B>5B>2B>623B>5B>6C>j.4C>j.623B>Daifunka = [4,556]
- (CH or RC) 6B>5A>5B>2B>623B>d.5B>6C>j.4C>j.623B>dash under>5B>j.A>j.B>j.4C>dj.4C>dj.C
- (50%) 2C>623B>5B>6C>7 jump>j.4C>j.623B>6C>j.B>j.4C>j.C>5A>5B>Ashura = [5,030]
- 5C>5D>623B>5B>6C>jc j.D>2B>6C>j.C = [~2,800]
- 5C>5D>623B>5B>6C>j.4C>j.623B>5B>6C>j.4C>j.C>(Poison Nail) = [3,472]
- 5C>5D>j.623B>6C>j.D>2B>6C>j.4C>j.C = [2,869]
- 5C>5D>j.623B>6C>j.D>Web Nail>5C>6D>623B = [~2,700 / 3 Seals]
- 5C>2C>623B>d.5B>6C>j.4C>j.623B>dash under>5B>2B>j.B>j.4C>dj.4C>dj.C
- 5C>2C>623B>5B>6C>7j.4C>j.623B>5B>j.A>j.B>j.4C>dj.4C>dj.C
- 5C>2C>623B>5B>6C>j.4C>j.623B>dash under>5B>2B>j.A>j.B>j.4C>dj.C
- (50%) 5C>2C>623B>5B>6C>7j.4C>j.623B>6C>j.B>j.4C>j.C>5A>5B>Ashura
- 5C>2C>623B>5B>2B>j.B>j.4C>j.623B>reverse 2B>sj.B>j.4C>j.C>(Poison Nail)
- 5C>6A>623B>d.5B>6C>j.4C>j.623B>dash under> 5A>5B>j.A>j.B>j.4C>dj.4C>dj.C
- (~50%) 5C>6A>623B>5B>6C>j.4C>j.623B>Reverse Ashura
- (CH or RC)3C>2B>623B>5B>6C>j.4C>j.623B>5B>6C>j.4C>j.C>Poison Nail = [4,195]
- (50%) 3C>RC>5C>6D>623B>5B>6C>j.4C>j.623B>5B>6C>j.4C>j.C>Poison Nail = [4,727]
- (50%) 3C>RC>d.2B>5B>j.4C?>j.623B> 5B>j.A>j.B>j.4C>dj.4C>dj.C
- (~100%) 3C>RC>2B>6C>j.4C>j.623B>dash under>5B>623B>Ashura
- (CH) 2D>d.5C>6D>623B>5B>6C>j.4C>j.623B>5B>6C>j.4C>j.C = [~4,708]
- (CH) 2D>d.5C>2C>623B>5B>6C>j.4C>j.623B>dash under>5B>2B>j.A>j.B>j.4C>dj.4C>dj.C
- (CH) 2D>d.5C>2C>623B>5B>6C>j.4C>j.623B>dash under>5B>2B>j.B>j.4C>dj.4C>dj.C
- (~50%) 2D>d.5C>2C>623B>5B>6C>j.4C>j.623B>Reverse Ashura/Daifunka
- 6D>623B>5B>6C>j.4C>j.623B>dash under>5B>2B>j.A>j.B>j.4C>dj.4C>dj.C
- 6D>623B>5B>6C>j.4C>j.623B>dash under>5A>5B>j.A>j.B>j.4C>dj.4C>dj.C
- 6D>623B>2B>5D>j.4C>j.623B>dash under>5A>5B>j.A>j.B>j.4C>dj.4C>dj.C = 2 Seals
- (CH) 6D>d.2B>5B>j.B>j.4C>j.623B>reverse 6C>j.D>Web Nail>d.5C>6D = 3 Seals
- (CH) 6D>d.2B>5D>j.4C>j.623B>reverse 6C>j.D>Web Nail>d.5C>6D = 4 Seals
- 623B>5B>6C>j.4C>j.623B>dash under>5A>5B>j.A>j.B>j.4C>dj.4C>dj.C
- j.623B>5B>623B>6C>j.D>Web Nail>5C>5D>j.B>j.4C>j.C
- (FC) j.623B>d.5B>5C>6D>623B>d.5B>5C>5D>j.B>j.4C>j.C>5A>5B>j.A>j.B>j.4C>dj.4C>dj.C
- (50%) j.623B>5B>623B>Ashura = [4,224?]
- (CH) j.B>2A>5B>2B>2C>623B>5B>2B>j.A>j.B>j.4C>dj.4C>dj.C
- j.C>5A>5B>2B>623B>5B>6C>j.4C>j.623B>dash under>5A>5B>j.A>j.B>j.4C>dj.4C>dj.C
- j.C>5B>2B>623B>5B>6C>j.4C>j.623B>dash under>5B>2B>j.A>j.B>j.4C>>dj.4C>dj.C
- (~50%) j.C>5B>2B>623B>5B>6C>7j.4C>j.623B>6C>j.B>j.4C>j.C>5A>5B>Ashura = [5,226]
- Throw>Air Dash>j.B>j.623B>5B>j.A>j.B>j.4C>dj.C
- Throw>Air Dash>j.4C>j.623B>5B>623B>5B>j.A>j.B>j.4C>dj.C
- Back Throw>d.2A>5B>j.A>j.B>j.4C>dj.4C>dj.C = [1,892]
- Air Throw>d.6D>623B>5B>6C>j.4C>j.623B>dash under>5A>5B>j.A>j.B>j.4C>dj.4C>dj.C
- (50%) Air Throw>(d.5C)>d.6D>Daifunka
- Note - You will almost always be Rapid Cancelling the 2nd "hit" of Command Throw Combos
- 623C>RC>5C>6D>623B>5B>6C>j.4C>j.623B>5B>6C>j.4C>j.C>Poison Nail [5,444]
- 623C>RC>5C>6D>623B>5B>6C>j.4C>j.623B>dash under>5A>5B>j.A>j.B>j.4C>dj.4C>dj.C
- 623C>RC>5C>2C>623B>d.5B>6C>j.4C>j.623B>dash under>5A>5B>j.A>j.B>j.4C>dj.4C>dj.C
- 623C>RC>5C>2C>623B>d.5B>6C>j.4C>j.623B>dash under>5B>j.A>j.B>j.4C>dj.C = [4,026?]
- 623C>RC>5C>623B>5B>6C>j.4C>j.623B>X (killed)
- 623C>RC>cross under>6C>j.623B>d.2B>623B>5B>j.A>j.B>j.4C>dj.4C>dj.C = [3,628]
- (~100%) 623C>RC>5C>2C>623B>d.5B>6C>j.4C>j.623B>reverse 5B>Ashura = [4,636?]
- (~100%) 623C>RC>5C>6D>623B>5B>6C>j.4C>j.623B>Daifunka [~6,300]
- (Air to Air) j.A>j.A>j.A>j.623B>5B>623B>5B>j.A>j.B>j.4C>dj.4C>dj.C
- (~50%) (Air to Air) j.A>j.B>j.623B>5B>623B>Ashura = [3,245]
- (~50%) (Air to Air) j.A>j.B>j.623B>Daifunka
- (~50%) (Air to Air) j.A>j.B>j.623B>5B>623B>Daifunka
- (Anti-Air) 5A>5B>j.B>j.4C>j.623B>dash under>5B>623B>6C>j.4C>j.C = [2,711]
- (Anti-Air) 5B>2B>j.4C>j.623B>dash under>5B>623B>6C>j.4C>j.C
- (Catch Roll) Web Nail>5C>6D>623B>5B>6C>j.4C>j.623B>X
Standing Only
- 5A>5B>2B>6C>j.623B>dash under>5B>623B>5B>j.A>j.B>j.4C>dj.C
- 5A>5B>2B>6C>j.623B>dash under>5B>623B>6C>j.4C>j.C
- 5A>5B>2B>6C>j.623B>dash under>6C>j.D>2B>6C>j.4C>j.C
- 5A>2A>5B>2B>6C>j.D>Web Nail>5C>6D>623B>2B>X (6C whiff tech)
- 5A>2A>5B>2B>6C>j.623B>dash under>5C>2C>623B>X
- 5A>2A>2A>5B>2B>6C>j.623B>dash under>2B>623B>6C>j.4C>j.C
- 5B>2B>6C>j.623B>(dash or reverse) 6C>j.D>Web Nail>5C>6D>623B = [? / 2 Seals]
- (~50%) 5B>2B>6C>j.623B>d.5C>6D>Daifunka = [4,689?]
- (~50%) 5B>2B>6C>j.623B>dash under>5B>623B>5C>6D>Daifunka = [5,077]
- (~50%) 5B>2B>6C>j.623B>dash “under”>5C>2C>Ashura = [3,948]
- (~50%) 5B>2B>6C>j.623B>dash “under”>5C>Web Nail>d.5C>6D>623B>2B>6C>j.4C>j.623B>reverse Ashura = [4,711?]
- (CH) 6C>B Nail Cancel>d.5C>6D>623B>5B>6C>j.4C>j.623B>dash under>5A>5B>j.A>j.B>j.4C>dj.4C>dj.C
- (CH) 6C>B Nail Cancel>d.5C>6D>623B>5B>6C>j.4C>j.623B>5B>j.A>j.B>j.4C>dj.4C>dj.C
- (CH) 6C>B Nail Cancel>d.5C>6D>623B>5B>6C>j.4C>j.623B>5B>2B>j.B>j.4C>dj.4C>dj.C
- (50%) (CH) 6C>B Nail Cancel>d.6C>j.623B>5B>623B>5C>6D>Daifunka = [6,594]
- (CH) j.B>5A>5B>2B>6C>j.623B>dash under>5B>623B>5B>j.A>j.B>j.4C>dj.4C>dj.C>(Poison Nail)
- j.B>5A>5B>2B>6C>j.623B>”dash under”>5C>Web Nail>d.5c>6d>623B>2b>6c>j.4c>j.623b>Ashura
- j.4B>5A>5B>2B>6C>j.D>Web Nail>6D>Web Nail>6D>Web Nail>5D = [ 2,691?] + 4 Seals
- j.4B>5B>2B>6C>j.623B>”dash under”>5C>Web Nail>d.5C>6D>623B>2B>6C>j.4C>j.C = [4,304?]
- j.4B>5B>2B>6C>j.623B>dash under>5B>623B>d.6C>j.D>2B>6C>j.4C>j.C = [4,473]
- j.C>5A>5B>2B>6C>j.623B>dash under>5B>623B>2B>6C>j.C = [3,540]
- j.C>5A>5B>2B>6C>j.623B>”dash under”>5C>2C>623B>5B>2B>j.A>j.B>j.4C>dj.B>dj.4C>dj.C = [4,052]
Crouching Only
- 5A>5B>2B>5D>j.4C>X (dj.4C teched)
- 5B>2B>5D>j.623B>reverse 6C>j.D>Web Nail>d.6D>X (burst)
- 5B>2B>5D>j.623B>reverse 6C>j.D>2B>6C>j.4C>j.C = [3,117] / 2 Seals
- j.4B>5B>2B>5D>j.623B>reverse 6C>j.D>Web Nail>j.D>Web Nail>5D = [3,108?] / 4 Seals
Fu-Rin-Ka-Zan
Please check kaeru's Fu-Rin-Ka-Zan Guide (v2.0) on the Bang forums for more in-depth information
http://www.dustloop.com/forums/showthread.php?12934-BBCSX-FuuRinKaZan-Guide-%28v2-0%29
A tool unique to Bang (don't accept cheap substitutes cough Jill MvC3 cough) in any fighting game. Lost it's ability to run away with backwards dash distance getting cut in half. Sacrificing your ability to block, FRKZ is about total offense now. And what an offense it is! Going with the example of an unreactable j.c, if your opponent guesses right, you can dash cancel into the following options:
6 dash to another j.c or j.b - a crossup and another overhead.
2 dash to the ground and a move with great frame advantage that the dashes exploit more (5a, 5b, 6a)
2 dash to the ground and a high low mixup.
2 dash to the ground and throw. Generally once you have people in range of Bang, they'll be scared and block. Beware of invincible dragon punch moves though!
Change a 2 dash to a 3 dash to retain those options and cross up your opponent.
And every one of those options with the exception of the throw can reset into another one (8 or 9 dash from the ground for jumping options. Experiment to create your own shenanigans!
Not only is it easy to open up opportunities, but you'll be doing tons of damage off a hit confirm with any dash cancellable move! Our combo thread already has some great FRKZ combos (and the first post will be updated with an easier way to reference them).
The activation of FRKZ is a powerful tool as well. +1 frame advantage for no reason! There's generally 3 times to activate:
When you are or know you can get in: After a knockdown or sending an opponent flying or cancelling from a normal to build more frame advantage.
To continue a combo: Start a combo, activate, and continue it with the FRKZ movement properties and damage boost.
Punish!: Instant block a move, activate FRKZ and throw out a 5a like it's CS1 all over again! Just be aware of what you can and can't do.
FRKZ can be a great asset to any Bang, and should be learned by all to always have the option.
Combos
- 5B>2B>6C>6dcj.4C>7dcj.4C>j.D>2B>623B>Daifunka [~5600]
- 5B>2B>2C>6D>6C>6dcj.4C>7dcj.4C>j.D>2B>623B>Daifunka [~ 5600]
- 2D>j.4C>j.4C>j.4C>1dash cancel? j.D>land?>5C>6D>Daifunka [~5800]
- j.C>2C>6dc>2D>6dc>5C>6D>4dc>2B>6C>8dc>j.4C>2dc>9dc>j.4C>2dc >8dc>j.4C>j.D>1dc>Web Nail>Daifunka [~6000]
- j.C>2C>2D>5C>6D>2B>6C>j.4C*2>j.D>2B>j.4C*5>j.623B>Ashura [6620]
- (Near Corner) 5A>5B>2B>2C>6 dash>5C>6D>6 dash>2D>j.D>2 dash>2B>6C>j.4C>2 dash>8 dash>j.4C>6 dash>j.4C>2 dash>8 dash>j.4C>6 dash>j.4C>8 dash>j.4C>j.623B>Ashura =[5,402]
- (Corner) 5B>FRKZ>6C>j.D>5C>6D>6 dash>2D>6 dash>5C>623B>2B>6C>j.4C>X = [5,365 at that point]
- j.C>2 dash>2C>2D>6 dash>5C>6D>6C>6 dash>j.4C>5C>6 dash>2B>9 dash>j.4C>2 dash>5C>6 dash>2B>6C>8 dash>j.4C>X = [5,719] at that point
- j.C>2 dash>2C>6 dash>5C>6D>6 dash>2D>6 dash>5C>”dash” 2B>6C>8 dash>j.4C>j.D>2 dash>2B>9 dash>j.4C>2 dash>j.4C>air 6 dash>j.4C>2 dash>j.4C>air 6 dash>j.4C>2 dash>j.4C>5A>X
- j.C>2 dash>2C>6 dash 5C>6D>6 dash>2D>j.D>2 dash>2B>6C>9 dash>j.4C>2 dash>8 dash>j.4C>6 air dash>j.4C>2 dash>8 dash>j.4C>killed = [5,256? at that point]
- j.C>2C>6 dash>5C>6D>6 dash>2D>j.D>2 Dash>2B>6C>9 dash>j.4C>2 dash>8 dash>j.4C>6 air dash>j.4C>2 dash>8 dash>j.4C>6 air dash>j.4C>X = [5,409 at that point]
- (Corner) j.C>2C>6 dash>5C>6D>6 dash>2D>6 dash>5C>623B>5B>6C>8 dash>j.4C>2 dash>8 dash>j.4C>8 dash>j.4C>2 dash>9 dash>j.4C>2 dash>8 dash>j.4C>7 dash>j.4C>6 dash>j.4C>j.623B>reverse Ashura = [7,234]
- j.C>5B>2B>2C>6D>6 dash>2B>9 dash>j.4C>6 dash>j.4C>6 dash>j.4C>9 dash>j.4C>6 dash>j.4C>6 dash>j.4C>9 dash>j.4C>6 dash>j.4C>6 dash>j.4C>9 dash>j.4C>6 dash>j.C
- j.C>5B>2C>6 dash>2D>6 dash>5C>6 dash>2B>6C>8 dash>j.4C>j.D>2 dash>5C>6D>Ashura = [5,922]
- (Crouching) (CH) j.C>9 dash>j.C>2 dash>2C>6 dash cancel 2D>6 dash>5C>6D>6 dash>2B>9 dash>j.4C>6 dash>j.4C>6 dash>j.4C>9 dash>j.4C>6 dash>j.4C>6 dash>j.4C>Ashura
- (Crouching) (CH) j.C>2 dash>2C>6 dash cancel 2D>6 dash>5C>6D>6 dash>5C>6A>6C>9 dash>j.4C>j.D>Ashura = [5,998?]
- (Air to Air) j.4C>5B>6C>8 dash>j.4C>j.D>2 dash>5C>6D>6 dash>2D>8 dash>j.4C>6 dash>j.4C>2 dash>8 dash>j.4C>6 dash>j.4C>2 dash>8 dash>j.4C>6 dash>j.4C>2 dash>8 dash>j.4C>6 dash>j.4C>6 dash>j.4C>2 dash>Ashura = [7,038]
- Air Throw>j.4C>j.4C>j.4C>j.D>5C>6D>Daifunka [~6000]
- IAD back B-Nail>(explosion CH)>2B>FRKZ>9 dash>j.4C>2 dash>5C>6D> 6 dash>2B>6C>8 dash>j.4C>X (killed)
- (Air to Air) j.4C>6 dash>j.4C>2 dash?>8 dash>j.4C>j.D>2 dash>2B>9 dash>j.4C>2 dash>5C>6 dash>6D>6 dash>2B>6C>9 dash>j.4C>2 dash>8 dash>j.4C>6 dash>j.4C>2 dash>8 dash>j.4C>6 dash>j.4C>2 dash>8 dash>j.4C>8 dash>dj.4C>9 dash>tj.4C>tj.623B = [5,819?]
- CH 5A>5B>2B>2C>6 dash>5C>6D>6 dash>2D>8 dash>j.D>2 dash>2B>6C>9 dash>j.4C>2 dash>8 dash>j.4C>6 dash>j.4C>2 dash>8 dash>j.4C>6 dash>j.4C>2 dash>Ashura = [5,137]
- j.C>2 dash>2C>6dc 2D>6 dash>5C>6D>6C>6 dash>j.4C>5C>6 dash>2B>5B>Ashura = [5,891]
FRKZ Nezu Combo Tutorial - By: MacArthur
Combo Videos
~Progression~ - By: ???? (Koshikawa)
?Makka Na Chikai? - By: ???? (Koshikawa)
?Steel Rainsistance? - By: superscience
Alternate Colors
Default Colors

Extend Unlockable Colors
