This page covers content from P4AU 1.1, which is NOT the most recent revision of the game.
The version of the game released on modern consoles with rollback netcode is P4U2R.
Click here to be taken to this character's updated page.
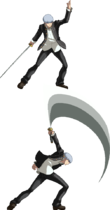
| Yu Narukami |
|---|
 |
|
Health: 9,500 Combo Rate: 60% Backdash Time: 23 Backdash Invincibility: 1-6 Movement Options: 1 Double Jump/Airdash, Dash type: Run
|
Introduction
P-1 Climax Nickname: "The Sister Complex Kingpin of Steel"
Persona: Izanagi
Arcana: Fool
Backstory:
- Yu Narukami, the previously unnamed protagonist from Persona 4, moved to Inaba to live with his uncle and cousin for a year while his parents went overseas on business. While in Inaba, he discovered the existence of a "TV World" as well as a bizarre serial murder case that threatened the lives of everyone in that town. After awakening to his Persona, Yu established the Investigation Team with a group of fellow high school students and sets out to investigate the connection between the TV world and the serial murders. With the help of his friends, Yu is able to a solve the mystery behind the serial murders and defeat the culprit.
Strengths/Weaknesses
| Strengths | Weaknesses |
|---|---|
|
|
External References
- Japanese Name: 鳴上悠
- Japanese Wiki
- Arcade Profile Dan Rankings
- Character Video Thread
Normal Attacks
5A (Normal)


| Version | Damage | Guard | Startup | Active | Recovery | Frame Adv. | Attribute |
|---|---|---|---|---|---|---|---|
| 5A | 200 | All | 5 | 5 | 10 | -2 | Body |
| 5AA | 400 | All | 7 | 2 | 15 | -2 | Body |
| 5AAA | 700・350 | All | 12 | 2・6 | 15 | -4 | Body |
- Jump cancelable.
- Hold 4 to prevent a cancel into 5AA.
5A is a short ranged jab with fast startup and many active frames. Powerful pressure tool thanks to its safety on block and whiff as well as its myriad cancel options. Can be used interchangeably with 2A up to 3 times per string. High vertical range makes this a fast and non-committal anti-air, albeit one that lacks any invincibility. Very important for corner combos as it can be linked into from both C Swift Strike and air A Raging Lion. On air counter hit, the opponent cannot tech until they land.
- Jump cancelable on hit.
5AA is a fast kick with moderate range. Used exclusively as blockstring and combo filler, usually to reach 5AAA. Can whiff after an air hit 5A if the opponent floats too high.
- Hits 2 times.
- Puts Narukami into an airborne state.
- Second hit is double jump cancelable.
- Second hit grants a bonus of 10 SP and 1/8th of the burst meter on hit, but only does so once per combo.
- Both hits launch the opponent on hit.
- Auto-combos into air A Raging Lion (j.214A).
5AAA is a jumping slash that is Narukami's only meterless mid-screen launcher. Jump canceling the second hit into j.C then into air A Raging Lion gives Narukami huge corner carry and safe-jump oki mid-screen or a link into 5A for a full combo in the corner. Incredibly important tool for meterless mid-screen fatal counter routes, leading into very high damage, corner carry, and meter gain. Avoid using this move on block as even though it is safe on block and can lead into a high/low mix after a double jump cancel, all of its follow-up options have a gap and are reactable. Even worse, against two-thirds of the cast the second hit will whiff on crouch block, making the move unsafe and unable to be jump canceled. Second hit connects against Narukami, Yosuke, Yukiko, Teddie, Aigis, Mitsuru, and Ken when crouching.
5A (Shadow)

| Version | Damage | Guard | Startup | Active | Recovery | Frame Adv. | Attribute |
|---|---|---|---|---|---|---|---|
| 5A | 200 | All | 5 | 5 | 10 | -2 | Body |
| 5AA | 400 | All | 7 | 2 | 15 | -2 | Body |
| 5AAA | 1000 | All | 9 | 2 | 22 | -7 | Body |
- Dash cancelable, -5 on block.
- Back dash cancelable, -4 on block.
- Jump cancelable on hit.
- Plummets airborne opponents on hit.
- Grants a bonus of 10 SP on hit, but only does so once per combo.
- Auto-combos into D Swift Strike (214D) if a persona is available.
5AAA is Narukami's original auto-combo ender from P4A, a downward sword slash that can be forward and back dash canceled for pressure resets on block and for better follow-ups on counter hit. While the opponent can tech as soon as they touch the ground on air hit, the jump cancel gives Narukami access to safe-jump oki that can cover multiple tech timings based on when an air dash is used. The bonus meter is extremely important for getting Shadow Frenzy ready so this move is often used to end mid-screen combos where it will deal similar damage and gain more meter than conventional routes.
5B

| Damage | Guard | Startup | Active | Recovery | Frame Adv. | Attribute |
|---|---|---|---|---|---|---|
| 500 | All | 9 | 3 | 21 | -9 | Chest |
- Backdash cancelable, -6 on block
- Jump cancelable on hit.
Horizontal slash that has a fantastic balance of range, speed, and damage. Strong spacing tool in neutral as it out-ranges most other normals with similar start-up. Thus, 5B is Narukami's go-to normal for starting offense, though be aware that this move can be low-profiled by certain attacks. Can be used twice per string though only if 2B and 5C have also been used in said string. Solid damage, low scaling, and a variety of follow-up options makes this his most frequently used normal in combos.
2A

| Damage | Guard | Startup | Active | Recovery | Frame Adv. | Attribute |
|---|---|---|---|---|---|---|
| 160 | Low | 7 | 3 | 11 | -3 | Foot |
- Cancels into itself, even on whiff.
Low hitting jab that can be used interchangeably with 5A up to three times. Narukami's safest and fastest low, one that doesn't require any resources or the corner to convert into a full combo. Commonly used in mix-ups after dash cancels, empty-jumps, or Once More Cancels. Has atrocious scaling as a starter but when used as a combo part the scaling is comparable to Narukami's B normals.
2B

| Damage | Guard | Startup | Active | Recovery | Frame Adv. | Attribute |
|---|---|---|---|---|---|---|
| 300, 150 | AUB | 8 | 2,3 | 29 | -17 | Body |
- Hits 2 times.
- Both hits are jump cancelable on hit.
- Both hits are air unblockable.
Vertical slash that acts as Narukami's dedicated anti-air. Head-attribute invulnerability starts at frame 5 but it stops on frame 9 which makes it prone to trading if timed slightly late. Can also be used to punish opponents for chicken-blocking or to reset airborne opponents thanks to its air unblockable property. Very unsafe on whiff so if used poorly or its baited by the opponent, expect a strong punish. Decent ground poke since it has low start-up and cannot be low-profiled. Used in most combos as filler, but it's vital for OTG'S as it can pick prone opponents for a full conversion. On air counter hit, the opponent cannot tech until they land.
j.A

Oops! All Fuzzy!

| Damage | Guard | Startup | Active | Recovery | Frame Adv. | Attribute |
|---|---|---|---|---|---|---|
| 200 | High | 7 | 7 | 8 | - | Head |
- Cancels into itself, even on whiff.
- Double jump cancelable.
A flying side kick which is Narukami's fastest air normal. Mainly used for close proximity air-to-air situations and for creating ambiguous mix-ups. Strong option after OMC'ing a airborne attack (like Raging Lion), as an immediate air dash can be used to hit an opponent who was expecting a dash-in 2A. Also used in some combos, usually in cases where no other air normal would be fast enough like air hit 5C > jc > IAD j.A. Long untechable time on air counter hit.
j.2A

I think I broke my leg, call an ambulance!

| Damage | Guard | Startup | Active | Recovery | Frame Adv. | Attribute |
|---|---|---|---|---|---|---|
| 450 | All | 16 | Until Landing | 8 After Landing | - | Head |
- Plummets airborne opponents on hit.
- Frame advantage values: -1 on IB (both standing and crouching); +1 on standing block; +3 on crouching block.
- Landing recovery will still occur if canceled with a Shadow Frenzy.
Dive kick whose frame advantage is highly variable depending on whether the opponent is crouch or stand blocking, whether they Instant Blocked, and the height at which j.2A was performed. Can be used to reset pressure or punish attempted throw techs. In fact, if it is performed at the lowest possible height it will be a gap-less blockstring into 5A against crouching opponents. Due to its slow startup, it can be used to bait an opponent's anti-airs by coming down after their attack's active frames have ended. Combos into 5A on crouch hit or into 5B/2B on counter hit.
j.B

| Damage | Guard | Startup | Active | Recovery | Frame Adv. | Attribute |
|---|---|---|---|---|---|---|
| 200, 100 | High | 10 | 3, 3 | 15 | - | Head |
- Hits 2 times.
- Both hits are double jump cancelable.
Double-hitting aerial slash with good range and long active frames, making it an excellent tool for hitting meaty for safe-jumps and for applying strong high/low mix-ups off of jump-ins. Used as filler in nearly every air combo, though remember to let both hits occur before canceling it to maximize combo damage.
j.2B and j.BB

Flying Jesus

| Version | Damage | Guard | Startup | Active | Recovery | Frame Adv. | Attribute |
|---|---|---|---|---|---|---|---|
| j.2B | 450 | High | 11 | 3 | 12 | - | Head |
| j.BB | 450 | High | 7 | 3 | 12 | - | Head |
- Double jump cancelable.
Air sword slash that has absurd range and high damage. As of P4AU, this move can be used on its own, making it significantly more versatile in both neutral and combos. The hitbox almost completely surrounds Narukami, even reaching behind him so it can cross-up opponents without needing to air turn. Also used after j.B for an extra overhead hit, usually after an air dash. Generally used as combo filler in normal combos but in fatal routes it can be looped after an air hit 5C for huge damage and corner carry.
All Out Attack
A+B

| Damage | Guard | Startup | Active | Recovery | Frame Adv. | Attribute |
|---|---|---|---|---|---|---|
| 300 | High | 26 | 1 | 41 | -23 | Body |
- Puts grounded opponents into a spin state.
- Ground bounces airborne and prone opponents.
- Guardpoints on frames 15 - 26.
Downward slash that acts as Narukami's universal overhead. Slower and and more unsafe than Raging Lion but leads into a full combo without using resources. Much less rewarding on air hit as it can only lead into a small combo if it was the starter, otherwise the opponent can air tech before Narukami recovers. Optimal combo tool mid-screen in counter hit routes starting from B normals.
Sweep
2A+B

| Damage | Guard | Startup | Active | Recovery | Frame Adv. | Attribute |
|---|---|---|---|---|---|---|
| 700 | Low | 13 | 3 | 18 | -6 | Foot |
- Knocks down opponents on hit.
- Chest invul on frames 4 - 15.
Low hitting sword swipe, used to mix-up opponents or get a knockdown to set up oki. Narukami can low profile under some attacks using this move, although the reward on hit without meter or the corner is extremely low. Can't cancel into 5D like in P4A and both 2D and D Zio's start-up are too slow, so the only safe set-up is use B Raging Lion Feint to do a safe-jump. Absolutely vital combo part in Shadow Frenzy combos due to its good damage, great scaling, and high minimum hitstun.
Persona Attacks
5C 

| Damage | Guard | Startup | Active | Recovery | Frame Adv. | Attribute |
|---|---|---|---|---|---|---|
| 900 | All | 13 | 3 | 33 | -17 | Body |
- Dash cancelable, -3 on block.
- Jump cancelable on hit.
Izanagi moves forward and slices the opponent. Very unsafe on whiff or on block on its own, leading to a painful punish and the loss of a persona card, so don't use it as a poke and always cancel into something else on block. Can be dash-canceled to reset pressure but this loses to DP's and reversal jabs. This move's main strength is it's high damage and fantastic scaling, making it a staple of all of Narukami's combos. Vital combo tool for juggles, as it's the only move that allows for important combos such as 5C > A Heroic Bravery > B Raging Lion Feint anywhere for safe-jump oki, 5C > 2C > B Raging Lion for ending corner combos, and 5C > jc > IAD j.2B loops for fatal counter routes.
5D

The Lawnmower


| Version | Damage | Guard | Startup | Active | Recovery | Frame Adv. | Attribute |
|---|---|---|---|---|---|---|---|
| 5D | 400, 200, | All | 39 | 9, 3 | Total 52 | +28 | Body |
| 5D~D | 700 | All | 19 | 3 | - | - | Body |
- First attack hits two times.
- Second attack plummets airborne opponents on hit.
- Persona travels up to half screen.
Izanagi drags his spear along the ground until he reaches a certain distance or hits something, then he slashes upward. The follow-up downward slice can be done at any time afterwards, even if Narukami is in the middle of another action. Strong pressure option that leads into a variety of tricky mix-ups, many of which can be a true blockstring. However, its difficult to set up due to its long start-up and the removal of sweep's cancel into 5D. Therefore, there will always be some risk when using this attack so try to condition the opponent to block first. Leads into good damage as a starter and the follow-up allows for full conversions off moves that normally need a resource. Go-to combo part after an OMB.
2C

| Damage | Guard | Startup | Active | Recovery | Frame Adv. | Attribute |
|---|---|---|---|---|---|---|
| 1200 | All | 19 | 2 | 26 | -11 | Body |
- Dash cancelable, -5 on block.
- Back dash cancelable, -4 on block.
- Launches opponent away on hit.
- Forces fatal counter on counter hit.
Izanagi does a slow but far reaching spear thrust. Risky poke that is dificult to combo after mid-screen, though it grants safe-jump oki at any range. Its main use is as a pressure tool as it's easy to frame trap with thanks to the small gap in blockstun when canceled from 5C. Can be forward or back dash canceled as a risky pressure reset or to disengage safely respectively. Used in nearly every corner combo to end combos with B Raging Lion. Has poor scaling and extremely high SMP so try to only use it once per combo and as late as possible.
2D

| Damage | Guard | Startup | Active | Recovery | Frame Adv. | Attribute |
|---|---|---|---|---|---|---|
| 600,300 | All | 102 | 8,3 | 15 | - | Head |
- Hits 2 times.
- First hit plummets airborne opponents on hit.
- Second hit launches opponents on hit.
Izanagi floats diagonally upward then, after a period of time, lunges downward. Very slow set-up tool, though it can be canceled into from sweep unlike 5D. However, it is much less rewarding in both pressure and combos so it isn't normally worth using. Best used as a shock tactic move as it's a move most opponents have likely never seen or practiced against. Almost impossible to use mid-combo, even after an OMB, the only way it will work is by OMC'ing EX Lightning Flash, using 2D, and picking up the staggered opponent with 2B.
j.C

| Damage | Guard | Startup | Active | Recovery | Frame Adv. | Attribute |
|---|---|---|---|---|---|---|
| 700 | All | 10 | 2 | 32 | - | Head |
- Launches opponents away on counter hit.
Izanagi slashes with his spear. Stalls Narukami's air movement. Strong combo tool as it has high enough hitstun to combo into any version of air Raging Lion, though which versions work depends on how much hitstun has decayed. Can be used in pressure if used low to the ground and canceled into air D Zio, allowing Narukami to reach the ground quickly.
j.D

| Damage | Guard | Startup | Active | Recovery | Frame Adv. | Attribute |
|---|---|---|---|---|---|---|
| 600, 300 | All | 32 | Until hitting ground +3 | Total 67/Landing 5 | - | Head, Body |
- Hits 2 times.
- First hit plummets airborne opponents on hit.
- Second hit launches opponents on hit.
Izanagi lunges downwards. Stalls Narukami's air movement, making this useful for punishing an opponent's anti-air attempts. Leads into a full combo on hit provided that Narukami reaches the ground in time to catch the opponent. Used in anti-air combos after OMC'ing air A Raging Lion in the corner to convert into a full ground combo. Shadow Narukami can replace OMC with Shadow Frenzy activation.
Universal Mechanics
Ground Throw
C+D

| Damage | Guard | Startup | Active | Recovery | Frame Adv. | Attribute |
|---|---|---|---|---|---|---|
| 0, 1100 | Throw | 5 | 3 | 25 | - | Throw |
- Launches opponents away on hit.
- Wall bounces the opponent in the corner.
Narukami grabs the opponent and kicks them away. Leads into a full combo in the corner, though an OMC is needed mid-screen. Launches the opponent higher on counter hit, allowing for meterless follow-ups mid-screen.
Air Throw
j.C+D

| Damage | Guard | Startup | Active | Recovery | Frame Adv. | Attribute |
|---|---|---|---|---|---|---|
| 0, 1800 | Throw | 4 | 3 | 19 | - | Throw |
- Knocks down opponent on hit.
Narukami throws the opponent into the ground. Should be used to discourage opponents from jumping out of pressure. Combos directly into j.2B, leading into good damage and safe-jump oki. Successful throws don't reset air options.
Big Gamble
B+D (air OK)

| Version | Damage | Guard | Startup | Active | Recovery | Frame Adv. | Attribute |
|---|---|---|---|---|---|---|---|
| ground | 750,350 | All | 10 | 3,10 | 37,9 After landing | -39 | Body |
| air | 600,300 | All | 4 | 3,3 | 9 After landing | - | Head |
- Invincible on start-up.
- Hits 2 times.
- Puts Narukami into an airborne state.
- Both hits launch the opponent on hit.
- Counter hit state recovery.
Rising sword uppercut that acts as Narukami's meterless reversal. Very punishable on block or whiff so use it sparingly. High vertical range makes it a decent anti-air, though the opponent can air tech before reaching the ground if it didn't fatal counter, making it somewhat unrewarding. Super cancel-able on block or hit, on either hit. Doing so on block can catch the opponent attempting to punish Narukami's DP though this can always be beaten if the opponent rolls through him, making the super whiff. Used in combos to maximize damage before ending a combo with a super or to set-up certain combo extensions like late hit Lightning Flash or cross-up Cross Slash.
Guard Cancel Attack
| Damage | Guard | Startup | Active | Recovery | Frame Adv. | Attribute |
|---|---|---|---|---|---|---|
| 0 | All | 20 | 4 | 22 | -15 | Body |
- Same animation as 5AA.
- Guardpoints on start-up.
- Knocks the opponent away on hit.
Reversal kick that requires 50 SP. Good anti-pressure option, but it's punishable on block. Can be OMC'd to stay safe on block or follow-up with a small combo on hit. Opponent cannot be K.O.'d by a combo that starts with this attack.
Skill Attacks
Zio
236C/D (air OK)


| Version | Damage | Guard | Startup | Active | Recovery | Frame Adv. | Attribute |
|---|---|---|---|---|---|---|---|
| C | 900 | All | 13 | - | 23,47(Izanagi) | -9 | Projectile |
| D | 620×2 | All | 31~? | 2,4 | ?,47(Izanagi) | +10~+? | Projectile |
| SB | 800×2 | All | 16 | - | 19,47(Izanagi) | -3 | Projectile |
C version is a horizontal traveling full-screen projectile. The aerial version travels at a slower speed and has more recovery. If Izanagi was already present when the command is inputted, he will fire the projectile from wherever he is currently located. Useful for zoning, but can be punished if the opponent jumps over it, slides under it, uses invulnerability to go through it, or beats it with a higher priority projectile. Tied with 5C for the best scaling attack in Narukami's arsenal, though this is difficult to exploit outside of Shadow Frenzy.
- Hits 2 times.
- Can be charged by holding D. Charging increases damage and frame advantage.
- Dash cancelable, +12 on block.
- Forces fatal counter on counter hit.
D version is a short ranged attack, though it still has projectile properties. After the end of it's recovery, Narukami will be able to move freely while charging, allowing him to go for mix-ups while Izanagi covers him. Highly advantageous on block, useful for resetting pressure against complacent opponents. Can be canceled into after knockdown inducing moves like sweep, air hit A Heroic Bravery, and air hit Shadow 5AAA, making it a situational but strong oki option. While useless as a combo tool for normal Narukami, the air version of this move is the cornerstone of Shadow Narukami's Shadow Frenzy pressure and combos. This is because the start-up is long and retains his air momentum before Izanagi appears but will be canceled instantly if he reaches the ground. Using it after Raging Lion connects will essentially give Narukami a free OMC, leading to powerful mix-ups and highly damaging combos.
- Hits 2 times.
- Inflicts paralysis on hit.
SB version is a fast two hit projectile, useful for beating other projectiles or to limit the opponent's movement options with paralysis. Narukami has better things to do with his meter so this shouldn't be used outside of Shadow Frenzy combos.
Swift Strike
214C/D

The Ziocar.

| Version | Damage | Guard | Startup | Active | Recovery | Frame Adv. | Attribute |
|---|---|---|---|---|---|---|---|
| C | 800 | Low | 15 | 6 | 21 | -10 | Foot |
| D | 200, 100, 1100 | Low | 17 | 6, 10, 7 | 29 | -19 | Foot |
| SB | 600, 300×4 | Low | 13 | 6,6,6,10,6 | 24 | -13 | Foot |
- Low profiles from frame 6 (C and D) or 8 (EX) until the end of active frames.
- Final hit launches the opponent on hit.
All versions are a sliding attack done in tandem with Izanagi which can go under many pokes and projectiles.
C version travels half screen. Has the lowest frame disadvantage, which can make it safe on block if properly spaced. Leads into safe-jump oki on hit. Can link into 5A in the corner for a full combo.
- Hits 3 times.
- Fatal counter hit state recovery.
- Grounded Suplex Hold skill, auto-combos into C Ziodyne (236236C).
D version travels full-screen. Generally only used if meter is available for an OMC, a super cancel, or Shadow Frenzy.
- Hits 5 times. Follow-up adds 2 hits.
- Follow-up can only be done on hit.
- Fatal counter hit state recovery.
SB version travels beyond full-screen. This is the best version for low profiling predictable pokes and long-range whiff punishes due to it's speed, range, and damage. Can be canceled into Big Gamble on hit for more damage and safe-jump oki. By super canceling the first hit of the follow-up Big Gamble into Lightning Flash in the corner, he can continue to combo after it for massive damage. Can also set-up a cross-up Cross Slash by canceling into the super just as Narukami travels underneath a juggled opponent, though this only works mid-screen.
Raging Lion
214A/B (air OK)

The core of Narukami's mix-ups, oki, and combos.

| Version | Damage | Guard | Startup | Active | Recovery | Frame Adv. | Attribute |
|---|---|---|---|---|---|---|---|
| A | 1000 | High | 23 | 5 | 16 | -4 | Head |
| A Air | 1000 | High | 19 | To Landing | 18 After Landing | -6 | Head |
| B | 1500 | High | 30 | 7 | 10 | +0 | Head |
| B Air | 1100 | High | 21 | To Landing | 18 After Landing | -4 | Head |
| Feint | - | - | - | - | Total 26 | - | - |
| SB | 1200 | High | 21 | 4 | 12 | +1 | Head |
| SB Air | 1400 | High | 17 | To Landing | 18 After Landing | -2 | Head |
- Puts Narukami into an airborne state.
All Versions are a diving sword thrust that hits overhead. As the air versions have their own unique properties and the grounded B version has a feint option, there is a grand total of 7 versions of this special move. While similar in appearance, each one has different intended uses. Performing the aerial versions stalls Yu's momentum, rising higher into the air before performing the attack.
- Forces crouch on grounded hit.
- Plummets airborne opponents on hit.
A Version: Fastest meterless version, this is Narukami's main overhead mix-up option, especially late into a blockstring where All-Out-Attack would usually whiff due to pushback. Opponents with good reactions will block and punish it or do an invulnerable attack through, so look for situations where this move is unexpected, such as after a cross-up/under or after a jump-in. Becomes much stronger when an OMC is available as it can lead into even more mix-ups on block or into a full combo on hit. Useful as a throw or throw break attempt punish since it takes Yu airborne quickly. Can also be used to go over crouching jabs and lows and punish them with a counter-hit. Combos into any A or B normals or 5C on a grounded counter hit. Rarely used as a combo part outside of 5D starter routes or certain Shadow Frenzy combos.
- Launches the opponent away on hit.
- Normal Narukami's 5AAAA, auto-combos into Ziodyne (236236C) or Cross Slash (214214C) in Awakening State if his persona is available.
The air version is generally used as an additional overhead after an IAD j.BB or to punish distant opponents who are either throwing projectiles or setting up resources (like Yukiko's Flame Boost or Ken's Mediarama). Can also be used as a movement tool, notable for escaping the corner. Powerful combo tool in the corner as when used at certain heights Narukami can link into 5A to extend combos.
- Groundslides opponent on hit.
- Forces fatal counter on counter hit.
B Version: Slowest version, can reset pressure due to being even on block. Against characters whose fastest attack has 6 frames or more of start-up, this move essentially becomes plus on block. Frame advantage improves if spaced or if it hits meaty, making it legitimately plus. Very slow start-up, making it susceptible to anti-airs and reversals. Low reward mid-screen without meter but it leads into a full combo on hit in the corner. This is Narukami's best corner combo ender thanks to it's massive frame advantage, leading into multiple oki options such a meaty D Zio or safe-jump oki with j.2B.
- Knocks down grounded opponents on hit.
- Plummets airborne opponents on hit.
The air version is never used outside of combos, and even then only to end anti-air combos and mid-screen fatal routes as it is Narukami's only meterless option that leads into oki. Can convert air combos into ground combos by using either an OMC or activating Shadow Frenzy on hit then hitting the opponent with an air normal before they reach the ground.
- Performed by holding down B.
B Lion Feint: Narukami jumps just like the B version but doesn't do the diving thrust. Once the recovery ends, Narukami is free to preform any action, such as double jumping or air dashing. This grants him several follow-up options, such as a falling j.2B, empty jump 2A or throw, delayed air dash into j.B, and so on. As Narukami travels further than the B version, he can potentially cross-up opponents for even more mix-ups. Go-to oki tool after knock down inducing attacks that are special cancelable, like sweep, A Heroic Bravery, and Shadow Narukami's 5AAA.
- Knocks down grounded opponents on hit.
- Ground bounces on counter hit.
- Forces fatal counter on counter hit.
SB Version: Fastest version, is plus on block, and leads into incredibly damaging combos on counter hit. Fantastic option for finishing off low health opponents. Combos into 2A if it hits as a meaty or against airborne opponents for a full combo. Combos into 2B if used after a fatal counter, which greatly increases the combo's damage for minimal meter use. Used in almost every Shadow Frenzy combo as air D Zio cancels allow this move to combo into 2B and sweep for combo extensions.
- Knocks down grounded opponents on hit.
- Plummets airborne opponents on hit.
The air version is used exclusively as an extra overhead following a jump-in, usually to close out a round. Provides no additional utility over the other versions so avoid using this one if possible.
Heroic Bravery
236A/B

Command grab? He needs it.


| Version | Damage | Guard | Startup | Active | Recovery | Frame Adv. | Attribute |
|---|---|---|---|---|---|---|---|
| 236A | 700 | All | 17~25 | 5 | 20 | -5 | Body |
| 236B | 0,0,1100 | Throw | 30 | 1 | 26 | - | Throw |
| 236AB | 0,0,1000 | Throw | 21 | 1 | 26 | - | Throw |
- Plummets airborne opponents on hit.
A version is a vertical electrical slash that is special cancelable. Startup is based on the opponent's distance; if the opponent is out of range, Narukami will run up to half-screen before using the skill. Can be used to safely end blockstrings or set-up a high-low mix-up with either A Raging Lion or C Swift Strike or a left/right mix-up with B Raging Lion and it's feint. Generally only used as combo filler against grounded opponents but it acts as a strong combo ender in juggles as it gives Narukami a safe-jump when canceled into B Raging Lion Feint. Combos into all grounded versions of Raging Lion and links into all his ground A and B normals on counter hit.
- Launches opponent away on hit.
B version is a command grab. The dash during the start-up extends the move's effective range. This move allows Narukami to threaten the opponent with a hit/throw mix-up even at a distance and late into a blockstring. Low reward without meter mid-screen but it leads into a full combo in the corner. The high start-up makes it risky to use without conditioning the opponent to block, so only use it when they respect your offense.
- Launches opponent away on hit.
SB version is a faster version of 236B with more range and less start-up. Has similar risk and reward to the meterless version but costs 25 SP and it decreases your metergain for a short time. Best used to finish off low health opponents.
SP Skill Attacks
Ziodyne
236236C/D (air OK)

Powerful reversal and neutral option with 100 SP.

| Version | Damage | Guard | Startup | Active | Recovery | Frame Adv. | Attribute |
|---|---|---|---|---|---|---|---|
| C ground | 134, 67×33 | All | 5+14 | 102 (34 Hits) | 67 | -53 | Projectile |
| C air | 134, 67×33 | All | 19+4 | 102 (34 Hits) | Until landing +9 | - | Projectile |
| D ground | 134, 67×33 | All | 5+38 | 102 (34 Hits) | 34 | -20 | Projectile |
| D air | 134, 67×33 | All | 26+4 | 102 (34 Hits) | Until Landing +9 | - | Projectile |
| SB ground | 134, 67×33 | All | 5+20 | 102 (34 Hits) | 41 | -27 | Projectile |
| SB air | 134, 67×33 | All | 19+10 | 102 (34 Hits) | Until Landing +9 | - | Projectile |
- Invincible on start-up.
- Cannot be OMB'd.
- Launches opponent away on hit.
- Wall sticks opponent in the corner.
- SB version inflicts paralysis on hit.
Full screen multi-hit horizontal projectile that is unsafe on block. Due to its invulnerability and quick start-up, it can be used to either punish or reversal through distant attacks. If OMC'd, Izanagi will continue to fire the projectile allowing Narukami to move freely and apply mix-ups while under the cover of Ziodyne's animation, making it difficult for the opponent to react. This is Narukami's only air super, thus it is useful for maximizing combo damage in the air. It grants essentially no oki so avoid using it if it won't finish off the opponent. The D version has slower startup, but it has significantly less recovery, making it safe on block and granting Narukami a short follow-up combo in the corner. The SB version also has slightly more startup and less recovery, but it can be used mid-combo for wall stick extensions.
Lightning Flash
236236A/B

DMC Stinger

| Version | Damage | Guard | Startup | Active | Recovery | Frame Adv. | Attribute |
|---|---|---|---|---|---|---|---|
| A | 160, 80×5m 1500 | All | 5+1 | 1×6 (5) 15 | 25 | -21 | Body |
| B | 160, 80×7m 1800 | All | 5+5 | 1×8 (5) 15 | 25 | -21 | Body |
| SB | 500, 2500 | All | 5+1 | 16 (5) 15 | 25 | -21 | Body |
- Launches opponent away on hit.
- First hit of SB version restands the opponent on hit.
- Final hit ground slides the opponent.
- Fatal counter state recovery.
Narukami lunges forward with a sword thrust. Fast super that covers a large portion of the screen, A and B versions go half-screen while the SB version goes full-screen. Has no invincibility so it cannot be used as a reversal or punish distant pokes or projectiles like Ziodyne can. This is Narukami's main super for ending combos thanks to its massive corner carry and decent oki if the move corners the opponent. If only the last hit of the super connects against an airborne opponent in the corner, it can link into 2B for a high damage combo extension. The A version is used to tack on extra damage after Cross Slash. The B version has slightly more startup, but deals more damage, making it the preferred version for both ending combos and setting up corner extensions. The SB version has the fast start-up of the A version and higher damage than the B version but can not be extended with OMB due to the high push-back on hit.
Awakened SP Skill Attacks
Cross Slash
214214C/D


| Version | Damage | Guard | Startup | Active | Recovery | Frame Adv. | Attribute |
|---|---|---|---|---|---|---|---|
| C | 1500,2800 | All | 11+5 | 7 | 32 | -20 | Body |
| D | 1500,4200 | All | 20+25 | 7 | 32 | -20 | Body |
| SB | 1500,2800 | All | 8+5 | 7 | 32 | -20 | Body |
- Invincible on start-up.
- Hits 1 time on block or whiff, hits 2 times on hit.
- First hit restands the opponent on hit.
- Second hit puts the opponent into a crumple state.
- Cannot be OMC'd or OMB'd on hit.
- D version forces fatal counter on counter hit.
- SB version inflicts paralysis on hit.
Narukami preforms an electrified slash. If it successfully connects, Izanagi follows up with a falling spear slam. Fast, high damage super with long horizontal range, used primarily as a combo ender or as a reversal. If it connects in such a way that Narukami passes under the opponent after the first hit, it can link into 2B for a combo extension. The C version is almost always the one that should be used. The D version deals more damage but it has much more startup, limiting its use to reversals through attacks with high recovery. The SB version does the same damage as the C version but has faster start-up and causes paralysis on hit, sees much more use in Shadow Frenzy combos.
Thunder God Dance
214214A+B

Holy Order Sol players would be proud of you for pulling off this homage.


| Damage | Guard | Startup | Active | Recovery | Frame Adv. | Attribute |
|---|---|---|---|---|---|---|
| 1200, 400×8, 4000, 400, 200×6, 4000 | All | 4+18 | 3 | 41 | -27 | Body |
- Invincible on start-up.
- Cannot be OMC'd or OMB'd.
- Consists of three parts; the Persona Card attack, the Sword Slashes, and the Lightning Strike.
- Requires 150 SP to use, each part individually consumes 50 SP.
- Persona Card restands and crumples the opponent on hit.
- Sword Slashes require multiple rhythmic inputs to complete. Narukami enters a long recovery state if the final part is not reached.
- Lightning Strike launches the opponent on hit.
- Cannot be used by Shadow Narukami.
Narukami creates a persona tarot card and cuts it in half. If the opponent is hit, he follows up with multiple sword attacks, then summons Izanagi to electrify the opponent. This is Narukami's most damaging attack, capable of dealing 5000 damage raw or over 3000 damage minimum during a combo. Requires certain set-ups for mid-screen combos but can be used to end just about any corner combo. The crumple from the Persona Card can be used to link into most of Narukami's other moves, though this is impractical due to its terrible proration. Unfortunately, this super is only usable in Awakening State and has a steep meter requirement of 150 SP. Furthermore, dropping an input during the Sword Slashes will force Yu into a long animation that cannot be cancelled in any way, giving the opponent a free punish. That said, should a situation where this move is available present itself and you have the guts, skill, and determination to pull it off, consider using it. Its incredible un-burstable damage can win games.
The full command for this super:
214214A+B > 5A > 5A > 5B > 5C > 5B > 5C > 5D > 5A+B > 214214C+D > [2]8C+D
Instant Kill
Myriad Truths
222C+D


| Damage | Guard | Startup | Active | Recovery | Frame Adv. | Attribute |
|---|---|---|---|---|---|---|
| K.O. | All | 23+40 | 32 | 44 | -46 | Body |
- Invincible on start-up.
- Cannot hit opponents who are in hitstun.
Narukami thrusts his katana into the floor, covering the entire ground with electricity. If the opponent is hit, Izanagi appears and strikes them with a column of light. Its humongous range and long invincibility allows Narukami to punish certain moves, most often supers done in neutral or as reversals as the input can be buffered during the super freeze. However, it costs 100 SP and has long startup and recovery, making the penalty of its misuse extremely high.
 Aigis[★]
 Akihiko Sanada[★]
 Chie Satonaka[★]
 Elizabeth[★]
 Junpei Iori[★]
 Kanji Tatsumi[★]
 Ken Amada[★]
 Labrys[★]
 Margaret[★]
 Marie[★]
 Mitsuru Kirijo[★]
 Naoto Shirogane[★]
 Rise Kujikawa[★]
 Shadow Labrys[★]
 SHO Minazuki[★]
 Sho MINAZUKI[★]
 Teddie[★]
 Tohru Adachi[★]
 Yosuke Hanamura[★]
 Yu Narukami[★]
 Yukari Takeba[★]
 Yukiko Amagi[★]
Click [★] for character's full frame data