
Slow, but does everything
< BBCF
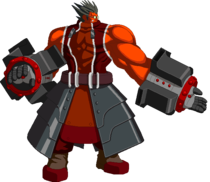
Overview
Overview
Tager is Blazblue's resident grappler who uses powerful command throws and guard point moves to deal high damage combos. Tager has very low mobility; He can't forward dash, and he can't double jump or air dash. However, Tager has a couple of things going for him. For one, he's a walking tank with the highest health in the game. Additionally, he has an amazing backdash with long invulnerability and can use some of his guard point attacks to close in against certain moves. Lastly, Tager has his Drive. Tager's Drive gives him the ability to magnetize his opponents in order to pull them towards him. With it, he can drag opponents into his attacks and open up new combo options for better damage. Once in, Tager's command grabs and high damage can mix up his opponent and take rounds.
As a low mobility grappler, Tager struggles against characters with strong neutral and low committal offense. His huge hurtbox also opens up unique combo options and mixups for the cast. Tager relies on reading his opponents and calling out their attacks with his command grabs. Thankfully, Tager's Distortion Drives (especially with Overdrive) can create huge momentum swings in his favor. With patient play and good fundamental defense, Tager can turn the tide on anyone and run his game. Drive: Voltic Battler
Tager can magnetize opponents for a small duration by landing certain attacks on hit or block. If the opponent is already magnetized and gets hit by an attack with magnetism, the duration stacks (max 1000F). The magnetism duration normally reduces at a rate of 1 point per frame, but if Tager's opponent is in hitstun, the rate halves to 1 point per 2 frames (when they perform a tech, the rate goes back to normal). Magnetism duration does not decrease during superflash or hitstop.
When the opponent is magnetized, certain attacks will pull in the opponent. All Drive moves, as well as 6A, 360A/B, 623C, j.360C, and Distortion Drives, will pull in magnetized opponents. Each move attracts differently and for different durations, and they may pull in airborne and grounded opponents differently. For example, Atomic Collider strongly attracts airborne opponents, but does not affect standing or crouching opponents at all. The forces are noted in the frame data. Typically attractive moves start their attraction early on during startup and end during the active frames. Magnetism pulls do not affect a player's ability to perform moves since it doesn't directly cause any kind of hitstun, however it can mess up spacing and force players to land earlier or later than normal, causing some unpredictable and sometimes amusing effects.
In all cases, players performing Distortion Drives and executing throws that have successfully connected are completely unaffected by magnetism.
Tager's magnetism cannot force enemies into an airborne state if they're currently grounded, enemies doing any kind of ground tech also cannot be pulled vertically, even though emergency techs are considered airborne and can be pulled sideways surprisingly fast
Overdrive: Voltic Field
Unlike most other overdrives, Tager's focuses more on taking advantage during neutral, with much stronger methods of applying and keeping magnetism. This isn't to say that it doesn't boost his combo damage, but this is limited to just what the overdrive cancel allows and greatly enhanced distortion drives, rather than boosted normals.
- All normal drive moves all gain projectile guardpoints as well as attribute specific guardpoints depending on the move
- Spark Bolt Gauge fills up four times as fast
- All moves that apply magnetism apply the maximum amount on hit or block
- Distortion Drives are enhanced (more information below)
- While grounded and not in hitstun, magnetized opponents are constantly pulled towards Tager with a velocity of 2,000u/F (about 2/5 of average backwalking speed, so basically not much).
Unique Mechanic: 360 inputs
While not completely unique to Tager, he has the largest number of special inputs that involve performing at least one full rotation of the direction stick before inputting a button. If you aren't familiar with these from other games, it's important to know the following:
- You do not need to do a full circle. Instead what you need to do all four cardinal directions or all four diagonal directions in sequence, so 4268 and 1397 are valid 360 inputs. Any other direction inputs input in the window will not interrupt the motion, so usually players aim to do 4123698 which works.
- 360 Inputs have a 30F input window, 720 has 45F and 1080 has 75F. This timer counts from the moment you leave the first input.
- Moves that require multiple spins require them to be in sequence and in the same direction. 42684268 is a valid 720 motion, 42686248 is not. Similarly, they must be of the same type, 4268 7139 is not a valid 720 Spin.
- The starting point and the direction of the spin is not important.
- Spin inputs have a higher input priority than 236 or 623 inputs (So try to do these motions neatly if you don't want a 360 instead).
This may feel unintuitive, since pressing upwards will usually make Tager jump, so there are some useful tricks to know:
- Jump startup may be special cancelled, therefore performing 4268A or 6248A quickly enough will allow you to perform 360A from a standing start. This can be done with a 720 spin, but it's extremely hard to do.
- You can also avoid jumping by doing the spin when Tager can't jump anyway (Known as "Buffering" the move). This includes:
- During Tager's own moves.
- While in the air, since Tager has no double jump
- While blocking or being hit
- While recovering from a knockdown (typically best done during the "bounce" recovery to prevent accidental rolling)
- During super pauses, especially overdrive activation
Normal Moves
5A


- Surprisingly large hitbox; hits crouching, low-dashing and even tech-rolling characters with ease.
- Cannot self cancel, even on hit
- Useful for setting up tick throws
- One of Tager's few jump-cancelable normals.
Tager's 5A is a good poke, and can even lead to decent damage. While it's not as fast as the average jab, its neutral frame advantage and generally large size gives it many uses including to set up tick throws.
5B

Fast low, versatile tool


Can hit surprisingly up high

| Damage | GuardHow this attack can be guarded. Throws have their throw range listed instead. | StartupHow many frames the attack needs to go through in order to reach its active frames. The listed startup frame coincides with the move's first active frame. | ActiveHow many frames where there is a hitbox that can hit an opponent. The first active frame occurs on the listed startup frame. | RecoveryHow many frames that the character must go through after an attack's active frames to automatically go back to a neutral stance, or the total duration of the move if it has no hitbox/creates projectiles. | Frame AdvHow many frames the attacker's recovery ends before the defender's blockstun ends if the attack is blocked. A positive value indicates that the attacker recovers first, while a negative value indicates that the defender recovers first. This value usually assumes that the attack's first active frame (of each hit, if multi-hit) is blocked. | On ODRThe difference between the attacker's total animation length and the period the opponent is in overdrive raid. This frame advantage is based off the assumption that both players input during the hitstop of a prior move, so that this attack and ODR start on the same frame. | AttributeSome attacks are invulnerable to attacks with specific attributes. This notes what attributes each attack possesses. H - Head B - Body F - Foot P - Projectile. Independent projectiles will have their Durability level listed, e.g. a projectile with Durability level 2 will show P2 T - Throw D - Doll attack, such as Carl's or Relius' doll Burst - Burst, which has its own unique attribute |
Invuln |
|---|---|---|---|---|---|---|---|---|
| 540 | Low | 10 | 3 | 14 | 0 | 0 | F |
- One of Tager's few jump-cancelable normals.
- Fundemental part of the low/throw mixup, but beware of normals that avoid both.
5B is a very important normal for its use in low/throw mixups. It has similar uses to 2B, and while it's slower and deals slightly less damage, its larger hitbox and numerous cancel options make it more useful for blockstrings and combos.
| Starter RatingDetermines the starting value of the hitstun/untech decay timer and subsequent combo length | P1Proration applied to future hits when used as the first hit of a combo | P2Proration applied to future hits when used during any part of a combo | Attack LevelDefault Attack Level Values
| |||||||||||||||||||||||||||||||||||
|---|---|---|---|---|---|---|---|---|---|---|---|---|---|---|---|---|---|---|---|---|---|---|---|---|---|---|---|---|---|---|---|---|---|---|---|---|---|---|
| Long | 90 | 89 | 3 |
5C

Chops! Tager's best starter


| Damage | GuardHow this attack can be guarded. Throws have their throw range listed instead. | StartupHow many frames the attack needs to go through in order to reach its active frames. The listed startup frame coincides with the move's first active frame. | ActiveHow many frames where there is a hitbox that can hit an opponent. The first active frame occurs on the listed startup frame. | RecoveryHow many frames that the character must go through after an attack's active frames to automatically go back to a neutral stance, or the total duration of the move if it has no hitbox/creates projectiles. | Frame AdvHow many frames the attacker's recovery ends before the defender's blockstun ends if the attack is blocked. A positive value indicates that the attacker recovers first, while a negative value indicates that the defender recovers first. This value usually assumes that the attack's first active frame (of each hit, if multi-hit) is blocked. | On ODRThe difference between the attacker's total animation length and the period the opponent is in overdrive raid. This frame advantage is based off the assumption that both players input during the hitstop of a prior move, so that this attack and ODR start on the same frame. | AttributeSome attacks are invulnerable to attacks with specific attributes. This notes what attributes each attack possesses. H - Head B - Body F - Foot P - Projectile. Independent projectiles will have their Durability level listed, e.g. a projectile with Durability level 2 will show P2 T - Throw D - Doll attack, such as Carl's or Relius' doll Burst - Burst, which has its own unique attribute |
Invuln |
|---|---|---|---|---|---|---|---|---|
| 1000 | Mid | 15 | 4 | 18 | -3 | -10 | B |
- High proration, strongest combo starter.
- Hitting with the tip of the attack normally doesn't lead to any combos outside of Spark Bolt followup.
A decent poke, an excellent starter if you land it up close and also a nice high damage combo filler, basically everything you want in a 5C with the exception that if often pushes the opponent away too far for comboing followups unless it's a counterhit. If you know a counterhit is guarenteed, follow it up with 6C to lead into some truly nasty damage.
| Starter RatingDetermines the starting value of the hitstun/untech decay timer and subsequent combo length | P1Proration applied to future hits when used as the first hit of a combo | P2Proration applied to future hits when used during any part of a combo | Attack LevelDefault Attack Level Values
| |||||||||||||||||||||||||||||||||||
|---|---|---|---|---|---|---|---|---|---|---|---|---|---|---|---|---|---|---|---|---|---|---|---|---|---|---|---|---|---|---|---|---|---|---|---|---|---|---|
| Long | 100 | 92 | 4 |
2A

Kind of an anti-air


Low profile hitboxes

| Damage | GuardHow this attack can be guarded. Throws have their throw range listed instead. | StartupHow many frames the attack needs to go through in order to reach its active frames. The listed startup frame coincides with the move's first active frame. | ActiveHow many frames where there is a hitbox that can hit an opponent. The first active frame occurs on the listed startup frame. | RecoveryHow many frames that the character must go through after an attack's active frames to automatically go back to a neutral stance, or the total duration of the move if it has no hitbox/creates projectiles. | Frame AdvHow many frames the attacker's recovery ends before the defender's blockstun ends if the attack is blocked. A positive value indicates that the attacker recovers first, while a negative value indicates that the defender recovers first. This value usually assumes that the attack's first active frame (of each hit, if multi-hit) is blocked. | On ODRThe difference between the attacker's total animation length and the period the opponent is in overdrive raid. This frame advantage is based off the assumption that both players input during the hitstop of a prior move, so that this attack and ODR start on the same frame. | AttributeSome attacks are invulnerable to attacks with specific attributes. This notes what attributes each attack possesses. H - Head B - Body F - Foot P - Projectile. Independent projectiles will have their Durability level listed, e.g. a projectile with Durability level 2 will show P2 T - Throw D - Doll attack, such as Carl's or Relius' doll Burst - Burst, which has its own unique attribute |
Invuln |
|---|---|---|---|---|---|---|---|---|
| 350 | All | 8 | 3 | 10 | +1 | +6 | B |
Like a slower 5A with fewer cancel options but a lower profile and much more disjointed hitbox (Tager's arm has no hurtbox during the move, unlike 5A), 2A sees some use as a ghetto anti air and a mashable button, since it can self cancel up to three times but 5A cannot self cancel at all. As an anti-air it's a bit weak since it requires a rather fast reaction to jump cancel into the followup combo, but it's still useful for disrupting your opponent's pressure nonetheless.
| Starter RatingDetermines the starting value of the hitstun/untech decay timer and subsequent combo length | P1Proration applied to future hits when used as the first hit of a combo | P2Proration applied to future hits when used during any part of a combo | Attack LevelDefault Attack Level Values
| |||||||||||||||||||||||||||||||||||
|---|---|---|---|---|---|---|---|---|---|---|---|---|---|---|---|---|---|---|---|---|---|---|---|---|---|---|---|---|---|---|---|---|---|---|---|---|---|---|
| Short | 100 | 80 | 2 |
2B

The monkey kick that's surprisingly fast and safe


Good hitbox for catching tech rolls and other pass-throughs

| Damage | GuardHow this attack can be guarded. Throws have their throw range listed instead. | StartupHow many frames the attack needs to go through in order to reach its active frames. The listed startup frame coincides with the move's first active frame. | ActiveHow many frames where there is a hitbox that can hit an opponent. The first active frame occurs on the listed startup frame. | RecoveryHow many frames that the character must go through after an attack's active frames to automatically go back to a neutral stance, or the total duration of the move if it has no hitbox/creates projectiles. | Frame AdvHow many frames the attacker's recovery ends before the defender's blockstun ends if the attack is blocked. A positive value indicates that the attacker recovers first, while a negative value indicates that the defender recovers first. This value usually assumes that the attack's first active frame (of each hit, if multi-hit) is blocked. | On ODRThe difference between the attacker's total animation length and the period the opponent is in overdrive raid. This frame advantage is based off the assumption that both players input during the hitstop of a prior move, so that this attack and ODR start on the same frame. | AttributeSome attacks are invulnerable to attacks with specific attributes. This notes what attributes each attack possesses. H - Head B - Body F - Foot P - Projectile. Independent projectiles will have their Durability level listed, e.g. a projectile with Durability level 2 will show P2 T - Throw D - Doll attack, such as Carl's or Relius' doll Burst - Burst, which has its own unique attribute |
Invuln |
|---|---|---|---|---|---|---|---|---|
| 580 | Low | 11 | 3 | 9 | +5 | +4 | F |
- After doing 2B > 5B >2B you cannot cancel into 5B again for that string.
In previous iterations, 5B and 2B were pretty interchangable, however 2B's use has now moved from being a combo tool to being a very safe low poke when up close. It has a very nice frame advantage making it ideal for setting up Wedge catapult attempts, deliberate whiffs on techs and other shenanigans. 2B's relatively short range limits its use to just an oki tool in many cases since it's not easy or practical for Tager to close in unimpeded most of the time.
| Starter RatingDetermines the starting value of the hitstun/untech decay timer and subsequent combo length | P1Proration applied to future hits when used as the first hit of a combo | P2Proration applied to future hits when used during any part of a combo | Attack LevelDefault Attack Level Values
| |||||||||||||||||||||||||||||||||||
|---|---|---|---|---|---|---|---|---|---|---|---|---|---|---|---|---|---|---|---|---|---|---|---|---|---|---|---|---|---|---|---|---|---|---|---|---|---|---|
| Long | 90 | 89 | 3 |
2C

Risky anti-air, mainly combo filler


| Damage | GuardHow this attack can be guarded. Throws have their throw range listed instead. | StartupHow many frames the attack needs to go through in order to reach its active frames. The listed startup frame coincides with the move's first active frame. | ActiveHow many frames where there is a hitbox that can hit an opponent. The first active frame occurs on the listed startup frame. | RecoveryHow many frames that the character must go through after an attack's active frames to automatically go back to a neutral stance, or the total duration of the move if it has no hitbox/creates projectiles. | Frame AdvHow many frames the attacker's recovery ends before the defender's blockstun ends if the attack is blocked. A positive value indicates that the attacker recovers first, while a negative value indicates that the defender recovers first. This value usually assumes that the attack's first active frame (of each hit, if multi-hit) is blocked. | On ODRThe difference between the attacker's total animation length and the period the opponent is in overdrive raid. This frame advantage is based off the assumption that both players input during the hitstop of a prior move, so that this attack and ODR start on the same frame. | AttributeSome attacks are invulnerable to attacks with specific attributes. This notes what attributes each attack possesses. H - Head B - Body F - Foot P - Projectile. Independent projectiles will have their Durability level listed, e.g. a projectile with Durability level 2 will show P2 T - Throw D - Doll attack, such as Carl's or Relius' doll Burst - Burst, which has its own unique attribute |
Invuln |
|---|---|---|---|---|---|---|---|---|
| 1100 | Mid | 15 | 2 | 39 | -22 | -29 | B | 11~14 H |
- High risk, high reward anti-air.
- Long recovery time, extremely dangerous to whiff.
- Small amound of head invulnerability.
- Good vertical reach, but poor horizontal reach.
Tager's 2C mostly sees use in combos, usually following 6A. Due to its abysmal recovery, it's generally not a good idea to use unless you're certain it will hit.
| Starter RatingDetermines the starting value of the hitstun/untech decay timer and subsequent combo length | P1Proration applied to future hits when used as the first hit of a combo | P2Proration applied to future hits when used during any part of a combo | Attack LevelDefault Attack Level Values
| |||||||||||||||||||||||||||||||||||
|---|---|---|---|---|---|---|---|---|---|---|---|---|---|---|---|---|---|---|---|---|---|---|---|---|---|---|---|---|---|---|---|---|---|---|---|---|---|---|
| Long | 90 | 82 | 4 |
6A
(Hold OK)

Pose when delaying the move...

And release


Frames 19-22

Frames 23-25


| Version | Damage | GuardHow this attack can be guarded. Throws have their throw range listed instead. | StartupHow many frames the attack needs to go through in order to reach its active frames. The listed startup frame coincides with the move's first active frame. | ActiveHow many frames where there is a hitbox that can hit an opponent. The first active frame occurs on the listed startup frame. | RecoveryHow many frames that the character must go through after an attack's active frames to automatically go back to a neutral stance, or the total duration of the move if it has no hitbox/creates projectiles. | Frame AdvHow many frames the attacker's recovery ends before the defender's blockstun ends if the attack is blocked. A positive value indicates that the attacker recovers first, while a negative value indicates that the defender recovers first. This value usually assumes that the attack's first active frame (of each hit, if multi-hit) is blocked. | On ODRThe difference between the attacker's total animation length and the period the opponent is in overdrive raid. This frame advantage is based off the assumption that both players input during the hitstop of a prior move, so that this attack and ODR start on the same frame. | AttributeSome attacks are invulnerable to attacks with specific attributes. This notes what attributes each attack possesses. H - Head B - Body F - Foot P - Projectile. Independent projectiles will have their Durability level listed, e.g. a projectile with Durability level 2 will show P2 T - Throw D - Doll attack, such as Carl's or Relius' doll Burst - Burst, which has its own unique attribute |
Invuln |
|---|---|---|---|---|---|---|---|---|---|
| Uncharged | 800 | Mid | 19~44 | 7 | 37 | -27 | -36 | B | {16~(End of Active) Guard HBP} |
| Charged | 1000 | Mid | 45~52 | 7 | 37 | -23 | B | 16~(End of Active) Guard HBP |
- Hold button to delay.
- Move is attractive to magnetized opponents throughout its startup and active frames, including if you delay the move.
- Armour is only enabled if the move is charged for at least 16 Frames.
- Armor throughout the charge animation against Body, Head and Projectile attacks. Somewhat uniquely, attacks against 6A's armor will still deal half of their base damage to Tager (And can still end the round).
- Negative knockback, opponents are knocked towards you when it connects in any way. Floor slides at Tager's feet on air hit.
- Full charge is achieved 6 frames before Tager will automatically swing anyway.
- Large hitbox that encompasses the spark around Tager's hand, overall reach slightly larger than 5C.
- Tager's only normal that can cancel into his command throws.
Tager's 6A is a very good multi-purpose tool. It brings the opponent closer to him, allowing him to start close range pressure and grab mixup. It also is a very good combo tool that removes the need to dash or jump cancel like other characters would need to. Usually in combos it gets used after a 5C, a link which eventually fails during long combos. Other times include after Sledgehammer B, Back throw and, with some timing, Spark bolt and j.D.
This move also has an effect where your opponent cannot tech the slide if they hit the floor within 2F of being hit (Basically when they're very close to the ground when hit in the air), causing a hard knockdown. The combined untech time is long enough to allow combos of all kinds. The normal version will generally only combo into 2C, 6B and 236A but if you get the long-untech time version, 6A will combo into 236B, 6C, and Crush Trigger as well, allowing a lot of combo possibilities. You'll want to learn this timing to get maximum damage combos, especially after Spark Bolt.
Charging 6A simply extends the armor frames and attractive time allows you to delay the attack for a bit more damage. Charging fully is generally useless, except if you read that a hit is coming and you want to guard point through it.
| Version | Starter RatingDetermines the starting value of the hitstun/untech decay timer and subsequent combo length | P1Proration applied to future hits when used as the first hit of a combo | P2Proration applied to future hits when used during any part of a combo | Attack LevelDefault Attack Level Values
| |||||||||||||||||||||||||||||||||||
|---|---|---|---|---|---|---|---|---|---|---|---|---|---|---|---|---|---|---|---|---|---|---|---|---|---|---|---|---|---|---|---|---|---|---|---|---|---|---|---|
| Uncharged | Long | 90 | 89 | 3 | |||||||||||||||||||||||||||||||||||
| Charged | Long | 90 | 94 | 5 |
Uncharged:
- Remaining startup after releasing button is 11F
- {Guard point only activates if charged to at least frame 16 (minimum 27F startup)}
- On Guard Point, hitstop for Tager 14F. Opponent hitstop unchanged
- Can guard point up to 2000 damage
- Tager takes 50% damage from attacks guarded
- Maximum Slide duration 20F
- Attractive from frame 16 to one frame before active frames
- Attraction force (2300G, 650A)
Charged:
- Remaining startup from button release is 11F
- Gains charged properties (increased damage/attack level) on frame 34 of charge, max charge time 41F
- On Guard Point, hitstop for Tager 14F. Opponent hitstop unchanged
- Can guard point up to 2000 damage
- Tager takes 50% damage from attacks guarded
- Maximum Slide duration 20F
- Attractive from frame 16 to one frame before active frames
- Attraction force (2300G, 650A)
6B


| Damage | GuardHow this attack can be guarded. Throws have their throw range listed instead. | StartupHow many frames the attack needs to go through in order to reach its active frames. The listed startup frame coincides with the move's first active frame. | ActiveHow many frames where there is a hitbox that can hit an opponent. The first active frame occurs on the listed startup frame. | RecoveryHow many frames that the character must go through after an attack's active frames to automatically go back to a neutral stance, or the total duration of the move if it has no hitbox/creates projectiles. | Frame AdvHow many frames the attacker's recovery ends before the defender's blockstun ends if the attack is blocked. A positive value indicates that the attacker recovers first, while a negative value indicates that the defender recovers first. This value usually assumes that the attack's first active frame (of each hit, if multi-hit) is blocked. | On ODRThe difference between the attacker's total animation length and the period the opponent is in overdrive raid. This frame advantage is based off the assumption that both players input during the hitstop of a prior move, so that this attack and ODR start on the same frame. | AttributeSome attacks are invulnerable to attacks with specific attributes. This notes what attributes each attack possesses. H - Head B - Body F - Foot P - Projectile. Independent projectiles will have their Durability level listed, e.g. a projectile with Durability level 2 will show P2 T - Throw D - Doll attack, such as Carl's or Relius' doll Burst - Burst, which has its own unique attribute |
Invuln |
|---|---|---|---|---|---|---|---|---|
| 620 | Mid | 16 | 2 | 18 | -3 | -9 | B | 4~17 F |
- Can cancel into itself once.
- Forces crouching on standing hit allowing combos into 236A (And 5D on fatal combos)
- Hard knockdown on air hit. Combos into A Sledge and Gadget finger but not 2C with a few exceptions.
- Has foot invulnerability on start-up, allowing you to counter low hitting pressure.
- Moves Tager forward slightly.
6B is an important tool thanks to its foot invulnerability. Since Tager's armored moves lose to low attacks, this can be used to call out those moves. On counterhit, 6B combos into 6C, leading to massive damage.
| Starter RatingDetermines the starting value of the hitstun/untech decay timer and subsequent combo length | P1Proration applied to future hits when used as the first hit of a combo | P2Proration applied to future hits when used during any part of a combo | Attack LevelDefault Attack Level Values
| |||||||||||||||||||||||||||||||||||
|---|---|---|---|---|---|---|---|---|---|---|---|---|---|---|---|---|---|---|---|---|---|---|---|---|---|---|---|---|---|---|---|---|---|---|---|---|---|---|
| Long | 90 | 89 | 3 |
- Forces crouch on standing hit
6C

Long range overhead. SMASH!!


| Damage | GuardHow this attack can be guarded. Throws have their throw range listed instead. | StartupHow many frames the attack needs to go through in order to reach its active frames. The listed startup frame coincides with the move's first active frame. | ActiveHow many frames where there is a hitbox that can hit an opponent. The first active frame occurs on the listed startup frame. | RecoveryHow many frames that the character must go through after an attack's active frames to automatically go back to a neutral stance, or the total duration of the move if it has no hitbox/creates projectiles. | Frame AdvHow many frames the attacker's recovery ends before the defender's blockstun ends if the attack is blocked. A positive value indicates that the attacker recovers first, while a negative value indicates that the defender recovers first. This value usually assumes that the attack's first active frame (of each hit, if multi-hit) is blocked. | On ODRThe difference between the attacker's total animation length and the period the opponent is in overdrive raid. This frame advantage is based off the assumption that both players input during the hitstop of a prior move, so that this attack and ODR start on the same frame. | AttributeSome attacks are invulnerable to attacks with specific attributes. This notes what attributes each attack possesses. H - Head B - Body F - Foot P - Projectile. Independent projectiles will have their Durability level listed, e.g. a projectile with Durability level 2 will show P2 T - Throw D - Doll attack, such as Carl's or Relius' doll Burst - Burst, which has its own unique attribute |
Invuln |
|---|---|---|---|---|---|---|---|---|
| 1500 | High | 28 | 2 | 33 | -14 | -36 | B |
- Fatal Counter.
- Jump cancelable on hit, but not on block.
- Tager's only real overhead, but basically useless as a mixup tool due to its massive tell and slow startup.
- Ground Bounces.
- 110% Bonus Proration.
Can be used as a poke at large distances, but it extends Tager's hurtbox forward thus it can can be stuffed and its hitbox doesn't extend as high as you might think, making it only really able to catch jumpouts. 5D is generally a much safer option. Inside combos however it's a very useful tool to boost damage, especially in the corner where you can loop it with 5D to pile on the damage and magnetism.
| Starter RatingDetermines the starting value of the hitstun/untech decay timer and subsequent combo length | P1Proration applied to future hits when used as the first hit of a combo | P2Proration applied to future hits when used during any part of a combo | Attack LevelDefault Attack Level Values
| |||||||||||||||||||||||||||||||||||
|---|---|---|---|---|---|---|---|---|---|---|---|---|---|---|---|---|---|---|---|---|---|---|---|---|---|---|---|---|---|---|---|---|---|---|---|---|---|---|
| Normal | 80 | 84 | 5 |
- Fatal Counter
- Bonus Proration 110%
- Jump cancel on hit only
3C

This is where the fun begins


| Damage | GuardHow this attack can be guarded. Throws have their throw range listed instead. | StartupHow many frames the attack needs to go through in order to reach its active frames. The listed startup frame coincides with the move's first active frame. | ActiveHow many frames where there is a hitbox that can hit an opponent. The first active frame occurs on the listed startup frame. | RecoveryHow many frames that the character must go through after an attack's active frames to automatically go back to a neutral stance, or the total duration of the move if it has no hitbox/creates projectiles. | Frame AdvHow many frames the attacker's recovery ends before the defender's blockstun ends if the attack is blocked. A positive value indicates that the attacker recovers first, while a negative value indicates that the defender recovers first. This value usually assumes that the attack's first active frame (of each hit, if multi-hit) is blocked. | On ODRThe difference between the attacker's total animation length and the period the opponent is in overdrive raid. This frame advantage is based off the assumption that both players input during the hitstop of a prior move, so that this attack and ODR start on the same frame. | AttributeSome attacks are invulnerable to attacks with specific attributes. This notes what attributes each attack possesses. H - Head B - Body F - Foot P - Projectile. Independent projectiles will have their Durability level listed, e.g. a projectile with Durability level 2 will show P2 T - Throw D - Doll attack, such as Carl's or Relius' doll Burst - Burst, which has its own unique attribute |
Invuln |
|---|---|---|---|---|---|---|---|---|
| 810 | Low | 13 | 3 | 22 | -6 | -11 | F |
- Massive untech time, allowing Tager to hit his opponent and then lift them unto the air with a whiffed Atomic Collider to continue the combo.
- Hitting with 3C at any point in the combo enables using Gadget Finger for that combo, even if they never hit the floor.
- Hard knockdown on grounded counterhit, even if you fling them into the air first (They'll eventually air tech if you fling them for too long).
- Surprisingly large vertical hitbox for a sweep attack.
- 110% Bonus Proration.
Tager's 3C is a useful tool since it starts a lot of his magnetized combos. The untech time is long enough to combo 3C > 623C whiff > 5C and can net you 3K off a simple interaction. It's a great poke as well, extending almost as far as 5C and coming out a bit faster, and it can also be used at the end of shorter combos to get magnetism with 22D.
| Starter RatingDetermines the starting value of the hitstun/untech decay timer and subsequent combo length | P1Proration applied to future hits when used as the first hit of a combo | P2Proration applied to future hits when used during any part of a combo | Attack LevelDefault Attack Level Values
| |||||||||||||||||||||||||||||||||||
|---|---|---|---|---|---|---|---|---|---|---|---|---|---|---|---|---|---|---|---|---|---|---|---|---|---|---|---|---|---|---|---|---|---|---|---|---|---|---|
| Long | 80 | 82 | 4 |
- Bonus Proration 110%
j.A

The best move nobody uses


| Damage | GuardHow this attack can be guarded. Throws have their throw range listed instead. | StartupHow many frames the attack needs to go through in order to reach its active frames. The listed startup frame coincides with the move's first active frame. | ActiveHow many frames where there is a hitbox that can hit an opponent. The first active frame occurs on the listed startup frame. | RecoveryHow many frames that the character must go through after an attack's active frames to automatically go back to a neutral stance, or the total duration of the move if it has no hitbox/creates projectiles. | Frame AdvHow many frames the attacker's recovery ends before the defender's blockstun ends if the attack is blocked. A positive value indicates that the attacker recovers first, while a negative value indicates that the defender recovers first. This value usually assumes that the attack's first active frame (of each hit, if multi-hit) is blocked. | On ODRThe difference between the attacker's total animation length and the period the opponent is in overdrive raid. This frame advantage is based off the assumption that both players input during the hitstop of a prior move, so that this attack and ODR start on the same frame. | AttributeSome attacks are invulnerable to attacks with specific attributes. This notes what attributes each attack possesses. H - Head B - Body F - Foot P - Projectile. Independent projectiles will have their Durability level listed, e.g. a projectile with Durability level 2 will show P2 T - Throw D - Doll attack, such as Carl's or Relius' doll Burst - Burst, which has its own unique attribute |
Invuln |
|---|---|---|---|---|---|---|---|---|
| 400 | High/Air | 7 | 3 | 9 | H |
- Useful air to air poke, much larger range than other j.As
- Combo filler needed when using 5A's or 2A's jump cancel to make a combo.
A fantastic but often overlooked move, used to win air to air battles, particularly ones your opponent didn't expect when trying to jump-in towards you. If you do it early enough in your jump, a counterhit j.A can chain into j.D for some nice combos.
| Starter RatingDetermines the starting value of the hitstun/untech decay timer and subsequent combo length | P1Proration applied to future hits when used as the first hit of a combo | P2Proration applied to future hits when used during any part of a combo | Attack LevelDefault Attack Level Values
| |||||||||||||||||||||||||||||||||||
|---|---|---|---|---|---|---|---|---|---|---|---|---|---|---|---|---|---|---|---|---|---|---|---|---|---|---|---|---|---|---|---|---|---|---|---|---|---|---|
| Normal | 80 | 80 | 2 |
j.B

Go-to jump-in and decent air-to-air


Not disjointed, won't clash with anti-airs

Hitbox changes slightly every 4 frames


| Damage | GuardHow this attack can be guarded. Throws have their throw range listed instead. | StartupHow many frames the attack needs to go through in order to reach its active frames. The listed startup frame coincides with the move's first active frame. | ActiveHow many frames where there is a hitbox that can hit an opponent. The first active frame occurs on the listed startup frame. | RecoveryHow many frames that the character must go through after an attack's active frames to automatically go back to a neutral stance, or the total duration of the move if it has no hitbox/creates projectiles. | Frame AdvHow many frames the attacker's recovery ends before the defender's blockstun ends if the attack is blocked. A positive value indicates that the attacker recovers first, while a negative value indicates that the defender recovers first. This value usually assumes that the attack's first active frame (of each hit, if multi-hit) is blocked. | On ODRThe difference between the attacker's total animation length and the period the opponent is in overdrive raid. This frame advantage is based off the assumption that both players input during the hitstop of a prior move, so that this attack and ODR start on the same frame. | AttributeSome attacks are invulnerable to attacks with specific attributes. This notes what attributes each attack possesses. H - Head B - Body F - Foot P - Projectile. Independent projectiles will have their Durability level listed, e.g. a projectile with Durability level 2 will show P2 T - Throw D - Doll attack, such as Carl's or Relius' doll Burst - Burst, which has its own unique attribute |
Invuln |
|---|---|---|---|---|---|---|---|---|
| 700 | High/Air | 10 | 16 | 20 | H |
- Cross-up tool
- Ground bounces on counterhit against airborne opponents.
- Ground bounce adjusts with height, allowing you to use the same followups from various starting heights.
- General purpose jump in attack with a huge active time.
Extremely useful air button. It has generous active frames and leads to decent damage in most combos. It has a long whiff recovery, however, so don't throw it out too carelessly.
j.B can also be used for a safejump after Atomic Collider. This keeps the opponent closer than Gadget Finger and thus allows for more immediate pressure, but beware it will lose to reversals that come out before frame 7.
| Starter RatingDetermines the starting value of the hitstun/untech decay timer and subsequent combo length | P1Proration applied to future hits when used as the first hit of a combo | P2Proration applied to future hits when used during any part of a combo | Attack LevelDefault Attack Level Values
| |||||||||||||||||||||||||||||||||||
|---|---|---|---|---|---|---|---|---|---|---|---|---|---|---|---|---|---|---|---|---|---|---|---|---|---|---|---|---|---|---|---|---|---|---|---|---|---|---|
| Long | 80 | 89 | 3 |
j.C

Forward momentum, good for closing in


Surprisingly deep hitbox inside Tager, catches more than you think

| Damage | GuardHow this attack can be guarded. Throws have their throw range listed instead. | StartupHow many frames the attack needs to go through in order to reach its active frames. The listed startup frame coincides with the move's first active frame. | ActiveHow many frames where there is a hitbox that can hit an opponent. The first active frame occurs on the listed startup frame. | RecoveryHow many frames that the character must go through after an attack's active frames to automatically go back to a neutral stance, or the total duration of the move if it has no hitbox/creates projectiles. | Frame AdvHow many frames the attacker's recovery ends before the defender's blockstun ends if the attack is blocked. A positive value indicates that the attacker recovers first, while a negative value indicates that the defender recovers first. This value usually assumes that the attack's first active frame (of each hit, if multi-hit) is blocked. | On ODRThe difference between the attacker's total animation length and the period the opponent is in overdrive raid. This frame advantage is based off the assumption that both players input during the hitstop of a prior move, so that this attack and ODR start on the same frame. | AttributeSome attacks are invulnerable to attacks with specific attributes. This notes what attributes each attack possesses. H - Head B - Body F - Foot P - Projectile. Independent projectiles will have their Durability level listed, e.g. a projectile with Durability level 2 will show P2 T - Throw D - Doll attack, such as Carl's or Relius' doll Burst - Burst, which has its own unique attribute |
Invuln |
|---|---|---|---|---|---|---|---|---|
| 1050 | High/Air | 13 | 5 | 12 | H |
- Adds a small amount of forwards momentum to Tager.
- Hitbox covers most of Tager's arms.
- Relatively fast recovery.
- Has a tendency to clash in air footsies.
- Long untech time on a counterhit, usually possible to land and pick up the combo.
- Hitbox also covers most of Tager's arms, making it a reasonable jump-in move.
- Quite decent recovery, advantageous in air to air situations.
j.C is a very useful tool for Tager. It gives Tager forward momentum, so it can be used as a ghetto approach option combined with j.63214A
This move also works well as an air-to-air since the hitbox covers most of Tager's hurtbox. On Counter Hit, it's usually possible to land and pick up the combo with 5C.
| Starter RatingDetermines the starting value of the hitstun/untech decay timer and subsequent combo length | P1Proration applied to future hits when used as the first hit of a combo | P2Proration applied to future hits when used during any part of a combo | Attack LevelDefault Attack Level Values
| |||||||||||||||||||||||||||||||||||
|---|---|---|---|---|---|---|---|---|---|---|---|---|---|---|---|---|---|---|---|---|---|---|---|---|---|---|---|---|---|---|---|---|---|---|---|---|---|---|
| Long | 80 | 92 | 4 |
- Last 2 frames of recovery are cancellable into j.C
j.2C

The anti-anti-air


First three active frames


Switches between 2 and 3 every 3 frames

Landing hitbox


| Damage | GuardHow this attack can be guarded. Throws have their throw range listed instead. | StartupHow many frames the attack needs to go through in order to reach its active frames. The listed startup frame coincides with the move's first active frame. | ActiveHow many frames where there is a hitbox that can hit an opponent. The first active frame occurs on the listed startup frame. | RecoveryHow many frames that the character must go through after an attack's active frames to automatically go back to a neutral stance, or the total duration of the move if it has no hitbox/creates projectiles. | Frame AdvHow many frames the attacker's recovery ends before the defender's blockstun ends if the attack is blocked. A positive value indicates that the attacker recovers first, while a negative value indicates that the defender recovers first. This value usually assumes that the attack's first active frame (of each hit, if multi-hit) is blocked. | On ODRThe difference between the attacker's total animation length and the period the opponent is in overdrive raid. This frame advantage is based off the assumption that both players input during the hitstop of a prior move, so that this attack and ODR start on the same frame. | AttributeSome attacks are invulnerable to attacks with specific attributes. This notes what attributes each attack possesses. H - Head B - Body F - Foot P - Projectile. Independent projectiles will have their Durability level listed, e.g. a projectile with Durability level 2 will show P2 T - Throw D - Doll attack, such as Carl's or Relius' doll Burst - Burst, which has its own unique attribute |
Invuln |
|---|---|---|---|---|---|---|---|---|
| 1200 | High/Air | 18 [5] | Until L+2 | 18 | H |
- Fatal Counter
- Ends all air momentum on startup, Tager falls straight down once the move goes active.
- Has a fast startup version when used very close to the ground.
The fatal counter move you will most likely actually get a counterhit with, j.2C is a useful punish tool for when you successfully jump out of ground pressure. You can also use it to delay your jump-in momentum to call out anti-air attacks, but you won't get a counterhit that way usually, on hitting a grounded opponent, you usually only have time for Gadget Finger, if at all, but you can rapid cancel the fall to eliminate the landing recovery and pick the combo up with 5B. It's still very risky however, since it's very punishable on block.
In combos this move is very frequently used after 6C to bring the opponent back down to earth. Ensure you hit them with Tager as low as you can to give yourself time to recover and use 5B or 3C.
The quick start up version seems to be a bug that was deliberately left in the game where the game cancels much of the startup into the landing animation (which has some active frames). This quick version is useful for getting surprise fatal counters on jump ins, and is also quite safe. However its use is very limited due to the rather precise height you need to be to activate it. Bizarrely enough it's still an overhead when you do this.
| Starter RatingDetermines the starting value of the hitstun/untech decay timer and subsequent combo length | P1Proration applied to future hits when used as the first hit of a combo | P2Proration applied to future hits when used during any part of a combo | Attack LevelDefault Attack Level Values
| |||||||||||||||||||||||||||||||||||
|---|---|---|---|---|---|---|---|---|---|---|---|---|---|---|---|---|---|---|---|---|---|---|---|---|---|---|---|---|---|---|---|---|---|---|---|---|---|---|
| Long | 80 | 92 | 4 |
- Fatal Counter
- Startup is five frames if performed just prior to landing
Drive Moves
5D

Hits pretty far, especially if they're magnetised. use responsibly.


Frames 23-26

Frames 27-29


| Damage | GuardHow this attack can be guarded. Throws have their throw range listed instead. | StartupHow many frames the attack needs to go through in order to reach its active frames. The listed startup frame coincides with the move's first active frame. | ActiveHow many frames where there is a hitbox that can hit an opponent. The first active frame occurs on the listed startup frame. | RecoveryHow many frames that the character must go through after an attack's active frames to automatically go back to a neutral stance, or the total duration of the move if it has no hitbox/creates projectiles. | Frame AdvHow many frames the attacker's recovery ends before the defender's blockstun ends if the attack is blocked. A positive value indicates that the attacker recovers first, while a negative value indicates that the defender recovers first. This value usually assumes that the attack's first active frame (of each hit, if multi-hit) is blocked. | On ODRThe difference between the attacker's total animation length and the period the opponent is in overdrive raid. This frame advantage is based off the assumption that both players input during the hitstop of a prior move, so that this attack and ODR start on the same frame. | AttributeSome attacks are invulnerable to attacks with specific attributes. This notes what attributes each attack possesses. H - Head B - Body F - Foot P - Projectile. Independent projectiles will have their Durability level listed, e.g. a projectile with Durability level 2 will show P2 T - Throw D - Doll attack, such as Carl's or Relius' doll Burst - Burst, which has its own unique attribute |
Invuln |
|---|---|---|---|---|---|---|---|---|
| 1100 | All | 23 | 7 | 20 | -6 | -23 | B | OD: 15~26 Guard BP |
- Magnetizes for 300F (1000F in Overdrive).
- Attractive to magnetized opponents during startup and active frames.
- Causes massive stagger on grounded CH, allowing for followups.
- Blows opponent away on air hit, and causes floorslide.
- Gains Body and Projectile guardpoint during Overdrive.
- Projectiles do not cause hitstop, but unblockable projectiles still cannot be armored.
5D is a massive poke that magnetizes the opponent and can lead to amazing damage. On counter hit, it can combo into 360B just outside of max range or 6A at any range. It's also possible to follow up with Spark Bolt from any hit, including air hit if you're fast enough. As a combo ender, it can also be canceled into 214D for a quick Spark Bolt charge or gadget finger to pull them back in for some shenanigans.
However, this move has a fairly long startup. Don't abuse this move, or you'll eat painful counter hits yourself.
| Starter RatingDetermines the starting value of the hitstun/untech decay timer and subsequent combo length | P1Proration applied to future hits when used as the first hit of a combo | P2Proration applied to future hits when used during any part of a combo | Attack LevelDefault Attack Level Values
| |||||||||||||||||||||||||||||||||||
|---|---|---|---|---|---|---|---|---|---|---|---|---|---|---|---|---|---|---|---|---|---|---|---|---|---|---|---|---|---|---|---|---|---|---|---|---|---|---|
| Long | 100 | 84 | 5 |
- Applies 300F of magnetism (1000F in Overdrive)
- On Guard Point, hitstop for Tager reduced by 1F. Opponent hitstop unchanged
- Maximum Slide duration: 15F, on CH 22F
- Crumple Duration 31F, Crumple Fall 64F
- Attractive on frames 6-23
- Attraction strength starts at (1500G, 1500A) before going to (4000G, 3600A) on frame 18
2D

Plus on block, but slow and risky


Frames 26-31. Smaller than you might think

Frames 32-35


| Damage | GuardHow this attack can be guarded. Throws have their throw range listed instead. | StartupHow many frames the attack needs to go through in order to reach its active frames. The listed startup frame coincides with the move's first active frame. | ActiveHow many frames where there is a hitbox that can hit an opponent. The first active frame occurs on the listed startup frame. | RecoveryHow many frames that the character must go through after an attack's active frames to automatically go back to a neutral stance, or the total duration of the move if it has no hitbox/creates projectiles. | Frame AdvHow many frames the attacker's recovery ends before the defender's blockstun ends if the attack is blocked. A positive value indicates that the attacker recovers first, while a negative value indicates that the defender recovers first. This value usually assumes that the attack's first active frame (of each hit, if multi-hit) is blocked. | On ODRThe difference between the attacker's total animation length and the period the opponent is in overdrive raid. This frame advantage is based off the assumption that both players input during the hitstop of a prior move, so that this attack and ODR start on the same frame. | AttributeSome attacks are invulnerable to attacks with specific attributes. This notes what attributes each attack possesses. H - Head B - Body F - Foot P - Projectile. Independent projectiles will have their Durability level listed, e.g. a projectile with Durability level 2 will show P2 T - Throw D - Doll attack, such as Carl's or Relius' doll Burst - Burst, which has its own unique attribute |
Invuln |
|---|---|---|---|---|---|---|---|---|
| 1200 | All | 26 | 10 | 18 | +2 | -27 | F | OD: 12~35 Guard FP |
- Fatal Counter
- Magnetises for 300F (1000F in Overdrive)
- Attractive to magnetized opponents during startup and active frames.
- Recovery starts immediately after the move connects, so frame advantage is always the same.
- Gains Foot and Projectile guardpoint during Overdrive
- Attacks do not cause hitstop
- Unblockables still cannot be armored.
Despite its enticing frame advantage, this move isn't as useful as it appears. Its slow startup and telegraphed animation means you normally won't be surprising your opponent, but on block it leaves Tager plus and close-up against a magnetized opponent, which is a very favorable position. Its best use is to close short distances or take advantage of opponents that are conditioned not challenge during blockstun.
This move does Fatal Counter, so on the off-chance you catch your opponent, you can follow up with either 3C > 623C (whiff) or 5C > 6A to start the combo. On regular hit, though, this move has no cancel options outside of Rapid Cancel. On air hit, the opponent gets a floorslide similar to 5D, but with no cancels to work with there's no real followup outside of a corner hit and a rapid cancel.
| Starter RatingDetermines the starting value of the hitstun/untech decay timer and subsequent combo length | P1Proration applied to future hits when used as the first hit of a combo | P2Proration applied to future hits when used during any part of a combo | Attack LevelDefault Attack Level Values
| |||||||||||||||||||||||||||||||||||
|---|---|---|---|---|---|---|---|---|---|---|---|---|---|---|---|---|---|---|---|---|---|---|---|---|---|---|---|---|---|---|---|---|---|---|---|---|---|---|
| Long | 90 | 84 | 5 |
- Fatal Counter
- Applies 300F of magnetism (1000F in Overdrive)
- On hit/block, Tager skips remaining active frames and goes into recovery
- Guard Point ends when Tager starts recovery
- On Guard Point, hitstop for Tager reduced by 1F. Opponent hitstop unchanged
- Maximum Slide duration 10F
- Attractive from frame 12 until start of recovery
- Attraction strength starts at (800G, 800A) before going to (5000G, 4000A) on frame 26
4D

Nice blockstring ender because of its speed and frame advantage


Frames 13-14, can be low profiled fairly easily

Frames 15-16, lower hitbox


| Damage | GuardHow this attack can be guarded. Throws have their throw range listed instead. | StartupHow many frames the attack needs to go through in order to reach its active frames. The listed startup frame coincides with the move's first active frame. | ActiveHow many frames where there is a hitbox that can hit an opponent. The first active frame occurs on the listed startup frame. | RecoveryHow many frames that the character must go through after an attack's active frames to automatically go back to a neutral stance, or the total duration of the move if it has no hitbox/creates projectiles. | Frame AdvHow many frames the attacker's recovery ends before the defender's blockstun ends if the attack is blocked. A positive value indicates that the attacker recovers first, while a negative value indicates that the defender recovers first. This value usually assumes that the attack's first active frame (of each hit, if multi-hit) is blocked. | On ODRThe difference between the attacker's total animation length and the period the opponent is in overdrive raid. This frame advantage is based off the assumption that both players input during the hitstop of a prior move, so that this attack and ODR start on the same frame. | AttributeSome attacks are invulnerable to attacks with specific attributes. This notes what attributes each attack possesses. H - Head B - Body F - Foot P - Projectile. Independent projectiles will have their Durability level listed, e.g. a projectile with Durability level 2 will show P2 T - Throw D - Doll attack, such as Carl's or Relius' doll Burst - Burst, which has its own unique attribute |
Invuln |
|---|---|---|---|---|---|---|---|---|
| 800 | All | 13 | 4 | 14 | -1 | -4 | B | OD: 5~12 Guard BP |
- Magnetises for 180F (1000F in Overdrive).
- Attractive to magnetized opponents during startup and active frames.
- Gains Body and Projectile guardpoint during Overdrive.
- Guarded attacks do not cause blockstop for Tager
- Unblockables cannot be armored.
4D is a very useful move thanks to its frame advantage. It's mostly used as a blockstring ender to set up a tick throw situation, since it's relatively fast and applies magnetism.
It can also be used instead of Gadget Finger in certain scenarios. For example, 623C , 4D will pull the opponent directly towards you if they emergency tech, or hit them if they delay tech.
Similarly to 2D, followups are only possible on counter hit since it has no cancel options. On counter hit, you can follow up with 3C > 623C (whiff) for decent damage.
| Starter RatingDetermines the starting value of the hitstun/untech decay timer and subsequent combo length | P1Proration applied to future hits when used as the first hit of a combo | P2Proration applied to future hits when used during any part of a combo | Attack LevelDefault Attack Level Values
| |||||||||||||||||||||||||||||||||||
|---|---|---|---|---|---|---|---|---|---|---|---|---|---|---|---|---|---|---|---|---|---|---|---|---|---|---|---|---|---|---|---|---|---|---|---|---|---|---|
| Normal | 100 | 89 | 3 |
- Applies 180F of magnetism (1000F in Overdrive)
- On Guard Point, hitstop for Tager reduced by 1F. Opponent hitstop unchanged
- Attractive on frames 9-15
- Attraction strength starts at (6000G, 3000A) before going to (4000G, 2000A) on frame 13
j.D

Pulls the opponent in for big damage


Very large hitbox, hits when you might not expect it

| Damage | GuardHow this attack can be guarded. Throws have their throw range listed instead. | StartupHow many frames the attack needs to go through in order to reach its active frames. The listed startup frame coincides with the move's first active frame. | ActiveHow many frames where there is a hitbox that can hit an opponent. The first active frame occurs on the listed startup frame. | RecoveryHow many frames that the character must go through after an attack's active frames to automatically go back to a neutral stance, or the total duration of the move if it has no hitbox/creates projectiles. | Frame AdvHow many frames the attacker's recovery ends before the defender's blockstun ends if the attack is blocked. A positive value indicates that the attacker recovers first, while a negative value indicates that the defender recovers first. This value usually assumes that the attack's first active frame (of each hit, if multi-hit) is blocked. | On ODRThe difference between the attacker's total animation length and the period the opponent is in overdrive raid. This frame advantage is based off the assumption that both players input during the hitstop of a prior move, so that this attack and ODR start on the same frame. | AttributeSome attacks are invulnerable to attacks with specific attributes. This notes what attributes each attack possesses. H - Head B - Body F - Foot P - Projectile. Independent projectiles will have their Durability level listed, e.g. a projectile with Durability level 2 will show P2 T - Throw D - Doll attack, such as Carl's or Relius' doll Burst - Burst, which has its own unique attribute |
Invuln |
|---|---|---|---|---|---|---|---|---|
| 1120 | High/Air | 23 | 4 | 28+7L | H | OD: 6~26 Guard HP |
- Magnetizes for 300F (1000F in Overdrive).
- Attractive to magnetized opponents during startup and active frames.
- Gains Head and Projectile guardpoint during Overdrive.
- Projectiles do not cause hitstop, but unblockable projectiles still cannot be armored.
- Hitbox extends far beyond Tager's arms.
j.D is a somewhat situational move since Tager is usually grounded, but it can be used to control air space. More importantly, it can lead to high damage if landed close to the ground, comboing into Wedge Catapult or 6C. It's a very strong move during combos as well, most commonly after 6C, due to its long untechable time and high proration values.
It's also used in the Fatal Counter loop of j.C > j.D. On Fatal, your goal should be to get into this loop as fast as you can to get the most damage.
| Starter RatingDetermines the starting value of the hitstun/untech decay timer and subsequent combo length | P1Proration applied to future hits when used as the first hit of a combo | P2Proration applied to future hits when used during any part of a combo | Attack LevelDefault Attack Level Values
| |||||||||||||||||||||||||||||||||||
|---|---|---|---|---|---|---|---|---|---|---|---|---|---|---|---|---|---|---|---|---|---|---|---|---|---|---|---|---|---|---|---|---|---|---|---|---|---|---|
| Long | 80 | 94 | 5 |
- Applies 300F of magnetism (1000F in Overdrive)
- On Guard Point, hitstop for Tager reduced by 1F. Opponent hitstop unchanged
- Attractive on frames 11-23
- Attraction strength starts at (2500G, 2500A) before going to (5000G, 5000A) on frame 19, then going back to (2500G, 2500A) on frame 23
Universal Mechanics
Forward Throw
5B+C

Surprisingly useful standard grab

| Damage | GuardHow this attack can be guarded. Throws have their throw range listed instead. | StartupHow many frames the attack needs to go through in order to reach its active frames. The listed startup frame coincides with the move's first active frame. | ActiveHow many frames where there is a hitbox that can hit an opponent. The first active frame occurs on the listed startup frame. | RecoveryHow many frames that the character must go through after an attack's active frames to automatically go back to a neutral stance, or the total duration of the move if it has no hitbox/creates projectiles. | Frame AdvHow many frames the attacker's recovery ends before the defender's blockstun ends if the attack is blocked. A positive value indicates that the attacker recovers first, while a negative value indicates that the defender recovers first. This value usually assumes that the attack's first active frame (of each hit, if multi-hit) is blocked. | On ODRThe difference between the attacker's total animation length and the period the opponent is in overdrive raid. This frame advantage is based off the assumption that both players input during the hitstop of a prior move, so that this attack and ODR start on the same frame. | AttributeSome attacks are invulnerable to attacks with specific attributes. This notes what attributes each attack possesses. H - Head B - Body F - Foot P - Projectile. Independent projectiles will have their Durability level listed, e.g. a projectile with Durability level 2 will show P2 T - Throw D - Doll attack, such as Carl's or Relius' doll Burst - Burst, which has its own unique attribute |
Invuln |
|---|---|---|---|---|---|---|---|---|
| 1500 | Throw reject | 7 | 3 | 23 | T |
- Functions the same as every other throw, but with more range.
- Has 401 pixel range compared to the standard 266 pixel range.
- Leads to higher damage, heat gain and is much safer on whiff than 360A, but has no startup invulnerability or magnetic attraction and has slightly less range.
- Your best choice as a close range punish tool if you haven't got much advantage to work with.
- Special cancellable.
While technically as quick as 360A to perform, keep in mind that this is much quicker to use on reaction than spinning the stick for 360A or even 720C. Since you'll be using atomic collider further down the combo, swapping sides, bare in mind which throw gives you the best positioning afterwards.
| Starter RatingDetermines the starting value of the hitstun/untech decay timer and subsequent combo length | P1Proration applied to future hits when used as the first hit of a combo | P2Proration applied to future hits when used during any part of a combo | Attack LevelDefault Attack Level Values
| |||||||||||||||||||||||||||||||||||
|---|---|---|---|---|---|---|---|---|---|---|---|---|---|---|---|---|---|---|---|---|---|---|---|---|---|---|---|---|---|---|---|---|---|---|---|---|---|---|
| Normal | 100 | 50 | 0, 4 |
- 100% minimum damage (1500)
- 125,000 Range normally
Back Throw
4B+C

Similarly useful, but sideswitches as well

| Damage | GuardHow this attack can be guarded. Throws have their throw range listed instead. | StartupHow many frames the attack needs to go through in order to reach its active frames. The listed startup frame coincides with the move's first active frame. | ActiveHow many frames where there is a hitbox that can hit an opponent. The first active frame occurs on the listed startup frame. | RecoveryHow many frames that the character must go through after an attack's active frames to automatically go back to a neutral stance, or the total duration of the move if it has no hitbox/creates projectiles. | Frame AdvHow many frames the attacker's recovery ends before the defender's blockstun ends if the attack is blocked. A positive value indicates that the attacker recovers first, while a negative value indicates that the defender recovers first. This value usually assumes that the attack's first active frame (of each hit, if multi-hit) is blocked. | On ODRThe difference between the attacker's total animation length and the period the opponent is in overdrive raid. This frame advantage is based off the assumption that both players input during the hitstop of a prior move, so that this attack and ODR start on the same frame. | AttributeSome attacks are invulnerable to attacks with specific attributes. This notes what attributes each attack possesses. H - Head B - Body F - Foot P - Projectile. Independent projectiles will have their Durability level listed, e.g. a projectile with Durability level 2 will show P2 T - Throw D - Doll attack, such as Carl's or Relius' doll Burst - Burst, which has its own unique attribute |
Invuln |
|---|---|---|---|---|---|---|---|---|
| 0, 1500 | Throw reject | 7 | 3 | 23 | T |
- Functions the same as Foward Throw before it hits.
- Not special cancellable.
Leads to almost identical damage to forward throw, so which one to pick is a matter of which one gives you the best position advantage. Remember that you will probably use atomic collider in the followup combo, swapping sides again.
Not special cancellable, but the bounce is close enough that you can followup with 5B or, more ideally, a low sliding 6A > 6C
| Starter RatingDetermines the starting value of the hitstun/untech decay timer and subsequent combo length | P1Proration applied to future hits when used as the first hit of a combo | P2Proration applied to future hits when used during any part of a combo | Attack LevelDefault Attack Level Values
| |||||||||||||||||||||||||||||||||||
|---|---|---|---|---|---|---|---|---|---|---|---|---|---|---|---|---|---|---|---|---|---|---|---|---|---|---|---|---|---|---|---|---|---|---|---|---|---|---|
| Normal | 100 | 50 | 0, 4 |
- 100% minimum damage (1500)
- 125,000 Range normally
Air Throw
j.B+C

Unfortunately not as useful as his ground throws

| Damage | GuardHow this attack can be guarded. Throws have their throw range listed instead. | StartupHow many frames the attack needs to go through in order to reach its active frames. The listed startup frame coincides with the move's first active frame. | ActiveHow many frames where there is a hitbox that can hit an opponent. The first active frame occurs on the listed startup frame. | RecoveryHow many frames that the character must go through after an attack's active frames to automatically go back to a neutral stance, or the total duration of the move if it has no hitbox/creates projectiles. | Frame AdvHow many frames the attacker's recovery ends before the defender's blockstun ends if the attack is blocked. A positive value indicates that the attacker recovers first, while a negative value indicates that the defender recovers first. This value usually assumes that the attack's first active frame (of each hit, if multi-hit) is blocked. | On ODRThe difference between the attacker's total animation length and the period the opponent is in overdrive raid. This frame advantage is based off the assumption that both players input during the hitstop of a prior move, so that this attack and ODR start on the same frame. | AttributeSome attacks are invulnerable to attacks with specific attributes. This notes what attributes each attack possesses. H - Head B - Body F - Foot P - Projectile. Independent projectiles will have their Durability level listed, e.g. a projectile with Durability level 2 will show P2 T - Throw D - Doll attack, such as Carl's or Relius' doll Burst - Burst, which has its own unique attribute |
Invuln |
|---|---|---|---|---|---|---|---|---|
| 0, 1500 | Throw reject | 7 | 3 | 23+3L | T |
- Functions the same as every other throw, but with more range.
- Has 453 pixel range compared to the standard 344 pixel range.
- Cancellable from j.A.
- Swaps sides.
- Hard knockdown after a small bounce. Follow up by landing a lowest-possible j.2C, 5B... or j.C, 5C.
Not exactly a useful move for Tager since he doesn't have many opportunities to get close mid air, or set up airthrow traps since Air Driver does these things much better. But it does at least recover much more quickly than Air Driver if you miss and does lead to slightly more damage.
| Starter RatingDetermines the starting value of the hitstun/untech decay timer and subsequent combo length | P1Proration applied to future hits when used as the first hit of a combo | P2Proration applied to future hits when used during any part of a combo | Attack LevelDefault Attack Level Values
| |||||||||||||||||||||||||||||||||||
|---|---|---|---|---|---|---|---|---|---|---|---|---|---|---|---|---|---|---|---|---|---|---|---|---|---|---|---|---|---|---|---|---|---|---|---|---|---|---|
| Normal | 100 | 50 | 0, 4 |
- 100% minimum damage (1500)
- 140,000 Range
Counter Assault
6A+B while Blocking

You're only at +1, so be careful
| Damage | GuardHow this attack can be guarded. Throws have their throw range listed instead. | StartupHow many frames the attack needs to go through in order to reach its active frames. The listed startup frame coincides with the move's first active frame. | ActiveHow many frames where there is a hitbox that can hit an opponent. The first active frame occurs on the listed startup frame. | RecoveryHow many frames that the character must go through after an attack's active frames to automatically go back to a neutral stance, or the total duration of the move if it has no hitbox/creates projectiles. | Frame AdvHow many frames the attacker's recovery ends before the defender's blockstun ends if the attack is blocked. A positive value indicates that the attacker recovers first, while a negative value indicates that the defender recovers first. This value usually assumes that the attack's first active frame (of each hit, if multi-hit) is blocked. | On ODRThe difference between the attacker's total animation length and the period the opponent is in overdrive raid. This frame advantage is based off the assumption that both players input during the hitstop of a prior move, so that this attack and ODR start on the same frame. | AttributeSome attacks are invulnerable to attacks with specific attributes. This notes what attributes each attack possesses. H - Head B - Body F - Foot P - Projectile. Independent projectiles will have their Durability level listed, e.g. a projectile with Durability level 2 will show P2 T - Throw D - Doll attack, such as Carl's or Relius' doll Burst - Burst, which has its own unique attribute |
Invuln |
|---|---|---|---|---|---|---|---|---|
| 0 | All | 16 | 2 | 31 | -14 | B | 1~20 All |
- Uses 6B's animation
- Slightly slower than other counter assaults
Sometimes the only way to end the endless pressure games you often face, particularly from low air dashes. Use it to disrupt the flow of your opponent and get back to neutral, where you often have the advantage. Unlike other Counter assaults, Tager's does not knock his opponent away. Instead, it grants a close-range soft knockdown on grounded hit and a close-range hard knockdown on airborne hit.
| Starter RatingDetermines the starting value of the hitstun/untech decay timer and subsequent combo length | P1Proration applied to future hits when used as the first hit of a combo | P2Proration applied to future hits when used during any part of a combo | Attack LevelDefault Attack Level Values
| |||||||||||||||||||||||||||||||||||
|---|---|---|---|---|---|---|---|---|---|---|---|---|---|---|---|---|---|---|---|---|---|---|---|---|---|---|---|---|---|---|---|---|---|---|---|---|---|---|
| Very Short | 50 | 92 | 4 |
Crush Trigger
5A+B (Chargeable)

Charge
Only useful in specific situations
Release


| Version | Damage | GuardHow this attack can be guarded. Throws have their throw range listed instead. | StartupHow many frames the attack needs to go through in order to reach its active frames. The listed startup frame coincides with the move's first active frame. | ActiveHow many frames where there is a hitbox that can hit an opponent. The first active frame occurs on the listed startup frame. | RecoveryHow many frames that the character must go through after an attack's active frames to automatically go back to a neutral stance, or the total duration of the move if it has no hitbox/creates projectiles. | Frame AdvHow many frames the attacker's recovery ends before the defender's blockstun ends if the attack is blocked. A positive value indicates that the attacker recovers first, while a negative value indicates that the defender recovers first. This value usually assumes that the attack's first active frame (of each hit, if multi-hit) is blocked. | On ODRThe difference between the attacker's total animation length and the period the opponent is in overdrive raid. This frame advantage is based off the assumption that both players input during the hitstop of a prior move, so that this attack and ODR start on the same frame. | AttributeSome attacks are invulnerable to attacks with specific attributes. This notes what attributes each attack possesses. H - Head B - Body F - Foot P - Projectile. Independent projectiles will have their Durability level listed, e.g. a projectile with Durability level 2 will show P2 T - Throw D - Doll attack, such as Carl's or Relius' doll Burst - Burst, which has its own unique attribute |
Invuln |
|---|---|---|---|---|---|---|---|---|---|
| 5A+B | 1000 | Guard Break 32/Barrier | 20 | 1 | 25 | 0 | B | ||
| 5[A+B] | 1000 | Guard Break 60/Barrier | 30~61 | 1 | 25 | 0 | B |
- Gives a small floorbounce followed by a hard knockdown, essentally giving it a long knockdown time.
- Useful in some combos, can be followed up with 5B, 3C, 6B and on some characters, 5C.
- Not the most useful move for Tager at neutral since has much better ways of dealing with people who guard too much that cost no Meter.
- Also not that useful during combos since Tager has other moves in most cases that lead to similar or better damage with no meter cost using 6C or B Sledgehammer.
- That said, it is possible to throw enemies that are in the guard crush state, so this can be used sparingly as a way to attempt a throw without being punishable on block.
- Basic CT combo route is 5c 6a 6bb CT, can follow with 5b 5c spark bolt for good damage
| Version | Starter RatingDetermines the starting value of the hitstun/untech decay timer and subsequent combo length | P1Proration applied to future hits when used as the first hit of a combo | P2Proration applied to future hits when used during any part of a combo | Attack LevelDefault Attack Level Values
| |||||||||||||||||||||||||||||||||||
|---|---|---|---|---|---|---|---|---|---|---|---|---|---|---|---|---|---|---|---|---|---|---|---|---|---|---|---|---|---|---|---|---|---|---|---|---|---|---|---|
| 5A+B | Normal | 80 | 60 | 4 | |||||||||||||||||||||||||||||||||||
| 5[A+B] | Long | 80 | 100 | 4 |
Specials
Gigantic Tager Driver
360A (Hold OK)

This is not a reversal, but still a potent defensive tool

| Damage | GuardHow this attack can be guarded. Throws have their throw range listed instead. | StartupHow many frames the attack needs to go through in order to reach its active frames. The listed startup frame coincides with the move's first active frame. | ActiveHow many frames where there is a hitbox that can hit an opponent. The first active frame occurs on the listed startup frame. | RecoveryHow many frames that the character must go through after an attack's active frames to automatically go back to a neutral stance, or the total duration of the move if it has no hitbox/creates projectiles. | Frame AdvHow many frames the attacker's recovery ends before the defender's blockstun ends if the attack is blocked. A positive value indicates that the attacker recovers first, while a negative value indicates that the defender recovers first. This value usually assumes that the attack's first active frame (of each hit, if multi-hit) is blocked. | On ODRThe difference between the attacker's total animation length and the period the opponent is in overdrive raid. This frame advantage is based off the assumption that both players input during the hitstop of a prior move, so that this attack and ODR start on the same frame. | AttributeSome attacks are invulnerable to attacks with specific attributes. This notes what attributes each attack possesses. H - Head B - Body F - Foot P - Projectile. Independent projectiles will have their Durability level listed, e.g. a projectile with Durability level 2 will show P2 T - Throw D - Doll attack, such as Carl's or Relius' doll Burst - Burst, which has its own unique attribute |
Invuln |
|---|---|---|---|---|---|---|---|---|
| 0×2, 2500 | Purple throw reject | 6 | 2~20 | 29 (Miss), 44 (Hit) | T | 3~6 All |
- Medium damage command grab, hits grounded opponents only.
- Attractive to grounded maganetised opponents during startup and active frames.
- Can be held to extend active frames.
- Cannot be special cancelled into, except from 6A.
- Small invulnerability window on frames 3-6. Cannot be increased by holding A.
- Bad whiff recovery, Tager is in a Counterhit state in this time.
- Hitbox extends to the ground; cannot be low-profiled.
- Tager is immune to external push forces during this move (Such as Wind or another Tager's magnetism).
- Final 5 frames after hitting is cancellable into Gadget Finger, no other cancels are possible, including rapid cancel.
- Has 210 pixel range between bounding boxes.
Due to 360A's fast startup and brief invulnerability, it can be used to punish pressure gaps of 3 frames or larger. This is particularly potent when combined with Instant Blocking. However, be wary of becoming predictable as it is extremely punishable and vulnerable to jump cancel, frametraps, throw invulnerable moves and meaty attacks.
It's also useful as a tick throw, most commonly after 5A or 4D to keep your opponent on their toes.
While it might seem as a Grappler that your gameplan should revolve around landing this move, it actually only leads to weak damage compared to Tager's other options. Typically you'll need to use this move to keep your opponent from doing bad blockstrings on the ground and also to win out point-blank jab contests when at near-neutral frame advantage, forcing your opponent to play less aggressively. Players playing against you will fear this move and you can use this to make them make other mistakes instead.
| Starter RatingDetermines the starting value of the hitstun/untech decay timer and subsequent combo length | P1Proration applied to future hits when used as the first hit of a combo | P2Proration applied to future hits when used during any part of a combo | Attack LevelDefault Attack Level Values
| |||||||||||||||||||||||||||||||||||
|---|---|---|---|---|---|---|---|---|---|---|---|---|---|---|---|---|---|---|---|---|---|---|---|---|---|---|---|---|---|---|---|---|---|---|---|---|---|---|
| Very Short | 100 | 60 | 0×2, 4 |
- 100% minimum damage (2500)
- Hold button to extend active frames
- On successful throw, can cancel into Gadget Finger last 5F
- Counterhit state for entire move
- Attractive from 1-end of active frames
- Attraction forces: (3450G, 0A) from frame 1, (1150G, 0A) from frame 8, (2300G, 0A) during extended active frames
Wedge Catapult
360B

Punish the opponent's big buttons

| Damage | GuardHow this attack can be guarded. Throws have their throw range listed instead. | StartupHow many frames the attack needs to go through in order to reach its active frames. The listed startup frame coincides with the move's first active frame. | ActiveHow many frames where there is a hitbox that can hit an opponent. The first active frame occurs on the listed startup frame. | RecoveryHow many frames that the character must go through after an attack's active frames to automatically go back to a neutral stance, or the total duration of the move if it has no hitbox/creates projectiles. | Frame AdvHow many frames the attacker's recovery ends before the defender's blockstun ends if the attack is blocked. A positive value indicates that the attacker recovers first, while a negative value indicates that the defender recovers first. This value usually assumes that the attack's first active frame (of each hit, if multi-hit) is blocked. | On ODRThe difference between the attacker's total animation length and the period the opponent is in overdrive raid. This frame advantage is based off the assumption that both players input during the hitstop of a prior move, so that this attack and ODR start on the same frame. | AttributeSome attacks are invulnerable to attacks with specific attributes. This notes what attributes each attack possesses. H - Head B - Body F - Foot P - Projectile. Independent projectiles will have their Durability level listed, e.g. a projectile with Durability level 2 will show P2 T - Throw D - Doll attack, such as Carl's or Relius' doll Burst - Burst, which has its own unique attribute |
Invuln |
|---|---|---|---|---|---|---|---|---|
| 0×2, 1200 | None | 30 | 4 | 30 (Miss), 41 (Hit) | T | 6~30 All |
- Command throw, hits grounded opponents only.
- Disables opponent's burst on hit.
- Attractive to magnetized opponents during startup.
- Long startup but generous invulnerability between frames 6-30.
- Cannot kill.
- Can only be cancelled into from 6A.
- Bad whiff recovery, Tager is in a counterhit state in this time.
- Combo throw, does not incur purple !! marks if used during blockstun or a combo and benefits from the 10% damage bonus on counterhits. Does not have 100% minimum damage.
- Untech time always lasts until the opponent hits the floor.
- Tager is immune to external push forces during this move (Such as Wind or another Tager's magnetism).
- If Tager's back is near to a wall when he hits, then he will be pushed away from the wall towards the middle of the screen to allow followups.
- Has 210 pixel range between bounding boxes
Tager's brand-new throw, 360B is useful for calling out the opponent's overheads, jump-ins and even some moves that bait out other throws due to its very generous invulnerability. However, it has a very slow startup and long recovery, meaning that abusing or whiffing it will lead to eating a painful punish. The invulnerability also kicks in at the same time that mashing 5A would hit, so it's extremely vulnerable to frametraps and meaty attacks.
As a combo starter, Wedge Catapult allows for a followup 5C or 6C for around 3-3.5K damage. If Tager's back is to the corner, it can be followed up with 5D to go into 6C > 5D corner loops.
This move is also a combo throw, which means like Atomic Collider it will never purple throw. It can be used in the middle of specific combos.
- 360B can combo after: 5D (counter hit), j.D (counter hit), 236B (counter hit), 6A max charge (counter hit), Gadget Finger (requires RC).
| Starter RatingDetermines the starting value of the hitstun/untech decay timer and subsequent combo length | P1Proration applied to future hits when used as the first hit of a combo | P2Proration applied to future hits when used during any part of a combo | Attack LevelDefault Attack Level Values
| |||||||||||||||||||||||||||||||||||
|---|---|---|---|---|---|---|---|---|---|---|---|---|---|---|---|---|---|---|---|---|---|---|---|---|---|---|---|---|---|---|---|---|---|---|---|---|---|---|
| Normal | 60 | 100 | 0×2, 4 |
- Can be comboed into
- Counterhit state for entire move
- Cannot reduce health below 1
- Attractive from 6-31F
- Attraction forces: (1000G, 1000A) from frame 6, (10000G, 1000A) from frame 21, (2000G, 0A) from frames 24 to 31
- Minimum Damage 100% when first hit of combo (1200), else Minimum Damage 0%
Impact Driver
360B After Wedge Catapult

High minimum damage, good for finishing off a round

| Damage | GuardHow this attack can be guarded. Throws have their throw range listed instead. | StartupHow many frames the attack needs to go through in order to reach its active frames. The listed startup frame coincides with the move's first active frame. | ActiveHow many frames where there is a hitbox that can hit an opponent. The first active frame occurs on the listed startup frame. | RecoveryHow many frames that the character must go through after an attack's active frames to automatically go back to a neutral stance, or the total duration of the move if it has no hitbox/creates projectiles. | Frame AdvHow many frames the attacker's recovery ends before the defender's blockstun ends if the attack is blocked. A positive value indicates that the attacker recovers first, while a negative value indicates that the defender recovers first. This value usually assumes that the attack's first active frame (of each hit, if multi-hit) is blocked. | On ODRThe difference between the attacker's total animation length and the period the opponent is in overdrive raid. This frame advantage is based off the assumption that both players input during the hitstop of a prior move, so that this attack and ODR start on the same frame. | AttributeSome attacks are invulnerable to attacks with specific attributes. This notes what attributes each attack possesses. H - Head B - Body F - Foot P - Projectile. Independent projectiles will have their Durability level listed, e.g. a projectile with Durability level 2 will show P2 T - Throw D - Doll attack, such as Carl's or Relius' doll Burst - Burst, which has its own unique attribute |
Invuln |
|---|---|---|---|---|---|---|---|---|
| 0, 1400 | None | 44 | T |
- Burst-proof followup to Wedge Captapault
- Deals 100% damage if Wedge catapult was the first hit of the combo. 50% minimum damage otherwise.
- You can input the move at any time during Wedge catapult's recovery after the wallbounce and it will connect.
- Opponent is returned to the same side they were on when Wedge catapult grabbed them
- Can be cancelled into Gadget Finger during the final recovery frames.
The impact driver followup is seldom used due to other combos from Wedge Catapult causing more damage. However it is unburstable and will always connect at any point in a combo, so if you manage to get wedge catapult late in a combo (Pretty much only possible from a Gadget finger RC), or when your opponent is very low on life, you can use impact driver as a solid combo ender. Can only be followed up with gadget finger.
| Starter RatingDetermines the starting value of the hitstun/untech decay timer and subsequent combo length | P1Proration applied to future hits when used as the first hit of a combo | P2Proration applied to future hits when used during any part of a combo | Attack LevelDefault Attack Level Values
| |||||||||||||||||||||||||||||||||||
|---|---|---|---|---|---|---|---|---|---|---|---|---|---|---|---|---|---|---|---|---|---|---|---|---|---|---|---|---|---|---|---|---|---|---|---|---|---|---|
| 100 | 4 |
- Minimum Damage 100% if canceled from Wedge Catapault that started the combo (1400), otherwise Mimimum Damage 50% (700)
Air Driver
j.360C (Hold OK)

Try not to think about how Tager jumps up when this hits.

| Damage | GuardHow this attack can be guarded. Throws have their throw range listed instead. | StartupHow many frames the attack needs to go through in order to reach its active frames. The listed startup frame coincides with the move's first active frame. | ActiveHow many frames where there is a hitbox that can hit an opponent. The first active frame occurs on the listed startup frame. | RecoveryHow many frames that the character must go through after an attack's active frames to automatically go back to a neutral stance, or the total duration of the move if it has no hitbox/creates projectiles. | Frame AdvHow many frames the attacker's recovery ends before the defender's blockstun ends if the attack is blocked. A positive value indicates that the attacker recovers first, while a negative value indicates that the defender recovers first. This value usually assumes that the attack's first active frame (of each hit, if multi-hit) is blocked. | On ODRThe difference between the attacker's total animation length and the period the opponent is in overdrive raid. This frame advantage is based off the assumption that both players input during the hitstop of a prior move, so that this attack and ODR start on the same frame. | AttributeSome attacks are invulnerable to attacks with specific attributes. This notes what attributes each attack possesses. H - Head B - Body F - Foot P - Projectile. Independent projectiles will have their Durability level listed, e.g. a projectile with Durability level 2 will show P2 T - Throw D - Doll attack, such as Carl's or Relius' doll Burst - Burst, which has its own unique attribute |
Invuln |
|---|---|---|---|---|---|---|---|---|
| 0×2, 2700 | Purple Throw Reject | 6 | 3~36 | Until L+12 (Miss), 44 (Hit) | T |
- Attractive to magnetized opponents during startup and active frames.
- Strongly attractive to airborne opponents, including during moves like
 Terumi's 5C
 GuardAllStartup11Recovery2+18LAdvantage-2.
 - Weakly attractive to grounded opponents. They'll be slowly dragged across the ground.
- Strongly attractive to airborne opponents, including during moves like
- Can be held to extend active frames.
- Cannot be special cancelled into at all.
- No invulnerability unlike 360A.
- Whiff recovery lasts until Tager lands plus 12 frames, very punishable.
- Has 210 pixel range between bounding boxes, but the hitbox tends to be the limiting factor.

An interesting tool that can be used to surprise opponents at long distance, giving similar damage to a meterless raw AC combo and making them afraid to jump. Do be careful since, just like Atomic Collider, opponents using superjumps and airdashes can cause them to overshoot and get a free hit on you. If your opponent is magnetised, you can jump and use this move to catch them jumping.
Can be disrespectfully used during combos as a purple throw or a tech trap to do an absurd amount of extra damage, but there's no way to do reliable Throw Reject Miss setups since you cannot cancel into this move from j.A
| Starter RatingDetermines the starting value of the hitstun/untech decay timer and subsequent combo length | P1Proration applied to future hits when used as the first hit of a combo | P2Proration applied to future hits when used during any part of a combo | Attack LevelDefault Attack Level Values
| |||||||||||||||||||||||||||||||||||
|---|---|---|---|---|---|---|---|---|---|---|---|---|---|---|---|---|---|---|---|---|---|---|---|---|---|---|---|---|---|---|---|---|---|---|---|---|---|---|
| Very Short | 100 | 60 | 0×2, 4 |
- 100% minimum damage (2700)
- On successful throw, can cancel into Gadget Finger last 5F
- Catches airborne only
- Counterhit state for entire move. Does not include landing
- Attractive from startup until recovery
- Attraction forces on Tager's body of (0G, 3450A) from frame 1, Adds an extra (0, 2500A) towards Tager's hand from frame 6 until end of active frames, After frame 8 Tager's body is set to (1150G, 0A) and then on frame 12 it is set to (575A, 0G) until end of active frames
Atomic Collider
623C (Hold OK)

Can lift magnetised opponents up on whiff to extend combos


| Damage | GuardHow this attack can be guarded. Throws have their throw range listed instead. | StartupHow many frames the attack needs to go through in order to reach its active frames. The listed startup frame coincides with the move's first active frame. | ActiveHow many frames where there is a hitbox that can hit an opponent. The first active frame occurs on the listed startup frame. | RecoveryHow many frames that the character must go through after an attack's active frames to automatically go back to a neutral stance, or the total duration of the move if it has no hitbox/creates projectiles. | Frame AdvHow many frames the attacker's recovery ends before the defender's blockstun ends if the attack is blocked. A positive value indicates that the attacker recovers first, while a negative value indicates that the defender recovers first. This value usually assumes that the attack's first active frame (of each hit, if multi-hit) is blocked. | On ODRThe difference between the attacker's total animation length and the period the opponent is in overdrive raid. This frame advantage is based off the assumption that both players input during the hitstop of a prior move, so that this attack and ODR start on the same frame. | AttributeSome attacks are invulnerable to attacks with specific attributes. This notes what attributes each attack possesses. H - Head B - Body F - Foot P - Projectile. Independent projectiles will have their Durability level listed, e.g. a projectile with Durability level 2 will show P2 T - Throw D - Doll attack, such as Carl's or Relius' doll Burst - Burst, which has its own unique attribute |
Invuln |
|---|---|---|---|---|---|---|---|---|
| 0, 2250 | None | 17~60 | 4 | 19 | T | 4~15 H |
- Attractive to airborne magnetized opponents during startup and active frames.
- Switches sides on hit.
- Strongly attractive to airborne opponents, including during moves like Terumi's 5CGuardAllStartup11Recovery2+18LAdvantage-2.
- No effect on grounded opponents.
- Strongly attractive to airborne opponents, including during moves like
- Can be held, but grab only becomes active upon release.
- Can never grab a grounded opponent, regardless of hitboxes.
- Combo throw. It will not incur a purple throw if used in a combo and will benefit from the 10% bonus damage from counter hits. Does not have 100% minimum damage.
- First hit also does 0 damage, so you'll never see the base damage of this move even if it's the first hit (Will do 1350 damage)
- Can be deliberately missed to reposition magnetised opponents, very important for combos.
- Can grab extended hitboxes.
- Trades inconistently due to its Head invulnerability expiring on its first active frame. Who wins the trade is determined by Character Priority, which is usually Tager, but not always.
Atomic Collider is a move that will add good damage to any combo. On hit, it is often not possible to follow up with anything other than Gadget Finger, meaning you'll generally want to add this in at the end of your combos. Very early on you can use 5A > j.A > j.B > j.C > Crimson Punisher. With an RC you can use 6C or B Sledgehammer and on fatal counter 5A > 5C > 5D/6A will work early in the combo. Due to the side switch, you may want to opt for a different move in your combo so you can keep them in the corner. Similarly, if you find your own back is against the wall, getting any combo to lead into Atomic Collider will turn the tables on them!
3C is a common button to set up the float on whiff. From there, you can followup with plenty of options.
| Starter RatingDetermines the starting value of the hitstun/untech decay timer and subsequent combo length | P1Proration applied to future hits when used as the first hit of a combo | P2Proration applied to future hits when used during any part of a combo | Attack LevelDefault Attack Level Values
| |||||||||||||||||||||||||||||||||||
|---|---|---|---|---|---|---|---|---|---|---|---|---|---|---|---|---|---|---|---|---|---|---|---|---|---|---|---|---|---|---|---|---|---|---|---|---|---|---|
| Long | 100 | 100, 82 | 0, 4 |
- If held, move goes active 2F after releasing button
- Cannot hit standing or crouching state
- Magnetic force of (0G, 3000A) starting from the end of minimum possible startup until end of active frames
- Attracts towards Tager's hand rather than his body
Voltec Charge
214D (Hold OK)

Hold to increase total gain

Gauge increases only on release


| Damage | GuardHow this attack can be guarded. Throws have their throw range listed instead. | StartupHow many frames the attack needs to go through in order to reach its active frames. The listed startup frame coincides with the move's first active frame. | ActiveHow many frames where there is a hitbox that can hit an opponent. The first active frame occurs on the listed startup frame. | RecoveryHow many frames that the character must go through after an attack's active frames to automatically go back to a neutral stance, or the total duration of the move if it has no hitbox/creates projectiles. | Frame AdvHow many frames the attacker's recovery ends before the defender's blockstun ends if the attack is blocked. A positive value indicates that the attacker recovers first, while a negative value indicates that the defender recovers first. This value usually assumes that the attack's first active frame (of each hit, if multi-hit) is blocked. | On ODRThe difference between the attacker's total animation length and the period the opponent is in overdrive raid. This frame advantage is based off the assumption that both players input during the hitstop of a prior move, so that this attack and ODR start on the same frame. | AttributeSome attacks are invulnerable to attacks with specific attributes. This notes what attributes each attack possesses. H - Head B - Body F - Foot P - Projectile. Independent projectiles will have their Durability level listed, e.g. a projectile with Durability level 2 will show P2 T - Throw D - Doll attack, such as Carl's or Relius' doll Burst - Burst, which has its own unique attribute |
Invuln |
|---|---|---|---|---|---|---|---|---|
| 39~113 | 6~(21~95) Guard HBP |
- Stance move used to either charge up your spark bolt faster, or as a guard point trap.
- Hold button to remain in stance for longer. The Electric gauge charges more based on how long Tager holds the stance. Minimum of 66 of Spark meter generated, Maximum of 510.
- This equates to 6 units of extra spark bolt charge for every optional frame of this stance held.
- Blocks Head, Body and Projectile attribute moves while held. Cannot block unblockable attacks.
- If your opponent activates the guardpoint, you can input an Additional attack (236A) while still holding D to cancel into it. This will prevent the normal Electric Gauge gain from Voltic Charge, however.
Due to the slow nature of cancelling into additional attack, which also only has a standing and projectile guard, your opponent can notice they've hit your guard point and simply cancel their blockstring into a low hit and score and easy counter hit on you. Therefore this is inadvisble to use to trap grounded attacks unless you're doing a hard read on a reversal (which typically don't hit low). Useful against air jump ins however, but beware of crossup attacks, even if your opponent has completely crossed over by the time you start using 236A, Tager will not change facing and will therefore do the additional attack the wrong way.
| Starter RatingDetermines the starting value of the hitstun/untech decay timer and subsequent combo length | P1Proration applied to future hits when used as the first hit of a combo | P2Proration applied to future hits when used during any part of a combo | Attack LevelDefault Attack Level Values
| |||||||||||||||||||||||||||||||||||
|---|---|---|---|---|---|---|---|---|---|---|---|---|---|---|---|---|---|---|---|---|---|---|---|---|---|---|---|---|---|---|---|---|---|---|---|---|---|---|
- Guard Point lasts until button is released
- On Guard Point, hitstop for Tager is 0F. Opponent hitstop is 9F
- If guard point is activated, can cancel into Additional Attack until last 18 frames of recovery
- If done from neutral/jump startup, cancellable into 720C on frames 1-11 if guard point is not activated
- Counterhit state for entire move
- Charges spark bolt 6 units for every frame of this move's duration after the 9th frame before releasing the button
A Sledgehammer
236A

Often called "Sledge" or "A Sledge"
Good combo filler, not-so-good neutral tool


| Damage | GuardHow this attack can be guarded. Throws have their throw range listed instead. | StartupHow many frames the attack needs to go through in order to reach its active frames. The listed startup frame coincides with the move's first active frame. | ActiveHow many frames where there is a hitbox that can hit an opponent. The first active frame occurs on the listed startup frame. | RecoveryHow many frames that the character must go through after an attack's active frames to automatically go back to a neutral stance, or the total duration of the move if it has no hitbox/creates projectiles. | Frame AdvHow many frames the attacker's recovery ends before the defender's blockstun ends if the attack is blocked. A positive value indicates that the attacker recovers first, while a negative value indicates that the defender recovers first. This value usually assumes that the attack's first active frame (of each hit, if multi-hit) is blocked. | On ODRThe difference between the attacker's total animation length and the period the opponent is in overdrive raid. This frame advantage is based off the assumption that both players input during the hitstop of a prior move, so that this attack and ODR start on the same frame. | AttributeSome attacks are invulnerable to attacks with specific attributes. This notes what attributes each attack possesses. H - Head B - Body F - Foot P - Projectile. Independent projectiles will have their Durability level listed, e.g. a projectile with Durability level 2 will show P2 T - Throw D - Doll attack, such as Carl's or Relius' doll Burst - Burst, which has its own unique attribute |
Invuln |
|---|---|---|---|---|---|---|---|---|
| 1200 | All | 20 | 3 | 18 | -4 | -14 | B | 1~23 Guard P |
- General purpose short ranged special, guard point against all projectiles including unblockable ones. Range is similar to 5C but without the extended hurtbox.
- Guardpoint also prevents any hitstop from projectiles it guards.
- Can only be followed up with Additional Attack on a standing non-counter hit. If your opponent is crouching (Use 6B to force crouch) or during a fatal counter combo, you can follow up with 5A > 3C...
- Can only be followed up on an air hit if the opponent was off the ground, fully downed opponents can only be hit with gadget finger or Additional Attack.
- The safest special cancel Tager has, still punishable on instant block though.
A special move that doesn't get used a lot at neutral due to other normals generally being better choices. While it has frame 1 projectile armour, it doesn't tend to get used much since most players don't use projectiles at such short range, There are a few exceptions however. It is also quite good damage if you can use it during combos, doing only slightly less than the B version.
Unusually for Tager however, this move has a very disjointed hurtbox during its active frames, so while it can still be stuffed just before then, it can be used as something of a safe poke.
| Starter RatingDetermines the starting value of the hitstun/untech decay timer and subsequent combo length | P1Proration applied to future hits when used as the first hit of a combo | P2Proration applied to future hits when used during any part of a combo | Attack LevelDefault Attack Level Values
| |||||||||||||||||||||||||||||||||||
|---|---|---|---|---|---|---|---|---|---|---|---|---|---|---|---|---|---|---|---|---|---|---|---|---|---|---|---|---|---|---|---|---|---|---|---|---|---|---|
| Normal | 80 | 89 | 3 |
- Can cancel into Additional Attack on frames 23~31
- On Guard Point, hitstop for Tager is 0F. Opponent hitstop unchanged
- Can guard point up to 20000 damage
- Can guard against unblockables
B Sledgehammer
236B (hold OK)

Often called "Sledge" or "B Sledge"
Charging poseGood at closing the distance against zoners...sometimes


Same hitbox as 236A
| Damage | GuardHow this attack can be guarded. Throws have their throw range listed instead. | StartupHow many frames the attack needs to go through in order to reach its active frames. The listed startup frame coincides with the move's first active frame. | ActiveHow many frames where there is a hitbox that can hit an opponent. The first active frame occurs on the listed startup frame. | RecoveryHow many frames that the character must go through after an attack's active frames to automatically go back to a neutral stance, or the total duration of the move if it has no hitbox/creates projectiles. | Frame AdvHow many frames the attacker's recovery ends before the defender's blockstun ends if the attack is blocked. A positive value indicates that the attacker recovers first, while a negative value indicates that the defender recovers first. This value usually assumes that the attack's first active frame (of each hit, if multi-hit) is blocked. | On ODRThe difference between the attacker's total animation length and the period the opponent is in overdrive raid. This frame advantage is based off the assumption that both players input during the hitstop of a prior move, so that this attack and ODR start on the same frame. | AttributeSome attacks are invulnerable to attacks with specific attributes. This notes what attributes each attack possesses. H - Head B - Body F - Foot P - Projectile. Independent projectiles will have their Durability level listed, e.g. a projectile with Durability level 2 will show P2 T - Throw D - Doll attack, such as Carl's or Relius' doll Burst - Burst, which has its own unique attribute |
Invuln |
|---|---|---|---|---|---|---|---|---|
| 1300 | All | 35~55 | 4 | 20 | -7 | -32~-52 | B | 1~(1F after Active) Guard P 11~(6F before Active) Guard HBP |
- Covers considerably more range than the A version, moves 33% further and deals slightly more damage when fully charged, but all other properties remain the same.
- It autoguards projectiles during start-up and active frames and Head and Body attacks during start-up. Unlike the A version, B Sledgehammer does not guard against unblockables.
- Guard point also prevents any hitstop for Tager.
- Causes Crumple stun on grounded hit. On Counterhit gives a crumple stun similar to 5D's standing counterhit, allowing all manner of followups.
- Causes a launching tumble on air hit or downed hit. Allows easy followups.
- Often used to close gaps and punch through reckless projectile spam, but it's far from ideal since it's your only real way to do this.
- Used in corner combos after a 5D air hit.
Not necessarily the best way to close gaps as predictable Sledge use will usually be punished. Vary between using this, super jump j.C and simply taking a nice stroll towards the opponent to keep them guessing. In combos it works as a great move due to its huge damage, decent scaling and can be followed with 6A > 6C fairly easily if you scoop them off the floor with it (Such as after a 3C counterhit or a 5D air hit into the corner).
| Starter RatingDetermines the starting value of the hitstun/untech decay timer and subsequent combo length | P1Proration applied to future hits when used as the first hit of a combo | P2Proration applied to future hits when used during any part of a combo | Attack LevelDefault Attack Level Values
| |||||||||||||||||||||||||||||||||||
|---|---|---|---|---|---|---|---|---|---|---|---|---|---|---|---|---|---|---|---|---|---|---|---|---|---|---|---|---|---|---|---|---|---|---|---|---|---|---|
| Normal | 80 | 89 | 3 |
- Can cancel into Additional Attack during first 13 frames of recovery
- Crumple Duration 31F, Crumple Fall 64F
- On Guard Point, hitstop for Tager is 0F. Opponent hitstop unchanged
- Can guard point up to 20000 damage
- Delaying move also extends both guardpoint durations
Additional Attack
236A after Sledgehammer 236A after Voltec Charge guardpoint

Often called "Hammer"
Gimmicky overhead followup


| Version | Damage | GuardHow this attack can be guarded. Throws have their throw range listed instead. | StartupHow many frames the attack needs to go through in order to reach its active frames. The listed startup frame coincides with the move's first active frame. | ActiveHow many frames where there is a hitbox that can hit an opponent. The first active frame occurs on the listed startup frame. | RecoveryHow many frames that the character must go through after an attack's active frames to automatically go back to a neutral stance, or the total duration of the move if it has no hitbox/creates projectiles. | Frame AdvHow many frames the attacker's recovery ends before the defender's blockstun ends if the attack is blocked. A positive value indicates that the attacker recovers first, while a negative value indicates that the defender recovers first. This value usually assumes that the attack's first active frame (of each hit, if multi-hit) is blocked. | On ODRThe difference between the attacker's total animation length and the period the opponent is in overdrive raid. This frame advantage is based off the assumption that both players input during the hitstop of a prior move, so that this attack and ODR start on the same frame. | AttributeSome attacks are invulnerable to attacks with specific attributes. This notes what attributes each attack possesses. H - Head B - Body F - Foot P - Projectile. Independent projectiles will have their Durability level listed, e.g. a projectile with Durability level 2 will show P2 T - Throw D - Doll attack, such as Carl's or Relius' doll Burst - Burst, which has its own unique attribute |
Invuln |
|---|---|---|---|---|---|---|---|---|---|
| 236X~236A | 1370 | High | 22 | 6 | 30 | -17 | -31 | B | 1~21 Guard HBP |
| 214D~236A | 1370 | High | 13 | 6 | 30 | -17 | -22 | B | 1~12 Guard HBP |
- Commonly named "Hammer" by players.
- Same Guard point properties as B Sledgehammer, but actually lasts until it goes active.
- Doesn't guard unblockables, even when done from A Sledgehammer
- Combo ender in most cases, will always connect after either sledgehammer unless the combo has prorated severely.
- Can be cancelled into on whiff on either sledgehammer.
- Can be RC'd into 5B very easily allowing the combo to continue. 6C Can also be used, but the timing is much tighter.
- Overhead, leading to a gimmicky mixup after a blocked sledgehammer, highly punishable if blocked and only possible to followup on a counterhit.
- Counterhits lead to short short combos due to its short starter property. For example, AA CH, 5B > 5C > 6A will miss on the 6A. Use AA, 5B > 5C > AC, 22D instead.
- Counterhit state throughout
A seldom used move for Tager, mostly sees use from Voltec Charge since it can still give a reasonable punish, occasionally sees use elsewhere as either a desperate finish to a combo to close a round, or more commonly mid combo with a rapid cancel to add good damage or to convert off awkward routes (Such as from a 6B air hit). Very punishable, but occasionally useful to throw out after Sledgehammer misses to catch sleeping opponents or ones who don't have a quick enough 2A to punish Sledgehammer B. Incredibly risky to do since getting blocked or evaded will eat a nasty punish.
| Version | Starter RatingDetermines the starting value of the hitstun/untech decay timer and subsequent combo length | P1Proration applied to future hits when used as the first hit of a combo | P2Proration applied to future hits when used during any part of a combo | Attack LevelDefault Attack Level Values
| |||||||||||||||||||||||||||||||||||
|---|---|---|---|---|---|---|---|---|---|---|---|---|---|---|---|---|---|---|---|---|---|---|---|---|---|---|---|---|---|---|---|---|---|---|---|---|---|---|---|
| 236X~236A | Very Short | 70 | 92 | 4 | |||||||||||||||||||||||||||||||||||
| 214D~236A | Very Short | 70 | 92 | 4 |
236X~236A:
- Considered a different move when done from each starter for Same Move proration purposes
- Counterhit state for entire move
- On Guard Point, hitstop for Tager reduced by 1F. Opponent hitstop unchanged
214D~236A:
- Counterhit state for entire move
- Considered a different move from the versions performed after Sledgehammer for Same Move proration purposes
- On Guard Point, hitstop for Tager reduced by 1F. Opponent hitstop unchanged
Gadget Finger
22D on downed opponent (Hold OK)

Common after combos to set up RPS oki

Drops them from up here


| Damage | GuardHow this attack can be guarded. Throws have their throw range listed instead. | StartupHow many frames the attack needs to go through in order to reach its active frames. The listed startup frame coincides with the move's first active frame. | ActiveHow many frames where there is a hitbox that can hit an opponent. The first active frame occurs on the listed startup frame. | RecoveryHow many frames that the character must go through after an attack's active frames to automatically go back to a neutral stance, or the total duration of the move if it has no hitbox/creates projectiles. | Frame AdvHow many frames the attacker's recovery ends before the defender's blockstun ends if the attack is blocked. A positive value indicates that the attacker recovers first, while a negative value indicates that the defender recovers first. This value usually assumes that the attack's first active frame (of each hit, if multi-hit) is blocked. | On ODRThe difference between the attacker's total animation length and the period the opponent is in overdrive raid. This frame advantage is based off the assumption that both players input during the hitstop of a prior move, so that this attack and ODR start on the same frame. | AttributeSome attacks are invulnerable to attacks with specific attributes. This notes what attributes each attack possesses. H - Head B - Body F - Foot P - Projectile. Independent projectiles will have their Durability level listed, e.g. a projectile with Durability level 2 will show P2 T - Throw D - Doll attack, such as Carl's or Relius' doll Burst - Burst, which has its own unique attribute |
Invuln |
|---|---|---|---|---|---|---|---|---|
| 0, 100 | None | 7 | 8~47 | 9 (Whiff), 27 (Hit) | T |
- Okizeme move, picks up the opponent off the floor or airborne near the floor and drops them in front of Tager, Re-stand A situation in which a character is taken from an airborne or OTG state and returned to a standing state on the ground while still in hitstun, which is very uncommon. Moves that re-stand the opponent often allow for unique mix-ups that are unexpected (since typically, mix-ups come after a knockdown), or unique combo extensions.ing them.
- Magnetizes for 360F (1000F in Overdrive)
- Attractive to magnetized opponents during startup and active frames.
- Can be held to extend active frames.
- The recovery is affected Fatal Counter and Jubei's crouching hitstun but not combo length
- Only usable if the combo has fully downed the opponent at some point before trying to activate Gadget Finger (floorbounce does not count).
- The moves that cause this are 6B (air hit), 6A (air hit), 5D and 2D (air hit, after floorslide begins), Crush Trigger, 360A, j.360C, Impact Driver, j.2C (non-CH), and air throw.
- Also includes any time the opponent hits the ground and simply chooses not to Emergency Roll.
- 3C and Atomic Collider will instantly allow the use of Gadget Finger, they do not need to touch the ground first in these cases.
- 100% minimum damage, 5% fixed heat gain.
- Unaffected by hitstun decay.
Gadget Finger is an incredibly versatile tool for Tager, used to end most combos with some magnetism and preventing recovery rolls. It's a natural followup to 360A, j.360C, and 623C. Since it leaves Tager at +10, this allows for mixups: 5C or 3C to catch mash, 360A to catch block, and blocking or backdash to cover reversal options like DP or Overdrive.
On some characters, particularly larger characters, the frame advantage also lets Tager follow up with 5A.
- 5A after Gadget Finger works on: Amane, Arakune, Bang (only in corner and CH), Bullet (only on CH), Hakumen, Jubei, Kagura, Rachel, Ragna, Susanoo, Tager, and Tsubaki
Gadget Finger whiffs can also be used to extend combos after 2C due to its magnetism pulling opponents back into range. These often function as longer, more damaging combo routes than Tager's unmagnetized combos, and they can be seen on his Combos page.
Due to the opponent remaining in hitstun until they hit the ground, it is possible to prevent the opponent from recovering using the infamous "Timeout Tager" or "Tager Circus" strategy. After landing Gadget Finger (preferably after the opponent is thoroughly magnetized), you can Rapid Cancel and repeatedly whiff j.360C. This is much harder than it sounds, and must be done with great care to not launch the opponent too far. If done correctly, with 100 meter, you can easily get a win by timeout even if a lot of time was remaining at the start of the circus.
Gadget Finger Rapid Cancel isn't just for the timeout strategy either. 22D > RC 360B~360B adds at least 800 damage at the end of a combo, and can be very useful unburstable damage or to finish off a low-health opponent.
| Starter RatingDetermines the starting value of the hitstun/untech decay timer and subsequent combo length | P1Proration applied to future hits when used as the first hit of a combo | P2Proration applied to future hits when used during any part of a combo | Attack LevelDefault Attack Level Values
| |||||||||||||||||||||||||||||||||||
|---|---|---|---|---|---|---|---|---|---|---|---|---|---|---|---|---|---|---|---|---|---|---|---|---|---|---|---|---|---|---|---|---|---|---|---|---|---|---|
| Long | 100 | 80 | 0 |
- Magnetises for 360F (1000F in Overdrive)
- Tager is +10 on hit
- Minimum Damage 100% (100)
- Hitstun unaffected by hitstun decay but can be extended by fatal counters
- No normal heat gain for either player. Fixed 5% heat gain for Tager
- Cannot hit standing or crouching opponents
- Combo must include a knockdown before this move can be activated
- Cannot reduce health below 1
- Attractive for entire move
- Attraction forces (6000G, 2000A) on frame 1 only, (4000G, 2000A) on frame 2-14 and (4000G, 3000A) thereafter
Spark Bolt
41236D 623D

Combos, neutral, magnetism, this tool does it all


41236D

623D


| Version | Damage | GuardHow this attack can be guarded. Throws have their throw range listed instead. | StartupHow many frames the attack needs to go through in order to reach its active frames. The listed startup frame coincides with the move's first active frame. | ActiveHow many frames where there is a hitbox that can hit an opponent. The first active frame occurs on the listed startup frame. | RecoveryHow many frames that the character must go through after an attack's active frames to automatically go back to a neutral stance, or the total duration of the move if it has no hitbox/creates projectiles. | Frame AdvHow many frames the attacker's recovery ends before the defender's blockstun ends if the attack is blocked. A positive value indicates that the attacker recovers first, while a negative value indicates that the defender recovers first. This value usually assumes that the attack's first active frame (of each hit, if multi-hit) is blocked. | On ODRThe difference between the attacker's total animation length and the period the opponent is in overdrive raid. This frame advantage is based off the assumption that both players input during the hitstop of a prior move, so that this attack and ODR start on the same frame. | AttributeSome attacks are invulnerable to attacks with specific attributes. This notes what attributes each attack possesses. H - Head B - Body F - Foot P - Projectile. Independent projectiles will have their Durability level listed, e.g. a projectile with Durability level 2 will show P2 T - Throw D - Doll attack, such as Carl's or Relius' doll Burst - Burst, which has its own unique attribute |
Invuln |
|---|---|---|---|---|---|---|---|---|---|
| 41236D | 1500 | All | 12 | Until Hit | Total: 47 | -1 | -20 | P2 | |
| 623D | 1500 | All | 12 | Until Hit | Total 47 | -1 | -20 | P2 |
- Magnetises for 480F (1000F during OD). Does not attract magnetised opponents, unlike other drive moves.
- Requires a full Spark bolt guage to fire and consumes all of it on the first startup frame, therefore getting this move stuffed will cause you to lose the spark bolt.
- Charges up in 1000 frames (16 2/3 seconds) normally.
- Charges four times as fast during Overdrive (Charges in approximately 4 seconds).
- Wall bounces on hit, allowing combos from any range.
- Each version has a slightly different hit effect, with the diagonal version causing higher vertical force and less horizontal rebound force then the horizontal version.
- Can be used to extend combos.
- A level 2 projectile, Destroys most projectiles without being destroyed itself.
- Absurdly fast startup and projectile speed. Reaches quite far from Tager even on its first active frame. Combos from basically anything you can special cancel and even some links.
- The projectile is large enough to hit floorsliding opponents (Such as from 5D's air hit), but will miss fully downed opponents.
A key tool for Tager, since once you have it available you have the means to counter pretty much any whiffed poke and any big and slow long ranged move. Therefore don't throw it away recklessly! Hold onto it and use that looming threat to keep your opponent playing cautiously at range, allowing you to close in via other means. In combos its big untechable time, quick startup, long range magnetism and big damage makes it an extremely useful tool for extending combos that would otherwise fail due to hitstun reduction or just pushing the opponent out of range. It's particularly useful for turning random 5D hits into full combos since it will combo from air and ground hits with a generous amount of time to react to the hit.
| Version | Starter RatingDetermines the starting value of the hitstun/untech decay timer and subsequent combo length | P1Proration applied to future hits when used as the first hit of a combo | P2Proration applied to future hits when used during any part of a combo | Attack LevelDefault Attack Level Values
| |||||||||||||||||||||||||||||||||||
|---|---|---|---|---|---|---|---|---|---|---|---|---|---|---|---|---|---|---|---|---|---|---|---|---|---|---|---|---|---|---|---|---|---|---|---|---|---|---|---|
| 41236D | Long | 80 | 82 | 4 | |||||||||||||||||||||||||||||||||||
| 623D | Long | 80 | 82 | 4 |
41236D:
- Magnetises for 480F (1000F in Overdrive)
- Electricity meter consumed on 1st frame
- Counterhit state for entire move
623D:
- Magnetises for 480F (1000F in Overdrive)
- Electricity meter consumed on 1st frame
- Counterhit state for entire move
Crimson Punisher
j.63214A

Whoa! Air combo oki ender :O


Not as big as it seems, but still huge

| Damage | GuardHow this attack can be guarded. Throws have their throw range listed instead. | StartupHow many frames the attack needs to go through in order to reach its active frames. The listed startup frame coincides with the move's first active frame. | ActiveHow many frames where there is a hitbox that can hit an opponent. The first active frame occurs on the listed startup frame. | RecoveryHow many frames that the character must go through after an attack's active frames to automatically go back to a neutral stance, or the total duration of the move if it has no hitbox/creates projectiles. | Frame AdvHow many frames the attacker's recovery ends before the defender's blockstun ends if the attack is blocked. A positive value indicates that the attacker recovers first, while a negative value indicates that the defender recovers first. This value usually assumes that the attack's first active frame (of each hit, if multi-hit) is blocked. | On ODRThe difference between the attacker's total animation length and the period the opponent is in overdrive raid. This frame advantage is based off the assumption that both players input during the hitstop of a prior move, so that this attack and ODR start on the same frame. | AttributeSome attacks are invulnerable to attacks with specific attributes. This notes what attributes each attack possesses. H - Head B - Body F - Foot P - Projectile. Independent projectiles will have their Durability level listed, e.g. a projectile with Durability level 2 will show P2 T - Throw D - Doll attack, such as Carl's or Relius' doll Burst - Burst, which has its own unique attribute |
Invuln |
|---|---|---|---|---|---|---|---|---|
| 800, 1500 | All | 15 | 3 | 16+3L (Whiff), 34 (Hit) | H |
- Two stage attack, if the initial arm sweep hits, his opponent is hit straight down with a hard knockdown and Tager immediately follows up with a bellyflop on the stricken opponent.
- Huge hitbox underneath Tager.
- First hit disables bursts on hit.
- Can only be used once per jump.
- During the initial arm sweep, Tager is launched slightly upwards and forwards and loses all previous jumping momentum, enabling it to easily hit enemies slightly above him, but also makes hitting it on standing opponents very tricky. Also not an overhead.
- Can be used as a ghetto double jump to perform crossups and bait out anti-air attacks, though j.2C is arguably better for baiting anti-airs.
Air combo finisher with big damage. Can be Rapid cancelled on either hit to continue the combo, although this is only worth doing early in the combo. There also exists some cases where the second hit will not actually connect, either due to the smack down attack being techable (only happens in some very long combos) or some external forces causing Tager's fall to miss (such as another Tager's magnetism before the attack hit). On successful hit there are various oki options to catch tech rolls, including using 5A and 2B.
| Starter RatingDetermines the starting value of the hitstun/untech decay timer and subsequent combo length | P1Proration applied to future hits when used as the first hit of a combo | P2Proration applied to future hits when used during any part of a combo | Attack LevelDefault Attack Level Values
| |||||||||||||||||||||||||||||||||||
|---|---|---|---|---|---|---|---|---|---|---|---|---|---|---|---|---|---|---|---|---|---|---|---|---|---|---|---|---|---|---|---|---|---|---|---|---|---|---|
| Long | 80 | 92×2 | 4 |
- On hit, goes to followup on frame 24
- Followup is only invuln until recovery (11th frame after landing)
Distortion Drives
Magna Tech Wheel
236236B

Tacks on a good bit of damage at the end of any combo

Everyone gets caught once by the overhead


Hitbox slightly shifts while spinning

Will hit even if they were behind Tager


| Version | Damage | GuardHow this attack can be guarded. Throws have their throw range listed instead. | StartupHow many frames the attack needs to go through in order to reach its active frames. The listed startup frame coincides with the move's first active frame. | ActiveHow many frames where there is a hitbox that can hit an opponent. The first active frame occurs on the listed startup frame. | RecoveryHow many frames that the character must go through after an attack's active frames to automatically go back to a neutral stance, or the total duration of the move if it has no hitbox/creates projectiles. | Frame AdvHow many frames the attacker's recovery ends before the defender's blockstun ends if the attack is blocked. A positive value indicates that the attacker recovers first, while a negative value indicates that the defender recovers first. This value usually assumes that the attack's first active frame (of each hit, if multi-hit) is blocked. | On ODRThe difference between the attacker's total animation length and the period the opponent is in overdrive raid. This frame advantage is based off the assumption that both players input during the hitstop of a prior move, so that this attack and ODR start on the same frame. | AttributeSome attacks are invulnerable to attacks with specific attributes. This notes what attributes each attack possesses. H - Head B - Body F - Foot P - Projectile. Independent projectiles will have their Durability level listed, e.g. a projectile with Durability level 2 will show P2 T - Throw D - Doll attack, such as Carl's or Relius' doll Burst - Burst, which has its own unique attribute |
Invuln |
|---|---|---|---|---|---|---|---|---|---|
| Magna Tech Wheel | 220×19, 1800 | All×19, High/Air | 7+(38 Flash)+12 | 4,2×18 (15) 3 | 72 | -56 | B | 1~24 Guard All 25~58 Guard xP |
|
| Magna Tech Wheel OD | 180×31, 1800 | All×31, High/Air | 7+(38 Flash)+12 | 4,2×30 (15) 3 | 72 | -56 | B | 1~24 Guard All 25~58 Guard xP |
- Minimum damage: 864 OD: 1080
- General purpose Distortion to add good damage to your combo.
- Strongly attractive to magnetised opponents.
- Guard point against everything until the third hit, then blocks anything that includes the projectile attribute for the rest. Can guardpoint through unblockables.
- Can be used as a reversal that can hit airborne opponents. But ensure you have heat left to rapid cancel should you get blocked since you will eat the worst possible combo your opponent has available otherwise.
- Combos nicely after 6B air hit, 6C, 2C (If magnetised) and somewhat awkwardly in other scenarios.
- Final hit hits overhead, can be used as a gimmicky mixup on RC if you swap to a low hit. Bear in mind that a rapid cancel won't remove the massive hitstop on the final hit.
- Only possible to follow up with Terra Break or Rapid cancel, Opponent otherwise can tech before Tager even recovers.
Tager's ever faithful big damage Distortion Drive. However due to the awkwardness of getting this move to actually combo without sacrificing hits like atomic collider, it's often better to use Rapid Cancels in most combos since they tend to give more damage. It is still useful as a wakeup reversal, but be aware that opponents hitting the guard point can Rapid Cancel in response to seeing the superflash and block, making it somewhat unreliable.
In Overdrive however, this move and its followup gain far more damage and will also force Active Flow if Tager hasn't activated it that round. If you wish to use it in this way, use MTW as early as you can in the combo to maximise damage.
| Version | Starter RatingDetermines the starting value of the hitstun/untech decay timer and subsequent combo length | P1Proration applied to future hits when used as the first hit of a combo | P2Proration applied to future hits when used during any part of a combo | Attack LevelDefault Attack Level Values
| |||||||||||||||||||||||||||||||||||
|---|---|---|---|---|---|---|---|---|---|---|---|---|---|---|---|---|---|---|---|---|---|---|---|---|---|---|---|---|---|---|---|---|---|---|---|---|---|---|---|
| Magna Tech Wheel | Normal | 80 | 82 | 4 | |||||||||||||||||||||||||||||||||||
| Magna Tech Wheel OD | Normal | 80 | 82 | 4 |
Magna Tech Wheel:
- Minimum Damage 15%: 897
- Counterhit state for entire move
- Cancellable into Terra Break frames 77-110
- Attractive only during active frames with force (2000G, 1500A)
- On Guard Point, hitstop for Tager is 0F. Opponent hitstop unchanged
- reversal guardpoint
Magna Tech Wheel OD:
- Minimum Damage 15%: 1107
- Counterhit state for entire move
- Cancellable into Terra Break frames 101-134
- Attractive only during active frames with force (2000G, 1500A)
- On Guard Point, hitstop for Tager is 0F. Opponent hitstop unchanged
Terra Break
236236B after Magna Tech Wheel

More damage, and extends combos in Overdrive


Basically will never miss after MTW if you time it vaguely correctly

| Damage | GuardHow this attack can be guarded. Throws have their throw range listed instead. | StartupHow many frames the attack needs to go through in order to reach its active frames. The listed startup frame coincides with the move's first active frame. | ActiveHow many frames where there is a hitbox that can hit an opponent. The first active frame occurs on the listed startup frame. | RecoveryHow many frames that the character must go through after an attack's active frames to automatically go back to a neutral stance, or the total duration of the move if it has no hitbox/creates projectiles. | Frame AdvHow many frames the attacker's recovery ends before the defender's blockstun ends if the attack is blocked. A positive value indicates that the attacker recovers first, while a negative value indicates that the defender recovers first. This value usually assumes that the attack's first active frame (of each hit, if multi-hit) is blocked. | On ODRThe difference between the attacker's total animation length and the period the opponent is in overdrive raid. This frame advantage is based off the assumption that both players input during the hitstop of a prior move, so that this attack and ODR start on the same frame. | AttributeSome attacks are invulnerable to attacks with specific attributes. This notes what attributes each attack possesses. H - Head B - Body F - Foot P - Projectile. Independent projectiles will have their Durability level listed, e.g. a projectile with Durability level 2 will show P2 T - Throw D - Doll attack, such as Carl's or Relius' doll Burst - Burst, which has its own unique attribute |
Invuln |
|---|---|---|---|---|---|---|---|---|
| 3600 [4200] | All | 9+(20 Flash)+25 | 9 | 35 | -25 | B | 1~13 All |
- Minimum damage: 720 OD: 840
- Followup to Magna Tech Wheel to add even more damage.
- Mashing out this move as early as possible after hitting Magna-Tech Wheel will cause it to miss; The ideal timing is just before your opponent reaches the highest point of the bounce from the MTW. The easiest way to do it is to continually roll the 236 motion and just press B at the right time.
- Blows opponent away on hit and wallbounds.
- Overdrive version causes wallbounce and hard knockdown that allows for folloup with various moves, the higher up they are when you hit them, the more time you will get.
- If the preceding Magna-Tech Wheel was the Overdrive version, then Terra break will also be the Overdrive version, even if Overdrive has already ended.
Only really useful as an ender to long combos (which you generally won't need to use it for) or in overdrive. It's not advised if you landed MTW as the first hit of the combo, you will actually get more damage by using a rapid cancel to create a followup combo than by using Terra Break. Similarly, even though it has some invulnerability, do not attempt to use it if MTW gets blocked, use a rapid cancel instead!
If you manage to use it during overdrive however, it will deal more damage and wallbounces for even more followup hits (Including using exceed accel!). If this happens, try to get Terra Break to hit as early as you can (While not missing completely) since this will give you more time to use harder hitting followup moves.
| Starter RatingDetermines the starting value of the hitstun/untech decay timer and subsequent combo length | P1Proration applied to future hits when used as the first hit of a combo | P2Proration applied to future hits when used during any part of a combo | Attack LevelDefault Attack Level Values
| |||||||||||||||||||||||||||||||||||
|---|---|---|---|---|---|---|---|---|---|---|---|---|---|---|---|---|---|---|---|---|---|---|---|---|---|---|---|---|---|---|---|---|---|---|---|---|---|---|
| Normal | 80 | 82 | 4 |
- Values in [] are during OD
- Counterhit state for entire move
- Minimum Damage 20%: 720 [840]
- OD Version always activates if cancelled from Magna Tech Wheel OD, even if Overdrive has ended
Genesic Emerald Tager Buster
720C (Hold OK)

Don't be too reckless with it

This is what you want to see


| Damage | GuardHow this attack can be guarded. Throws have their throw range listed instead. | StartupHow many frames the attack needs to go through in order to reach its active frames. The listed startup frame coincides with the move's first active frame. | ActiveHow many frames where there is a hitbox that can hit an opponent. The first active frame occurs on the listed startup frame. | RecoveryHow many frames that the character must go through after an attack's active frames to automatically go back to a neutral stance, or the total duration of the move if it has no hitbox/creates projectiles. | Frame AdvHow many frames the attacker's recovery ends before the defender's blockstun ends if the attack is blocked. A positive value indicates that the attacker recovers first, while a negative value indicates that the defender recovers first. This value usually assumes that the attack's first active frame (of each hit, if multi-hit) is blocked. | On ODRThe difference between the attacker's total animation length and the period the opponent is in overdrive raid. This frame advantage is based off the assumption that both players input during the hitstop of a prior move, so that this attack and ODR start on the same frame. | AttributeSome attacks are invulnerable to attacks with specific attributes. This notes what attributes each attack possesses. H - Head B - Body F - Foot P - Projectile. Independent projectiles will have their Durability level listed, e.g. a projectile with Durability level 2 will show P2 T - Throw D - Doll attack, such as Carl's or Relius' doll Burst - Burst, which has its own unique attribute |
Invuln |
|---|---|---|---|---|---|---|---|---|
| 0×3, 4620 [0×3, 5220] | Throw | 5+(28 Flash)+0 | 3~58 | 41 | T | 1~6 All |
- A true reversal command throw with absurd range (especially with magnetism).
- Hold C to extend active frames, but Tager is not invulnerable during this time.
- Catches standing or crouching enemies only.
- Goes active on the superflash frame, meaning that your opponent cannot respond to the superflash if they're already in a valid grabbing position.
- Hilariously attractive during its startup before going weaker when held.
- Has minimum distance check larger than its hitbox, which is unusual for throws, meaning that it's possible to be in range but miss since no hitboxes line up. Be aware that throws actually measure to the front of a player's collision box which gets pushed forward during some moves, such as Ragna's 5B.
- Moves forward and swaps sides after a successful hit, meaning it's impossible to corner someone with this.
- No followups possible, including rapid cancels
- Overdrive version magnetises opponent for the maximum duration of 1000F in addition to dealing much more damage.
- 100% minimum damage.
- Awful recovery if it misses and Tager is in a counterhit state during this time.
Tager's signature Distortion drive, sadly with less damage from previous iterations but can still be brought up considerably with overdrive and active flow damage boosts. Ideally used more as a reversal than a punish unless you really need your combo to be burst proof or your punish window isn't large enough for 5C to connect. This isn't a move to be thrown out lightly since anyone familiar with fighting against Tager will be keen to bait this move out with their own jump cancellable normals and other throw safe moves. Try to use it at more unpredictable times or in conjunction with Overdrive to see if they're vulnerable before committing your heat as well (You can easily buffer this move during overdrive startup). Remember to take advantage of the fact that it can pull in enemies from surprising distances before it goes active on top of its already massive reach, so remember you can use it as a medium ranged attack.
This move also costs more than it seems; It cannot be used as part of a combo, so it requires you to commit 50 Heat up front and, even if it hits, you have no way to follow it up with any other move. Therefore there's no way to recover or offset the heat cost when using this move. Given that the opponent is also completely free to roll away afterwards, you'll generally want to use this as a round ender rather than a way to do big damage mid round.
| Starter RatingDetermines the starting value of the hitstun/untech decay timer and subsequent combo length | P1Proration applied to future hits when used as the first hit of a combo | P2Proration applied to future hits when used during any part of a combo | Attack LevelDefault Attack Level Values
| |||||||||||||||||||||||||||||||||||
|---|---|---|---|---|---|---|---|---|---|---|---|---|---|---|---|---|---|---|---|---|---|---|---|---|---|---|---|---|---|---|---|---|---|---|---|---|---|---|
| Long | 100 | 100,75,92 | 0×3, 4 |
- Values in [] are during OD
- Minimum Damage 100%: 4620 [5220]
- OD Version applies 1000F of magnetism
- Counterhit state for entire move
- Attractive from 1-end of active frames
- Attraction forces: (26000G, 0A) from frame 1, (1200G, 0A) from frame 3 until the end of the attractive time*Ends up at 69P2 on the hit for burst gain calculation
- reversal
Exceed Accel
Charged Lightning
A+B+C+D during Overdrive

Same animation as 5C

Good damage, but there's usually a better option


Same hitbox as 5C

| Damage | GuardHow this attack can be guarded. Throws have their throw range listed instead. | StartupHow many frames the attack needs to go through in order to reach its active frames. The listed startup frame coincides with the move's first active frame. | ActiveHow many frames where there is a hitbox that can hit an opponent. The first active frame occurs on the listed startup frame. | RecoveryHow many frames that the character must go through after an attack's active frames to automatically go back to a neutral stance, or the total duration of the move if it has no hitbox/creates projectiles. | Frame AdvHow many frames the attacker's recovery ends before the defender's blockstun ends if the attack is blocked. A positive value indicates that the attacker recovers first, while a negative value indicates that the defender recovers first. This value usually assumes that the attack's first active frame (of each hit, if multi-hit) is blocked. | On ODRThe difference between the attacker's total animation length and the period the opponent is in overdrive raid. This frame advantage is based off the assumption that both players input during the hitstop of a prior move, so that this attack and ODR start on the same frame. | AttributeSome attacks are invulnerable to attacks with specific attributes. This notes what attributes each attack possesses. H - Head B - Body F - Foot P - Projectile. Independent projectiles will have their Durability level listed, e.g. a projectile with Durability level 2 will show P2 T - Throw D - Doll attack, such as Carl's or Relius' doll Burst - Burst, which has its own unique attribute |
Invuln |
|---|---|---|---|---|---|---|---|---|
| 600, 0, 70×21, 1150 {600, 0, 75×30, 3300} |
All | 20 [10] | 3 | 34 | -10 | -30 [-20] | B | 1~22 All [1~12 All] |
- Ends the faster spark bolt gauge gain from OD the instant the move hits, so it can't be used to pad out this gain.
- Otherwise behaves the same as every other Exceed Accel.
- 322/639 Minimum Damage
An expensive reversal and oddly gives no magnetism, but still very useful since Active flow Tager is pretty terrifying. Launches opponent far away from Tager, unfortunately. Can be used with overdrive raids to escape pressure and take advantage back better than most characters can. Tager can use the overdrive super flash to buffer any move and can mix this move up with his throws and atomic collider to cover all possibilities. Often not used if overdrive screen freeze shows a 720 opportunity since that will deal more damage, and give magnetism.
During combos the damage this deals is fairly weak, so it's only really worth using if you're in active flow or need an unburstable finish since it leaves your opponents far away from you. It does combo off pretty much anything however. Can go into this easily off of OD MTW > TB 6BB if you still have overdrive left.
| Starter RatingDetermines the starting value of the hitstun/untech decay timer and subsequent combo length | P1Proration applied to future hits when used as the first hit of a combo | P2Proration applied to future hits when used during any part of a combo | Attack LevelDefault Attack Level Values
| |||||||||||||||||||||||||||||||||||
|---|---|---|---|---|---|---|---|---|---|---|---|---|---|---|---|---|---|---|---|---|---|---|---|---|---|---|---|---|---|---|---|---|---|---|---|---|---|---|
| Long | 125 | 80 | 2 |
Astral Heat
King of Tager
1080D (Hold OK)

Fairly impractical to land, even among Astrals


But oh boy when it lands


| Damage | GuardHow this attack can be guarded. Throws have their throw range listed instead. | StartupHow many frames the attack needs to go through in order to reach its active frames. The listed startup frame coincides with the move's first active frame. | ActiveHow many frames where there is a hitbox that can hit an opponent. The first active frame occurs on the listed startup frame. | RecoveryHow many frames that the character must go through after an attack's active frames to automatically go back to a neutral stance, or the total duration of the move if it has no hitbox/creates projectiles. | Frame AdvHow many frames the attacker's recovery ends before the defender's blockstun ends if the attack is blocked. A positive value indicates that the attacker recovers first, while a negative value indicates that the defender recovers first. This value usually assumes that the attack's first active frame (of each hit, if multi-hit) is blocked. | On ODRThe difference between the attacker's total animation length and the period the opponent is in overdrive raid. This frame advantage is based off the assumption that both players input during the hitstop of a prior move, so that this attack and ODR start on the same frame. | AttributeSome attacks are invulnerable to attacks with specific attributes. This notes what attributes each attack possesses. H - Head B - Body F - Foot P - Projectile. Independent projectiles will have their Durability level listed, e.g. a projectile with Durability level 2 will show P2 T - Throw D - Doll attack, such as Carl's or Relius' doll Burst - Burst, which has its own unique attribute |
Invuln |
|---|---|---|---|---|---|---|---|---|
| 16000 | Unblockable | 5+(50 Flash)+16~84 | 4 | 76 | T | 1~9 All |
- Cannot be cancelled into from anything.
- Startup is extendable by holding the button, attack will only happen after it is released.
- Extremely attractive towards magnetised opponents, including during extended startup.
- The invulnerability ends before the move becomes active.
Tager's Astral is a comand grab that can be comboed into that can catch airborne, standing and crouching enemies as long as they're inside the hitbox in front of Tager. Hard to connect after his normals due to its long startup, but it combos easely after Wedge Catapult 360B, or in any combo using Spark Bolt 623D.
Difficult to use on reaction however due to the long input that needs buffering. In most cases a 720 will work much better as it will always finish someone off in critical health.
Has a horizontal distance check of 670px (Approximately slightly less than roundstart position), which is longer than the actual hitbox (Which extends 657px from Tager's origin). Meaning this can catch some extended hurtbox moves, particularly if they "push" forward of their position, but not all of them.
| Starter RatingDetermines the starting value of the hitstun/untech decay timer and subsequent combo length | P1Proration applied to future hits when used as the first hit of a combo | P2Proration applied to future hits when used during any part of a combo | Attack LevelDefault Attack Level Values
| |||||||||||||||||||||||||||||||||||
|---|---|---|---|---|---|---|---|---|---|---|---|---|---|---|---|---|---|---|---|---|---|---|---|---|---|---|---|---|---|---|---|---|---|---|---|---|---|---|
| 5 |
- Can be comboed into
- Counterhit state for entire move
- Attractive force of 4500G, 3000A from end of superflash to end of delayed startup + 14F
- Can hit all states except fully downed.
Colors
 |
 |
 |
 |
 |
 |
 |
 |
 |
 |
 |
 |
 |
 |
 |
 |
 |
 |
 |
 |
 |
 |
 |
 |
To edit frame data, edit values in BBCF/Iron Tager/Data.
Amane
Arakune
Azrael
Bang
Bullet
Carl
Celica
Es
Hakumen
Hazama
Hibiki
Tager
Izanami
Izayoi
Jin
Jubei
Kagura
Kokonoe
Lambda-11
Litchi
Mai
Makoto
Mu-12
Naoto
Nine
Noel
Nu-13
Platinum
Rachel
Ragna
Relius
Susano'o
Taokaka
Tsubaki
Valkenhayn
Terumi
System Pages
Mechanics
Application & Advanced Information
Archived Information