| Overview | Combos | Strategy/Counter Strategy | Full Frame Data | Discord | Forums | Videos |
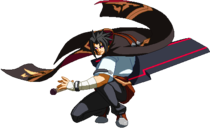
| Lore: | Kagura Mutsuki is a General in the NOL, and the head of the Duodecim's Mutsuki family. He recognizes how dire the state of the world is under the Imperator's rule and seeks to change how the NOL operates from within. |
| Kagura Mutsuki | |
|---|---|
 |
Overdrive greatly increases Kagura's damage potential.
- Removes the limit on stance cancels in D attack strings
- Can dash cancel all C and D attacks except for 3C
- 5DC launches upwards instead of behind
- 6DC slides the opponent across the screen
- 2DC causes untechable knockdown
- [4]1236C gets a additional follow-up attack
- 28D deal more hits and damage
Normal Moves
5A

One of the faster 5As in the game. Can be used as an anti-air, but requires very good spacing to do so
5B

5C

Swing for the fences, shoot for the stars

- Causes wall bounce on Air Counter Hit.
Huge, but slow swing with the sword. Blows opponent away on air hit. On non-CH can confirm into 6DC and 2DC from closer ranges, and 2DB from all ranges.
2A

2B

Hits low. Has better reach than 5B, but slower startup. Better for certain pickups off the ground than 5B.
2C

You're gonna press this button a lot

- Causes ground slide
- Has foot property
- Hitbox fully extended at 18F
Long ranged thrust. Although it can be blocked with a standing or crouching block, it is still a very useful poke against certain moves. Range is similar to 5C, but 3F faster, making it a slightly better tool at midrange. Causes slide. The entire sword does not have a hitbox on the first two active frames, only about the first 1/4th of it. Can be late canceled into 5C on block and hit.
Due to being a mid with a foot property, 2C interacts with other moves in notably good and/or bad ways, depending on which attribute the opponent's attack cares about. 2C will beat Tager's Sledge armor despite being a mid, lose to Azrael's 3C despite being a mid, and lose to Hakumen's 5D despite having the foot property. Still a very good and useful move overall, but needs to be used with care in certain match-ups.
6A

- Forces crouch on hit
- Causes ground bounce on air hit
- Bonus Proration 110%
Kagura's very short-ranged overhead which has him attacking his opponent with his elbow. Links into 3C on counter hit, and can be linked into 5A on normal hit against Tager and Hakumen, and late canceled into [2]8B on everyone. Causes ground bounce on air hit.
6B or 5BB

The only button that truly matters

Significantly buffed in 2.0 with better startup, recovery, active frames, and being stance cancelable. Jump cancelable on block/hit. Has more range than one would expect and leads to great damage, making it an excellent punish and neutral poke. Basic combo staple as most of his C moves only combo off this.
6C

SOURAIYOU

- Launches on hit
- Wall bounces and untechable knockdown on CH
- No head invulnerability
Kagura takes a step forward and swings his sword upwards towards his opponent. On hit, launches the opponent high into the air with a ton of untech time, allowing combos into a wide range of followups, notably 6D~A and 6D~B. On CH, causes wall bounce and hard knockdown, allowing for an easy 6DA or 3C pickup or another 6C for almost fullscreen corner carry. Frames 20 and 21 of this attack show the sword being fully swung and in the air, but do not have an active hitbox. This creates situations where Kagura's sword visually sails cleanly through the opponent, without actually hitting them.
3C

Launcher, decently fast and useful for ground combos. Has a very poor hitbox VS air though, despite its appearance. Goes into a wide range of Drive moves, as well as Crush Trigger only in the corner.
j.A

j.B

- Huge untechable time on air CH.
Air poke that hits below and behind Kagura, very large crossup, good hitbox. Safer jump attack used when the opponent is right below Kagura. Has a ton of untechable time on air CH.
j.C

The sword is probably rubber

- Ground opponent on air hit
Buffed in 2.0 with significantly reduced startup and landing recovery. Kagura does a huge downward swing with his sword while airborne. Good hitbox, good air defensive tool but need to well-spaced. Poor as an air-to-air due to being rather slow with very little reward. Staggers for a long time on CH. The part of the sword directly below and behind Kagura's head does not have a hitbox; only the parts from his head and forward do.
Drive Moves
Stance
5D/2D/6D (air OK)

5D
2D

6D

4D to cancel


| Ground |
|---|
| Air |
| Cancel |
| Air Cancel |
- Earliest cancel into a drive attack is 10F
- Earliest cancel into a drive attack from stance change is 8F
- Earliest cancel into Air Drive attack is 8F
- Air Stance quickly dives to the ground before using a Drive attack
Kagura enters stance on frame 1. Each stance (5D, 2D and 6D) has a maximum of 3 attacks + his super. Any stance can be canceled into another stance quickly. Any stance attack can be canceled into another one from a different stance (5D~A > 2D~A > 6D~A) for a maximum of 3 chains (except during Overdrive), in any order. The chain is reset when a normal is used between drives.
Air version hangs in air while active. Upon drive attack use, Kagura dives to the ground before performing the normal ground version of the Drive. Can be followed up after his command throw and his 2D~A.
You can adjust the direction of the dive by holding 4 (and 3) or 6 (and 1) when activating air Drive attacks.
Dragon Blast
5D~A

Don't make me punch this sword

| Attack |
|---|
| Forward |
| Back |
- Staggers opponent on ground hit.
- On air hit, blows back slightly with wallbounce in corner.
- Fatal Counter and staggers for 43F
- Has Super Armor on frames 7-21 against everything but fast lows.
- Air unblockable
Kagura throws his sword and punches it towards his opponent.
Can be canceled into a forward dash or backdash on hit/block. While it is -3 or -6, Kagura can cancel the last 5F of each dash into Stance.
Dragon's Claw
5D~B

龍戟爪(りゅうげきそう)

- Ground bounces on second hit
- Minimum damage 100%
Short-ranged command grab followed by Kagura doing a mid-air spin kick to his opponent. Canceling into drives will put Kagura in air stance. Both the first and second hits can be canceled into specials.
Dragon Slaughter
5D~C

This is the wheel of fate and it's turning

- Wall splats on CH and wall bounds on regular hit in the corner
- Throws opponent behind Kagura
- Head invuln from frame 1
Kagura swings his sword upwards twice. Huge hitbox and very tight blocksting when it is canceled into 2D~B. The head invulnerability and huge hitbox make it a powerful, but highly situational anti-air. Extremely bad recovery on whiff, so be careful using it at neutral.
Dragon Strike
2D~A

High level IQ, pal-io

- Fatals on CH
- Ground bounces on hit
- Cancels into air stances, will cancel into ground stances if done late in the animation
- Foot attribute invulnerable once Kagura leaves the floor
Kagura jumps from his crouching position and slams his sword to the ground, can be used to beat out low/throw mixups due to being invulnerable to both during much of the startup. Has a long ground bounce on hit, allowing combos into 5DA. Versitile combo tool and fast start-up for an overhead, but punishable on block.
Dragon's Blade
2D~B

Uber? nah brah

- First attack hits low and causes hard knockdown
- Second hit is mid and is emergency techable
Kagura uses his sword to surf and attack the opponent. First attack hits low and allowing followup combos by RCing the first hit. Gives hard knockdown on CH, and can be followed up with other Drives. Standard ender, can be cancelled into a Fireball for oki. In 2.0, launches the opponent higher, making it more advantageous and comboable into C Fafnir.
Dragon's Dual Strike
2D~C

臥竜双破(がりょうそうは)

- Untechable knockdown on CH
- Causes spin state when hitting grounded opponent.
Kagura attacks with an upwards and then downwards strike. First attack hits mid and vacuums and the second hit is a low and hits slightly farther. Has a good hitbox and comes out fairly fast, making this an easy move to use to start drive combos with. Quite safe on block due to the push block of the last hit.
Dragon's Fang
6D~A

龍牙迅(りゅうがじん)

- Fatals on CH
- Ground bounces on hit
- Amazing invuln, can go through DPs or supers
Kagura dashes forward and swings his swords downwards towards the opponent's feet. Hits mid. Startup depends on distance from the opponent. On hit, groundbounces and can be linked into normals without canceling. Has Body attribute invuln for a lengthy portion of the move allowing it to ignore most standing normals, but beware as it still loses to Foot, Head and Projectile attributes moves, which are normally crouching normals, low hits, jumping moves and any projectile.
Dragon's Mirage
6D~B

I said Sike

- Switches sides
Kagura slides through his opponent and attacks them from behind. Crosses up. Typically used as a means of switching sides mid-combo. Has some invuln mid way into the move (some being used loosely), but nothing too amazing.
Sky Dragon's Strike
6D~C

Do you have the balls?

- Blows back opponent on hit
- Armour against projectiles
- Wallbounces on counter hit
- Hitbox fully extended on 20F
Kagura charges his sword forward towards his opponent. Blows back on hit, but can be followed up in corner with various drive moves, notably 2D~C and 2D~B. Very good combo tool and corner carry. Does not hit crouching opponent at max range and does not go fullscreen. Has armour against projectiles. Inexplicably has a hurtbox all around the sword starting at 20F, leading to some very silly looking interactions. Can be low-profiled by many characters, so try to avoid being too predictable with it.
Universal Mechanics
Forward Throw
5/6B+C

- Wall bounces opponents midscreen
- Wall Splats opponents in the corner
Can be followed up with [4]~6A to extend combos midscreen.
Back Throw
4B+C

The same as the forward throw, but in reverse. This can be difficult to follow up if throwing an opponent out of the corner.
Air Throw
j.B+C

- Ground bounces
Fourth hit causes ground bounce, easy to follow up with [4]6A
Counter Assault
When blocking 6A+B
Has the same animation as his 6B. Not stance cancelable. Knocks away, short tech time.
Crush Trigger
5A+B (Chargeable)

- Costs 25% Heat
- Possible to charge
- 180F Heat Gauge cooldown
- Neutral on barrier guard. 40 frame+ spinning knockdown, launch on air hit
Fairly short range Crush Trigger. Can be easily used in corner combos to increase combo damage.
Specials
Dragon Spirit
[4]~6A/B

龍縛旋(りゅうばくせん)

| A |
|---|
| B |
- 45F charge
- A version starts up faster and goes half-stage. B version takes longer to start up and moves slower initially, but rapidly accelerates and goes all the way across the stage, but number of hits varies per distance traveled (From 2 to 6)
Dissipates rapidly after Kagura is hit. You can use the projectile as an okizeme tool. The further the B version travels, the more hits it gets (Min 2, Max 6). Has Vacuum effect, which is negated if the opponent IB barriers. Grants frame disadvantage on A version, good to massive frame advantage on B version if it travels far enough. Can be used for both a combo extender and for okizeme.
Dragon's Ascent
(Fafnir)
[2]~8B/C

Vibe

| B |
|---|
| C |
- 45F charge
- B version is anti-air, C version is reversal
- Can be canceled into Ryuurenbu
- B version has frame 1 head invulnerability
Uppercut, B version has only head invuln and must be barrier blocked in the air, while C version is completely invuln but can be regular blocked in the air. Damage scales well in combos. B version is safe on air block in most situations. C version launches them directly up, and is untechable until knockdown on CH. Ridiculously unsafe on block.
Dragon's Dance
(Kadamos)
[8]~2C

C H E C K

| Normal |
|---|
| Followup |
Overhead. Can be used as a follow-up to Dragon's Ascent. In 2.0, both are untechable and can be followed up at the right heights.
Distortion Drives
Supreme Dragon's Inferno
[4]~41236+C

龍覇・獄焔塵(りゅうは・ごくえんじん)

(Rindo)
| Normal |
|---|
| Overdrive Followup |
- 30F charge
- 180F Heat Gauge cooldown
- Flames appear on 5, 18, 31
- Minimum damage 15%
- No invulnerability whatsoever.
Kagura swings his sword and causes three pillars that travel forward towards his opponent. Projectile. Very fast get-away move and only unsafe on block from very close. Has very poor minimum damage. In OD, the follow up attack has the chance to whiff in the corner if done in a particular spot, so be careful using it there. Do not use this as a reversal in panic situations since it has no invulnerability, use dragon's ascent instead and rapid cancel it if you need to.
The Dragon Lord's Striking Fang
During Stance 28D (air OK)

龍皇・斬牙欧衝(りゅうおう・ざんがおうしょう)

| Ground |
|---|
| Air |
- Air OK
- 180F Heat Gauge cooldown
- Minimum Damage 1100 (1450 OD)
Kagura raises his sword and slams it to the ground, creating a vertical pillar below his opponent. Can be done either on the ground or in the air depending on the stance used. The OD version has the chance to whiff the follow up at max range, but this doesn't usually happen. Has very little to no usefulness as a reversal super, as you need to be in a stance to activate it.
Exceed Accel
Dark Flame of the Bellowing Dragon
ABCD during Overdrive

EPIC GUITAR SOLO

- Does not cost Heat, but immediately ends Overdrive if used.
- Becomes stronger and flashier with Active Flow.
Kagura jumps from his crouching position and slams his sword to the ground. On hit, he slashes the opponent several times before finishing with a black flame pillar. Has the same attack animation as 2DA, but does not have the same hitbox. Puts Kagura in Active Flow if he hasn't already been in it already.
Astral Heat
Black Dragon's Sky-Rending Blade
236236C

Swift death and eye candy for everyone!

Kagura attacks the opponent with two slashes as black and purple lightning courses around his sword. He points his sword toward the sky and a cinematic occurs where his sword emits a large pillar of black energy. There is a zoomed in shot on Kagura's face which pans out as he delivers the final blow by crashing his sword down on the downed opponent. Incredibly easy to combo into from moves such as 3C, and just about any stance move, most notably 2DC.
External References
- Japanese Name: カグラ=ムツキ
- Japanese Wiki
- Japanese BBS
- Arcade Profile Dan Rankings
- Character Video Thread
- Kagura Discord
move and the move Full sections. One is shown on the character page, while the other is shown on the frame data page. Amane Nishiki [★]
 Arakune [★]
 Azrael [★]
 Bang Shishigami [★]
 Bullet [★]
 Carl Clover [★]
 Celica A. Mercury [★]
 Es [★]
 Hakumen [★]
 Hazama [★]
 Hibiki Kohaku [★]
 Iron Tager [★]
 Izanami [★]
 Izayoi [★]
 Jin Kisaragi [★]
 Jubei [★]
 Kagura Mutsuki [★]
 Kokonoe [★]
 Lambda-11 [★]
 Litchi Faye Ling [★]
 Mai Natsume [★]
 Makoto Nanaya [★]
 Mu-12[★]
 Naoto Kurogane [★]
 Nine the Phantom [★]
 Noel Vermillion [★]
 Nu-13 [★]
 Platinum the Trinity [★]
 Rachel Alucard [★]
 Ragna the Bloodedge [★]
 Relius Clover [★]
 Susano'o [★]
 Taokaka [★]
 Tsubaki Yayoi[★]
 Valkenhayn R. Hellsing [★]
 Yuuki Terumi [★]
Click [★] for character's full frame data
• HUD •
Controls •
Frame Data & System Data •
Patch Notes •
• Movement/Canceling •
Offense •
Defense •
Damage/Combo •
Attack Attributes •
Gauges •
Misc •