
Stab
< BBCF
Overview
Lambda-11 (stylized as ᴧ-No.11-) is a hybrid character with tools split between rushdown, zoning and light setplay while having some of the best corner carry in the game. Lambda's main goal is to carry her opponent to the corner and force them into strong okizeme setups — She achieves this through Gravity Seed and Act Parcer Tri: Cavalier, which allow her to do corner-to-corners with ease while achieving consistently strong damage. Lambda's neutral is versatile: she can either play a more passive zoning style or commit more to a rushdown approach. Her Drive has high recovery on whiff, however, and players will need to be aware of how far they are from the corner at all times to adjust their routes on the fly. A flexible mindset and good understanding of match flow will take any Lambda player a long way.
Lambda's Drive let's her summon projectiles which can be pointed at different angles. There is an automatic follow up hit if it connects with the opponent. Unlike other characters' projectiles, Lambda can gatling hers into other moves on block and hit.
Sword Summoner EX has no limit on the amount of times it can be used, so a string like 2D > 6D > 5D > 4D can be perfomed, and it's possible to go into specials and then summon more later in a combo. However, they can't reverse beat with each other, so a string like 5D > 4D > 5D is not possible.
It's a good tool for controlling screen space since it is much faster than most projectiles that other characters' have and can lead to pressure on block, but all of the summons have very high recovery, so caution is needed in using them.Lambda's swords grow larger in size, the second attack of each Drive deals double damage, and become Level 5 attacks (increasing their P2 and all forms of stun.) Additionally, aerial swords will launch grounded opponents on normal hit.
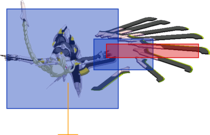
Her OD gives many new conversions that significantly increase her damage without needing to spend Gravity Seed.
- Gravity Seed recharges at a quicker rate.
- Sickle Storm summons two wheels that travel in opposite directions.
- Spike Chaser travels the entire stage.
- Crescent Saber ground bounces.
- Exiga Nail has its recovery reduced, to the point that Lambda recovers in midair.
- Legacy Edge fires more projectiles.
- Calamity Sword tracks the opponent horizontally.
 | |
| Health | |
| 10,500 | |
| Prejump | |
| 4F | |
| Backdash | |
| 25F (1~7F Inv All) | |
| Fastest Attack | |
| Reversals | |
| Fatal Starters | |
Normal Moves
5A


Frames 6-8.
- Lambda 5A Hitbox 9-11.png
Frames 9-11.

A jab that's disjointed and has lengthy active frames. It hits most of the cast crouching but whiffs on 1/3rd. 5A is decent for stagger and can be used an Anti-Air, it has a better hitbox than 6A, but it has less reward and no invul.
- Jump-cancelable on hit or block.
| Characters 5A Hits While Crouching | ||
|---|---|---|
| Crouch | Crouching Prox. Guard | Does Not Hit any Crouch |
|
||
5B

Great reward.


Watch out for low profiles.

One of her best starters. This easily nets 4.0k to 4.7k on any gravity confirm and still hurts without it. It's okay for stagger. 5B isn't as safe from ODR as 2B, however, so it's not as great for meaty-ing.
- Jump-cancelable on hit or block.
5C

"Go Away"
This is not a poke. Don't attempt to poke with this.

Another great starter. The range on this is good and disjointed but it's only used in pressure and combos because startup is slow and the recovery long. It's relatively safe from ODR, but if they OD before the first sword hits then being punished is unavoidable.
- Counts as a projectile.
2A

5A but shorter


Frames 7-7.

Frames 8-10.


A crouching jab used for poking out of pressure and setting up TRMs. It's slightly disjointed but a weak stagger tool because of its unusual minus frames for a jab. It can low profile some air normals.
2B

Your main low.


Your main low.

A good poke that's her best low starter. It can be a strong stagger tool and reverse beats with 6A so it's a staple in pressure. The reward off this button is very high with Gravity scoring 4.2k from midscreen. Gravity-less routes are weaker but it's still possible to get over 3k while carrying them to the corner with IAD routes.
The low recovery on whiff makes it nice for catching rolls and staying safe from ODR.
2C

Can hit crossup.

Slower, less rewarding Anti-Air than 6A, the trade-off being more head invul and better hitbox, although her hurtbox rises a bit before invul.
Being the only C normal that's jump cancellable on block makes it a good option in pressure, but it's the worst button to get OD'd through, as it gives your opponent a crouch confirm.
6A

Good Anti-Air.


But not the best of hitboxes.

Your main close range Anti-Air. Early invul and fast startup, on top of granting amazing reward on hit, makes it a great reactionary button, the fast recovery means being less vulnerable to baits.
However, 6A has poor vertical reach that makes it easier to clash with or be beaten by disjointed jump-ins, it's also easier to get crossed up in some situations, especially in the corner.
6A is a good pressure tool as its reverse beats with 5B/2B and ability to jump-cancel gives Lambda more options in pressure.
6B

This is an overhead and it makes you angry.


One of Lambda's two overhead normals. It's quicker than 4D, but has no gatlings left if it's blocked. While not great damage, IAD routes are consistent and converting with tk.214D routes nets more reward. It's used in crouch confirms to launch when the opponent is too far for gravity, as 5C 6B always works except from short starters like 5A/2A.
6B can go over low-hitting buttons like ![]() Bang's 3C
Bang's 3C![]() GuardLowStartup15Recovery21Advantage-9, but this isn't the main purpose of the move as it has no Foot invul. Despite what the animation suggests, Lambda is not considered airborne and thus can be thrown.
GuardLowStartup15Recovery21Advantage-9, but this isn't the main purpose of the move as it has no Foot invul. Despite what the animation suggests, Lambda is not considered airborne and thus can be thrown.
- Untechable on CH.
- 110% Bonus Proration.
6C

Sets up 214D and not much else.

Purely combo filler. The long startup, recovery, and few gatlings left on block make this a weak button for neutral and pressure. There's no true blockstrings into 6C except if 5C were Barrier Blocked, so it can frametrap on occasion.
- Fatal Counter.
3C

Low sweep.

Sweep. It's a multi-hit low with great horizontal range, but limited gatlings on block. In pressure, 3C > 236B has a gap that can be reversal'd — Cancelling 3C into 214A or 22D will beat most reversals.
- Only the first 3 hits are lows.
j.A

Air jab.


Air jab.

Air jab. Mostly used by gatling into from a different air attack to keep Lambda's opponent in blockstun or to set up air TRMs as it's self-cancellable.
- Not jump-cancellable.
j.B

Overhead

- Lambda jB Hurtbox.png
This is can be used for jumping in and when the opponent is locked down by 236D. It reverse beats j.A which can be nice for pressuing opponents as they land. It's used for safejump setups after a Tri KD; 236B > 66 > falling jB will beat even 7f reversals.
Except on shorter characters like ![]() ES, it's possible to set up fuzzy jumps with this if you have 50 meter for RC.
ES, it's possible to set up fuzzy jumps with this if you have 50 meter for RC.
j.C

Cross-ups.


Frames 9-10.
Frames 13-14.

Frames 15-16.

Frames 19-20.


j.C is a cecent air-to-air, but isn't as disjointed as j.B. It can act as a mixup tool in conjuction with j.2C(w) and j.214D, noted more below.
- Hitbox doesn't extend until frame 11.
- Last 3 hits can land as cross-ups.
j.2C

There's no hitbox behind Lambda, despite the animation.

j.2C has a decent hitbox, but it's on the slow side, so j.B is used more for air-to-airs and jump-ins, although j.2C is great for jailing opponents to the ground as it makes Lambda fall faster while having decent blockstun. This "fast-fall" is also good for mixups as j.C(1) j.2C(whiff) 2B is a true blockstring while and 50/50 when used with j.B j.C(1) > j.214D.
The untech time on air CH is long, so Lambda can land back on the ground and convert with normals to land them into the corner.
- Only the first hit of the move is an overhead, not the first hit to connect. It's possible to jump in with just mids.
Drive Moves
- All Drives will followup into the second hit unless RC'd or whiffed.
- All Drives except 4D are Projectile Level 2 and decrease to Projectile Level 1 after a set amount of active frames.
- Always Projectile Level 2 in OD.
- All Drives are Attack Level 4 and become Attack Level 5 in OD.
- All Drives have a deadzone in front of her where they have no hitbox.
- Air Drives will launch the opponent on CH or OD.
- None of them can be jump-cancelled on block.
5D

Horizontal sword

The most common summon. Used to stop the opponent running at Lambda and to punish things from fullscreen. 5D into 236B is a true blockstring when not too far, and becomes a frametrap when further out or delayed. In OD, it can link into Cavalier; on CH, 5D > 236A > 5C is possible.
Also in OD, 5D becomes +2 on block, so going into 4D becomes gapless and safe from reversals, but it's not generally enough to get resets from considering the distance.
- Projectile Level 2 for the first 6 active frames; always Projectile Level 2 in OD.
- Crumple stuns on CH but not on OD CH.
2D

70º angle sword

This summon goes steeply upwards and is a good Anti-Air against characters who like to go high above Lambda, like ![]() Mu and
Mu and ![]() Rachel. This can be followed up with either 236B~6C or IAD j.B j.C 6A routes to land them in the corner.
Rachel. This can be followed up with either 236B~6C or IAD j.B j.C 6A routes to land them in the corner.
The second hit pushes the opponent downwards, making it possible score a soft KD from it at the end of combos.
- Projectile Level 2 for the first 5 active frames; always Projectile Level 2 in OD.
6D

30° angle sword. The pinnacle of Lambda's range.

Lambda's furthest reaching summon. It's a long-range anti-air and good at catching people trying to jump out of pressure. It can hit tall characters like ![]() Tager while they are standing.
Tager while they are standing.
Long range confirms can be converted with either other swords like 4D or Cavalier.
- Projectile Level 2 for the first 2 active frames; always Projectile Level 2 in OD.
4D

Make nerds complain about "off screen overheads"

A summon that tracks the opponent and appears behind them. This overhead is slower than 6B, but Lambda can still pressure if it's blocked. In the corner, 4D becomes 'invisible', making it nasty if the opponent isn't paying attention to Lambda's pose — But it is still reactable at 27f startup. The opponent can even react with a dash straight towards Lambda if done raw.
Be careful, as 5D > 4D has a gap that's vulnerable against fullscreen supers like Carnage Scissors GuardAllStartup9+(40 Flash)+4~12Recovery58Advantage-43 [-40] — OD 5D > 4D is gapless on normal block, however.
- Forces crouching on hit.
- 110% Bonus Proration.
j.D

Aerial 30° angle sword

One of Lambda's furthest reaching drives, going almost fullscreen and more distance than 5D. It covers a decent angle and pre-emptively catches opponents trying to air dash. But it can't be converted from at long range and can't be jump-cancelled, so this button is medium risk for low reward as Lambda only get a soft KD at most.
- Projectile Level 2 for the first 2 active frames; always Projectile Level 2 in OD.
- Plus on block when done low to the ground.
j.2D

Aerial -30° angle sword

Probably the least used summon. The angle is weak compared to other Drives and the launch on CH can be difficult to convert, so it's restricted to combo filler. Can sometimes be used to bait Anti-Airs.
- Projectile Level 2 for the first 2 active frames; always Projectile Level 2 in OD.
j.6D

Aerial -15° angle sword

An air-to-ground sword, but it's not great on block and can't be converted on normal hit without OD. On CH, the second hit vacuums the opponent, so it's easy to convert with 665B. Good for catching people running at you after an IAD/Jump back.
- Projectile Level 2 for the first 2 active frames; always Projectile Level 2 in OD.
Universal Mechanics
Ground Throw
5B+C 4B+C

No results
Lambda grabs the opponent and impales them with her swords. Launches the opponent allowing for a follow up combo.
Back Throw, aside from switching sides, is virtually identical to her normal Throw.
- 100% minimum damage.
Air Throw
j.B+C

No results
Lambda grabs the opponent and crushes them with her knees. Causes the opponent to bounce into the air upon making contact with the ground, allowing for a combo.
- 100% minimum damage.
Counter Assault
6A+B while Blocking
This WILL whiff
No results
Triggers the 5B animation. It is invincible, but can easily be low-profiled or out-ranged. Try to use this sparingly as it's really easy to bait.
- Invul on frames 1-20.*180F Heat Gauge cooldown.
Crush Trigger
5A+B (Chargeable)

"Barrier Smash"

No resultsNo results
Breaks the opponent's Guard on normal block, leading to a pretty decent reward when charged. For combos, it can be done off 3C to corner carry when gravity's not available.
- Can be charged.
Specials
Spike Chaser
214D

"Systems Activate"
Great corner okizeme.

The main tool for okizeme, Spike Chaser can be used in combos and taking up space in neutral too. It's only minus on the first spike, becoming increasingly plus the further out it's blocked — When spaced, buttons after will be true blockstrings and catch fuzzy jumps, so the opponent has to sit still and guess the incoming mixup.
Spike Chaser covers every wakeup option (forward rolls; reversals; no tech; quick rise etc...) while being very plus and completely unpunishable if spaced right, making it a pretty insane oki option. Always go for this whenever possible. It can be 'looped' by doing combos that end in this one after another, usually by sacrificing some damage in the process.
There is a very small window to delay tech through, but this is risky as 214D is active forever, is a big damage starter (even without Gravity available), and can be beaten by the Lambda player varying their input timing. Lambda is also still safe and can retreat to neutral on successful delay tech.
- Travels the entire screen in OD.
- Safe from every reversal in the game if spaced correctly.
Sickle Storm
236D

"Opening Rift."
Pizza Cutter. Does everything.

Besides combo filler, 236D is used to lockdown the opponent as it's very plus on block, netting Lambda a mixup. CAs can be baited with dash break due to multi-hits and it's active until it disappears from the screen, so it can catch poorly timed bursts and ODs. The chip damage from this move builds up to a decent amount if blocked repeatedly.
With that said, chaining into this move is never a true blockstring; thus, it can be jumped or fullscreen super'd on reaction. The opponent can try delay teching it on wakeup, but if they get pedictable, run up 2B could be used instead for a blue beat OTG.
- Lambda summons two wheels in OD.
- Hits four times.
Crescent Saber
j.214D

"Altering State"

Crescent Saber's main function is to score knockdowns from air combos. It's also used mid-combo for optimal 6A and 6B confirms. For mixups, it's Lambda's second fastest overhead and has quite good reward with meter to RC. It's active for a long time and hits behind Lambda, so it can cross up.
To pickup on non-OD hits, an RC j.2C will be needed if high in the air, or just 2B / 3C if TK'd properly.
- OD version bounces which allows for easier pickups.
- Hits crouchers on frame 17. If TK'd, Crescent Saber is a 22f overhead that's -13 on block.
Gravity Seed
214A/B/C

"Curbing Time-Space"
Your most important tool.


This move summons a field which launches the opponent on hit and drags them towards it. The field still appears on whiff and reduces the opponent's movement to 30% of their normal speed — This includes momentum from specials and teleport dashes like ![]() Azrael,
Azrael, ![]() Nine and
Nine and ![]() Arakune's. It does not slow down projectiles nor Ignis / Nirvana, however.
Arakune's. It does not slow down projectiles nor Ignis / Nirvana, however.
It has a cooldown but only takes up a 1/3 of the gauge on whiff.
- Fatal Counter.
- Recharge becomes faster in OD.
214A
This summons the field next to Lambda. It's used for corner combos and okizeme after a 6C KD, as the spacing cripples their mobility while keeping Lambda outside the range of reversals. This is very strong against characters without a normal dash.
214B
This version summons the field in the middle of the screen and is used most in neutral. It creates a wall so characters can't run at Lambda for free, making it safer to throw out Swords in neutral. But this move really shines when used in combos, as it gives access to high damage routes with its high P2 while doing great corner carry. The recharge flows back uninterruped during 5C, 236D and 214D, so it's always worth spending this if possible.
214C
This version summons the field at the opposite end of the screen and is used only in combos. It pulls the opponent much further out than the other two, so it's used for corner-to-corners where 214B wouldn't travel enough. This can also be used midscreen to ensure they'll wallsplat after 236C.
Act Parcer Zwei
236A

"Shift"

A really fast command dash. Zwei doesn't have invul but it can pass through moves with proximity hitboxes and wakeup reversals, as Lambda phases through them before they become active — It can then cancel into 236B to attempt to start pressure or into 236C for a Fatal Counter if used as a bait.
236A can be done at almost any point on her pressure for jumpscare Throws, not safe for pressure resets, but can be made conditionable through 22D to bait any button attempt and 236B to catch jump startup.
Once conditioned, it's possible to go for pressure resets and tick throws with 236A > 2A > Throw or 236A > 9 jump > Throw if they begin to jump out, etc...
- Shares almost the same animation as 236B between frames 1-11
- Passes through the opponent during frames 8-13.
- Cancellable into Throw, 236B, 236C and 22D
Act Parcer Tri
236B

"Rapid"

Tri is the first part of the rekka. It travels a good distance and is a true blockstring if done close range after a Drive like 5D. In pressure, it can be canceled into either Blade or Sparda for a high-low mixup. The cancel window is very long, so the followups can be delayed to frametrap, and then once the opponent becomes afraid press buttons, you can pressure reset by going into normals. This is suceptible to the same problems as other Rekkas, however, so don't get predictable.
Tri being able to whiff cancel makes it very safe against ODR, going into 22D will outright beat EAs and buttons pressed after the flash, and for quite high reward.
- Shares almost the same animation as 236A between frames 1-11
Act Parcer Tri: Sparda
6A (during 236B)

"Hazard."

Sparda is Lambda's fastest overhead, clocking at 21f, and it's the most rewarding one when used with Gravity — Getting roughly 4k or over plus a Spike Chaser setup. Generally, a CH or RC will be needed midscreen, but it's possible to instantly cancel Tri into this to get the spacing for meterless conversions. In the corner, it's easy to convert with double side-swap routes which are stable.
It's good to throw this out to add to the opponent's mental stack and help enforce the threat of Blade in mixups. As with most things in this game, don't get too carried away as it is punishable on block.
Lambda's hurtbox goes high in the air, giving the move the ability to low crush butttons; there's no Foot invul, however, so it can occasionally trade with some characters' 2As.
- Hard-coded not to hit crossup on standing opponents (it can hit crossup on crouching ones).
- Lambda side-switches on both hit and block.
Act Parcer Tri: Blade
6B (during 236B)

"Light."
Fullscreen low.


Frames 11-13.

Frames 14-16.


Low option from Tri. It's a pretty fast sweep that's good at catching people who expect 4D. Lambda slightly low-profiles while having quite a disjointed hitbox, so this can be a decent thing to throw out in neutral from time to time. It is safe on normal block, but can be punished on IB, so adjusting the timing and ending pressure in 22D as well are important.
At midscreen, Blade should be RC'd as the reward is high, but in the corner or inside Gravity Seed it can be converted without meter.
- The range of Blade varies with the time 236B was cancelled from; max range is fullscreen.
Act Parcer Tri: Cavalier
236C (or 6C during 236B)

"Mirror."
Corner carries from Miami to Japan


Frames 30-31.

Frames 32-33.


Cavalier is a staple in combos and what makes Lambda's corner carry strong as it has massive blowback while wallbouncing in midscreen loops. The high base damage and Fatal property make it her strongest starter as well.
The vertical hitbox goes much higher than what the animation suggests, so it can be used as a hard read anti-air for great reward. It's not used in either pressure nor frameteraps, but it is safe on normal block.
- Fatal Counter.
- Wallbounces midscreen.
- Wallsticks in the corner.
Exiga Nail
22D

"Fading."
Situational reversal
Also good for baits


Lamba's meterless reversal. It can be hard-to-use as its invincibility ends before becoming active; if timed right, however, Exiga Nail can beat anything shorter than 8 active frames. It also works if Lambda moves out of an attack's hitbox in time, such as those of many crouching buttons.
It's very susceptible to meaties with long active frames, but leads to great reward on CH as it crumple stuns for easy conversions. It's safe on block and even IB, so this can be used instead of Blade for a safe pressure ender. It's also good for baiting other reversals and OD/CA when used mid-pressure. Be wary of using this to escape the corner, as it can whiff on everyone point blank except ![]() Tager and
Tager and ![]() Valkenhayn in wolf form.
Valkenhayn in wolf form.
- Frame advantage is for ground block. It's -3 at the closest possible distance, but goes up to 0 at max spacing.
- Reduced recovery in OD — Lambda can perform actions midair.
- Needs CH or air hit to convert without meter.
Distortion Drives
Legacy Edge
236236D

"Annihilate."
If you really need to win neutral.

A super that can be used as a fullscreen punish and and winning neutral against some characters for the pricey cost of 50 meter. If they get stuck blocking this on the ground and Lambda is close enough, this enables a variety of mixups: empty jump 2B, late airdash jB, IAD jC for a crossup, etc...
The downsides are that if Lambda is hit during the 9 frames after the superflash, the meter will be spent but the swords won't appear; the opponent can chicken block and mash 4 to IB all the projectiles — giving them a lot of meter while being safe from mixups; not all of the projectiles will land if they are crouching; and, against opponents on the other side of the screen, Lambda get less time to capitalize on the frame advantage. Furthermore, while all the projectiles are level 2, the complete lack of invul means Legacy Edge can't be used as an anti-zoning tool in situations where it would be useful (such as using it against Sparkbolt GuardAllStartup12RecoveryTotal: 47Advantage-1 or Eternal Coils
 GuardAllStartup1+(30 Flash)+15RecoveryTotal 70Advantage-46).
For what it's worth, it's a pretty good starter for combos (particularly the OD version). It's also neat for specific MU interactions like blowing up ![]() Izanami's Shield of Dreams
Izanami's Shield of Dreams GuardStartupRecovery46Advantage-.
- Summons a portal that shoots forth 19 projectiles and 29 projectiles in OD.
- Minimum damage: 32*19 (OD: 32*29).
Calamity Sword
632146D (air OK)

"Thunder of Heaven."
Reversal and combo ender

Metered reversal. It hits overhead and is a good combo ender for the minimal damage. It can combo off CH (which it will usually be), leading to big damage and corner-to-corner combos. In OD, Calamity Sword becomes very threatening in neutral, as it can be used for fullscreen punishes if the opponent does anything committal.
- Tracks the opponent fullscreen in OD.
- Minimum damage: 960 (OD: 1260).
Exceed Accel
Duo Cultus
A+B+C+D during Overdrive


Putting Nu's Supra Rage to shame


No results
This is used either as a reversal in OD or as a combo ender. The KD from Duo Cultus doesn't allow for much more than setting up Gravity Seed midscreen, so it's essentially a reset to neutral which may or may not be a good thing depending on the MU.
- Behaves the same as every other Exceed Accel.
- Minimum Damage: 303 (AF: 641).
Astral Heat
Sword of Destruction
214214D

Hug.exe

Lambda grabs the opponent and plunges a mighty sword down upon them. It's pretty easy to combo into from 5C and 3C on ground hit, 6A and 5D on air hit, and 236C after a wallsplat.
It has no startup invul, so it can't be used as a reversal unlike most Astrals.
Colors
 |
 |
 |
 |
 |
 |
 |
 |
 |
 |
 |
 |
 |
 |
 |
 |
 |
 |
 |
 |
 |
 |
 |
 |
External References
- Kasha's Guide to Lambda
- Notes by Taihenna
- Japanese Name: ラムダ·イレブン
- Japanese Wiki
- Japanese BBS
- Arcade Profile Dan Rankings
- Color Palettes on https://blazblue.wiki
To edit frame data, edit values in BBCF/Lambda-11/Data.
 Amane Nishiki [★]
 Arakune [★]
 Azrael [★]
 Bang Shishigami [★]
 Bullet [★]
 Carl Clover [★]
 Celica A. Mercury [★]
 Es [★]
 Hakumen [★]
 Hazama [★]
 Hibiki Kohaku [★]
 Iron Tager [★]
 Izanami [★]
 Izayoi [★]
 Jin Kisaragi [★]
 Jubei [★]
 Kagura Mutsuki [★]
 Kokonoe [★]
 Lambda-11 [★]
 Litchi Faye Ling [★]
 Mai Natsume [★]
 Makoto Nanaya [★]
 Mu-12[★]
 Naoto Kurogane [★]
 Nine the Phantom [★]
 Noel Vermillion [★]
 Nu-13 [★]
 Platinum the Trinity [★]
 Rachel Alucard [★]
 Ragna the Bloodedge [★]
 Relius Clover [★]
 Susano'o [★]
 Taokaka [★]
 Tsubaki Yayoi[★]
 Valkenhayn R. Hellsing [★]
 Yuuki Terumi [★]
Click [★] for character's full frame data
Essentials
• HUD •
Controls •
FAQ •
The Basics
• Movement/Canceling •
Offense •
Defense •
Gauges •
Universal Strategy •
Detailed & Advanced Information
• Damage/Combo •
Attack Attributes •
Frame Data & System Data •
Misc •
Archived Information
• Patch Notes • Tier Lists •
- Active Flow
- Advanced Input
- Attack Attributes
- Attack Level
- Astral Heat
- Auto Heat Gain
- Burst
- Barrier Block
- Barrier Gauge
- Bonus Proration
- Clash
- Combo Rate
- Counter Assault
- Counter Hit
- Counter Hit Carry
- Crush Trigger
- Danger State
- Distortion Drive
- Exceed Accel
- Fatal Counter
- Guard Cancel Overdrive
- Guard Crush
- Guard Bonus
- Hard Knockdown
- Heat Gauge Cooldown
- Instant Barrier
- Instant Block
- Negative Penalty
- Overdrive
- Overdrive Cancel
- Purple Throw
- P1, P2
- Rapid Cancel
- Same Move Proration (SMP)
- Starter Rating
- Super Flash Buffer
- Throw Reject Miss (TRM)
- Ukemi/Tech (Air)
- Ukemi/Roll/Emergency Tech
- Untechable State