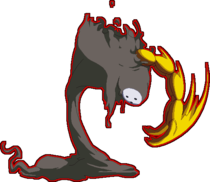
| Arakune |
|---|
 |
|
Overview
A Sector Seven scientist turned blob after insane exposure to the boundary, now with thousands of bees inside of him, he haunts the city of Kagutsuchi in search of the Azure. In terms of Gameplay, Arakune is a very awkward character with awkward attacks, awkward movement, and an awkward playstyle. The main goal is to put your opponent in a "Cursed" State and deal big damage along with extremely safe block strings, cross ups, mix ups and even an unblocklable here and there. This is the offset to a very weak character without curse with lackluster pressure and mix up, and mediocre and predictable defensive options.
Drive: Zero Vector
Zero Vector is the system that calculates curse meter, how much is needed to curse an opponent, what attacks inflict how much curse meter (more details on this below), how long curse last, how much is taken per bug and the cap of meter gain after curse ends. During curse, Arakune can summon a variety of bugs that helps his pressure, comboability and damage. Curse lasts for roughly 30 seconds with no summons. Each bug has a cooldown before it can be summoned again (more details on this below) and Arakune cannot summon bugs when he is taking damage or in blockstun (but he can summon bugs in the few frames that he is not in blockstun in usual blockstrings). When the curse gauge depletes while bugs are hitting the opponent, any attempt to rebuild curse meter will be capped at 50%. There is no cap if bugs hit the opponent after the gauge is already depleted.
Overdrive: Crimson Depths
All drive attacks (and specials that build curse meter) will add 100% curse on hit, 50% on block during pre-curse. If Overdrive is used during curse, the period that the opponent is cursed will be extended for the duration that Overdrive lasts. Arakune's distortion drives will also apply more hits and do more damage.
Some general information on Overdrive (OD) as it is a new system mechanic in Chrono Phantasma:
- You activate OD by pressing A+B+C+D when you are not blocking or taking damage, as OD and bursts use the same input.
- The OD gauge becomes 3/4 depleted after being used but it recharges with time. How much has been recharged will carry over to the next round.
- Since the gauge is used for both OD and bursts, if you use OD you can not burst until the gauge is full again and vice versa (if you burst you can not use OD).
- The lower your health, the longer OD will last and the match timer will also freeze while OD is active.
Pros/Strengths:
- Very mobile in the air, with good use of his air dashes.
- High damage, pressure, keep away,and oki during curse.
- Good pokes with safe jump cancels.
- Unpredictable thanks to Invisibility and Fake-outs.
Cons/Weaknesses:
- Below-average health.
- Limited movement options on the ground.
- Lack of meterless defensive options.
- Low combo damage without curse.
- Lack of reliable oki without curse.
External References:
- Japanese Name: アラクネ
- Japanese Wiki
- Japanese BBS
- Arcade Profile Dan Rankings
- Character Video Thread
Move List
Normal Moves
5A

Standard poke. Hit Crouchers. Good for it's range.

| Damage | Cancel | Guard | Startup | Active | Recovery | Frame Adv | Attribute | Invul | Hitbox |
|---|---|---|---|---|---|---|---|---|---|
| 300 | CSOJR | All | 6 | 3 | 12 | -3 | B | - | Click! |
Standard ground poke, easy to confirm, jump cancellable, goes into a few other attacks, notably his rekka 6B. Simply put, Arakune best ground poke. Cancels into itself 3 times.
The main idea of using Arakune's 5A is to confirm into 6B to get curse meter or to pressure your opponent enough so you can jump back or try to continue pressure. There are better 5A's out there, but it's certainly not a bad move. The lack of a quick dash makes it hard to follow up in max range on hit or block.
5B

Combo filler, really

| Damage | Cancel | Guard | Startup | Active | Recovery | Frame Adv | Attribute | Invul | Hitbox |
|---|---|---|---|---|---|---|---|---|---|
| 300x3 | SO(J)R | HL | 11 | 2, 3, 3 | 12 | +2 | B | - | Click! |
Basically pre-curse combo filler. Due to it's speed, it's not very useful for anything else. You could use it as an emergency anti air, but it's highly unrecommended. It's good for pressure if your opponent isn't barrier blocking since it's +2, and it gatlings into 5A, but since most people barrier block Arakune (because it's so effective, seriously), it's a rare quality to luxuriate in.
No use during curse.
5C

Standard Anti Air, not a very good one though.

| Damage | Cancel | Guard | Startup | Active | Recovery | Frame Adv | Attribute | Invul | Hitbox |
|---|---|---|---|---|---|---|---|---|---|
| 800 | SOJR | HL | 23 | 3 | 18 | -2 | B | 4-25 Head | Click! |
- 4-25H Invul
Arakune's primary anti air, but because of it's speed and hitbox it's easy to see coming and/or cross up because the jump in was too deep. It will only really hit if you catch your opponent being reckless, or rather, it will only really hit if the circumstance is in your favor, because 5C is so slow, using it as an anti air is more of a yomi thing than reaction. Few characters have little to no answer to Arakune's 5C, that said you're usually better off evading air approaches or blocking them like a man, and in few cases, you might be better of using 2B. It has better use as combo filler in curse combos.
2A

Funky Attack, namely used now for combo filler.

2B

Another Funky move, but not as funky.

| Damage | Cancel | Guard | Startup | Active | Recovery | Frame Adv | Attribute | Invul | Hitbox |
|---|---|---|---|---|---|---|---|---|---|
| 460 | CSOR | L | 11 | 3 | 10 | +2 | F | - | Click! |
The move no one really sees coming since it's not very useful. 2B has it's rare uses of low profiling some normals and being a anti air on some characters/air attacks. It also gatlings from 6A, making an air tight blockstring, however with barrier blocking, it's pretty moot. It cancels into itself infinitely on hit, block or whiff. Looks pretty funny.
During curse it's become very dangerous. It's hard to see with bugs everywhere so it compliments his mix up and leads into big damage.
2C

The infamous shark.

| Damage | Cancel | Guard | Startup | Active | Recovery | Frame Adv | Attribute | Invul | Hitbox |
|---|---|---|---|---|---|---|---|---|---|
| 240x5 | R | L, HLx4 | 13 | 9, 6, 9, 9, 3 | 16 | -9 (0 if spaced) | F | - | Click! |
- Frame advantage is ±0 if blocked on active F10~end
- Max of 5 hits
Arakune's 2C has decent abare quality, but try your hardest to make sure that it's never blocked. Gatling into 6D to optimize this move. During curse is when this move shines. A 2C starter will deal the most damage in any curse combo, and combined with the j.C starter (which is the runner up), you have a high/low mix up that scares everyone. 2C is also a staple tool in setting up Arakune's unblockable reset.
6A
Overhead, not a bad one in fact.

| Damage | Cancel | Guard | Startup | Active | Recovery | Frame Adv | Attribute | Invul | Hitbox |
|---|---|---|---|---|---|---|---|---|---|
| 600 | SOJR | H | 23 | 2 | 15 | 0 | B | - | Click! |
Primary Overhead, it's even on block and jump cancellable. The only downside is that it's one of the slower standard speed overheads. Easy to stuff with mashing. This, like many other overheads in BB, requires you to condition your opponent to block, which is tricky when using Arakune in some cases. Plus, it's his only practical overhead pre-curse, so after a while, it's easy to recognize and block.
It gets even better during curse, as it goes into decent damage and is a part of his mix up in general. It can also go into a double overhead situation with his j.C.
6B

PELVIC THRUST.

| Damage | Cancel | Guard | Startup | Active | Recovery | Frame Adv | Attribute | Invul | Hitbox | |
|---|---|---|---|---|---|---|---|---|---|---|
| 5a/6a > 6b | 500 | SO(J)R | HL | 6 | 2 | 25 | -10 | B | - | Click! |
| standalone 6b | 500 | SOJR | HL | 10 | 2 | 25 | -10 | B | - | Click! |
- Fatal Counter
Pre-curse combo staple, comes after 5A for curse meter, it gatlings from 6A as well for combo variety or corner carry. It has some mix up potential during curse when used correctly, and can also push the opponent into D bug during a combo if they're too far. It's mostly positioning.
Standalone verison is also a Fatal Counter.
4B

Standing low.

| Damage | Cancel | Guard | Startup | Active | Recovery | Frame Adv | Attribute | Invul | Hitbox |
|---|---|---|---|---|---|---|---|---|---|
| 600 | SOJR | L | 19 | 3 | 21 | -7 | F | - | Click! |
One of the least used attacks in Arakune's arsenal. It's not too useful pre-curse other than to troll. It's jump cancellable and hard to see coming since it's a standing low.
During curse it's scary, because it's a standing low. Goes into decent damage, rare usage so it's hard to see coming. Nothing too special about it.
6C

Impractical pre-curse overhead. Combo Staple in Curse.

6C > 5C

Follow up #1 from 6C. Fruitful for it's cross up reset, not too good for anything else other than combo filler.

| Damage | Cancel | Guard | Startup | Active | Recovery | Frame Adv | Attribute | Invul | Hitbox |
|---|---|---|---|---|---|---|---|---|---|
| 1000 | R | HL | 21 | 4 | 32 | -17 | B | - | Click! |
- Airborne F21-24
The first rekka of his 6C, in curse, when 6C is done point blank on a emergency tech, this attack will cross up and reset the opponent, other than this little tidbit, it simply combo filler.
Leads into good damage if you can land it stand alone though.
6C > 5C > 2C
Follow up #2 from 6C. Combo filler. Nothing more.

3C

Don't use this move unless you are 100% sure it will hit (or trolling).

| Damage | Cancel | Guard | Startup | Active | Recovery | Frame Adv | Attribute | Invul | Hitbox |
|---|---|---|---|---|---|---|---|---|---|
| 800 | SOR | L | 26 | 3 | 37 | -21 | F | 13-26 All | Click! |
Was once barely useful, now auto-corrects and is a combo stable. Often comboed into from 5D for knockdown, or to be continued by using crush trigger and going into a normal 6B combo for curse.
j.A

Pretty good air to air

j.B

Arakune's most valuable attack pre-curse.

| Damage | Cancel | Guard | Startup | Active | Recovery | Frame Adv | Attribute | Invul | Hitbox |
|---|---|---|---|---|---|---|---|---|---|
| 180x5 | SOR | HA | 10 | 3x5 | 21 | - | H | - | Click! |
Arakune best move precurse, j.B is his best offensive method after a jump or air dash, a good air to ground in general, can lead into any BnB Arakune has and is also small combo filler for a few of his air combos. You're not playing Arakune right if you're not massively overusing j.B in some way. The proper usage of it is to air dash, hold 4, and press j.B (also known as j.4B). Although that technique can be done with any air command that doesn't offer it's own trajectory, j.B is the most practical in neutral. As awesome as it is pre-curse, it has almost no use during curse, as j.C and bugs will be of better use for more damaging combos and pressure.
j.C

Combo filler pre-curse, high damage starter during curse.

| Damage | Cancel | Guard | Startup | Active | Recovery | Frame Adv | Attribute | Invul | Hitbox |
|---|---|---|---|---|---|---|---|---|---|
| 700 | SOR | HA | 12 | 2 | 20 | - | H | - | Click! |
- Arakune jumps on hit or block
- Jump direction can be selected forward, straight up or backwards depending on direction inputs
- Fatal Counter
J.C is a Fatal Counter. You can alter the trajectory of where Arakune bounces once the attack connects, using 4, 5, or 6 for backward, neutral and forward momentum. During curse, j.c becomes a scary mix-up tool, it's an instant overhead for one, for two it can be also used as a cross up overhead, which creates a realm of fear for the opponent, it deals big combo damage if it connects. Scary in the corner as well.
j.6A/B/C

Air to air abare and combo filler, with high execution, it good for pressure.

| Version | Damage | Cancel | Guard | Startup | Active | Recovery | Frame Adv | Attribute | Invul | Hitbox |
|---|---|---|---|---|---|---|---|---|---|---|
| j.6A | 600 | SOJR | HA | 13 | 3 | 13 + 7 frames landing | - | H | - | Click! |
| j.6B | 600 | SOJR | HA | 14 | 4 | 14 + 7 frames landing | - | H | - | Click! |
| j.6C | 600 | SOJR | HA | 15 | 5 | 14 + 7 frames landing | - | H | - | Click! |
The "bird", this attack lunges Arakune forward horizontally, with variable distances depending on which version you use (A, B, or C). Each version makes you travel further and provides more active frames, but there is more start up and recovery the further you go. It has it's uses as abare and combo filler pre-curse, and combo filler/corner carry during curse. Not a bad move. With high execution, you can use it for pressure against certain characters on the ground by using j.6x > jc > j.4B.
j.2A/B/C
Combo filler. Never try to use this as a starter.

| Version | Damage | Cancel | Guard | Startup | Active | Recovery | Frame Adv | Attribute | Invul | Hitbox |
|---|---|---|---|---|---|---|---|---|---|---|
| Version | Damage | Cancel | Guard | Startup | Active | Recovery | Frame Adv | Attribute | Invul | Hitbox |
| j.2A | 600 | R | All | 21 | until landing | 20 frames total | - | H | - | Click! |
| j.2B | 600 | R | ALL | 22 | until landing | 21 frames total | - | H | - | Click! |
| j.2C | 600 | R | All | 21 | until landing | 20 frames total | - | H | - | Click! |
- Can transition into follow-up on hit anytime before reaching the ground
- Follow-ups used 4f before landing or later puts Arakune on the ground (no landing recovery)
- After Landing, 1-10 All Invul
The Dive. It hasn't been the same since CT, because of it's recovery, it's terrible to just throw out, but is a combo staple. A and C versions have the same frame data, but the trajectory is different. J.2A has forward movement, j.2C has backwards movement. J.2B goes down as a small backwards angle.
Drive Moves
Arakune is one of the characters who rely heavily on their Drive effects, Arakune's play is set into two different phases, Pre-curse and Curse. During pre-curse, the goal is to curse the opponent, so it is essential to include or end your combos with a D attack (or a special attack that can serve as an equivalent) to gain curse meter. The curse gauge is set at 0 at the start of every round and has a maximum capacity of 60000.
5D

Interesting move.

| Damage | Cancel | Guard | Startup | Active | Recovery | Frame Adv | Attribute | Invul | Hitbox |
|---|---|---|---|---|---|---|---|---|---|
| 480 | SOR | HL | 17 | 18 | 44 | -35 | BP | - | Click! |
- Fills curse gauge - 20000 on hit, 10000 on block
5D is a combo staple, and it can also be used as a half baked oki technique. Has good hitstun on normal and frighteningly good hitstun on CH, but whatever you do, don't whiff this move, the recovery will leave you vulnerable enough for a Fatal Counter to hit you. 5D adds 20000 on hit 10000 on block.
2D

Bad Start up, don't use point blank. Kinda unsafe in most situations, but it's a half decent for mid-range zoning.

| Damage | Cancel | Guard | Startup | Active | Recovery | Frame Adv | Attribute | Invul | Hitbox |
|---|---|---|---|---|---|---|---|---|---|
| 400, 520 | R | All | 19 | 11 (15) 12 | 46 frames total | - | HBFPr | - | Click! |
- Fills curse gauge - 10000x2 on hit, 5000x2 on block
A half decent zoning tool that doesn't even combo into itself unless it's on crouching CH and with specific spacing. Don't use it point blank. It's best use is getting blue beat curse meter if the opponent refuses to emergency tech a combo, but that's it. 2D adds 10000 per hit, on hit 5000 per hit, on block.
6D

Headbutt, really.

| Version | Damage | Cancel | Guard | Startup | Active | Recovery | Frame Adv | Attribute | Invul | Hitbox |
|---|---|---|---|---|---|---|---|---|---|---|
| Headbutt | 560 | R | HL | 14 | 16 | 48 frames total | -18 | B, HBFPr | - | Click! |
| Bell Bug | 880 | R | HA | 38 | until landing | - | - | BP | - | Click! |
- If used again, old projectile disappears on F14
- Fills curse gauge - 20000 on hit, 10000 on block
A headbutt that knocks the opponent into the bell bug. The bell bug is still used as a zoning tool, but if it hits, it knocks down and forces emergency tech, this changes the scope of his combos a little to get optimal curse meter. Combo staple, especially in the corner. Still bad on whiff though. Bell Bug adds 20000 on hit 10000 on block.
j.D

Combo ender, zoning tool. Hits mid, don't be fooled.

| Damage | Cancel | Guard | Startup | Active | Recovery | Frame Adv | Attribute | Invul | Hitbox |
|---|---|---|---|---|---|---|---|---|---|
| 500 | R | All | 34 | 3 | until landing + 7 frames recovery | - | HBFPr | - | Click! |
- Hitbox disappears if Arakune is hit before landing
- Location depends on directional input
- Fills curse gauge - 20000 on hit, 10000 on block
A combo tool for getting extra curse, aside from where it can and cannot be used, it's pretty much the same as always. You can change where the bug is summoned using different commands for directional input (j.4D, j.2D, j.3d and j.6D). J.d adds 20000 on hit 10000 on block.
Curse Bugs
Once the curse gauge reaches 100%, it's time to summon bugs, these bugs change the entire scope of Arakune's combo potential, creating a variety of options off of the simplest hits. Although powerful, not invincible, All bugs vanish if Arakune takes a hit, and there is a cool down between summoning of the same bug. The fun stops when the Curse gauge depletes. The 60000 points of curse goes down at a rate of 30 per frame, which amount to a little less than 33 seconds without summoning bugs. Do what you can during that time, with good execution, you'll be happy about the outcome.
Each bug is summoned by releasing it's corresponding button (A, B, C, D). Hold left or right to alter the bugs horizontal summoning position/trajectory. Keep in mind that bugs now use up curse meter, see below for specific amounts.

A Bug

Bouncy.

| Damage | Cancel | Guard | Startup | Active | Recovery | Frame Adv | Attribute | Invul | Hitbox |
|---|---|---|---|---|---|---|---|---|---|
| 220 | - | All | 1 | until ground + 55 | - | - | HBFPr | - | Click! |
- Disappears if Arakune is hit
- Uses 3000 curse
The combo starter bug, most basic curse set ups involve the a bug in some way. It bounces in from behind the opponent and bounces once it hits the ground, then gone. Vanishes if contact is made with anything that's not the stage floor, Arakune, or it's fellow bugs. It's really good on block and hit, easy to confirm into a combo, it pulls the opponent in as well, so that's an "up yours" to those who rely on barrier blocking. A Bug uses up 3000 curse meter.
B Bug

Drill Monster

| Damage | Cancel | Guard | Startup | Active | Recovery | Frame Adv | Attribute | Invul | Hitbox |
|---|---|---|---|---|---|---|---|---|---|
| 200x3 | - | All | 7 | until ground | - | - | HBFPr | - | Click! |
- Disappears if Arakune is hit
- Uses 2000 curse
This is a pressure and combo bug now, it no longer knocks down. It flies down at a 45 degree angle from behind Arakune. Arakune's fastest bug in terms of projectile speed. B Bug uses up 2000 curse meter.
C Bug

Nom for massive hitstop.

| Damage | Cancel | Guard | Startup | Active | Recovery | Frame Adv | Attribute | Invul | Hitbox |
|---|---|---|---|---|---|---|---|---|---|
| 650 | - | All | 40 | 24 | - | - | HBFPr | - | Click! |
- Disappears if Arakune is hit
- Uses 5000 curse
- 41F hitstop
The Combo staple of combo staples, the C bug is there for it all, good for everything, pressure, combos, set ups, and even the unblockable reset. It comes out of the ground hungry and has 41 frames of hitstop which virtually adds to the block stun, hit stun and the start up frames to any counter assaults your opponent attempts. The awesome comes at a price of absurdly slow start up and costing 5000 curse to use.
D Bug

Bane of everyone's existence.

| Damage | Cancel | Guard | Startup | Active | Recovery | Frame Adv | Attribute | Invul | Hitbox |
|---|---|---|---|---|---|---|---|---|---|
| 150xN, 500 | - | All, HL | 1 | until ground (33) until off screen | - | - | HBFPr | - | Click! |
- Disappears if Arakune is hit
- Uses 12000 curse
- 120% bonus proration on rising hit
You're second milk and meat for combos and another important tool in the unblockable reset. The D bug come straight down from above, burrows into the ground, giving hard knockdown, then launches as an air unblockable moth. Second hit has bonus proration. D bug uses up 12000 curse meter, the most expensive bug to use.
Universal Mechanics
Ground Throw

Not bad, since Arakune rarely grabs. Good Range too.

Air Throw

Hugs.

Counter Assault
Better than a throw overall.
| Damage | Cancel | Guard | Startup | Active | Recovery | Frame Adv | Attribute | Invul | Hitbox |
|---|---|---|---|---|---|---|---|---|---|
| 0 | -.R | All | 13 | 2 | 29 | -12 | B | - | Click! |
- 180F heat cooldown
- 1-20 All Invul
Arakune's brand new Counter Assault is his 6b animation, good for effectively getting your opponent off of you without having to worry about the unlucky throw break, but is now useless for getting curse meter, unless specific circumstances are met.
Crush Trigger

What a calamity.

Special Moves
Equals Zero
236B

GET IT!?

| Damage | Cancel | Guard | Startup | Active | Recovery | Frame Adv | Attribute | Invul | Hitbox |
|---|---|---|---|---|---|---|---|---|---|
| - | - | - | - | -- | 30 | - | - | - | Click! |
- Effect ends if a non-Pr attribute from Arakune hits or is blocked, or if Arakune is hit by or blocks an attack.
This move makes Arakune virtually invisible, good when being sneaky during evasion, or being sneaky during pressure. Invisibility lasts until Arakune makes any hitbox/hurtbox contact with a projectile or opposing character. Pretty good.
Zero Vector
j.236D

The Random Cloud.

| Damage | Cancel | Guard | Startup | Active | Recovery | Frame Adv | Attribute | Invul | Hitbox |
|---|---|---|---|---|---|---|---|---|---|
| - | - | - | 33 | 390 | 46+11 landing total | - | - | - | Click! |
- Trajectory is random between 3 types
- Fills curse gauge by 20000 if touched by opponent
- Dissapears if Arakune is hit (including throws), 20f after using another Zero Vector, or 16F after a throw from Arakune is teched
- While a cloud is active, using Zero Vector again will generate a different cloud trajectory
- Fills heat gauge by 500 if touched by opponent
The infamous cloud. The type of cloud is random between a homing cloud, a cloud that hovers above the opponent and a cloud that hovers around Arakune. Now, when you summon a new cloud, you're never going to get the same cloud in a row, so that's a good addition. Adds 20000 curse on contact with opponent, vanishes if Arakune is thrown, hit, if Arakune summons another cloud or it's active frame reaches it's limit.
Y-Two Dash
j.236C

Combo Staple.

| Damage | Cancel | Guard | Startup | Active | Recovery | Frame Adv | Attribute | Invul | Hitbox |
|---|---|---|---|---|---|---|---|---|---|
| 200x8 | R | HA | 11 | 3x8 | until landing + 11 | - | H | - | Click! |
The "Spin" or "Wheel", this move is 100% combo staple, pre-curse and during curse. It's good for corner carry when used with j.6A/B/C. Don't use it more than once in a combo, repeat move proration. Still not a bad move. Decent abare when you're trying to cover your opponent's air movements.
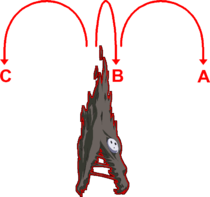
Permutation, N, R
22A/B/C, air OK
- BBCP Arakune Permutation.png
Spider.....Sting?
| Version | Damage | Cancel | Guard | Startup | Active | Recovery | Frame Adv | Attribute | Invul | Hitbox |
|---|---|---|---|---|---|---|---|---|---|---|
| Ground | 500 | - | All | 57 | until ground | 48T | - | HBFPr | - | Click! |
| Air | 500 | - | All | 33 | until ground | 75+7 landing | - | HBFPr | - | Click! |
- Button used only affects attack location
- Start up frames listed are for when opponent in on the ground
- Fills curse gauge - 20000 on hit, 10000 on block
- Button used only affects attack location
- Start up frames listed are at apex of double jump
- Fills curse gauge - 20000 on hit, 10000 on block
The "spider move". Arakune summons a giant spider to hit the opponent. The Button that you use only affects where the spider is summoned. Adds 20000 curse on hit, 10000 on block.
a±b
41236A, air OK

SLoooooooW

| Damage | Cancel | Guard | Startup | Active | Recovery | Frame Adv | Attribute | Invul | Hitbox |
|---|---|---|---|---|---|---|---|---|---|
| - | - | - | 31 | - | 54 total | - | - | - | Click! |
(Air OK)
A new cloud that Arakune can only summon during curse, it looks like a homing cloud, but travels faster and slows down any and all of the opponent's horizontal movement to a crawl. Lasts until either curse ends or Arakune takes a hit. Good for oki, preventing your opponent from avoiding you and running out the clock.
If p then qR
214A/B/C, air OK


| Version | Damage | Cancel | Guard | Startup | Active | Recovery | Frame Adv | Attribute | Invul | Hitbox |
|---|---|---|---|---|---|---|---|---|---|---|
| 214A | - | - | - | - | - | 48 total | - | - | 1-5T, 39-37T, 38-39 Inv | Click! |
| 214B | - | - | - | - | - | 48 total | - | - | 1-5T, 6-25 All | Click! |
| 214C | - | - | - | - | - | 85 total | - | - | 7-62 All | Click! |
| j.214A | - | - | - | - | - | 46 total | - | - | 24-33 All | Click! |
| j.214B | - | - | - | - | - | 52 total | - | - | 28-39 All | Click! |
| j.214C | - | - | - | - | - | 56 total | - | - | 28-43 All | Click! |
- Cannot be used after a double jump or airdash
- 28-46 All Invul
Arakune's various command teleports, each version (air and ground versions included) puts him in a different spot after he teleports.
- 214A looks like a forward jump and puts Arakune directly below where he teleported
- 214B looks like a forward jump and puts Arakune right back where you performed the input.
- 214C looks like a forward dash and puts Arakune right back where you performed the input.
- j.214A looks like a forward double jump and puts Arakune one character space ahead of where he teleported.
- j.214B looks like j.d's animation and puts Arakune directly below where he teleported.
- j.214C looks like a forward air dash and puts Arakune one character space ahead of where he teleported.
When it comes to these move, use of them is up to the player, but it's good for evasion pre-curse and good for cross ups and positioning during curse. Be careful when using them, you can get punished hard if the opponent sees the teleport coming. Sometimes you'll get it just because the circumstance was against your favor.
Wall Teleport
j.44 When backed to a wall

Pissing off opponents since 2008.

| Damage | Cancel | Guard | Startup | Active | Recovery | Frame Adv | Attribute | Invul | Hitbox |
|---|---|---|---|---|---|---|---|---|---|
| - | - | - | - | - | 47 total | - | - | 25-32 All | Click! |
- Uses 1 airdash
Arakune's last and most useful command teleport, when you are at a wall (either screen parameters or in the corner), air dash back and Arakune will warp from one wall to the other. Good when you're cornered pre curse, good for a fast fullscreen approach and cross up during curse. Don't get careless about this move, it takes 25 frames for the teleport to happen, that's plenty of time to get hit in most circumstances. Use this move wisely.
Distortion Drives
F-Inverse
236236C

Combo filler or Arakune's only real wake up DP.

| Version | Damage | Cancel | Guard | Startup | Active | Recovery | Frame Adv | Attribute | Invul | Hitbox |
|---|---|---|---|---|---|---|---|---|---|---|
| Body | 640 | R | All | 5+0 | 107 | 33 | -121 | B | 1-12 All | Click! |
| Body (OD) | 640 | R | All | 5+0 | 160 | 33 | -175 | B | 1-12 All | Click! |
| Laser | 90x35 | R | All | 5+2 | 3x35 | - | - | HBFPr(2) | - | Click! |
| Laser (OD) | 90x53 | R | All | 5+2 | 3x53 | - | - | HBFPr(2) | - | Click! |
- Body portion is active immediately after Super Flash
- Body and Laser both do 15% minimum damage (Normal: 551, OD: 785)
- 180F heat cooldown
- Can move horizontally during animation
- 1-12 All Invul
Arakune first and most practical Distortion Drive, used as a combo ender during curse, combo filler after a throw pre-curse and a pre-curse wake up DP, the latter being the least practical and very risky to do. It's an awkward DP since the range it covers is strictly vertical, unlike most other Distortions which have horizontal range, that said, it can't be used like them, still when your opponent does something close and meaty on wakeup though.
F of G
j.214214D

Useful now. Homes in, hits low, 100% curse, swag

| Version | Damage | Cancel | Guard | Startup | Active | Recovery | Frame Adv | Attribute | Invul | Hitbox |
|---|---|---|---|---|---|---|---|---|---|---|
| Normal | 350x15 | R | LA | 20+4 | 15 | until landing + 32 | - | HBFPR(2) | 1-26 All | Click! |
| Overdrive | 350x25 | R | LA | 20+4 | 15 | until landing + 32 | - | HBFPR(2) | 1-26 All | Click! |
- Normal version does 10% minimum damage (525)
- Overdrive version does 5% minimum damage (425)
- Last hit fills curse gauge by 60000
- 180F heat cooldown
- 1-26 All Invul
Arakune's air Distortion Drive. It can be comboed into, adding 100% curse on hit during pre-curse. Pretty much any combo that ends with j.D can be replaced with this move if you have the heat and appropriate lack of curse meter to make this move necessary. It's also good at catching AA attempts. Don't whiff this move or have them block it; it's pretty bad on block and whiff, and like j.D, it leaves Arakune vulnerable until he lands and then some.
Astral Heat
N-Infinity
632146D

Troll move, really.

Strategy
For more detailed information on Arakune, check out the "Technical & Gameplay Discussion Thread". The general idea of Arakune is to be passive-aggressive pre-curse, and very offensive during curse. More specifically, pre-curse strategy is to be evasive and pick your moments to be confrontational. Once curse is active, you should be in your opponent's face planning to make a joke of their defenses.
Offense
Arakune's offensive game revolves around making a few small hits count towards gaining curse meter, your neutral is to either evade your opponent or zone your opponent, zoning your opponent is beneficial because it either forces them to approach or keeps them away, afterwards, or sometimes beforehand evasion is necessary. There are characters who Arakune can't zone or evade without staying at a disadvantage. These are the times Arakune is forced to approach. You can use your air dashes, forward dash and command dashes to safely close in on the opponent and use your best judgement to prevent them from escaping. At times blocking is necessary.
Defense
Arakune's defense is very weak without meter, your best option is to block and/or choose the right time to backdash. Evasion is your best defense, as you can punish moves on whiff easier than you can on block. If you can help it, evade before blocking. With meter you have 236236c (f Inverse) to punish presumptuous pressure strings or meaty oki. You also have Arakune's Counter Assault at your disposal to return to neutral.
Combos
Notations
- > = Next notation of attack
- j. = jump.attack
- sj. = Super Jump.attack
- DC = [1]
- RC = Rapid Cancel
- IAD = Instant Air Dash
- (N) = Only use the Nth attack of the move (for example, if j.b(2) is written, you only use the first two hits of j.b)
- (text) = (Details of the combo)
- Red text = Lists optional notations.
- Green text = Requires heat in order to use the combo, heat is specified.
- Yellow text = Fatal Counter combo
Pre-curse
Midscreen
Each combo goes under a set of assumptions based on how much curse meter you've accumulated thus far.
0~10,000 Curse
| 5a > 6b > j.66d > j.6c > dj.6c > j236c (extension for oki and corner carry) (adds 20,000 Curse) |
|---|
| 5a > 2a > 5b > 2c > 6d (adds 20,000 Curse) |
| 5a > 5b > 5d > 3c > a+b > 6b > j.6d (requires 25 heat, adds 40,000 Curse) (adds 20,000 Curse) |
| 5a (air hit) > sj.a > j.c > j.2a >6d (adds 20,000 Curse) |
| 5a (air hit) > s.ja > j.c > j.2a > DC walk back > 6b > j.66d > j.6c > dj.6c > j236c (extension for oki and corner carry) (adds 20,000 Curse) |
| 5a (air hit) > 6b > j.66d > j.6c > dj.6c > j236c (extension for oki and corner carry) (adds 20,000 Curse) |
| 5a (air hit) > 6b > j.4a+b > j.6d > j.6d (adds 40,000 Curse) |
| 6a > 2b > 5b > 2c > 6d (adds, 20,000 Curse) |
| 6a > 2b > 5b > 5d > 3c > a+b > 6b > j.6d (requires 25 heat, adds 40,000 Curse) (adds 20,000 Curse) |
| 6a > 5d > 3c > a+b > 6b > j.6d (requires 25 heat, adds 40,000 Curse) (adds 20,000 Curse) |
| 5c > sj.a > j.c > j.2a > 6d (adds 20,000 Curse) |
| 5c > sj.a > j.c > j.2a > DC walk back > 6b > j.66d > j.6c > dj.6c > j.236c (extension for oki and corner carry) (adds 20,000 Curse) |
| 5c > sj.a > j.c > j.2a > DC walk back > 6b > j.4a+b > j.6d > j.6d (adds 40,000 Curse) |
| b+c > 6d (adds 20,000 curse) |
| b+c > delay 6b > j.66d > j.6c > dj.6c > j.236c (adds 20,000 Curse) |
| b+c > 6b > j.4ab > j.6d > j.6d (adds 40,000 Curse) |
| j.b+c > j.d > 6d (adds 40,000 curse. j.d may need to be delayed based on height) |
20,000~30,000 Curse
| 5a > 5b > 2c (3) > RC 5d > 3c > a+b > 6b > j.66[db] > CURSE ACTIVATED > ]6bd[ > sj.41236[a] > d bug 1 > 6a (requires 75 heat, adds 40,000 Curse.) |
|---|
| 5a > 5b > 5d > 3c > a+b > 6b > j.66[db] > CURSE ACTIVATED > ]6bd[ > sj.41236[a] > d bug 1 > 6a (requires 25 heat, adds 40,000 Curse.) |
| 6a > 2b > 5b > 5d > 3c > a+b > 6b > j.66[db] > CURSE ACTIVATED > ]6bd[ > sj.41236[a] > d bug 1 > 6a (requires 25 heat, adds 40,000 Curse.) |
| 6a > 2b > 5b > 2c (3) > RC 5d > 3c > a+b > 6b > j.66[db] > CURSE ACTIVATED > ]6bd[ > sj.41236[a] > d bug 1 > 6a (requires 75 heat, adds 40,000 Curse.) |
40,000~50,000 Curse
| 5a > 6b > j.66[db] > CURSE ACTIVATED > ]6bd[ > sj.41236[a] > d bug 1 > 6a (adds 20,000 Curse.) |
|---|
| 5a > 5b > 5d > CURSE ACTIVATED > 3c > [5d] > 41236[a] > 6a (adds 20,000 Curse.) |
| 5a > 2a > 5b > 2c > 6d > CURSE ACTIVATED > [5b] (adds 20,000 Curse.) |
| 5a (air hit) > sj.a > j.c > j.2a > 6d > CURSE ACTIVATED > [5b] (adds 20,000 Curse.) |
| 5a (air hit) > s.ja > j.c > j.2a > DC walk back > 6b > j.66[db] > CURSE ACTIVATED > ]6bd[ > sj.41236[a] > d bug 1 > 6a (adds 20,000 Curse.) |
| 5a (air hit) > 6b > j.66[db] > CURSE ACTIVATED > ]6bd[ > sj.41236[a] > d bug 1 > 6a (adds 20,000 Curse.) |
| 6a > 2b > 5b > 2c > 6d > CURSE ACTIVATED > [5b] (adds 20,000 Curse.) |
| 6a > 2b > 5b > 5d > CURSE ACTIVATED > 3c > [5d] > 41236[a] > 6a (adds 20,000 Curse.) |
| 6a > 5d > CURSE ACTIVATED > 3c > [5d] > 41236[a] > 6a (adds 20,000 Curse.) |
| 5c > sj.a > j.c > j.2a > DC walk back > 6b > j.66[db] > CURSE ACTIVATED > ]6bd[ > sj.41236[a] > d bug 1 > 6a (adds 20,000 Curse.) |
| b+c > 6d > CURSE ACTIVATED > [5b] (adds 20,000 Curse.) |
| b+c > delay 6b > j.66[db] > CURSE ACTIVATED > ]6bd[ > sj.41236[a] > d bug 1 > 6a (adds 20,000 Curse.) |
| j.b+c > j.[db] > CURSE ACTIVATED > ]bd[ > 41236[a] > d bug 1 > 6a (adds 20,000 Curse. j.d may need to be delayed based on height.) |
Near Corner
0~10,000
| 5c > {j.a > j.c > j.3b > DC 5d} > 66 > 2c wallstick > 6b > j.d > 6d > CURSE ACTIVATED (adds 60,000 Curse. may need to substitute {j.a > j.c > j.3b > DC 5d} for {j.a > j.b (2) > j.c > j.2b > DC walk backwards 5d depending on character.) |
|---|
20,000~30,000
| 5c > {j.a > j.c > j.3b > DC 5d} > 66 > 2c wallstick > 6d > CURSE ACTIVATED (adds 40,000 Curse. may need to substitute {j.a > j.c > j.3b > DC 5d} for {j.a > j.b (2) > j.c > j.2b > DC walk backwards 5d depending on character. refer to Part 4) |
|---|
40,000~50,000
| 5c > {j.a > j.c > j.3b > DC 6d} > CURSE ACTIVATED > 6[acd] (adds 20,000 Curse. may need to substitute {j.a > j.c > j.3b > DC 6d} for {j.a > j.b (2) > j.c > j.2b > DC 6d depending on character. refer to Part 4) |
|---|
Corner
0~10,000 Curse
| 5a > 6b > j.66d > 5d wallstick > 236b > 2c wallstick > 6d > CURSE ACTIVATED (adds 60,000 Curse.) |
|---|
| 5a > 2a > 2c wallstick > 5d wallstick > 236b > 6b > j.d > 6d > CURSE ACTIVATED (adds 60,000 Curse.) |
| 5a (air hit) > 6b > j.66d > 5d wallstick > 236b > 2c wallstick > 6d > CURSE ACTIVATED (adds 60,000 Curse.) |
| 6a > 2b > 5b > 2c wallstick > 5d wallstick > 236b > 6b > 6c > 5c > 5a > 6b > j.6d > 6d > CURSE ACTIVATED (adds 60,000 Curse.) |
| 5c > j.a > j.c > j.2a > DC 6d > 2c wallstick > 6b > j.6d > 5d > CURSE ACTIVATED > 41326[ad] (adds 60,000 Curse.) |
| b+c > 6b > j.6d > j.6a > dj.c > j.2a >DC 6d > 2c wallstick > 5d > CURSE ACTIVATED > 41236[acd] (adds 60,000 Curse.) |
| j.b+c > j.d > 6d > 2c wallstick > 5d > CURSE ACTIVATED > 41236[acd] (adds 60,000 Curse. j.d may need to be delayed based on height.) |
20,000~30,000 Curse
| 5a > 6b > j.66d > 5d wallstick > CURSE ACTIVATED > 41236[ad] (adds 40,000 Curse.) |
|---|
| 5a > 2a > 2c wallstick > 5d wallstick > 236b > 6b > j.6[db] > CURSE ACTIVATED > ]6bd[ > d bug 1 > 2c(1~4) > 6da (adds 40,000 Curse.) |
| 5a (air hit) > sj.a > j.c > j.2a > DC 6d > 2c wallstick > 5d > CURSE ACTIVATED > 41236[ad] (adds 40,000 Curse.) |
| 5a (air hit) > 6b > j.66d > 5d > CURSE ACTIVATED > 41236[ad] (adds 40,000.) |
| 6a > 2b > 5b > 2c wallstick > 5d wallstick > 236b > 6b > j.6[db] > CURSE ACTIVATED > ]6bd[ > sj.41236[a] > d bug 1 > 6[a] (adds 40,000 Curse.) |
| 6a > 2b > 5b > 2c wallstick > 6b > j.d > 5d > CURSE ACTIVATED > 41236[ad] (adds 40,000 Curse.) |
| 5c > j.a > j.c > j.2a > DC 6d > 2c wallstick > 5d > CURSE ACTIVATED > 41326[ad] (adds 40,000 Curse.) |
| b+c > 5d > 236b > 2c wallstick > 6d > CURSE ACTIVATED > 6[acd] (adds 40,000 Curse.) |
| j.b+c > j.d > 6d > CURSE ACTIVATED > 6[acd] (adds 40,000 Curse. j.d may need to be delayed based on height.) |
40,000~50,000 Curse
| 5a > 6b > j.6[db] > CURSE ACTIVATED > ]6bd[ > d bug 1 > 2c(1~4) > 6da (adds 20,000 Curse.) |
|---|
| 5a > 2a > 2c wallstick > 5d wallstick > CURSE ACTIVATED > 41236[ad] (adds 20,000 Curse.) |
| 5a (air hit) > sj.a > j.c > j.2a > DC 6d > CURSE ACTIVATED (adds 20,000 Curse.) |
| 5a (air hit) > 6b > j.66[db] > CURSE ACTIVATED> ]6bd[ > d bug 1 > 2c(1~4) > 6da (adds 20,000 Curse.) |
| 6a > 2b > 5b > 2c wallstick > 5d CURSE ACTIVATED > 41236[ad] (adds 20,000 Curse.) |
| 5c > j.a > j.c > j.2a > DC 6d > CURSE ACTIVATED > 6[acd] (adds 20,000 Curse.) |
| b+c > 5d > CURSE ACTIVATED > 41236[acd] (adds 20,000 Curse.) |
| j.b+c > j.6d > CURSE ACTIVATED > 6[dbc] (adds 20,000 Curse. j.d may need to be delayed based on height.) |
Curse Combos
| Coming Soon |
|---|
Curse Set Ups
| Coming Soon |
|---|
Resets & Etc
Re-curse
| Coming Soon |
|---|
Unblockable reset
| Coming Soon |
|---|