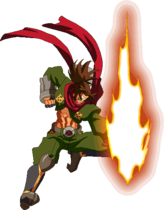
| Bang Shishigami |
|---|
 |
|
Overview
A reliable ninja who is prepared to spill his blood for love and justice. After fleeing from his home country of Ikaruga, he became a vigilante, biding his time until he could restore his country's honor. After learning of the existence of his former lord's son, he appears on the scene once again. In BBCP, the story takes place in Bang's home country of Ikaruga, in which he will have a major role in story's plot.
Bang is a balanced character with all sorts of ninja tools. Bang is good at extremely close range combat. He has attacks that are straight-forward, as well as attacks that are tricky. He is a fun character for both beginners and advanced players alike. A major part of his playstyle is his mix-up tools, with advanced mix-ups coming from his "Bumpers" and "FRKZ".
Drive: Burning Heart
Bang's Drive is called "Burning Heart." Most attacks that involve "D" will have an auto-guard period, in which the attack itself can block most incoming attacks. After blocking an attack, Bang will continue with the "D" attack and can perform "Secret Art: Bang's Shadowstep Jutsu" or simply put "Teleport". Each "D" attack has different auto-guard attributes, and each button pressed (A/B/C) after an auto-guard will cause Bang to travel different distances.
Also, when any of the "D" attacks hit your opponent, an icon in the "Fu-Rin-Ka-Zan" Gauge will light up. In BBCP, Bang needs to get one of each specific drive hit to satisfy the conditions to use his new Distortion Drive: Hurricane Fury. This attack functions as a ground to ground/air command grab that does massive damage.
5D = Fu - Gives 4 Airdashes in FRKZ
6D = Rin - Allows Bang to dash through characters in FRKZ
j.D = Kaa - Gives better proration in combos
2D = Zan - Makes all Drives full guardpoint in FRKZ
Overdrive: FuRinKaZan (FRKZ)
FuRinKaZan, previously a distortion drive, is now Bang's overdrive in Chrono Phantasma. It offers similar properties as before where Bang loses the ability to block in exchange for very strong movement options. He gains a dash that goes in 8 ways which he can cancel into normals and specials for strong mixup and good combos. Both of Bang's fire punches now wall bounce both in corner and midscreen. Generally used to close out a round. It isn't used very often in neutral due to it's relative short period duration compared to previous iterations. When used in combos, j.C loops are very strong. Within blockstrings, the ability to dash cancel most of Bang's normals make this very strong for mixup. Bang's attack power also rises to 120%.
Pros/Strengths:
- Strong neutral game
- FuRinKaZan makes Bang one of the fastest characters in the game.
- Really good mobility
- High Health
Cons/Weaknesses:
- Very poor defensive options without meter
- Guardpoints have very specific uses
- Inability to late-chain (gatling into normals late) most of his normals
External References:
- Japanese Name:シシガミバング
- Japanese Wik
- Japanese BBS
- Arcade Profile Dan Rankings
- Character Video Thread
Move List
Normal Moves
5A

Standard Jab

| Damage | Cancel | Guard | Startup | Active | Recovery | Frame Adv | Attribute | Invul | Hitbox |
|---|---|---|---|---|---|---|---|---|---|
| 300 | SOJR | All | 6 | 3 | 9 | 0 | B | - | Click! |
Standard jab. Hits on both standing and crouching.
Bang's fastest normal for mashing out of pressure. Can stagger 5A against characters with slower 5As as it is 0 on block to restart pressure. Goes into all of Bang's standard BNBs. Pretty much gatlings into all of Bang's other grounded normals.
5B

Standard Poke

| Damage | Cancel | Guard | Startup | Active | Recovery | Frame Adv | Attribute | Invul | Hitbox |
|---|---|---|---|---|---|---|---|---|---|
| 640 | SOJR | HL | 9 | 2 | 17 | -2 | B | - | Click! |
Bang's go to poke. Fast and pretty safe.
Can be used as a situational anti-air. Close range, this goes into some of Bang's most damaging combos, but at max range, only 2B and 2C will connect.
5C

Go to Overhead

| Damage | Cancel | Guard | Startup | Active | Recovery | Frame Adv | Attribute | Invul | Hitbox |
|---|---|---|---|---|---|---|---|---|---|
| 760 | SOJR | H | 18 | 8 | 19 | -8 | B | - | Click! |
Standard overhead
- Forces crouching on hit
An overhead with a decent amount of startup. It can also be used as a frametrap. It combos into 6A, 2C. On block, gatling into 6A for continued pressure or 6B for double overhead. Can jump cancel it to continued pressure or back off.
2A

Low Jab

| Damage | Cancel | Guard | Startup | Active | Recovery | Frame Adv | Attribute | Invul | Hitbox |
|---|---|---|---|---|---|---|---|---|---|
| 300 | CSOR | LA | 8 | 3 | 9 | -2 | F | - | Click! |
Bang's fastest low
- Gatlings into itself (2 times max)
Bang's fastest low. Can chain into itself twice. Can be used to pick up late techs and rolls. Combo options are limited as Bang's 2A starting proration is fairly weak.
2B

Situational Poke

| Damage | Cancel | Guard | Startup | Active | Recovery | Frame Adv | Attribute | Invul | Hitbox |
|---|---|---|---|---|---|---|---|---|---|
| 620 | SO(J)R | HL | 13 | 5 | 20 | -8 | B | - | Click! |
Combo/Blockstring filler and mid range poke
Generally used as combo/blockstring filler. Can also be used as a mid-range poke since Bang thrusts his elbow and retracts, and gatlings into 5B or 2C on hit or block. One of Bang's best starters especially as a punish.
2C

Sweep

6A

Only Plus Normal

6B

Overhead #2

6C

Standing Combo Filler

3C

BEST ANTI AIR

| Damage | Cancel | Guard | Startup | Active | Recovery | Frame Adv | Attribute | Invul | Hitbox |
|---|---|---|---|---|---|---|---|---|---|
| 880 | R | L | 15 | 9 | 26 | -14 | F | 11-23H | Click! |
Slide kick along ground
- Invuln 11-23 Head
Covers about 3/4 of the screen and can be used as a long range poke. Unsafe on block even if done as meaty as possible. Usually RC'ed to be safe and leads to decent damage on FC. Can pick up with 2A meterlessly if hit at the end of the active frames.
j.A

Jumping Jab

| Damage | Cancel | Guard | Startup | Active | Recovery | Frame Adv | Attribute | Invul | Hitbox |
|---|---|---|---|---|---|---|---|---|---|
| 300 | CSOJR | HA | 7 | 2 | 9 | - | H | - | Click! |
Quick punch in the air
- Gatlings on whiff
Fast short range poke in the air. Can be used as a preemptive anti-air. Can use this move in order to tick command grabs in the air and ground or as a way to guard crush. Can go into knock down or 623B if near corner.
j.B

Air-to-Air Poke

| Damage | Cancel | Guard | Startup | Active | Recovery | Frame Adv | Attribute | Invul | Hitbox |
|---|---|---|---|---|---|---|---|---|---|
| 560 | SOJR | HA | 10 | 5 | 20 | - | H | - | Click! |
Horizontal Kick
Longer range air to air as well as a potential poke. Can go into a full BnB if it connects with a grounded opponent. If it connects in the air, can possibly jump back up with j.A and pick it up.
j.C
Air-to-Air Poke
| Damage | Cancel | Guard | Startup | Active | Recovery | Frame Adv | Attribute | Invul | Hitbox |
|---|---|---|---|---|---|---|---|---|---|
| 600 | SOJR | HA | 10 | 4 | 18 | - | H | - | Click! |
Bang's aerial 6C
Generally used as combo/blockstring filler. Can also be used as an air to air. Has very long untech time. Canceling into 22A allows you to confirm from normal jump heights that you normally wouldn't be able to.
j.4B

Crossup kick

| Damage | Cancel | Guard | Startup | Active | Recovery | Frame Adv | Attribute | Invul | Hitbox |
|---|---|---|---|---|---|---|---|---|---|
| 840 | SOJR | HA | 11 | 4 | 16 | - | H | - | Click! |
Bang kicks behind him.
- Vaccuums opponent toward Bang.
Used primarily as a cross up tool on a grounded opponent. It pulls the opponent and goes into a full combo on a grounded opponent. If it hits in the air, it generally can be picked up with 5A or j.A.
j.2C

Air-to-Ground normal

| Damage | Cancel | Guard | Startup | Active | Recovery | Frame Adv | Attribute | Invul | Hitbox |
|---|---|---|---|---|---|---|---|---|---|
| 650 | SOR | HA | 12 | 4 | 21 | - | H | - | Click! |
Downard aerial kick
General go to air to ground. Knocks down on air hit, and goes into full combo on grounded opponents. Generally used to end air combos for knockdown. Can cross up, but very difficult.
Drive Moves (Burning Heart)
5D

| Damage | Cancel | Guard | Startup | Active | Recovery | Frame Adv | Attribute | Invul | Hitbox |
|---|---|---|---|---|---|---|---|---|---|
| 562[672][840] | R | HL | 19 | 4 | 28 | -15 | B | 3-10GP | Click! |
Bang's gauntlets glow, then he lunges with an uppercut. Gives the Fu Icon. Damage values - [iconless [with icon] [with all icons]
Only autoguards mids and highs from frames 3-11 (Not unblockables). When 2D seal is obtained and in OD, it will also autoguard lows and unblockables.
On grounded opponents, it leaves the opponent standing. On air hit, it will send the opponent in the air and if they are close enough to the corner, they will ground bounce.
2D

| Damage | Cancel | Guard | Startup | Active | Recovery | Frame Adv | Attribute | Invul | Hitbox |
|---|---|---|---|---|---|---|---|---|---|
| 710[852][1065] | SOJR | HL | 24 | 3 | 26 | -10 | B | 7-23GP | Click! |
Bang's gauntlets glow as he crouches, then he uppercuts. Gives the Zan Icon. Damage values - [iconless [with icon] [with all icons]
Autoguards highs and mids from frames 7-23 (Not unblockables). When 2D seal is obtained and in OD, it will also autoguard lows and unblockables.
Will launch opponent on hit. Can be used as a ghetto anti-air but it has alot of start up frames. Can be comboed into from a 5D far from the corner.
6D

| Damage | Cancel | Guard | Startup | Active | Recovery | Frame Adv | Attribute | Invul | Hitbox |
|---|---|---|---|---|---|---|---|---|---|
| 710[852][1065] | (S)O(J)R | L | 24 | 2 | 28 | -13 | F | 1-14GP | Click! |
Bang turns around and delivers a low kick. Gives the Rin Icon. Damage values - [iconless [with icon] [with all icons]
Autoguards mids and lows from frames 1-14 (Not unblockables). When 2D seal is obtained and in OD, it will also autoguard highs and unblockables.
Having guardpoint on frame 1 allows it to be used as a reversal. Used with teleport, it can go behind the opponent and punish a whiffed gatling.
j.D
Nice Pick Up.

| Damage | Cancel | Guard | Startup | Active | Recovery | Frame Adv | Attribute | Invul | Hitbox |
|---|---|---|---|---|---|---|---|---|---|
| 630[756][945] | (S)O(J)R | HA | 24 | 1 | 24 | -5 | H | 4-15GP | Click! |
Bang gathers energy into his hands and slams downward. Gives the Kaa Icon. Damage values - [iconless [with icon] [with all icons]
Autoguards against mid and high attacks from frames 4-15 (Not unblockables). When 2D seal is obtained and in OD, autoguards unblockables. Can cancel into The Ultimate Bang before the attack starts up.
Used in some air combos as well. Downs opponent no matter where you hit them (air or ground).
Overhead.
Teleport / Air Teleport (Secret Art: Bang's Shadowstep Jutsu) (A/B/C after Guard Point off Drives)
When your D move autoguards an attack, pressing A, B, or C will have Bang teleport, then finish the attack.
Button pressed determines distance teleported, A being the shortest, C being the longest. Typically you will teleport behind the opponent. Learn to know which to use, or even to teleport at all, depending on the situation.
Universal Mechanics
Ground Throw

| Version | Damage | Cancel | Guard | Startup | Active | Recovery | Frame Adv | Attribute | Invul | Hitbox |
|---|---|---|---|---|---|---|---|---|---|---|
| Forward Throw | 0x2, 1400 | -, R, SOR | - | 7 | 3 | 15 | - | T | - | Click! |
| Back Throw | 0x2, 1400 | -, R, SOR | - | 8 | 3 | 15 | - | T | - | Click! |
Bang grabs his opponent, disappearing before coming out with a drop kick from behind the opponent. Typically canceled into j.22A (Flaming Air Attack).
Air Throw

| Damage | Cancel | Guard | Startup | Active | Recovery | Frame Adv | Attribute | Invul | Hitbox |
|---|---|---|---|---|---|---|---|---|---|
| 0x2, 1400 | -, R, SOR | - | 7 | 3 | 18+3L | - | T | - | Click! |
Bang grabs his opponent, then disappears before teleporting behind (infront if you input 4bc) with a kick. Causes groundslide. Depending on height, it cannot be followed up with a combo. Midscreen, it's comboed from a meaty 3C.
Counter Assault
GET AWAY FROM ME
| Damage | Cancel | Guard | Startup | Active | Recovery | Frame Adv | Attribute | Invul | Hitbox |
|---|---|---|---|---|---|---|---|---|---|
| 0 | R | All | 13 | 3 | 34 | -18 | B | 1-20Inv | Click! |
Downard aerial kick
- Invuln 1-20 ALL
- Costs 50 Meter
- 180F Heat Gauge Cooldown
Pretty standard Counter Assault. Has invulerability and gets pressure off. As Bang doesn't have very good reversals, it's very useful to get someone off you.
Crush Trigger
Wish it was better :<

Special Moves
Bang's Void Tempest Kick
623C

| Damage | Cancel | Guard | Startup | Active | Recovery | Frame Adv | Attribute | Invul | Hitbox |
|---|---|---|---|---|---|---|---|---|---|
| 0*2, 600, 653, 842 | -*2, R*3 | c.T (100) | 13 | 3 | 37 | - | T | - | Click! |
- 100% minimum damage
Bang grabs the opponent, sending them upward delivering a few hits before kicking them downward.
Command throw, though pretty slow and doesn't have great range...Part of your mixup game, as it cannot be broken outside of hit or blockstun. You retain aerial options (such as jumping, dashing, etc.).
Rapid the last launching kick for combos, but proration has been hit pretty hard so there won't be that much damage.
Bang's Void Tempest Kick EX
j.623C

| Damage | Cancel | Guard | Startup | Active | Recovery | Frame Adv | Attribute | Invul | Hitbox |
|---|---|---|---|---|---|---|---|---|---|
| 0,700,785,1000 | -*2, R*3 | c.T (120) | 7 | 3 | 20 | - | T | - | Click! |
- 100% minimum damage
Bang grabs his opponent, kicking them up once, then downwards, followed by launching them in the air.
Aerial command grab. Catch predictable techs or jumps for some solid damage. Halts momentum if whiffed. Rapid before the launch (but after Bang gets to the ground) to go for combos. Similarly, due to proration nerfs, it doesn't add too much damage.
Bang's Unstoppable Double Palm Thrust
623B

| Damage | Cancel | Guard | Startup | Active | Recovery | Frame Adv | Attribute | Invul | Hitbox |
|---|---|---|---|---|---|---|---|---|---|
| 1300 | R | HL | 16 | 2 | 24 | -7 | B | - | Click! |
Bang throws a punch with both arms engulfed in flames.
Mid-screen, it knocks them away full screen. Gives a small wallstick in corner. Fatal counter lets it wall bounce midscreen. A key part of his combos near corner.
Bang's Heavenly Double Palm Thrust
j.623B

| Damage | Cancel | Guard | Startup | Active | Recovery | Frame Adv | Attribute | Invul | Hitbox |
|---|---|---|---|---|---|---|---|---|---|
| 1300 | R | All | 13 | 3 | Landing + 7 | -4 | H | - | Click! |
Bang lunges forward once again throwing a punch with both arms engulfed in flame.
Similar to 623B, it knocks away mid-screen and gives a small wallstickin the corner, but recovers more quickly. It can be used as a ghetto poke inputted as 9623B. Like 623B, it's a key part of his combos near the corner
Bang-style Shuriken
j.236A/B/C/D

shuriken Special!

A Nail (poison)

B Nail (explosion)

C Nail (web)

D Nail(s)


| Damage | Cancel | Guard | Startup | Active | Recovery | Frame Adv | Attribute | Invul | Hitbox | |
|---|---|---|---|---|---|---|---|---|---|---|
| A Version | 300 | R | All | 9 | - | 23+9LT | - | HBFPr | - | Click! |
| A+D Version | 300*3 | R | All | 20 | - | 23+9LT | - | HBFPr | - | Click! |
| B Version | 300x2 | R | All | 16 | til rebound (46)4 | 36+9LT | - | HBFPr | - | Click! |
| B+D Version | (300x2)*3 | R | All | 20 | til rebound (46)4 | 36+9LT | - | HBFPr | - | Click! |
| C Version | 300 | R | All | 18 | - | landing + 9 | - | HBFPr | - | Click! |
| C+D Version | 300*3 | R | All | 20 | - | landing + 9 | - | HBFPr | - | Click! |
| D Version | 300*3 | R | All | 9 | - | 23 Total | - | HBFPr | - | Click! |
- A Nails
A nails are thrown at a 30 degree angles. These nails poison on hit. Causes knockdown. Can be used to maintain distance from afar or approach by cancelling your airdash with one (Bang retains the momentum). Poison goes away after a set period of time or if Bang is hit.
A+D nails are thrown at 30, 45, and 60 degree angles. They take a little longer to come out and retain the properties of normal A nails, but uses 3 nails. Poison does 800 damage over time.
- B Nails
B nails are thrown at a 45 degree angle, and Bang retains his momentum. These nails will bounce off the ground or whatever they hit and then make a small explosion. Covers some space, though not as effective as D Nails. Can be used for ghetto oki.
B+D nails are thrown at 30, 45, and 60 degree angles. They take a little longer to come out and retain the properties of normal B nails, but uses 3 nails.
- C Nails
C nails are thrown at a 60 degree angle and Bang stays in place. Bang loses all momentum when he throws these nails, falling straight down afterwards. These nails upon hit will ensnare the opponent in a web. Typically used for "Seal Combos".
C+D nails are thrown at 30, 45, and 60 degree angles. They take a little longer to come out and retain the properties of normal C nails, but uses 3 nails.
- D Nails
D nails are 3 nails thrown at a time at all 30, 45, and 60 degree angles. They halt Bang in the air, and bounce off the ground. Bang now maintains momentum after throwing them so, TK D nails cannot be used to maintain pressure. Even so, they are also fast to come out and recover. D nails have a ton of versatile uses, such as controlling space, keeping distance, and providing cover. As expected, they consume 3 nails from your stock.
Bang's Shishigami-style Ultimate Technique: "Steel Rain"
632146B


| Version | Damage | Cancel | Guard | Startup | Active | Recovery | Frame Adv | Attribute | Invul | Hitbox |
|---|---|---|---|---|---|---|---|---|---|---|
| 100*64 | - | All | 92 | til ground | 61F | - | HBFPr | - | Click! |
Bang throws an umbrella that opens and rains down nails.
Previously a distortion drive, this is now is a special that consumes 4 nails. Not used very often in play.
Disappears as soon as Bang takes damage.
Flaming Air Attack
j.22A
| Damage | Cancel | Guard | Startup | Active | Recovery | Frame Adv | Attribute | Invul | Hitbox |
|---|---|---|---|---|---|---|---|---|---|
| - | - | - | - | - | 148+5LT | - | - | - | - |
Bang deploys a cape that he floats with.
A new special that is key to his air combos both midscreen and corner. Can be used in neutral, but can only be used if he hasn't used any of his air options.
Bang can fly through other characters while using this special.
Set Nail
214A/B/C/D air OK


Nail Set Diagram. Same when airborne.


| Version | Damage | Cancel | Guard | Startup | Active | Recovery | Frame Adv | Attribute | Invul | Hitbox |
|---|---|---|---|---|---|---|---|---|---|---|
| Ground | - | - | - | - | - | 30 total | - | - | - | Click! |
| Air | - | - | - | - | - | 33 total | - | - | - | Click! |
Bang lifts his arm up and places a bumper on screen.
A and B versions set bumper in front of you, C above you, D behind you. Jumping into a bumper then pressing a direction will cause you dash in that direction (3 times max). Only one bumper of each version will be set at a time. Setting a second A bumper will get rid of the old one, but setting a C bumper while an A bumper is out, will have both of them on screen. You can also jump and/or dash after using a nail!
Nail Dash
Any direction off Set Nail

| Version | Damage | Cancel | Guard | Startup | Active | Recovery | Frame Adv | Attribute | Invul | Hitbox |
|---|---|---|---|---|---|---|---|---|---|---|
| Ground | - | - | - | - | - | 16 total | - | - | 7-10Inv | Click! |
| Air | - | - | - | - | - | 19 total | - | - | 9-14Inv | Click! |
- Only invulnerable if there's the Rin icon, or nail dash
- From frame 2, Can cancel into specials or j.D
- From frame 9, Can cancel into normals/throws
Bang dashes off the Bumper in whatever direction you input. When in FRKZ, you can only air dash so many times.
Distortion Drives
Shishigami-style Secret Technique: "Fatal Eruption" / Daifunka
2363214C

| Version | Damage | Cancel | Guard | Startup | Active | Recovery | Frame Adv | Attribute | Invul | Hitbox |
|---|---|---|---|---|---|---|---|---|---|---|
| Normal | 0, 760x4, 0, 4500 | R | All | 1+17 | 24 | 20 | -27 | Bx5, T, B | 1-25Inv | Click! |
| Overdrive | 0, 760x6, 0, 4500 | R | All | 1+17 | 24 | 20 | -27 | Bx7, T, B | 1-25Inv | Click! |
- Costs 50% Heat
- 180F Heat Gauge Cooldown
- All hits except last hit have 20% minimum damage (Normal: 608, OD: 912)
- Has full body invulnerability from frames 1-25
Bang dashes forward, if he connects, will perform a damaging autocombo.
Has invincibility on dash (frames 1-24 after dash). Can be used as a reversal and is very unsafe on block.
The normal version carries them forward to the corner while the OD version carries them to opposite corner. The OD version is generally used as an ender for combos. Will combo from 5D and 6D and off of j.623B.
Shishigami-style Technique: "Bang's Infinite Chaos-Fist of the Void" / Ashura
236236A

| Damage | Cancel | Guard | Startup | Active | Recovery | Frame Adv | Attribute | Invul | Hitbox |
|---|---|---|---|---|---|---|---|---|---|
| 0,2476 | R | HL | 1+8 | 3 | 25 | -7 | B | 1-11Inv | Click! |
- Costs 50% Heat
- 180F Heat Gauge Cooldown
- 1st hit 20% minimum damage, 2nd hit has 40% minimum damage (total 990)
- Has full body invulnerability from frames 1-11
Bang goes into a powerup stance releasing tons of energy around him. On hit, the opponent will get sent up and 2 Bang’s will appear, attacking in an X formation, as the opponent drops down, Bang will pose like a Kamen Rider.
Unlike Daifunka, covers above him, still has invulnerability, and has shorter startup. This can make this a reversal of choice. Forces opponents to respect you when pressuring or getting up or get hit. You can RC this move on block. On hit he can only RC after the full animation is over.
When blocked, it also pushes away the opponent quite a bit and since opponents often have to barrier, pushing them farther away, punishing this move is not always easy.
Ultra Technique:"Hyper Shadowstep Strike"
236236D

| Version | Damage | Cancel | Guard | Startup | Active | Recovery | Frame Adv | Attribute | Invul | Hitbox |
|---|---|---|---|---|---|---|---|---|---|---|
| Normal (vs. Grounded Opponent) | 0x2, 570x3, 2400 | R* | - | 19+10 | 1 | 40 | - | T | 1-19Inv | Click! |
| Overdrive (vs. Grounded Opponent) | 0x2, 570x3, 2400, 600, 1000 | R* | - | 19+10 | 1 | 40 | - | T | 1-19Inv | Click! |
| Normal (vs. Airborne Opponent) | 0x2, 490x3, 2400 | R* | - | 19+3 | 2 | til L+14 | - | T | 1-19Inv | Click! |
| Overdrive (vs. Airborne Opponent) | 0x2, 490x3, 2400, 600, 1000 | R* | - | 19+3 | 2 | til L+14 | - | T | 1-19Inv | Click! |
- vs ground opponents
- Has full body invulnerability from frames 1-19
- Only can rapid cancel the 2nd attack
Bang strikes a pose, then teleports behind the opponent and grabs them. The normal version ends with a upward nail, and the OD version ends with a downward nail.
Pretty much the same as the normal version, except does more damage. Still has the same problems in that there are too many frames after super flash for them to just hold up and get out.
- vs airborne opponents
- Has full body invulnerability from frames 1-19
- Only can rapid cancel the 2nd attack
Bang strikes a pose, then teleports behind the opponent and grabs them. The normal version ends with a upward nail, and the OD version ends with a downward nail.
Bang's new command grab super. The air version is much more usable since the amount of frames post superflash are much lower. Can be used as a reset in the air. Keep in mind if the opponent has already put out a move that covers behind them, Bang will get hit. The same goes with opponents with invincible air moves (eg. Hakumen's Hotaru). The OD version also does more damage.
Astral Heat
Shishigami-style Forbidden Technique: "The Ultimate Bang"
j.6321463214D


| Damage | Cancel | Guard | Startup | Active | Recovery | Frame Adv | Attribute | Invul | Hitbox |
|---|---|---|---|---|---|---|---|---|---|
| DESTROY | - | UNB | 9+24 | 3 | until landing | - | T | 1-35GP(A) | Click! |
- 180F Heat Cooldown
- Frames 1-35 have Guard Point
Bang will get the giant nail off of his back and stab. Connecting will cause Bang to go through many random old Japanese styled doorways on his way to drive the nail into his victim. Bang will then do his FuRinKaZan victory pose (crossed arms posed with the letters on the side) without wearing anything but a scarf and underwear. No minimum height requirement allow this to be TK'd! Has lots of autoguard everywhere allowing you to use the Shadowstep Jutsu. Oh and it's unblockable too . If you have the heat at the end of the match, go for it! You'll be the hero at your arcade/tournament/gathering for sure.
Strategy
Offense
In this part, you can talk about anything you feel like beginner players should know.
Split up your topics like this
- And even further split it up
- Like this.
Add more asterisks to further indent your text as necessary.
The categories are split into Offense, Defense, and Neutral, but you can change these categories as you see fit for your character.
Defense
Neutral
Combos
| Combo Notation Guide: |
|---|
|
Midscreen
This combo section is designed on a "move starter" basis. However, you can use whatever kind of organization you prefer, as long as it is readable and efficient.
*insert move name* Starter
Notes: In case these combos need notes. If they do not, you can remove this line.
Point 1
- move > move > special >> special NOTE: this is only a base. your combos do not have to follow this format.
- Requirements: -- (ex: 50 heat, Overdrive, crouching opponent. if no requirements, leave as is)
- Damage: ----, Heat Gain: --
- + move = Damage: ----, Heat Gain: -- NOTE: if a necessary combo is very similar to a previous one, you can add options like this.
- Notes: Write notes for the combo if necessary.
Point 2
Copy and paste the code from Point 1 to Point 2 as many times as you need to.
Midscreen to Corner
Corner Only
Other
