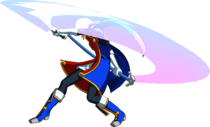
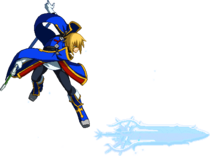
| Jin Kisaragi |
|---|
 |
|
Overview
Jin is a Major in the NOL and one of its elite commanding officers. He is always cool and calm, but is also jealous, ambitious, and possessive with little care for others, treating them like they are mere obstacles. He displayed formidable actions to gain his rank during the Ikaruga Civil War. When he heard that Ragna the Bloodedge had arrived on the scene, he quickly abandoned his post to hunt him down by himself.
Drive: Frostbite
Frostbite enables Jin to freeze his opponents, allowing for extended combos and unconventional reset opportunities.
Moves that can freeze have two additional values: Freeze Count and Freeze Duration
- Freeze Count: this value determines the amount of times that an opponent may be frozen in a single combo. Under normal circumstances, an opponent can only be frozen once per combo using a normal Drive attack (5D, 2D, 6D, j.D). If you use another normal Drive attack while the opponent has already been frozen once before, the normal Drive attack will not freeze the opponent. However, EX Specials (214D, 236D, 623D, etc) ignore the Freeze Count limit. Furthermore, you may freeze the opponent more than once per combo with normal Drive attacks during Overdrive (read the Overdrive section for more details).
- Freeze Duration: this value determines how long the opponent will be frozen in place after being hit by a move that freezes. Freeze Duration is not affected by hit-stun decay or bonus hit-stun from a Fatal Counter starter, which basically means that the Freeze Duration is fixed/set.
- If you hit an opponent with a move that freezes while they're crouching or while they're airborne, they will be forced into a standing state.
- If an attack hits Jin while the opponent is frozen, the opponent will recover from the freeze effect immediately after hitstop.
- Opponents will also break free from the freeze effect when they are hit by a normal attack, if Jin goes over the Freeze Count limit or after the Freeze Duration expires.
EX Specials
Jin also has access to a set of special moves that consume 25% Heat, similar to Force Breaks from Guilty Gear AC or EX attacks from Street Fighter 4.
- All of Jin's EX Specials freeze the opponent and ignore the Freeze Count limit.
- If Jin attempts an attack that requires 25% Heat without enough Heat, the C version of the attack will occur instead. (Ex: 623D becomes 623C)
- All EX Specials have a 180 Frame cool-down.
- Jin will gain a reduced amount of Heat during a combo after using an EX Special.
- Although EX Specials ignore the freeze count limit, if you trigger SMP by using the same EX Special again in the same combo, it will NOT freeze the opponent again.
Overdrive: Frost End
Frost End allows Jin to freeze his opponent with his sword normals and all of his specials, it allows him to break the Freeze Count limit on his normal Drive attacks, and his EX specials gain additional properties (ground bounce, wall bounce, etc).
- Sword normals (5C, 2C, 6C, j.C, j.2C) will now freeze the opponent and have a Freeze Count limit of 3.
- Normal Drives (5D, 2D, 6D, j.D) gain an extended Freeze Count limit of 3.
- Special moves will now freeze the opponent and have a Freeze Count limit of 5.
- Normal Drives (5D, 2D, 6D, j.D) gain more frame advantage, have a higher P2 and freeze for a longer period of time.
- EX Specials gain additional properties: 214D~C wall bounces, j.214D ground bounces, 22C~D deals more hits and additional damage, 236D can be dash cancelled, and 623D(2) launches the opponent.
- EX Specials lose the 180F cool-down period.
- 632146C and 236236D gain extra animations and do additional damage.
- Freeze attacks that trigger SMP will fail to freeze the opponent.
- You can only freeze the opponent up to 5 times in a single OD combo (not counting EX Specials). The specials' Freeze Count limit of 5 is shared with the sword normals/Drives' Freeze Count limit of 3, meaning that you can only freeze the opponent up to 3 times with sword normals/Drives and 2 more times with special attacks for a maximum of 5 freezes per OD combo (not counting EX Specials which ignore the Freeze Count limit).
Pros/Strengths
- Above-average health
- Jin has tools to deal with just about any situation; be it air to air battles, long range battles, or close quarter battles.
- Good average damage, he can hit-confirm pretty much everything and turn those hit-confirms into damaging combos as long as he has 25 Heat.
- Has access to various reversal options, including two DPs (DP C and DP D) which cover different situations as well as a counter super (Yukikaze).
- One of the better Distortion Drives in terms of damage output.
- He can play an effective zoning game with his projectiles (Ice Blades) and his poking tools such as 5C, 5D, 2D, j.C.
- Jin is a pretty straight-forward character, perfect for newbies. His bread and butter combos are pretty simple in terms of execution.
Cons/Weaknesses
- Jin is the standard "jack of all trades, master of none" character. He doesn't excel at anything in particular.
- Lacks a reliable anti-air. 2C is much too slow to be reliable, 2A can only low-profile under certain attacks, and DP B is punishable on whiff.
- While his overhead (6A) is among one of the fastest in the game, it can't be followed up unless you land a CH or RC it.
- Due to the above, his basic mix-up is weak without 25-50 Heat when he can use TK Hizangeki or RC 6A. Jin has to rely on gimmicky resets with his freezing attacks and his normals in order to attempt to get past the opponent's defense.
External References:
- Japanese Name: ジン=キサラギ
- Japanese Wiki
- Japanese BBS
- Arcade Profile Dan Rankings
- Character Video Thread
Move List
Normal Moves
5A

| Damage | Cancel | Guard | Startup | Active | Recovery | Frame Adv | Attribute | Invul | Hitbox |
|---|---|---|---|---|---|---|---|---|---|
| 300 | CSOJR | All | 6 | 3 | 9 | -2 | B | - | - |
Your standard jab. It can be used to stuff late jump-in attacks or some of the slower ones like Jin's j.B. It normally whiffs on crouching opponents except against those with larger bodies like Tager or Relius.
5B

Great tool for it's range and speed. Both hits pull in.

| Damage | Cancel | Guard | Startup | Active | Recovery | Frame Adv | Attribute | Invul | Hitbox |
|---|---|---|---|---|---|---|---|---|---|
| 350, 250 | SO(J)R | HL | 7 | 4(2)1 | 19 | -6 | B | - | - |
- Pulls in opponent on hit or block
Hits twice and the first hit has a slight vacuum effect. You can cancel its recovery into throw, so even though it's -6 on block raw it can still be useful for tick throwing in pressure. It has pretty good vertical reach and it must be Barrier blocked in the air, which makes it a situational anti-air tool. Can be jump cancelled on hit only, allowing for corner resets and air combos.
5C
Good zoning tool, but can lose to mash if you're not careful.

| Damage | Cancel | Guard | Startup | Active | Recovery | Frame Adv | Attribute | Invul | Hitbox |
|---|---|---|---|---|---|---|---|---|---|
| 710 | SOJR | HL | 10 | 4 | 19 | -6 | B | - | - |
- Freezes opponent for 40F during OD. Freeze Count 3
It's quick and has pretty decent horizontal reach which makes it a pretty good poke. It also has some pretty decent vertical reach, hits behind Jin, and is air unblockable which also makes this a situational anti-air. From a max range CH, you'll want to hit-confirm into 2D or 6B/6C at medium to point blank range. Please note that this move does not reach its maximum horizontal reach until after frame 11.
2A

2B

Surprisingly long range for its animation

2C

Long vertical range, has head invul before and through the first active frame, slow.

| Damage | Cancel | Guard | Startup | Active | Recovery | Frame Adv | Attribute | Invul | Hitbox |
|---|---|---|---|---|---|---|---|---|---|
| 720 | SOJR | HL | 17 | 3 | 24 | -10 | B | 9-19H | - |
- Head invulnerable during frames 9-19
- Air unblockable
- Freezes opponent for 40F during OD. Freeze Count 3
It's slow and has some horrid recovery but it has 10 frames of head invulnerability starting on frame 9. It has a massive vertical hit-box, which makes this a pretty decent anti-air.
6A

Overhead, short range, fast, -4 on block. Need to RC (or CH) to continue combos.

| Damage | Cancel | Guard | Startup | Active | Recovery | Frame Adv | Attribute | Invul | Hitbox |
|---|---|---|---|---|---|---|---|---|---|
| 640 | R | H | 19 | 3 | 22 | -8 | B | - | - |
[Jin's overhead, it's pretty quick but it's negative on block (-4). Forces the opponent into a crouching state on hit. This move cannot be canceled into anything unless you use a Rapid Cancel. It does link into other fast moves like 2A or 5B on CH though. You can also cancel it into a ground throw on hit only.
6B

NOT an overhead. Goes over lows.

| Damage | Cancel | Guard | Startup | Active | Recovery | Frame Adv | Attribute | Invul | Hitbox |
|---|---|---|---|---|---|---|---|---|---|
| 690 | SOR | All | 25 | 2 | 5+9L | +3 | H | 4-18F | - |
It's really slow but it has lower body invulnerability and Jin is airborne while performing this move, which makes it useful for baiting and punishing yomi tech throws and command throws as well as most low attacks. It's positive on block (+3), so it can be used to reset pressure from time to time. Leads to a pretty good damaging combo both on regular hit and CH.
6C

Combo filler (especially in the corner).

| Damage | Cancel | Guard | Startup | Active | Recovery | Frame Adv | Attribute | Invul | Hitbox |
|---|---|---|---|---|---|---|---|---|---|
| 920 | SOR | HL | 19 | 3 | 31 | -13 | B | - | - |
- Freezes opponent for 45F during OD. Freeze Count 3
Jin steps forward during this attack. It's slow and unsafe but it leads to good damage as a starter in the corner. It's air unblockable and its vertical reach makes this a situational anti-air near in the corner. Mostly used as combo filler.
3C

Combo ender, occasional zoning tool.

| Damage | Cancel | Guard | Startup | Active | Recovery | Frame Adv | Attribute | Invul | Hitbox |
|---|---|---|---|---|---|---|---|---|---|
| 650 | SOR | L | 10 | 3 | 29 | -15 | F | - | - |
Low sweep. It's relatively fast but it has horrid recovery and it's unsafe on block (-15). Low profiles under certain moves and leads to a decent CH combo mid-screen and some pretty good damage in the corner.
j.A

Good for an air-to-air battle.

j.B

Hits above, in front, and below Jin. Has a cross-up hitbox.

| Damage | Cancel | Guard | Startup | Active | Recovery | Frame Adv | Attribute | Invul | Hitbox |
|---|---|---|---|---|---|---|---|---|---|
| 540 | SOJR | HA | 10 | 8 | 23 | - | H | - | - |
- Can cross-up during the last 2 active frames
Hits forward, above, below, and behind Jin, making it an ok jump-in, good air-to-air, and ok cross-up tool. Its utilities and good hit-box make this a good air normal. Don't abuse this move when jumping-in as it easily gets beat by most jabs.
j.C

Pretty safe move to spam from far away. Primarily used for air-to-air.

| Damage | Cancel | Guard | Startup | Active | Recovery | Frame Adv | Attribute | Invul | Hitbox |
|---|---|---|---|---|---|---|---|---|---|
| 700 | SOJR | HA | 10 | 3 | 20+4L | - | H | - | - |
- Has 4 frames of landing recovery
- Freezes opponent for 40F during OD. Freeze Count 3
Its quick start-up and insanely long range make this one of Jin's best pokes. Leads to a decent combo on CH. Don't be too predictable using it as an air-to-ground as most characters can just crouch under it and punish you.
j.2C

Primarily used for combos and jump-ins.

| Damage | Cancel | Guard | Startup | Active | Recovery | Frame Adv | Attribute | Invul | Hitbox |
|---|---|---|---|---|---|---|---|---|---|
| 700 | SOJR | HA | 13 | 5 | 24 | - | H | - | - |
- Attack hitbox above Jin on last 3 active frames
- Freezes opponent for 40F during OD. Freeze Count 3
A decent jump-in tool and an ok air-to-air when the opponent is right above you. It also hits behind Jin, making this an useful cross-up tool.
Drive Moves
5D

The infamous Wofhead

| Damage | Cancel | Guard | Startup | Active | Recovery | Frame Adv | Attribute | Invul | Hitbox |
|---|---|---|---|---|---|---|---|---|---|
| 800 | DrRD | All | 17 | 8 | 20 | -9/-3 | HBFP | - | - |
- Fatal Counter
- Freezes opponent for 26F (during OD: 30F). Freeze Count 1 (during OD: 3)
- Dash Cancel on block is -4, on hit +4
It has some pretty amazing range but it's relatively slow, has some horrid recovery, and it's unsafe on block (-9). Use it only at its max range. It can only be special canceled into the EX moves and supers. Primarily used in combos (5D > 214D) and occasionally as a zoning tool.
2D

Zoning tool.

| Damage | Cancel | Guard | Startup | Active | Recovery | Frame Adv | Attribute | Invul | Hitbox |
|---|---|---|---|---|---|---|---|---|---|
| 720 | R | All | 22 | 3 | 35 | +3/+9 | HBFP* | - | - |
- Freezes opponent for 50F (during OD: 55F). Freeze Count 1 (during OD: 3)
A pretty good poking tool. It's +3 on block, so it can be used to reset pressure. It's relatively slow and has extremely bad recovery so only use it if you know it will land.
6D

Pressure reset tool, combo filler.

| Damage | Cancel | Guard | Startup | Active | Recovery | Frame Adv | Attribute | Invul | Hitbox |
|---|---|---|---|---|---|---|---|---|---|
| 810 | R | All | 35 | 6 | 25 | +12/+18 | HBFP | - | - |
- Freezes opponent for 60F (during OD: 70F). Freeze Count 1 (during OD: 3)
This is one of Jin's slowest attacks but it leads to pretty good frame advantage (+12 normally and +18 in OD). Use it at max range during block strings but use it occasionally.
j.D

Combo filler, gimmicky crossup.

| Damage | Cancel | Guard | Startup | Active | Recovery | Frame Adv | Attribute | Invul | Hitbox |
|---|---|---|---|---|---|---|---|---|---|
| 740 | SOR | All | 16 | 3 | 29+5L | - | HBFP | - | - |
- Freezes opponent for 50F (during OD: 55F). Freeze Count 1 (during OD: 3)
j.D hits all around Jin and can be used as a high risk, high reward cross-up. It's incredibly unsafe on whiff and on block, so use it with caution. Mostly used as combo filler.
Hishougeki
236D

Chargeable for better frame advantage.

| Version | Damage | Cancel | Guard | Startup | Active | Recovery | Frame Adv | Attribute | Invul | Hitbox |
|---|---|---|---|---|---|---|---|---|---|---|
| Uncharged | 800x3 | R/RDa | All | 19 | - | 59T | 0 | HBFP* | - | - |
| Charged | 800x3 | R/RDa | All | 33 | - | 63T | +30 | HBFP* | - | - |
- Costs 25% Heat
- Hold button to charge
- Can be canceled into Touga Hyoujin on hit and block
- Possible to dash cancel on whiff during OD
- Each hit freezes opponent for 40F. Freeze Count 10
Uncharged version has faster start-up than in former games.
Charged version has a slow start-up but it locks the opponent down, allowing for an empty-jump mix-up.
All versions have:
- Projectile (Lv ?)
Air Hishougeki
j.236D

Anti-air bait.

| Damage | Cancel | Guard | Startup | Active | Recovery | Frame Adv | Attribute | Invul | Hitbox |
|---|---|---|---|---|---|---|---|---|---|
| 800x3 | R | All | 33 | - | 50T/35T | - | HBFP* | - | - |
- Costs 25% Heat
- Each hit freezes opponent for 45F. Freeze Count 10
- Jin can move again before he touches the ground (at around the same height he does this attack)
On hit it leads to a standard combo, on block you'll gain enough frame advantage to reset pressure. It's not that easy to land this move due to the angle in which the ice sword is fired, you'll mostly be using it as way to bait and punish certain anti-airs. The final hit pulls-in the opponent on block, making it useful to set up IAD crossup j.2C in the corner.
Hirensou
623D

Dragon punch. Leads to good damage in the corner.

| Damage | Cancel | Guard | Startup | Active | Recovery | Frame Adv | Attribute | Invul | Hitbox |
|---|---|---|---|---|---|---|---|---|---|
| 700, 1100 | R | HL | 13 | 3(24)1 | 42 | -24 | B | 1-15 All | - |
- Costs 25% Heat
- 1st hit freezes opponent for 50F. Freeze Count 10
- Possible to charge the 2nd attack
- 2nd attack becomes unblockable and Fatal Counter when fully charged
- 2nd attack pulls in opponent during OD
Jin's most commonly used Dragon Punch, which costs 25 Heat to use. It has excellent range and hits all-around Jin.
As a gimmick, you can RC the second hit at any point assuming the first hit touched the opponent. This can be used to trick the opponent into blocking/dodging the second hit and Jin can resume pressure or sneak in a throw. This move can now be followed up with 214D or 214D > C for fullscreen carry into a small corner combo.
Musou Tousshugeki
214D

Really fast. Used for combos. Can continue combo if semi-near corner.

| Version | Damage | Cancel | Guard | Startup | Active | Recovery | Frame Adv | Attribute | Invul | Hitbox |
|---|---|---|---|---|---|---|---|---|---|---|
| 1st hit | 640 | R | LA | 17 | 24 | 4+5L | -10 | F | - | - |
| 2nd hit (214D~C) | 900 | R | All | 17 | 3 | 8+19L | -11 | H | - | - |
- Costs 25% Heat
- Jin is airborne from frame 4 and onwards
- Freezes opponent for 45F. Freeze Count 10
- Follow-up by pushing the C button
The fastest of the Ice Cars. The second hit sends the opponent flying across the screen and they'll slide to cover more distance when they hit the ground and wallstick if they hit the wall. This move actually works rather well against certain full-screen zoning attempts. It leads to a decent combo both midscreen and in the corner. In Chrono Phantasma you are able to whiff the first hit and still follow up with the second to avoid using your freeze prematurely.
Hizangeki
j.214D

Aerial combo ender or used as an overhead.

| Damage | Cancel | Guard | Startup | Active | Recovery | Frame Adv | Attribute | Invul | Hitbox |
|---|---|---|---|---|---|---|---|---|---|
| 1184 (300, 1500) | R | All,HA | 8 | 1(13)3 | 22 | - | H | - | - |
- Costs 25% Heat
- 1st hit whiffs on crouching opponents
- If the 1st hit whiffs, the 2nd hit has a 22F start-up and must be blocked high
- 1st hit freezes opponent for 80F. Freeze Count 10
Can be used to refreeze the opponent midair to land and followup with 6C. Can also be utilized as a very fast overhead by doing the TK motion or by canceling 6B mid-air into this. Causes ground slide on hit and ground bounce during OD. This move leads to a ridiculous amount of damage in the corner and can be followed up with 214D mid-screen.
Universal Mechanics
Forward Throw

Can cancel into specials and supers on 3rd hit.

| Damage | Cancel | Guard | Startup | Active | Recovery | Frame Adv | Attribute | Invul | Hitbox |
|---|---|---|---|---|---|---|---|---|---|
| 0,0,1400 | R,SOR | T(70) | 7 | 5 | 15 | - | T | - | - |
- 100% minimum damage (1400)
- Freezes opponent for 70F. Freeze Count 3
The general combo route for this is to cancel into 214B on the 3rd hit in order to be right next to them when they land. In the corner, you can Rapid Cancel the second hit and perform the full corner combo for about 4k damage. You can also cancel the 3rd hit into astral for a stylish ender!
Back Throw

Can cancel into specials and supers on 2nd hit.

| Damage | Cancel | Guard | Startup | Active | Recovery | Frame Adv | Attribute | Invul | Hitbox |
|---|---|---|---|---|---|---|---|---|---|
| 0,1400 | SOR | T(70) | 7 | 5 | 15 | - | T | - | - |
- 100% minimum damage (1400)
- Freezes opponent for 70F. Freeze Count 3
The general combo route for this is to cancel into 214B on the 3rd hit in order to be right next to them when they land. You can also cancel the 3rd hit into astral for a stylish ender!
Air Throw

Has a variety of combo options depending on throw height.

| Damage | Cancel | Guard | Startup | Active | Recovery | Frame Adv | Attribute | Invul | Hitbox |
|---|---|---|---|---|---|---|---|---|---|
| 0, 1400 | SOR | T(90) | 7 | 3 | 18+3L | - | T | - | - |
- 100% minimum damage (1400)
- Freezes opponent for 65F. Freeze Count 3
If performed at or below normal jump height, you can air dash j.2C afterwards and combo the opponent. Otherwise, you can just go for the j.2C > j.C combo route.
Counter Assault
Jin's Counter Assault, it uses 5C's animation.
Crush Trigger

Special Moves
Hishouken
236A, air OK

Zoning tool.
Can double jump or air dash if performed high enough.


| Damage | Cancel | Guard | Startup | Active | Recovery | Frame Adv | Attribute | Invul | Hitbox | |
|---|---|---|---|---|---|---|---|---|---|---|
| Ground | 500 | R | All | 14 | - | 44T | -6 | HBFP* | - | - |
| Air | 600 | R | All | 18 | - | 45T | - | HBFP* | - | - |
- Both Freezes opponent for 30F during OD. Freeze Count 5
Jin throws an ice blade at the opponent which travels in a perfect horizontal line. Use it to zone, to reset pressure, and to get in by chasing after it.
Fubuki
623B

Head invincibility starting on frame 4. Cannot hit crouchers.

| Damage | Cancel | Guard | Startup | Active | Recovery | Frame Adv | Attribute | Invul | Hitbox |
|---|---|---|---|---|---|---|---|---|---|
| 800 | R | HL | 8 | 3 | 33 | -17 | B | 5-9H | - |
- Cannot hit crouching opponents
- Freezes opponent for 50F during OD. Freeze Count 5
Insanely fast with an amazing reach and some head invulnerability, which makes it a good anti-air but it's unsafe, has horrible recovery, and can be crouched under. Only use it if you're absolutely sure it will land or get blocked, it's way too punishable on whiff. On Counter Hit, it can be followed up with 214D, Ice Arrow or Ice Wave.
Rehhyou
623C

Invincible from frame 1 through all active frames. Very slow.

| Damage | Cancel | Guard | Startup | Active | Recovery | Frame Adv | Attribute | Invul | Hitbox |
|---|---|---|---|---|---|---|---|---|---|
| 1100 | R | HL | 20 | 3 | 56 | -40 | B | 1-22 All | - |
- Freezes opponent for 70F during OD. Freeze Count 5
Jin's worst Dragon Punch. It's slow to the point where your opponent can use a jab that will go through the start-up I-frames and still have time to recover from the jab and block the actual attack. Can be easily baited with a back dash as well. It works wonders against cross-up attempts though because of its hit-box. Use this one with caution.
Musou Senshouzan
214B

| Version | Damage | Cancel | Guard | Startup | Active | Recovery | Frame Adv | Attribute | Invul | Hitbox |
|---|---|---|---|---|---|---|---|---|---|---|
| 1st Hit | 780 | R | LA | 17 | 9 | 4+3 | -8 | F | - | - |
| 2nd hit (1st hit hits) (214B~C) | 200 | R | All | 15 | 6 | 3+22L | -12 | H | - | - |
| 2nd hit (1st hit whiffs) (214B~C) | 800 | R | All | 36 | 6 | 3+22L | -12 | H | - | - |
- Freezes opponent for 40F during OD. Freeze Count 5
- 2nd hit has 100% minimum damage (200).
Used as combo filler in the corner and it's the go-to combo finisher.
2nd hit does 200 damage guaranteed and gains 7 meter on hit. Used primarily for gaining meter and for knockdown midscreen.
Hizansen
j.214C

The new aerial combo ender.

Sekkajin
22C

Must be close to the opponent to attack...

...or else Jin just stands there


Distortion Drives
Touga Hyojin
632146C

Punish tool and combo ender

| Version | Damage | Cancel | Guard | Startup | Active | Recovery | Frame Adv | Attribute | Invul | Hitbox |
|---|---|---|---|---|---|---|---|---|---|---|
| Normal | 700xN | R | All | 1+8 | - | 44T | -16 | HBFP*(2) | 1-2 All | - |
| Overdrive | 700xN, 400x3,1000 | R | All | 1+8 | - | 44T | -16 | HBFP* | 1-2 All | - |
- 180F Heat Gauge Cooldown
- Normal version has 25% minimum damage (175xN)
- Overdrive version has 30% minimum damage for last hit. All other hits have 25% minimum damage (total: 175xN+600)
- All hits of the Overdrive version wave Freeze opponent for 100F, next 3 followup hits freeze for 120F each
Most commonly known as "the Ice Wave". The Ice Wave will absorb most projectiles and go through those that can't be absorbed, making this the most powerful projectile in the game. This move is a zoner's bane, on reaction you can stuff things like Rachel's Tempest Dahlia or just hit anybody who wants to use a projectile against you while you have 50 meter. Exercise caution when using it against Lambda as her swords are just fast enough to impale you during the start-up. Because of its speed and range, you can use this to punish the recovery of whiffed grounded pokes and other moves with a lot of recovery. You can get a small combo on CH.
Overdrive follow-up only activates if opponent gets hit by the wave. Has 600 minimum damage making it one of the best enders in the game.
Hiyoku Getsumei
632146D air OK

Invincible startup, now a decent combo ender (1000 minimum damage). Has much less recovery on whiff and block.

| Version | Damage | Cancel | Guard | Startup | Active | Recovery | Frame Adv | Attribute | Invul | Hitbox |
|---|---|---|---|---|---|---|---|---|---|---|
| Ground | 800, 100x22, 1100 | R | HL | 5+5 | - | 63T | -35 | HBFP*(2) | 1-11 All | - |
| Air | 800, 100x22, 1100 | R | All | 5+5 | - | until L+11 | - | HBFP*(2) | 1-13 All | - |
- 180F Heat Gauge Cooldown
- Ground version has 25% minimum damage (1025)
- Air version has 20% minimum damage (820)
Most commonly known as "the Ice Arrow". It has full body invincibility on the first frame and it can be used as a high risk, moderate reward reversal but I wouldn't recommend it. It can work to punish stuff like Arakune summoning a cloud high up in the air, Rachel summoning pumpkin, or to punish Noel's Thor Hammer but these instances are extremely situational. This move is mostly used as a combo finisher.
Yukikaze
236236D

Catches any blockable attack.

Unblockable, invincible the whole time.


| Version | Damage | Cancel | Guard | Startup | Active | Recovery | Frame Adv | Attribute | Invul | Hitbox |
|---|---|---|---|---|---|---|---|---|---|---|
| Catch | - | - | - | 1 | 14 | 21 | - | - | 1-14C | Click! |
| Attack (Normal) | 100, 3700 | R | UNB | 57 | 15 | 78 | - | B,HBFP | All | Click! |
| Attack (OD) | 100, 1000x5 | R | UNB | 57 | 15 | 78 | - | Bx5,HBFP | All | - |
- Costs 50% Heat
- 180F Heat Gauge Cooldown
- Can't catch throws and unblockables
- Fatal Counter
- Jin is Invincible the entire time
- Normal version has 25% minimum damage (950)
- Overdrive version has 25% minimum damage for first 5 hits, last hit 30% (1120 total)
- Normal version: 1st attack Freezes opponent for 180F
- Overdrive version: all attacks except 5th Freeze opponent. 1st hit for 180F, rest for 100F
If you catch any non-projectile attack, the opponent is stuck in place for Jin to mow them down with the actual attack. If you catch a projectile, the opponent is free to move and avoid the attack. If you catch on the first active frame, then the startup is shortened considerably, thus making it more difficult for the opponent to avoid.
This move is best used against long range pokes where you're out of your opponent's throw range, that and it will be harder to punish since you're far away from the opponent.
Astral Heat
Rengoku Hyouya
[2]8D

Unblockable and freezes the entire ground. Combos from ground throw.

| Damage | Cancel | Guard | Startup | Active | Recovery | Frame Adv | Attribute | Invul | Hitbox |
|---|---|---|---|---|---|---|---|---|---|
| DESTROY | - | UNB | 6+50 | 5 | 95 | - | FP* | 1-6 All | - |
- Costs 100% Heat
- 180F Heat Gauge Cooldown
- Invul until superflash
Jin freezes the ground and if the opponent comes into contact with the frozen ground, they will die instantly. This is an unblockable move and all that's needed to avoid it is to jump. The only way you're getting this to work is during certain corner combos that utilize 6D, during OD combos that utilize 6D, and by canceling into this from a throw.
Strategy
Jin is one of those characters that has a tool for almost every situation. Jack of all trades, master of none type of character. He has pretty good poking tools such as 5C, 2D, ,j.C and Fubuki as well as his Ice Blades if he wants to play a zoning game. He has moderately fast normals with good range such as 5B and 2A if he's close to the opponent. You'll want to play him as the match-up dictates, zone against opponents with a weak neutral game (Tager, Kagura) and rush in against opponents with a stronger neutral game (Nu, Rachel).
In any other situation, you'll want to fish for CHs using 5C and j.C, as well as fish for confirms with Ice Blades and 2D. Once you confirm into a combo, you get the options to either finish your combo and knock the opponent down or freeze them and attempt a mix-up.
Jin's basic mix-up options are rather weak. While his 6A is insanely fast, it can't be followed up unless you RC it or land a CH. That which means that Jin must use his Drives in an attempt to mix-up the opponent. However, in the corner you gain the option of jump canceling 5B at the end of a combo; you'll use its vacuum effect to drag the opponent towards you just enough so that you can IAD towards the corner, squeeze in that gap that you just made with the vacuum effect, and attempt a quick cross-up using j.2C. If you have 25 Heat, you can go for TK Hizangeki and use it as an overhead. If you have 50 Heat, you can RC 6A into a full crouching combo.
In short, Jin will be fishing for CHs and confirms with j.C, 5C, Ice Blades, and 2D. He'll want to force the opponent into the corner where he becomes a real threat thanks to Hizangeki and his 5B resets.
Neutral
Use but not abuse Jin's j.C as a poke and an air-to-air. Jin can zone and successfully poke the majority of the cast with j.C because of its insane range and speed. It leads to a nice combo on CH as well. It can be crouched under and punished though, that's why you shouldn't abuse it.
5C and 2D can also be used to poke the opponent but the latter is highly punishable on whiff. You're going to want to use 5C according to the opponent that you're facing. If they have a move that's faster than your 5C at its optimal range then you'll want to refrain from using it too often. 2D needs to be used when you've conditioned the opponent to block it. Some common examples of these scenarios include the 5C > 2D block string, 2D on their neutral wake-up, against a move with a lot of recovery, and as your opponent is falling down. You can just throw it out naked but you have to make sure that the opponent will block it at the very least.
2A has a pretty good hit-box, low profiles under certain moves, and can be used to start pressure. You'll be using this move to poke from time to time.
The Ice Blades are a decent way to try and get a response out of your opponent. You'll mostly be using TK j.236C because it has less recovery than 236A. If the opponent jumps over the TK j.236C and tries to approach you, then you can try to intercept their approach with j.A, j.C, or an air throw depending on the distance between you and your opponent. If the opponent just sits there and blocks it, then you can try and get in. If they IB it, then you have to be careful as to how you want to rush down as you lose a bit of frame advantage. You'll be trying this approach from all the way across the screen as even TK j.236C can be punished with an IAD > air attack.
The Ice Wave super comes in extremely handy against zoners. On reaction, you can stuff things like Rachel's Tempest Dahlia or Lambda's 214D. Outside of that, zoners will have to play a lot more reserved because the Ice Wave will mow down any and every projectile.
Offense
Once you get in, you'll want to start using 2A to pressure. Do 2A x n > dash > 2A x n and see how the opponent reacts to that. If they're mashing A then frame trap them next time with 5C. If they're mashing reversals then bait them next time by simply holding back or jumping. If they're trying to jump away then simply delay your 2As from time to time; the opponent will most likely be hit during the jump start-up and you can hit-confirm from there. That or just do 2A > 2B and the low will connect since they're letting go off down + back in order to jump away.
You'll want to use 2B to reset pressure now that 5B is -6 on block. 2B is -3 but with proper conditioning, you can setup frame-trap and reversal bait scenarios. Other than that, you'll want to use 6B or 2D to reset pressure depending on the distance between you and your opponent. Throw some jump cancels here and there and try to screw with your opponent's head using j.2C.
Since throws, 2B, and 6A can only take you so far when it comes to opening the opponent up, you'll want to use Hizangeki when you have the meter. Performing a TK motion using Hizangeki will give you a 22F overhead that leads to 4K+ in the corner. Canceling 6B before you touch the ground into Hizangeki yields similar results.
Freeze Resets
Another important aspect of Jin's mix-up includes the use of resets. Jin can go for a reset any time he freezes an opponent or after 5B on the ground. From a j.D high in the air you can use a 5B to tag them if they're not holding barrier. The way this works is that you'll most likely be below them when you use j.D, you'll land and have enough time to use 5B for a reset. If they're holding barrier then you can pressure reset. Other than that, you can also run under them after the j.D and attempt a cross-under mix-up with 5B.
From a 6D freeze late in a combo, you can create a scenario where the opponent will have to guess whether to block high, low, or tech a throw. Your options here are jump > air dash > j.B/j.2C, jump > falling j.2C low to the ground for a feint high and then you'll land and do 2B.
Okizeme
Mid-screen, 214B~C Knockdown:
You don't really have many options in terms of catching rolls after this type of knockdown. 2A will act as a meaty if the opponent goes for a neutral tech and will OTG them for a new combo if they try to sneak-in a quick tech. 2A will only catch forward rolls if you were relatively far away from the opponent after the 214B~C knockdown or if they're too slow with their forward roll. There's nothing you can do if the opponent decides to go for a back roll, other than chase after them. The main reason you'll be using this type of combo finisher is because of the Heat gain (+9 on the 2nd hit of 214B~C).
Mid-screen, 22C Stagger
You sacrifice a bit of damage and Heat gain but you lock your opponent down with a stagger. From there you can start some new pressure or go for some high-low or throw mix-up. This is the go-to combo finisher if you absolutely must not allow your opponent any breathing room.
Mid-screen, 3C > 22C Knockdown:
You sacrifice a bit of damage and Heat gain compared to 214B~C and the lockdown from 22C but you carry the opponent further into the screen and closer to the corner. Furthermore, you gain the ability to punish any type of roll after this type of knockdown. After the 22C, you need to run up to the opponent and use 5B if you suspect a forward roll. If they neutral tech, it will act as a meaty and if they roll forward they'll get caught. If you suspect that they will roll backwards then run up to them and use 5C, the 5C will act as a meaty and catch the back roll for huge damage.
Corner, 22C Knockdown
The standard combo finisher in the corner. All you have to do is jump and use j.2C low to the ground to use it as a meaty, to catch forward rolls, and to safe jump reversals.
Corner, j.214C Knockdown
This type of knockdown is only used if you go into the damage route in a corner combo. Your best option here is to go for run-up 2A which will act as a meaty and if timed correctly it will tag the opponent out of a forward roll. The opponent will not be able to roll out of the corner because you'll body block them as you go for the run-up 2A.
Defense
Jin has some pretty decent defensive tools with Yukikaze, DP D, DP B, 2A, and 2C.
Yukikaze is better used against your opponent's pokes where you're out of your opponent's throw range. If you read a poke or wanna be flashy with a reversal kill, then use Yukikaze. It can also be used to escape projectile oki scenarios such as Rachel's frog, Makoto's orb, or Kagura's orb. Yukikaze truly shines as an escape tool when Carl or Relius use their Rhapsody of Memories/Duo Bios super to force you to block. Not only will you be able to dodge the dolls trying to lock you down because of Yukikaze's invulnerability but Carl and Relius will be forced to find a way to dodge Yukikaze, and a simple super jump > double jump won't cut it. That's because when Jin hits any of the dolls with Yukikaze, it extends the active frames considerably.
DP D is your go-to reversal; it has amazing range and the second hit can be charged up and released at any time in order to screw with your opponent trying to dodge it or punish it. You should only use DP C if you get a really good read on your opponent; it has horrible horizontal range, speed, and gives the opponent all the time in the world to punish you with their best combo starter.
As far as anti-airs go, you have Fubuki, 2A, and 2C. Fubuki is extremely fast, has pretty good reach, and has head invulnerability starting on frame 4 but it's negative on block and punishable on whiff. 2A shrinks Jin's hurt-box and allows him to low profile under a few jump-in attacks. 2C has an insane vertical reach and has head invulnerability starting on frame 9 but it has a slow, 17F start-up and a ton of recovery on whiff.
Combos
| Combo Notation Guide: |
|---|
|
Midscreen
This combo section is designed on a "move starter" basis. However, you can use whatever kind of organization you prefer, as long as it is readable and efficient.
*insert move name* Starter
Notes: In case these combos need notes. If they do not, you can remove this line.
Point 1
- move > move > special >> special NOTE: this is only a base. your combos do not have to follow this format.
- Requirements: -- (ex: 50 heat, Overdrive, crouching opponent. if no requirements, leave as is)
- Damage: ----, Heat Gain: --
- + move = Damage: ----, Heat Gain: -- NOTE: if a necessary combo is very similar to a previous one, you can add options like this.
- Notes: Write notes for the combo if necessary.
Point 2
Copy and paste the code from Point 1 to Point 2 as many times as you need to.
Terms
AD - Air Dash
IAD - Instant Air Dash
UD - Under Dash
hj - high jump
dj - Double jump
OD - Over Drive
RC - Rapid Cancel
CH - Counter Hit
FC - Fatal Counter
CT - Crush Trigger
Combos from A Moves
Mid-screen:
- 5A/2A > 5B > 2B > 5C > 3C > 214B + C
- 5A/2A > 5B > 5C > 22C You can try to make: Dash+Grab(A+B), Dash 6A(Overhead), IAD+j.5D(crossup) and more..
- 5A/2A > 5B > 5C > 3C > 22C You can also try IAD j.2С as punishment
- 5A/2A > 5B > 5C > 3C > 22C + D > 2C > 421B
- (crouch)
- 2A > 5B > 5C > 2C > 6C > 2D > j.2C > j.5C > j.214C
- 2A > 5B > 5C > 6C > 2D > Dash 5B > 2B > 5C > 3C > 214B + C
Corner:
- 5A/2A > 5B > 5C > 3C > 214B > 5B > 5C > 2C > hj.C > j.2C > dj.5C > dj.214C
- 5A/2A > 5B > 5C > 3C > 214B > 5B(1) > 5C > 22C > 5B(1) > 22C
- (crouch)
- 2A > 5B > 5C > 2C > 6C > 6D > 6C > 22C > 5B(1) > 22C
- 2A > 5B > 5C > 2C > 6C > 6D > Dash 5B > 2B > 5C > 3C > 214B + C
- 2A > 5B > 5C > 6C > 214B > 5C > 2C > j.5C > j.2C > dj.5C > dj.214C
Mid-screen:
- 6A > RC 5C > 2C > 6C > 2D > j.2C > j.C > Dash 5B > 5C > 2C > 3C > 214B + C
- 6A > If you land a Counter Hit 6A, than 5B > 5C > 2C > 6C > 2D > j.2C > j.C > Dash 5B > 5C > 2C > 3C > 214B + C
Mid-screen:
- 5B/2B > 5C > 2C > 3C > 214B + C
- 5B/2B > 5C > 3C > 22C + D > 5C > 2C > hj.5C > j.2C > j.5C > j.2C > j.236C
- 5B/2B > 5C > 3C > 22C + D > [ UD 5C > 2C > hj.5C > j.2C > j.5C > j.2C > 214C] or [UD 5B > 5C > 2C > hj.5C > j.2C > j.5C > 214C]
- 5B/2B > 5C > 2C > 3C > 214D > 5B > 5C > 3C > 214B + C
- 5B/2B > 5C > 3C > 22C + D > 5C > 2C > hj.5C > j.2C > j.236D > 412364C
- (crouch)
- 5B/2B > 5C > 2C > 6C > 2D > j.2C > j.5C > Dash 5B > 2B > 5C > 3C > 214B + C
- 5B/2B > 5C > 2C > 6C > 2D > CT > j.2C > j.5C > Dash 5B > 2B > 5C > 3C > 214B + C
Mid-screen to Corner
- 5B/2B > 5C > 5D > 214D-С > Dash 6C > 214B > 5C > 22C > 5B > 5C > j.5C > j.2C > j.5C > j.214C
Near сorner
- (crouch)
- 5B/2B > 5C > 6C > 2D > 6C > 214B > 5C > 22C > 5B > 5C > 2C > hj.5C > j.2C > j.5C > 214C
- 5B/2B > 5C > 6C > 214D(wiff) + C > 6C > 214B > 5C > 6C > 6D > OD 6C > delay 6B > j.214C > 6C > 22C > 623B > 632146C
Only corner
- 5B/2B > 5C > 3C > 214B > 5B > 5C > 6C > 6D > 6C > 22C > 5B(1) > 5C > 22C
- 5B/2B > 5C > 3C > 214B > 5B > 5C > 6C > 6D > 5C > 2C > j.5C > j.2C > j.5C > j.214C
- 5B/2B > 5C > 3C > 214B > 5B > 5C > 6C > 6D > 6C > 22C > 5B > 5C > j.5C > [j.214C] or [j.214D > 6C > [623B or 632146D]] or [j.2C > dj.5C [j.214C or 632146D or j.214D > 632146D]]
- 5B/2B > 5C > 3C > 214B > 5B(1 hit) > 5C > 2C > 6C > 623C > 5B > 5C > 2C > hj.5C > j.2C > j.5C > [j.214C] or [j.632146D] or [j.214D > 632146D]
- 5B/2B > 5C > 3C > 214B > 5B(1 hit) > 5C > 2C > 6C > 623C > 5B > 5C > 2C > hj.5C > j.2C > j.214D > land 6C > OD > 623B > 632146C
- 5B/2B > 5C > 3C > 214B > 5B > 5C > 6C > 6D > IAD j.2C > j.5C > Dash 5B > 5C > 3C > [22C or 632146D]
- (crouch)
- 5B > 5C > 6C > 214B > 5C > 6C > 6D > 6C > 22C > 5B > 5C > j.2C > j.5C > dj.2C > dj.5C > dj.214C
- 5B > 5C > 6C > CT > 6C > 214B > 5C > 6C > 6D > 6C > delay 6B > j.214D > 66 6C > 22C
- 5B/2B > 5C > 6C > 214D + C > 6C > 214B > 5C > 6C > 6D > OD 6C > delay 6B > j.214C > 6C > 22C > 623B > 632146C
Mid-screen:
- 6B > j.214D > 214D > Dash 5B > 5C > 3C > 214B > 5B > 5C > 2C > hj.5C > j.2C > j.5C > [j.214C or j.632146D]
- 6B > 66 5B > 2B > 5C > 3C > [214B+C] or [214D > 66 5B > 5C > 3C > 214B+C]
- (crouch)
- 6B > 66 5B > 5C > 6C > 2D > j.2C > j.5C > 66 5B > 5C > 3C > 214B+C
- 6B > 66 5B > 5C > 6C > 2D > CT > j.2C > j.5C > 66 5B > 5C > 3C > 214B+C
Mid-screen
- TK.214D > 214D > Dash 5B > 5C > 3C > 214B > 5B > 5C > 2C > hj.5C > j.2C > j.5C > [j.214C or j.632146D]
Corner
- TK.214D > Dash 6C > 214B > 5C > 6C > 6D > 6C > 22C > 5B > 5C > j.5C > j.2C > j.5C > [214C] or [j.632146D]
- TK.214D > Dash 6C > 214B > 5C > 6C > 6D > 6C > OD > 6C > 6D > 6B > j.214C > 6(hold) 623B > 632146C
- TK.214D > Dash 6C > 214B > 5C > 6C > 6D > IAD j.2C > j.5C > 66 5B > 5C > 3C > OD > 5C > 6B > j.214C > 6(hold) 623B > 632146C
Combos from Throw
Mid-screen:
- Throw > 214B(wiff) > j.2C > j.5C > Dash 5B > 2B > 5C > 3C > 214B + C
- Throw > 214B(wiff) > j.2C > j.5C > Dash 5B > 2B > 5C > 3C > 22CAlso you can try IAD j.2С as punishment
- Throw > 214B(wiff) > j.2C > j.5C > Dash 5B > 2B > 5C > 3C > 632146D
- Throw > 214B(wiff) > j.2C > j.5C > Dash 5B > 2B > 5C > 3C > OD 5C > 6B > 214C > 632146C
- Throw > 214B(wiff) > OD 5C > 6B > 214C > Dash 6C > 22C > 5C > 3C > 632146C
- Throw > 214B(wiff) > OD 5C > 2C > j.2C > j.5C > land 5C > 3C > 214B > Dash 5C > 3C > 632146C
- j.Throw > AD j.52C > j.5C 66 5B > 2B > 5C > 3C > [22C or 214B+C]
Corner:
- Throw > 214B(wiff) > 6C > 22C > 5B > 5C > 2C > hj.5C > j.2C > j.5C > [j.214C or j.632146D]
- Throw > 214B(wiff) > 6C > 22C > 5B > 5C > 2C > hj.5C > j.214D > land 6C > [623B or 632146D or OD 623B > 632146C]
- j.Throw > 6C > 214B > 5C > 2C > hj.2C > j.5C > j.2C > j.5C > [j.214C or j.632146D]
- j.Throw > 6C > 214B > 5C > 2C > hj.5C > j.214D > land 6C > [623B or 632146D or OD 623B > 632146C]
Combos from CH
Mid-screen:
- DPC > 5C > 2C > 2D > Dash 5B > 5C > 214B + C
- DPC > 5C > 2C > 2D > 5C > j.5C > 214D > 632146C
- DPC > 5C > 2C > hj.5C > j.5D > Delay, and You can try AD j.5D
- DPC > 5C > 2C > hj.5A > j.5C > j.5D Wait landing, and You can try: under dash > Grab(A+B) or Grab on landing
- DPC > 5C > 2C > 2D > You can try: j.2C (crossup) + 44 5B > 5C ...
Corner:
- 6В (CH) > 6С > СТ > dash 6C > 6B > j. 214D > dash 6C > 214B > 5C > OD 5C > 6C > 6B > j. 214C > 6(hold) 623B > 632146C
Combos from FC
Mid-screen:
- 5D(FC) > Dash 5B > 5C > j.2C > j.5C > Dash 5B > 5C > j.2C > j.5C > Dash 5B > 5C > 3C > 214B + C
- 5D(FC) > Dash 5B > 5C > j.5B > j.2C > j.5C > Dash 5B > 5C > j.5B > j.2C > j.5C > Dash 5B > 5C > j.5B > j.2C > j.5C > Dash 5B > 5C > 3C > 214B + C (Only on Iron Tager)
- 5D(FC) > Dash 5B > 5C > j.2C > j.5C > Dash 5B > 5C > j.2C > j.5C > Dash 5B > 5C > 3C > 632146D
- 5D(FC) > Dash 5B > 5C > j.2C > j.5C > Dash 5B > 5C > j.2C > j.5C > Dash 5B > 5C > 3C > OD 5C > 6B > 214C > 632146C
- 5D(FC) > Dash 5B > 5C > j.2C > j.5C > Dash(66) 5B > 5C > j.2C > j.5C > Dash(66) 5B > 5C > j.2C > 632146D
- 5D(FC) > Dash 5B > 5C > j.2C > j.5C > Dash(66) 5B(1hit) > 5C > j.2C > j.5C > Dash(66) 5B(1hit) > 5C > 6C > OD > DPB > 632146C
- 5D(FC) > Dash 5B > 5C > j.2C > j.5C > Dash(66) 5B(1hit) > 5C > j.2C > j.5C > Dash(66) 5B(1hit) > 5C > 6C > OD > 632146D > delay DPB > delay j.5C > j.5C > j.214C > land 632146C
{Сreator - PSN:YouMyEnemy}