| Taokaka |
|---|
 |
|
Overview
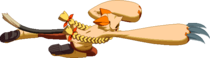
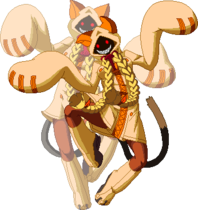
A young beastkin of the Kaka tribe who live in the lower class part of Kagutsuchi. Her coat is equipped with massive paw-like hands that include long, retractable claws. She wants to get back the sky above her village that was sealed off with an enormous plate by humans who came to the land and started building a big city. She left her village in search of someone called Ragna after she heard that you could gain a lot of money for defeating him. She doesn't know it, but she is a descendant of bio-weapons created from one of the six heroes, Jyuubei. Her Drive Ability is known as Dancing Edge: Reckless Kitty, which specializes at dashing at high speeds with a slash attack.
Drive: Dancing Edge
Taokaka's Dancing Edge involves using the drive button and a directional input to launch her in a torpedo fashion at the opponent. Each drive travels at a set distance and can all be canceled on block or on hit by inputting A/B/C, 6 or 4. The A cancel stops her from moving completely if done in the air she is unable to perform any action until she touches the ground. This cancel leaves her at an advantage on hit and -2 on block. This is mostly used to frame trap on hit and is one of the two primary cancels that can be safely done on block/instant block. B cancel makes Tao pass through the opponent, and is heavily negative on block (-5) and on hit it's neutral. If Tao uses the B cancel high enough off the ground she can still perform actions such as air normals and utilize her unused jumps. This cancel is commonly used with 2D and j.8D to create cross-up j.A, j.B, j.2B, and j.C situations. It can also be used in the air to alter her landing and control space. A high B-canceled j.D is advantageous on block due to being able to input j.A before landing making it one of her best air pokes. Finally her C cancel stops her mid air and allows the use of any remaining jumps as well as air normals. The C cancel is the second most used on block as it leaves her +2 and she can choose to go for pressure or return to neutral. Another usage it has is with j.4D since j.4D causes Tao to touch the ground, and she can C-cancel this infinitely due to her jumps being refreshed every time she touches the ground. This makes for a very good spacing tool in neutral. It's important to note that despite being +3, since Tao is mid air, she is very susceptible to anti airs. You can also cancel her drive by inputting 6 (forward) which will cause her to bounce of the enemy and go forward pass them, but due to the landing recovery this is rarely seen anymore outside of combos.
Overdrive: Almost Becoming Two!
This Overdrive is great for extending pressure or increasing your damage from 4k to 8k depending on the starter. Like all Overdrives, the opponent cannot burst during it, making it a surefire way to finish off your opponent. You can do 5B > 5C > AB2 to extend your pressure in the corner and it frame traps so it is 100% mash safe. This becomes a very useful tool when your opponent has their back to the corner as this is where Tao's damage is at its highest but pressure is at its weakest, however be on the look out for reversals such as DP'S and reversal supers as you will be hit out of anything you do after AB2. The most common way Overdrive Cancel into AB2 is from 6C > 4D~B. Because of the shadow, most normals will now link together much easier (even fully charged ones). Almost everything is now jump cancelable (including j.236Bx5, and Cat Spirit Encore), allowing you to maximize minimum damage. Her new aerial Distortion Drive, Unison Nyaibu is particularly potent during Overdrive, and can combo off j.236Bx5. With 100 meter, a low j.236Bx5 can also combo into a double Hexa-edge (for up to 9k).
Notes
- Attack power reduced to 50% for duration of AB2 (untechable time is unaffected)
- Shadow clone does everything Tao does with a 12F delay
- Any effect on hit or guard (like float) is reduced by 8F
- If Tao whiffs a move, the shadow clone's move will whiff as well
- Normal moves can cancel into themselves twice and jump-cancelled
- Drives and specials can all be special-cancelled
- Cooldown 180F
Pros/Strengths:
- Mobility is easily the most versatile in the game
- Has solid normals to poke with at neutral
- Good average damage output
- Above average pressure, effective frame traps
- Good crossup potential
- Gets corner carry into knockdown off most good confirms
- Extra dashes/jumps allow you to bait and punish more easily
- Almost Becoming Two combos greatly increase damage potential
Cons/Weaknesses:
- Below average mixup, only standing overhead that combos without CH/meter is 6B > j.236B(whiff) > 5B
- Lowest health in the game
- No DP without meter, few defensive options in general
- Variety of movement options, poor defensive options, and low HP combined can make for a difficult character to pick up and learn
- Midscreen damage output without a CH/crouch confirm or meter is fairly low
External References:
- Japanese Name: タオカカ
- Japanese Wiki
- Japanese BBS
- Arcade Profile Dan Rankings
- Character Video Thread
Move List
Normal Moves
5A

Kitty paw.

5B

Protect your family jewels.

| Damage | Cancel | Guard | Startup | Active | Recovery | Frame Adv | Attribute | Invul | Hitbox |
|---|---|---|---|---|---|---|---|---|---|
| 400 | SOJRDr | HL | 6 | 3 | 9 | -1 | B | - | Click! |
This is your main pressure tool as it goes into all your High/low stuff, frame traps and it's 6 frames as well as air unblockable so it will occasionally catch jump outs. At point blank range it makes for a good poke out of pressure, but its lack of range makes doing this risky.
5C

Not a poke!.

| Version | Damage | Cancel | Guard | Startup | Active | Recovery | Frame Adv | Attribute | Invul | Hitbox |
|---|---|---|---|---|---|---|---|---|---|---|
| Normal | 550 | SO(J)RDr | HL | 10 | 3 | 24 | -10 | B | - | Click! |
| Max Charge | 650 | SO(J)RDr | HL | 17 | 3 | 24 | -10 | B | - | Click! |
(Chargeable)-Has decent range but due to the high recovery frames it's not really a reliable poke. Works well to catch certain back dashes and with heat it can be RC to hit confirm into solid damage. It's air unblockable and works well with air blocked normals as you can jump cancel it to keep the pressure going or just return to neutral. Can be held down and be released at any time so you can use it to punish mash out's. Due to the high risk of charging in your opponent's face it should only be charged for short periods of time to act as a bootleg frame trap.
2A

OMG Why is Tao's 2A so broken.

| Damage | Cancel | Guard | Startup | Active | Recovery | Frame Adv | Attribute | Invul | Hitbox |
|---|---|---|---|---|---|---|---|---|---|
| 300 | CSORDr | LA | 6 | 3 | 11 | -4 | F | - | Click! |
Another main pressure tool. It hits low so it does really well at punishing people that attempt to jump out of pressure. It can be canceled into itself twice and is used primarily to reset pressure as well as throw/TRM setups. Due to it being 6 frames it makes for a good poke out of your opponent's pressure and can be used as a way to approach your opponent from the ground.
2B

Important space controlling tool that is heavily underestimated.

| Damage | Cancel | Guard | Startup | Active | Recovery | Frame Adv | Attribute | Invul | Hitbox |
|---|---|---|---|---|---|---|---|---|---|
| 360 | SORDr | L | 7 | 4 | 18 | -10 | F | - | Click! |
This is one of her most important spacing tools as it pushes her forward and covers good space. It uses are primarily for tic trows, catching jump outs, and being her only other viable low besides 2A. This is also one of her best pokes out of pressure without heat becasue it shrinks her hit box so that it can low profile a lot of normals in the game. It also makes for a great way to safely punish things like Dead spike, Hazama's stance mix up, Jin's 6D, etc. You can generally toss this out any time you feel there's an awkward space between you and your opponent and if timed properly it can also go under certain jump in attempts. USE THIS POKE SON!!!
2C

Outside of combos this makes for a decent go to normal for a frame trap.

| Version | Damage | Cancel | Guard | Startup | Active | Recovery | Frame Adv | Attribute | Invul | Hitbox |
|---|---|---|---|---|---|---|---|---|---|---|
| Normal | 575 | SORDr | HL | 12 | 2 | 21 | -6 | F | - | Click! |
| Max Charge | 675 | SORDr | HL | 29 | 2 | 21 | +1 | F | - | Click! |
For the most part this has become a combo staple. Outside of combos it serves as a fantastic punishing tool and a decent frame trap. It's actually possible to hit her out of anything into 2C but the opponent has to really be mashing to be successful.
6A

Anti air.

6B

Slow overhead, safe on block

| Damage | Cancel | Guard | Startup | Active | Recovery | Frame Adv | Attribute | Invul | Hitbox |
|---|---|---|---|---|---|---|---|---|---|
| 440 | SORDr | HA | 26 | 3 | 4+13L | -2 | H | 1-32F | Click! |
- 1-32 Feet Invul
This is a pretty slow overhead that should only be used once you have respect from your opponent, since it is very easy to poke her out of 6B. The main advantage is that 6B is +2 on block and has other uses outside of pressure. 6B has low invincibility so it goes over lows and since it leaves her air borne she can use this to avoid throws ( think of jin's 6B just 1 frame slower.) Another use this move has in combination with the throw/counter assault OS off a neutral tech, you input the OS throw break then you input 6AB right afterwards. If your opponent goes for a grab you tech due to the throw OS and if they try to delay their throw Tao will 6B which will avoid the delayed throw. As of extend this move has fatal properties.
6C

Tao's best standing poke now due to the increase in speed.

| Version | Damage | Cancel | Guard | Startup | Active | Recovery | Frame Adv | Attribute | Invul | Hitbox |
|---|---|---|---|---|---|---|---|---|---|---|
| Normal | 700 | SORDr | HL | 19 | 6 | 18 | -5 | B | - | Click! |
| Max Charge | 800 | SORDr | HL | 42 | 6 | 18 | ±0 | B | - | Click! |
This poke has gotten an immense increase of speed in extend thus making this Tao's best standing poke. 6C can be charged, but has the same risk of 2C/5C just with the reward of being 0 on block if fully charged. This is your go to ground poke for footsies and on counter hit it wall bounces from any place on the screen leading into big damage.
3C

Pointless outside combos.

j.A

Standard j.a nothing special.

j.B

Standing hit confirm into stuff.

| Damage | Cancel | Guard | Startup | Active | Recovery | Frame Adv | Attribute | Invul | Hitbox |
|---|---|---|---|---|---|---|---|---|---|
| 140*2 | SOJRDr | HA, all | 8 | 2(3)2 | 15 | - | H | - | Click! |
Used primarily as a pressure tool and to hit confirm into solid damage on standing opponents. This can also be used in conjunction with 214D in the corner to go for either an over head (j.b) or a low (land 2A).
j.2B

Has good active frames so makes for a good answer to character's that rely on anti air 2A.

| Damage | Cancel | Guard | Startup | Active | Recovery | Frame Adv | Attribute | Invul | Hitbox |
|---|---|---|---|---|---|---|---|---|---|
| 385 | SOJRDr | HA | 17 | 3 | 19 | - | H | - | Click! |
Another one of her main pressure tools. Has a ton of active frames so it really shines in match ups in which the opponent heavily relies on 5A/2A for an anti air. Outside of combos this move is pretty basic.
j.C

Both her safest and most rewarding air poke if hit confirmed properly.

| Version | Damage | Cancel | Guard | Startup | Active | Recovery | Frame Adv | Attribute | Invul | Hitbox |
|---|---|---|---|---|---|---|---|---|---|---|
| Normal | 400 | SOJRDr | HA | 9 | 3 | 21 | - | H | - | Click! |
| Max Charge | 500 | SOJRDr | HA | 24 | 3 | 21 | - | H | - | Click! |
This is one of your best air to air poke as it put's you at little risked when spaced properly and on counter hit can be hit confirmed into 6C if your low enough to the ground. Also makes for a very good pressure tool as you can space it out to be just out of range of your opponent's anti air. Overall this normal is very versatile and can generally be tossed out any time your in the air to control space or go fishing for counter hits. Just like all of her C moves it is also chargeable and with a little respect can be used to fake out a j.c and go for a low or a tic throw, but again due to the risk of having to charge this is not highly recommended.
Crawl
3

Low profile's everything (almost).

| Damage | Cancel | Guard | Startup | Active | Recovery | Frame Adv | Attribute | Invul | Hitbox |
|---|---|---|---|---|---|---|---|---|---|
| - | - | - | - | - | - | - | - | - | Click! |
- 1F~ low profile hitbox
- 4F~ even lower profile hitbox
- Tao's Crawl is most useful in the following match ups/Situations- Valkenhayn,Tager,Ragna,Litchi (Staff),Mu (5C),Bang (5B,5A).
Tao's crawl can be done by inputting down forward, doing so shrinks Tao's hit box drastically and allows her to crawl most ground/air normals in the game. Unfortunately her crawl is only applicable in very few match ups and situations. The good news is that Crawl does not put her in CH state. This is an important tool used to counter your opponent's attempt at spacing and in some instances a way out of certain mix ups. Be sure to experiment with this as it is a very useful defensive option due to the fact it causes normals to whiff thus meaning your opponent can not RC the normal due to it never being blocked
Taunt

Taunt RC mix up is OP.

| Damage | Cancel | Guard | Startup | Active | Recovery | Frame Adv | Attribute | Invul | Hitbox |
|---|---|---|---|---|---|---|---|---|---|
| 100*2 | SOR | HL | 11 | 5(10)5 | 15 | -10 | B | - | Click! |
There are only two things you could possibly do with this; Firstly, to go for a taunt RC mix up. Taokaka's taunt animation is technically a hit that does 10 damage so you can RC it and go for a TRM setup or some trollish mix up attempt. Secondly, this makes for a really humorous anti air if you're lucky and spaced out properly. Other than the two uses above it is useless.
Drive Moves
5D
Torpedo.

| Damage | Cancel | Guard | Startup | Active | Recovery | Frame Adv | Attribute | Invul | Hitbox |
|---|---|---|---|---|---|---|---|---|---|
| 600 | R | all | 15 | 9 | 5+25L | - | H | - | Click! |
- All of her drives can be canceled with either A,B,C, or 6
5D isn't really all that good outside of combos. Its primary uses are after any random hit confirm into 5C, 5D, A cancel, which leaves Tao at frame advantage on hit, but outside of this it really has no other purpose.
2D

Works as an anti air sometimes.

| Damage | Cancel | Guard | Startup | Active | Recovery | Frame Adv | Attribute | Invul | Hitbox |
|---|---|---|---|---|---|---|---|---|---|
| 650 | R | all | 13 | 10 | 10 | - | H | - | Click! |
- Cannot hit grounded opponents
This drive is a little better as it can serve as a decent anti air when your opponent is above you at super jump height. On counter hit it can be hit confirmed into j.4D and leads into big damage thus making this move one of Tao's most useful drives. Besides it being a decent anti air it makes for a good cross-up if B canceled as you can either go high (j.A,j.C),low (2A,2B) or even go for a fast empty jump throw.
4D

In combos now.

j.D

Amazing air poke only 2nd to j.C .

| Damage | Cancel | Guard | Startup | Active | Recovery | Frame Adv | Attribute | Invul | Hitbox |
|---|---|---|---|---|---|---|---|---|---|
| 550 | R | all | 11 | 12 | till L+10 | - | H | - | Click! |
As of extend this move now wall bounds on counter hit, but the opponent can tech a few feet before they touch the ground. Overall this move is still the same and remains as one of Tao's best air pokes. Though not as rewarding as j.c it definitely controls more space and works as a good tool to switch sides on the screen. Off of any jump cancelable normal you can input a a low to the ground j.D and B cancel it to make for a much faster cross-up than J.2D,B cancel.
j.2D

gimmicks.

| Damage | Cancel | Guard | Startup | Active | Recovery | Frame Adv | Attribute | Invul | Hitbox |
|---|---|---|---|---|---|---|---|---|---|
| 600 | R | all | 12 | till L | 25L | - | H | - | Click! |
This move doesn't really have much uses besides frame traps with C cancel and going for risky tick throws after a B cancel. If you feel someone is about to mash out you can just use J.2D as a frame trap the problem is you almost have to C cancel to stay safe due to recovery frames. after 6B you can go for j.2D, B cancel and go for a green throw as this move has barely any hit stun, but please be warned this is not safe and the opponent can mash out.
j.4D
Alters landing.

| Damage | Cancel | Guard | Startup | Active | Recovery | Frame Adv | Attribute | Invul | Hitbox |
|---|---|---|---|---|---|---|---|---|---|
| 200, 600 | R | all | 6 | till L(16)9 | 4+25L | - | H | - | Click! |
- 1st attack cannot hit grounded opponents
This is her best drive starter by far and can be comboed into on hit with A cancel, dash 5B. As mentioned earlier when combined with C canceled this allows an infinite amount of j.4D as this moves makes Tao touch the ground mid animation. It's primary uses are for controlling space, altering landing,hit confirming counter hit 2D, and going under your opponent when he is in the air thus causing you to be on the other side of the screen. It loses out to anti air's and certain 2A's so use with moderation, but be sure to not forget about this tool as it control a lot of horizontal ground space once the actual torpedo animation has begun.
j.8D
No more loops!
| Damage | Cancel | Guard | Startup | Active | Recovery | Frame Adv | Attribute | Invul | Hitbox |
|---|---|---|---|---|---|---|---|---|---|
| 580 | R | all | 10 | 10 | 10 | - | H | - | Click! |
- Cannot hit grounded opponents
This is primarily used as a combo tool and for an occasional cross up if your looking for something faster than 2D, B Cancel. Besides that this move serves no other purpose.
Forward Cancel

Combo stuff.

| Damage | Cancel | Guard | Startup | Active | Recovery | Frame Adv | Attribute | Invul | Hitbox |
|---|---|---|---|---|---|---|---|---|---|
| - | S | - | - | - | 18 | - | - | - | Click! |
- Starts up either after drive hit or 5F after drive block
- 15F landing recovery
This is actually more important than it would seem. You can delay this cancel to adjust combos so that the opponent doesn't fall out of the ender. A very useful skill when you're getting random things hit confirmed into a highly hit or low hit j.C in the air, but outside of adjusting combos it has no other uses.
Back Cancel
Combo stuff.

A Cancel

Frame traps on hit and safe on block.

| Damage | Cancel | Guard | Startup | Active | Recovery | Frame Adv | Attribute | Invul | Hitbox |
|---|---|---|---|---|---|---|---|---|---|
| - | - | - | - | - | 18 | -2 | - | - | Click! |
- 13F landing recovery on landing during animation
- Frame advantage calculated using cancel from 5D
- Consumes 1 jump/air dash
- Frame advantage off 5D hit
This is her most used cancel during hit confirmed block strings as on hit it leaves you at +1. Although this move is safe on block (-2) it's not really recommended as doing so will end your pressure or put you at a slight risk if your opponent is paying attention to your cancels. Overall this is a staple in match ups in which you cannot get a standing hit confirm (Makoto,Rachel,Noel,Lambda,Carl,Platinum)and can still be used in the other matchups if you feel you're too far to get a standing hit confirm. It should be noted that this cancel should be used in the air with caution as Taokaka cannot use any of her remaining jumps after an A cancel and must land before she can perform any action.
B Cancel

J.D BFF.
| Damage | Cancel | Guard | Startup | Active | Recovery | Frame Adv | Attribute | Invul | Hitbox |
|---|---|---|---|---|---|---|---|---|---|
| - | - | - | - | - | 21 | -5 | - | - | Click! |
- Cancels from 5D (23T), 4D (15T), j.D (21T), or j.4D (20T) travels sideways
- Cancels from 2D, j.8D travels upwards (16T)
- Cancels from j.2D travels downwards (16T)
- 16F landing recovery on landing during animation
This cancel is -5 on block and is roughly neutral on hit. In almost all known counter hit situations you are forced to use your fastest move in order to prevent your opponent from escaping your pressure.
C Cancel

+3 leaves you air borne.

| Damage | Cancel | Guard | Startup | Active | Recovery | Frame Adv | Attribute | Invul | Hitbox |
|---|---|---|---|---|---|---|---|---|---|
| - | - | - | - | - | 16 | - | - | - | Click! |
This cancel is really good for safely controlling space in neutral as you can use all your remaining jumps even on whiff. When combined with A cancel it becomes hard for an opponent to mash out of Tao's pressure due to the minimal frame disadvantage and overall lack of universal options the opposing character might have. Most characters cannot safely throw out a normal that will beat out both her A cancel and c cancel.
Universal Mechanics
Forward Throw

Normal.

| Damage | Cancel | Guard | Startup | Active | Recovery | Frame Adv | Attribute | Invul | Hitbox |
|---|---|---|---|---|---|---|---|---|---|
| 0, 1400 | -, SOR | T (70) | 7 | 3 | 18 | - | T | - | Click! |
- 100% minimum damage (1400)
Her throw range is the worst in the game so always be at point blank range before attempting throw setups!!!
In the corner the opponent will bounce this allows you to go for j.2D,22C(1),5D,jD-A,6C,etc,etc.
As of Extend you can now combo mid screen by simply doing j.D-B,5C,J8D-A,air ender
Backward Throw

Troll pose.

| Damage | Cancel | Guard | Startup | Active | Recovery | Frame Adv | Attribute | Invul | Hitbox |
|---|---|---|---|---|---|---|---|---|---|
| 0, 1400 | -, R | T (70) | 7 | 3 | 18 | - | T | - | Click! |
- 100% minimum damage (1400)
Can combo into 22C(1),5D-6,*j.2D,j.C,j.D-A, 6C, etc. (This will corner carry from anywhere on the screen)
You only need to input j.2D, j.C if you're coming from a really far distance. It is a must if you are going from one corner to another as without this input 6C will not wall bounce.
Air Throw

Solid damage.

| Damage | Cancel | Guard | Startup | Active | Recovery | Frame Adv | Attribute | Invul | Hitbox |
|---|---|---|---|---|---|---|---|---|---|
| 0, 1400 | -, R | T (70) | 7 | 3 | 15+3L | - | T | - | Click! |
- 100% minimum damage (1400)
Can go into 6A(1), 5D-6, etc for corner carry 6C stuff or 5D-B, 5C j.8D-A, air ender for something simple.
You do not need the 6A(1) you can actually skip it and go straight to 5D-6, j.D-A, but it helps with the timing.
Counter Assault
Got a buff back up in CP.
Crush Trigger

Special Moves
Cat Spirit One!
236A (Repeatable)

Safe.

| Damage | Cancel | Guard | Startup | Active | Recovery | Frame Adv | Attribute | Invul | Hitbox |
|---|---|---|---|---|---|---|---|---|---|
| 420*N | RDr | all | 14 | 2(15)*N | (18, 19)*N | (-6, -7)*N | B | - | Click! |
- Recovery and frame advantage are written that first value applies to odd-placement moves (1st, 3rd, 5th), and second value applies to even-placement (2nd, 4th, 6th)
Can be done repeatedly, but can be easily DP interrupted so only do it once as it allows you to restart pressure. This is your go to move to make yourself safe. Very useful when you try to frame trap with 2C and fail as 2C is -6, but ends your pressure. 236A(1), 66, 2A is pretty tight and if you eliminate the dash it will frame trap so make use of this when pressuring your opponent.
Cat Spirit Two!
j.236B (Repeatable)

Combo ender.

| Version | Damage | Cancel | Guard | Startup | Active | Recovery | Frame Adv | Attribute | Invul | Hitbox |
|---|---|---|---|---|---|---|---|---|---|---|
| Hits 1-4 | 380*N | RDr | all | 9 | 4(3)*N | 12+9L | - | H | - | Click! |
| 5th Hit | 1000 | R | all | 37 | 4 | 12+9L | - | H | - | Click! |
- 60% minimum damage (20% in OD)
This move is really mostly just used in combos as it isn't great for pressure at all. Can be used to slightly change where you land, but besides that serves no other purpose.
Cat Spirit Three!
236C (Repeatable)

No longer an overhead.

| Version | Damage | Cancel | Guard | Startup | Active | Recovery | Frame Adv | Attribute | Invul | Hitbox |
|---|---|---|---|---|---|---|---|---|---|---|
| Downswing | 660 | RDr | all | 21 | 2 | 17 | ±0 | B | - | Click! |
| Downswing (Max Charge) | 660 | RDr | HA | 37 | 2 | 17 | ±0 | B | - | Click! |
| Upswing | 580 | (J)RDr | all | 35 | 4 | 22 | -7 | B | - | Click! |
- 1st attack possible to charge
- Pressing button again alternates between up and down version
- Performing this move after 1st time changes guard properties to HA (remains as "all" in OD)
Placeholder
Cat Spirit Encore!
236C~B

Easy resets, but real men go for corner 5D~A.

Kitty Litter Special
63214A/B/C

A and B are not options.

Bowling ball xN.


| Version | Damage | Cancel | Guard | Startup | Active | Recovery | Frame Adv | Attribute | Invul | Hitbox |
|---|---|---|---|---|---|---|---|---|---|---|
| A | - | R | - | 30 | - | 52T | - | - | - | Click! |
| B | - | R | - | 30 | - | 52T | - | - | - | Click! |
| C | - | - | - | 67 | - | 56T | - | - | - | Click! |
| Apple | 150 | R | all | - | - | - | - | HBFP* | - | Click! |
| Bomb | 150*2 | R | all | - | - | - | - | HBFP* | - | Click! |
| Chibikaka | 300 | R | all | - | - | - | - | HBFP* | - | Click! |
| Pillow | 150*2 | R | all | - | - | - | - | HBFP* | - | Click! |
| Hammer | 200 | R | all | - | - | - | - | HBFP* | - | Click! |
| Baseball | 200 | R | all | - | - | - | - | HBFP* | - | Click! |
| Fish | 200 | R | all | - | - | - | - | HBFP* | - | Click! |
| Bowling Ball | 300*2 | - | all | - | - | - | - | HBFP* | - | Click! |
The only really notable items here should be the baseball which will come back around if it passes to the other side of the screen on whiff and the bowling ball. After anything into 3C you can safely throw out a bowling ball to cover some space. A lot of the time your opponent will do his best to avoid the bowling ball through jumping. When used correctly with air throws,6C,j.A, and 6A you can get some control on your opponent and punish their attempt to avoid the bowling ball.
Cat Jump
214D

broken.

| Damage | Cancel | Guard | Startup | Active | Recovery | Frame Adv | Attribute | Invul | Hitbox |
|---|---|---|---|---|---|---|---|---|---|
| - | - | - | - | - | 15+2L | - | - | - | Click! |
This move is used primarily for setting up cross-ups and to hit confirm crouching hits for more damage. So long as you are not in the corner and are relatively close to the opponent Tao's 214D will always auto correct Tao mid air which allows for a cross up j.c to occur. This is really useful for pressure and with a little practice becomes a good way to bait things like random gold bursts and DP's; due to being able to barrier block throughout the entire animation. You can also go for empty 214D 2B for a low or just do dash up throw once you have conditioned your opponent to respect your pressure. On a crouching opponent close to the corner you can do anything into 6C, 214D, j.4D-B,22C.... this is extremely useful as it allows you to see the opponent wall bounce and simply confirm with j.4D and if they do not wall bounce you can restart your pressure with a meaty 5B or j.2B.
Sticky Kitty
j.214D (at edge of screen)

Ambigious.

| Damage | Cancel | Guard | Startup | Active | Recovery | Frame Adv | Attribute | Invul | Hitbox |
|---|---|---|---|---|---|---|---|---|---|
| - | - | - | - | - | 10L | - | - | - | Click! |
- Holding button prolongs move
- Unclings from wall 11F after releasing button
This move causes Tao to stick on the wall and greatly delay her landing on the ground consuming one jump in the process; It can be done repeatedly to further increase the time it takes to touch the ground. By inputting 6 Tao leaps off the wall in a straight direction and is able to use any of her remaining jumps or barrier block till she lands. Despite the heavy nerf on the follow up this move received in Extend it is still a useful tool for gaining some space and when combined with j.4D makes it very hard for your opponent to determine where Tao is going to land.
Trick Edge
[2]~8D

Testu Special.

| Version | Damage | Cancel | Guard | Startup | Active | Recovery | Frame Adv | Attribute | Invul | Hitbox |
|---|---|---|---|---|---|---|---|---|---|---|
| Normal | 600 | R | all | 4 after wall contact | 10 | till L+10 | - | H | - | Click! |
| Down | 600 | R | all | 4 after wall contact | till L | 25 | - | H | - | Click! |
| Back | 600 | R | all | 17L | 9 | 4+25L | - | H | - | Click! |
This has one applicable purpose outside of combos and that is to cancel the first hit of 236C into trick edge and get oki. By doing so you get oki, but lose out on some damage. This is insanely useful in match ups in which the opposing character has air options that reduce or alter their landing on the ground such as Mu, Rachel, Platinum, Jin, Hakuman, Arakune, etc.
Slashy Slashy
22C

Great P2.

| Damage | Cancel | Guard | Startup | Active | Recovery | Frame Adv | Attribute | Invul | Hitbox |
|---|---|---|---|---|---|---|---|---|---|
| 80*9 | RDr | HL | 11 | (2, 2, 6)*2 | 15 | -4 | B | - | Click! |
- Possible to charge
- Charging lengthens active frames
This move has some uses outside combos, for one when combined with AB2 Tao is able to do massive amounts of chip damage. This move has three major flaws: Tao can only cancel 22C with her drive, for the most part ends her pressure, and this move is very easy to IB so it actually gives free meter to the opponent. On a knowledgeable opponent, when in the corner or against a DP character this move should not be used.
Distortion Drives
Hexa Edge
236236D

No more wall bounce =[.

| Damage | Cancel | Guard | Startup | Active | Recovery | Frame Adv | Attribute | Invul | Hitbox |
|---|---|---|---|---|---|---|---|---|---|
| 450*4, 1900 | R | all | 4+3 | 2(6)2(4)2(6)2(18)2 | 43 | -26 | B | 1-14 All | Click! |
- Costs 50% Heat
- 180F Heat Gauge Cooldown
- Attacks 1~4 have 20% minimum damage (10% in OD), 5th attack has 30% minimum damage (Normal: 930 OD: 750)
- 1-14 All Invul
Typical reversal super nothing all that special, with 100 heat in the corner you can RC the last hit of and confirm into 6C, 4D-A, etc. so long as the proration isn't too bad.
Imma Beat The Crap Outta You
214214C

Hold Dat L.

| Version | Damage | Cancel | Guard | Startup | Active | Recovery | Frame Adv | Attribute | Invul | Hitbox |
|---|---|---|---|---|---|---|---|---|---|---|
| Normal | 0, 3300 | R | UNB | 5+11 | 10 | 5+50L | - | T | 1-15 All | Click! |
| Overdrive | 0, 5500 | R | UNB | 5+11 | 10 | 5+50L | - | T | 1-15 All | Click! |
- Costs 50% Heat
- 180F Heat Gauge Cooldown
- 25% minimum damage (Normal: 825 OD: 1375)
- Cannot hit crouching opponents
- 1-15 All Invul
Covers some decent distance and can occasionally be useful against zoners, but other than that it has no really notable uses. If you have 100 heat you can combo pounce super into hexa edge for 3K unburstable damage.
Unison Nyaibu!
j.236236D

Damage and knockdown.

| Version | Damage | Cancel | Guard | Startup | Active | Recovery | Frame Adv | Attribute | Invul | Hitbox |
|---|---|---|---|---|---|---|---|---|---|---|
| Normal | 500, 300*8, 500, 2000, 500*2 | R | all | 4+5 | 3 | till L | - | H | 1-32 All | Click! |
| Overdrive | 500, 300*28, 500, 2000, 500*2 | R | all | 4+5 | 3 | till L | - | H | 1-32 All | Click! |
- Costs 50% Heat
- 180F Heat Gauge Cooldown
- Normal version: Attacks 1, 10~13 have 20% minimum damage, attacks 2~9 have 10% minimum damage (1040)
- Overdrive version: Attacks 1, 30~33 have 20% minimum damage, attacks 2~29 have 10% minimum damage (1640)
- 1-32 All Invul
An aerial super that is devastating in overdrive. Provides a knockdown.
Overdrive
Almost Becoming Two
tao's attempt at ninjutsu.

| Damage | Cancel | Guard | Startup | Active | Recovery | Frame Adv | Attribute | Invul | Hitbox |
|---|---|---|---|---|---|---|---|---|---|
| - | - | - | - | - | - | - | - | - | Click! |
- Attack power reduced to 50% for duration of AB2 (untechable time is unaffected)
- Shadow clone does everything Tao does with a 12F delay
- Any effect on hit or guard (like float) is reduced by 8F
- If Tao whiffs a move, the shadow clone's move will whiff as well
- Normal moves can cancel into themselves twice and jump-cancelled
- Drives and specials can all be special-cancelled
This overdrive is great for extending pressure or increasing your damage from 4k to 8k depending on the starter. Like all overdrives, the opponent cannot burst during it, making it a surefire way to finish off your opponent. You can do 5B -> 5C -> AB2 to extend your pressure in the corner and it frame traps so it is 100% mash safe. This becomes a very useful tool when your opponent has their back to the corner as this is where Tao's damage is at its highest but pressure is at its weakest, however be on the look out for reversals such as DP'S and reversal supers as you will be hit out of anything you do after AB2. The most common way overdrive cancel into AB2 is from 6C -> 4D~B. Because of the shadow, most normals will now link together much easier (even fully charged ones). Almost everything is now jump cancelable (including j.236Bx5, and Cat Spirit Encore), allowing you to maximize minimum damage. Her new aerial distortion drive, Unison Nyaibu is particularly potent during overdrive, and can combo off j.236Bx5. With 100 meter, a low j.236Bx5 can also combo into a double hexa-edge (for up to 9k).
Astral Heat
Attack Meow Pow!
1080D during Frangible Engage

GG.

| Damage | Cancel | Guard | Startup | Active | Recovery | Frame Adv | Attribute | Invul | Hitbox |
|---|---|---|---|---|---|---|---|---|---|
| DESTROY | - | all | 2 after SF | 10 | till L+54 | - | H | SF - 11 after SF All | Click! |
- Costs 100% Heat
- 180F Heat Gauge Cooldown
- Invul Superflash - 11 after Superflash All
- Command can be done with: charge [1], then 2, 8+D (as opposed to just charging 4)
Good Games
Strategy
Making your opponent be at the defensive...and taking them down the quickiest way possible. Using dancing egde in the starting of the round will gets you up quick to a combo. After that, the fight can go to either rushdown pressure or zoning, because throwing random item at your opponent will lead to a chance to get in there. Her projectiles has low high and mid versions. Good for mixing up projectiles for a long distance. Don't for be so reackless with her game. She still has low health, so be careful.
Offense
In this part, you can talk about anything you feel like beginner players should know.
Split up your topics like this
- And even further split it up
- Like this.
Add more asterisks to further indent your text as necessary.
The categories are split into Offense, Defense, and Neutral, but you can change these categories as you see fit for your character.
Defense
Neutral
Combos
| Combo Notation Guide: |
|---|
|
Midscreen
This combo section is designed on a "move starter" basis. However, you can use whatever kind of organization you prefer, as long as it is readable and efficient.
*insert move name* Starter
Notes: In case these combos need notes. If they do not, you can remove this line.
Point 1
- move > move > special >> special NOTE: this is only a base. your combos do not have to follow this format.
- Requirements: -- (ex: 50 heat, Overdrive, crouching opponent. if no requirements, leave as is)
- Damage: ----, Heat Gain: --
- + move = Damage: ----, Heat Gain: -- NOTE: if a necessary combo is very similar to a previous one, you can add options like this.
- Notes: Write notes for the combo if necessary.
Point 2
Copy and paste the code from Point 1 to Point 2 as many times as you need to.