Overview

- Health: 9,500
- Guard Primers: 4
- Movement Options: 3 jumps, 2 Airdashses, Command jump, Dash-type:Run
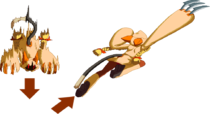
![]() Taokaka is Versatile and can quickly move around the stage to attack at an angle/timing the opponent least expects
Taokaka is Versatile and can quickly move around the stage to attack at an angle/timing the opponent least expects
Move List
- See also: Taokaka Full Frame Data
Normal Moves
5A

Kitty paw.

5B

Protect your family jewels.

| Damage | Heat Gain | P1 | P2 | Startup | Active | Recovery | Frame Adv | Hitbox |
|---|---|---|---|---|---|---|---|---|
| 340 | 140 | 90 | 86 | 6 | 3 | 9 | -1 | Click! |
Gatlings/Cancels-6B,2B,2A,5C,2C,3C,6C,Drive,Special,Jump,distortion
This is your main pressure tool as it goes into all your High/low stuff, frame traps and it's 6 frames as well as air unblockable so it will occasionally catch jump outs. At point blank range it makes for a good poke out of pressure, but its lack of range makes doing this risky.
5C

Not a poke!.

| Damage | Heat Gain | P1 | P2 | Startup | Active | Recovery | Frame Adv | Hitbox |
|---|---|---|---|---|---|---|---|---|
| 550 | 227 | 90 | 89 | 10 | 3 | 24 | -10 | Click! |
Gatlings/Cancels-5C,2C,6C,Drive,Jump,Special,Distortion
(Chargeable)-Has decent range but due to the high recovery frames it's not really a reliable poke. Works well to catch certain back dashes and with heat it can be RC to hit confirm into solid damage. It's air unblockable and works well with air blocked normals as you can jump cancel it to keep the pressure going or just return to neutral. Can be held down and be released at any time so you can use it to punish mash out's. On fully charge it breaks a primer but due to the high risk of charging in your opponent's face it should only be charged for short periods of time to act as a bootleg frame trap.
2A

OMG Why is Tao's 2A so broken.

| Damage | Heat Gain | P1 | P2 | Startup | Active | Recovery | Frame Adv | Hitbox |
|---|---|---|---|---|---|---|---|---|
| 216 | 68 | 70 | 82 | 6 | 3 | 11 | -4 | Click! |
Gatlings/Cancels-2A X2,2B,5B,6B,5C,2C,6C,Special,distortion,Drive,throw
Another main pressure tool. It hits low so it does really well at punishing people that attempt to jump out of pressure. It can be canceled into itself twice and is used primarily to reset pressure as well as throw/TRM setups. Due to it being 6 frames it makes for a good poke out of your opponent's pressure and can be used as a way to approach your opponent from the ground.
2B

Important space controlling tool that is heavily underestimated.

| Damage | Heat Gain | P1 | P2 | Startup | Active | Recovery | Frame Adv | Hitbox |
|---|---|---|---|---|---|---|---|---|
| 210 | 86 | 80 | 84 | 7 | 4 | 12 | -4 | Click! |
Gatlings/Cancels-5B,5C,2C,6C,Drive,Special,Distortion
This is one of her most important spacing tools as it pushes her forward and covers good space. It uses are primarily for tic trows, catching jump outs, and being her only other viable low besides 2A. This is also one of her best pokes out of pressure without heat becasue it shrinks her hit box so that it can low profile a lot of normals in the game. It also makes for a great way to safely punish things like Dead spike, Hazama's stance mix up, Jin's 6D, etc. You can generally toss this out any time you feel there's an awkward space between you and your opponent and if timed properly it can also go under certain jump in attempts. USE THIS POKE SON!!!
2C

Outside of combos this makes for a decent go to normal for a frame trap.

| Damage | Heat Gain | P1 | P2 | Startup | Active | Recovery | Frame Adv | Hitbox |
|---|---|---|---|---|---|---|---|---|
| 575 | 238 | 100 | 89 | 14 | 2 | 21 | -6 | Click! |
Gatlings/Cancels-6C,3C,Super,Drive
For the most part this has become a combo staple. Outside of combos it serves as a fantastic punishing tool and a decent frame trap. It's actually possible to hit her out of anything into 2C but the opponent has to really be mashing to be successful. This move can also be charged and does break a primer after being fully charge but the same caution for 5C applies here as well so do so at your own risk.
6A

Anti air.

6B

Slow overhead.....plus on block.

| Damage | Heat Gain | P1 | P2 | Startup | Active | Recovery | Frame Adv | Hitbox |
|---|---|---|---|---|---|---|---|---|
| 440 | 182 | 70 | 89 | 26 | 3 | 4+8f of landing | +2 | Click! |
Gatlings/Cancels-Drive*,Super,Special (6B puts Tao air borne and cancels into air D attacks)
This is a pretty slow overhead that should only be used once you have respect from your opponent, since it is very easy to poke her out of 6B. The main advantage is that 6B is +2 on block and has other uses outside of pressure. 6B has low invincibility so it goes over lows and since it leaves her air borne she can use this to avoid throws ( think of jin's 6B just 1 frame slower.) Another use this move has in combination with the throw/counter assault OS off a neutral tech, you input the OS throw break then you input 6AB right afterwards. If your opponent goes for a grab you tech due to the throw OS and if they try to delay their throw Tao will 6B which will avoid the delayed throw. As of extend this move has fatal properties.
6C

Tao's best standing poke now due to the increase in speed.

| Damage | Heat Gain | P1 | P2 | Startup | Active | Recovery | Frame Adv | Hitbox |
|---|---|---|---|---|---|---|---|---|
| 700 | 289 | 80 | 82 | 19 | 6 | 18 | -5 | Click! |
Gatlings/Cancels-3C,Drive,special,super
This poke has gotten an immense increase of speed in extend thus making this Tao's best standing poke. 6C can be charged and breaks a primer if fully charged, but has the same risk of 2C/5C just with the reward of being +5 on block if fully charged. This is your go to ground poke for footsies and on counter hit it wall bounces from any place on the screen leading into big damage.
3C

Pointless outside combos.

j.A

Standard j.a nothing special.

j.B

Standing hit confirm into stuff.

| Damage | Heat Gain | P1 | P2 | Startup | Active | Recovery | Frame Adv | Hitbox |
|---|---|---|---|---|---|---|---|---|
| 140×2 | 57 | 90 | 86 (once) | 8 | 2(3)2 | 15 | Click! |
Gatlings/Cancels- .A,j.2B.j.C,j.D,Special,Super,Jump
Used primarily as a pressure tool and to hit confirm into solid damage on standing opponents. This can also be used in conjunction with 214D in the corner to go for either an over head (j.b) or a low (land 2A).
j.2B

Has good active frames so makes for a good answer to character's that rely on anti air 2A.

| Damage | Heat Gain | P1 | P2 | Startup | Active | Recovery | Frame Adv | Hitbox |
|---|---|---|---|---|---|---|---|---|
| 385 | 159 | 90 | 89 | 13 | 3 | 19 | Click! |
Gatlings/Cancels-j.A,j.C,j.D,special,super,jump
Another one of her main pressure tools. Has a ton of active frames so it really shines in match ups in which the opponent heavily relies on 5A/2A for an anti air. Outside of combos this move is pretty basic.
j.C

Both her safest and most rewarding air poke if hit confirmed properly.

| Damage | Heat Gain | P1 | P2 | Startup | Active | Recovery | Frame Adv | Hitbox |
|---|---|---|---|---|---|---|---|---|
| 480 | 198 | 90 | 89 | 9 | 3 | 21 | Click! |
Gatlings/Cancels- j.B,j.2B,j.D,special,super,jump
This is one of your best air to air poke as it put's you at little risked when spaced properly and on counter hit can be hit confirmed into 6C if your low enough to the ground. Also makes for a very good pressure tool as you can space it out to be just out of range of your opponent's anti air. Overall this normal is very versatile and can generally be tossed out any time your in the air to control space or go fishing for counter hits. Just like all of her C moves it is also chargeable and with a little respect can be used to fake out a j.c and go for a low or a tic throw, but again due to the risk of having to charge this is not highly recommended.
Crawl
3

Low profile's everything (almost).

| Damage | Heat Gain | P1 | P2 | Startup | Active | Recovery | Frame Adv | Hitbox |
|---|---|---|---|---|---|---|---|---|
| -- | -- | -- | -- | -- | -- | -- | -- | Click! |
Tao's crawl can be done by inputting down forward, doing so shrinks Tao's hit box drastically and allows her to crawl most ground/air normals in the game. Unfortunately her crawl is only applicable in very few match ups and situations. The good news is that Crawl does not put her in CH state. This is an important tool used to counter your opponent's attempt at spacing and in some instances a way out of certain mix ups. Be sure to experiment with this as it is a very useful defensive option due to the fact it causes normals to whiff thus meaning your opponent can not RC the normal due to it never being blocked
Tao's Crawl is most useful in the following match ups/Situations- Valkenhayn,Tager,Ragna,Litchi (Staff),Mu (5C),Bang (5B,5A).
Taunt

Taunt RC mix up is OP.

| Damage | Heat Gain | P1 | P2 | Startup | Active | Recovery | Frame Adv | Hitbox |
|---|---|---|---|---|---|---|---|---|
| 100×2 | 100 | 20 | 11 | 5(10)5 | 15 | -10 | Click! |
Gatling's- None
There are only two things you could possibly do with this; Firstly, to go for a taunt RC mix up. Taokaka's taunt animation is technically a hit that does 10 damage so you can RC it and go for a TRM setup or some trollish mix up attempt. Secondly, this makes for a really humorous anti air if you're lucky and spaced out properly. Other than the two uses above it is useless.
Counter Assault
Got a heavy nerf in extend, will whiff on certain normals or if the opponent is too close.
| Damage | Heat Gain | P1 | P2 | Startup | Active | Recovery | Frame Adv | Hitbox |
|---|---|---|---|---|---|---|---|---|
| 0 | 0 | 50 | 92 | 15 | 6 | 30 | -17 | Click! |
This has been nerfed greatly in extend and will now whiff more frequently at closer distances. It will also whiff on certain normals like Litch's 6D or Tsubaki's 5CC. Overall this should be used on randomly blocked normals in neutral. Keep in mind that for every time you use a CA you lose one primer and Tao only has 4 so please you use this only for emergencies.
Drive Moves
5D

Torpedo.

| Damage | Heat Gain | P1 | P2 | Startup | Active | Recovery | Frame Adv | Hitbox |
|---|---|---|---|---|---|---|---|---|
| 600 | 248 | 70 | 92 | 15 | 9 | 5+25 after landing | Click! |
All of her drives can be canceled with either A,B,C, or 6.
5D isn't really all that good outside of combos. Its primary uses are after any random hit confirm into 5C, 5D, A cancel, which leaves Tao at frame advantage on hit, but outside of this it really has no other purpose.
2D

Works as an anti air sometimes.

| Damage | Heat Gain | P1 | P2 | Startup | Active | Recovery | Frame Adv | Hitbox |
|---|---|---|---|---|---|---|---|---|
| 650 | 269 | 80 | 92 | 13 | 10 | 10 | Click! |
This drive is a little better as it can serve as a decent anti air when your opponent is above you at super jump height. On counter hit it can be hit confirmed into j.4D and leads into big damage thus making this move one of Tao's most useful drives. Besides it being a decent anti air it makes for a good cross-up if B canceled as you can either go high (j.A,j.C),low (2A,2B) or even go for a fast empty jump throw.
4D

In combos now.

j.D

Amazing air poke only 2nd to j.C .

| Damage | Heat Gain | P1 | P2 | Startup | Active | Recovery | Frame Adv | Hitbox |
|---|---|---|---|---|---|---|---|---|
| 550 | 227 | 70 | 92 | 11 | 12 | 10 after landing | Click! |
As of extend this move now wall bounds on counter hit, but the opponent can tech a few feet before they touch the ground. Overall this move is still the same and remains as one of Tao's best air pokes. Though not as rewarding as j.c it definitely controls more space and works as a good tool to switch sides on the screen. Off of any jump cancelable normal you can input a a low to the ground j.D and B cancel it to make for a much faster cross-up than J.2D,B cancel.
j.2D

gimmicks.

| Damage | Heat Gain | P1 | P2 | Startup | Active | Recovery | Frame Adv | Hitbox |
|---|---|---|---|---|---|---|---|---|
| 600 | 248 | 70 | 92 | 12 | Till landing | 25 after landing | Click! |
This move doesn't really have much uses besides frame traps with C cancel and going for risky tick throws after a B cancel. If you feel someone is about to mash out you can just use J.2D as a frame trap the problem is you almost have to C cancel to stay safe due to recovery frames. after 6B you can go for j.2D, B cancel and go for a green throw as this move has barely any hit stun, but please be warned this is not safe and the opponent can mash out.
j.4D
Alters landing.

| Damage | Heat Gain | P1 | P2 | Startup | Active | Recovery | Frame Adv | Hitbox |
|---|---|---|---|---|---|---|---|---|
| 700 | 289 | 90 | 92 | 17 after landing | 9 | 3+25 after landing | Click! |
This is her best drive starter by far and can be comboed into on hit with A cancel, dash 5B. As mentioned earlier when combined with C canceled this allows an infinite amount of j.4D as this moves makes Tao touch the ground mid animation. It's primary uses are for controlling space, altering landing,hit confirming counter hit 2D, and going under your opponent when he is in the air thus causing you to be on the other side of the screen. It loses out to anti air's and certain 2A's so use with moderation, but be sure to not forget about this tool as it control a lot of horizontal ground space once the actual torpedo animation has begun.
j.8D
No more loops!
Forward Cancel

Combo stuff.

| Damage | Heat Gain | P1 | P2 | Startup | Active | Recovery | Frame Adv | Hitbox |
|---|---|---|---|---|---|---|---|---|
| -- | -- | -- | -- | -- | -- | 4+18 | -- | Click! |
This is actually more important than it would seem. You can delay this cancel to adjust combos so that the opponent doesn't fall out of the ender. A very useful skill when you're getting random things hit confirmed into a highly hit or low hit j.C in the air, but outside of adjusting combos it has no other uses.
Back Cancel
Combo stuff.

A Cancel

Frame traps on hit and safe on block.

| Damage | Heat Gain | P1 | P2 | Startup | Active | Recovery | Frame Adv | Hitbox |
|---|---|---|---|---|---|---|---|---|
| -- | -- | -- | -- | -- | -- | 18 | -2 | Click! |
This is her most used cancel during hit confirmed block strings as on hit it leaves you at +1. Although this move is safe on block (-2) it's not really recommended as doing so will end your pressure or put you at a slight risk if your opponent is paying attention to your cancels. Overall this is a staple in match ups in which you cannot get a standing hit confirm (Makoto,Rachel,Noel,Lambda,Carl,Platinum)and can still be used in the other matchups if you feel you're too far to get a standing hit confirm. It should be noted that this cancel should be used in the air with caution as Taokaka cannot use any of her remaining jumps after an A cancel and must land before she can perform any action.
Notes
-18f of recovery
-Additional 13F landing recovery if landing during the move's recovery
-Consumes 1 jump/air dash
-Frame advantage off 5D hit
B Cancel

J.D BFF.
C Cancel

+3 leaves you air borne.

| Damage | Heat Gain | P1 | P2 | Startup | Active | Recovery | Frame Adv | Hitbox |
|---|---|---|---|---|---|---|---|---|
| -- | -- | -- | -- | -- | -- | 16 | -- | Click! |
This cancel is really good for safely controlling space in neutral as you can use all your remaining jumps even on whiff. When combined with A cancel it becomes hard for an opponent to mash out of Tao's pressure due to the minimal frame disadvantage and overall lack of universal options the opposing character might have. Most characters cannot safely throw out a normal that will beat out both her A cancel and c cancel.
Throws
Forward Throw

Normal.

| Damage | Heat Gain | P1 | P2 | Startup | Active | Recovery | Frame Adv | Hitbox |
|---|---|---|---|---|---|---|---|---|
| 0,1000 | 0,414 | 90 | 100,55 | 7 | 3 | 18 | -- | Click! |
Her throw range is the worst in the game so always be at point blank range before attempting throw setups!!!
In the corner the opponent will bounce this allows you to go for j.2D,22C(1),5D,jD-A,6C,etc,etc.
As of Extend you can now combo mid screen by simply doing j.D-B,5C,J8D-A,air ender
Backward Throw

Troll pose.

| Damage | Heat Gain | P1 | P2 | Startup | Active | Recovery | Frame Adv | Hitbox |
|---|---|---|---|---|---|---|---|---|
| 0,1000 | 0,414 | 90 | 100,55 | 7 | 3 | 18 | -- | Click! |
Can combo into 22C91),5D-6,*j2D,j.C,JD-A, 6C, etc. (This will corner carry from anywhere on the screen)
Notes
- You only need to input J.2D, j.C if you're coming from a really far distance. It is a must if you are going from one corner to another as without this input 6C will not wall bounce.
Air Throw

Solid damage.

| Damage | Heat Gain | P1 | P2 | Startup | Active | Recovery | Frame Adv | Hitbox |
|---|---|---|---|---|---|---|---|---|
| 0,1400 | 0,579 | 100 | 100,55 | 7 | 3 | 15 | -- | Click! |
Can go into 6A(1), 5D-6, etc for corner carry 6C stuff or 5D-B, 5C j8D-A, air ender for something simple.
Notes
- you do not need the 6A(1) you can actually skip it and go straight to 5D-6, JD-A, but it helps with the timing.
Special Moves
Cat Spirit 1
236A (Repeatable)

Safe.

| Damage | Heat Gain | P1 | P2 | Startup | Active | Recovery | Frame Adv | Hitbox |
|---|---|---|---|---|---|---|---|---|
| 280×N | 115 | 80 | 80 | 14 | 2 | 18* | -6* | Click! |
Can be done repeatedly, but can be easily DP interrupted so only do it once as it allows you to restart pressure. This is your go to move to make yourself safe. Very useful when you try to frame trap with 2C and fail as 2C is -6, but ends your pressure. 236A(1,dash 2A is pretty tight and if you eliminate the dash it will frame trap so make use of this when pressuring your opponent.
Notes
-1st and 2nd attack have 18F hitstun, 3rd attack has 22F histun
-Counter carries
-Can continue attack by repeatedly pressing the button; each successive attack has startup 16F
-Even numbered attacks (2nd, 4th, 6th, etc) have 19F recovery with a frame advantage of -7F
Cat Spirit 2
j.236B (Repeatable)

Combo ender.

| Version | Damage | Heat Gain | P1 | P2 | Startup | Active | Recovery | Frame Adv | Hitbox |
|---|---|---|---|---|---|---|---|---|---|
| Hits 1-4 | 380 | 157 | 100 | 80 | 9 | 4 | 12 | -- | Click! |
| 5th Hit | 800 | 331 | 90 | 80 | (33+)4[26] | 4 | 12 | -- | Click! |
Cat Spirit 2
Cat Spirit 2 (5th Hit)
This move is really mostly just used in combos as it isn't great for pressure at all. Can be used to slightly change where you land, but besides that serves no other purpose.
Notes for j.236B
-Counter carries
-5th hit has attack Level 4
-Can continue attack by repeatedly pressing the button; each successive attack has a startup of 4F
Notes for 5th hit of j.236B
-Blows the opponent away
-Wallbounce in the corner
-Counter carries
-62% minimum damage
Cat Spirit 3
236C (Repeatable)

Slowest overhead.

| Version | Damage | Heat Gain | P1 | P2 | Startup | Active | Recovery | Frame Adv | Hitbox |
|---|---|---|---|---|---|---|---|---|---|
| Downswing | 680[580] | 273[240] | 70 | 92* | 30 | 2 | 17 | 0 | Click! |
| Downswing (max charge) | 820 | 339 | 70 | 92* | 61 | 2 | 17 | 0 | Click! |
| Upswing | 580 | 240 | 70 | 92* | (31+)13 | 4 | 22 | -7 | Click! |
This is more or less a terrible overhead option and should only be used as a combo tool. It's slow, easily can be mashed out of, unsafe and overall the risk does not match the reward.
Notes (Downswing)
-1st and 3rd hit knocks down opponent
-Cannot emergency tech
-70% repeat proration
-1st hit can be delayed by holding the button, startup is 14F after button is released (max is 47F)
-Can continue into CS3 (upswing) by pressing button again
-Values in [ ] are for 3rd attack (followup after every up slash)
Notes (Downswing Max Charge)
-Knockdown airborne opponent
-Cannot emergency tech
-Removes 1 guard primer
Notes (Upswing)
-Floats opponent on hit
-70% repeat proration
-Can continue into CS3 (downswing) by pressing button again
-Removes 1 guard primer only after Cat Spirit 3! (downswing max charge). If 1st attack was blocked, this attack will not break a primer
Slashy Slashy
22C

Great P2.

| Damage | Heat Gain | P1 | P2 | Startup | Active | Recovery | Frame Adv | Hitbox |
|---|---|---|---|---|---|---|---|---|
| 80×60 | 33×6 | 100 | 99 | 9 | 2,2,6,2,2,6 | 15 | -4 | Click! |
This move has some uses outside combos, for one when combined with AB2 Tao is able to do massive amounts of chip damage. Another use it has is that it breaks a primer on the 4th hit, which is often overlooked so be sure to take advantage of it on a non attentive opponent. This move has three major flaws: Tao can only cancel 22C with her drive, for the most part ends her pressure, and this move is very easy to IB so it actually gives free meter to the opponent. On a knowledgeable opponent, when in the corner or against a DP character this move should not be used.
Notes
-Counter carries
-Can lengthen attack by holding down the button (max 10 hits)|
-Removes 1 guard primer on block on 4th hit
-8% chip damage
Sticky Kitty
j.214D (at edge of screen)

Ambigious.

| Damage | Heat Gain | P1 | P2 | Startup | Active | Recovery | Frame Adv | Hitbox |
|---|---|---|---|---|---|---|---|---|
| 17~total | Click! |
This move causes Tao to stick on the wall and greatly delay her landing on the ground consuming one jump in the process; It can be done repeatedly to further increase the time it takes to touch the ground. By inputting 6 Tao leaps off the wall in a straight direction and is able to use any of her remaining jumps or barrier block till she lands. Despite the heavy nerf on the follow up this move received in Extend it is still a useful tool for gaining some space and when combined with j.4D makes it very hard for your opponent to determine where Tao is going to land.
Trick Edge
[2]~8D

Testu Special.

| Version | Damage | Heat Gain | P1 | P2 | Startup | Active | Recovery | Frame Adv | Hitbox |
|---|---|---|---|---|---|---|---|---|---|
| Normal | 600 | 248 | 90 | 92 | 4f after wall stick | 10 | 25f after landing | Click! | |
| Down | 600 | 248 | 90 | 92 | 4f after wall stick | 10 | 25f after landing | Click! | |
| Back | 700 | 289 | 90 | 92* | 17f after landing | 10 | 3+25f after landing | -4 | Click! |
This has one applicable purpose outside of combos and that is to cancel the first hit of 236C into trick edge and get oki. By doing so you get oki, but lose out on some damage. This is insanely useful in match ups in which the opposing character has air options that reduce or alter their landing on the ground such as Mu, Rachel, Platinum, Jin, Hakuman, Arakune, etc.
Notes (Trick Edge)
-airborne from 7F~
-30F hitstun
-20F blockstun
-input charge time 30F
-can cancel into Dancing Edge's drive cancels during active frames or hitstop
Notes (Down)
-airborne from 7F~
-30F hitstun
-20F blockstun
-input charge time 30F
-can cancel into Dancing Edge's drive cancels during active frames or hitstop
Notes (Back)
-airborne from 7F~
-24F hitstun
-17F blockstun
-80% repeat proration
-input charge time 30F
-can cancel into Dancing Edge's drive cancels 17F after landing or hitstop
Cat Jump
214D

broken.

| Damage | Heat Gain | P1 | P2 | Startup | Active | Recovery | Frame Adv | Hitbox |
|---|---|---|---|---|---|---|---|---|
| -- | -- | -- | -- | -- | -- | 38T | -- | Click! |
This move is used primarily for setting up cross-ups and to hit confirm crouching hits for more damage. So long as you are not in the corner and are relatively close to the opponent Tao's 214D will always auto correct Tao mid air which allows for a cross up j.c to occur. This is really useful for pressure and with a little practice becomes a good way to bait things like random gold bursts and DP's; due to being able to barrier block throughout the entire animation. You can also go for empty 214D 2B for a low or just do dash up throw once you have conditioned your opponent to respect your pressure. On a crouching opponent close to the corner you can do anything into 6C, 214D, j.4D-B,22C.... this is extremely useful as it allows you to see the opponent wall bounce and simply confirm with j.4D and if they do not wall bounce you can restart your pressure with a meaty 5B or j.2B.
Kitty Litter Special
214A/B/C

A and B are not options.

Bowling ball xN.


| Version | Damage | Heat Gain | P1 | P2 | Startup | Active | Recovery | Frame Adv | Hitbox |
|---|---|---|---|---|---|---|---|---|---|
| A | -- | -- | -- | -- | 30 | -- | 52T | -- | Click! |
| B | -- | -- | -- | -- | 30 | -- | 52T | -- | Click! |
| C | -- | -- | -- | -- | 33 | -- | 56T | -- | Click! |
| Apple | 150 | 62 | 100 | 84 | -- | -- | -- | -- | Click! |
| Bomb | 150×2 | 62×2 | 100 | 84 | -- | -- | -- | -- | Click! |
| Chibikaka | 216 | 447 | 100 | 84 | -- | -- | -- | -- | Click! |
| Pillow | 150×2 | 62×2 | 100 | 84 | -- | -- | -- | -- | Click! |
| Hammer | 200 | 82 | 100 | 89 | -- | -- | -- | -- | Click! |
| Baseball | 200 | 82 | 100 | 86 | -- | -- | -- | -- | Click! |
| Fish | 200 | 82 | 100 | 84 | -- | -- | -- | -- | Click! |
| Bowling Ball | 300 | 124 | 100 | 89 | -- | -- | -- | -- | Click! |
The only really notable items here should be the baseball which will come back around if it passes to the other side of the screen on whiff and the bowling ball which breaks a primer. After anything into 3C you can safely throw out a bowling ball to cover some space. A lot of the time your opponent will do his best to avoid the bowling ball through jumping in order to not lose a primer. When used correctly with air throws,6C,j.A, and 6A you can get some control on your opponent and punish their attempt to avoid the bowling ball.
Distortion Drives
Hexa Edge
236236D

No more wall bounce =[.

| Damage | Heat Gain | P1 | P2 | Startup | Active | Recovery | Frame Adv | Hitbox |
|---|---|---|---|---|---|---|---|---|
| 450×4, 1900 | 0 | 90 | 92×5 | 4+3 | 2(6)2(4)2(6)2(18)2 | 43 | -26 | Click! |
Typical reversal super nothing all that special, with 100 heat in the corner you can RC the last hit of and confirm into 6C, 4D-A, etc. so long as the proration isn't too bad.
Notes
-Invincible from 1F until 10F after super freeze
-Hits 1-4 have 23F hitstop
-5th hit wallbounces opponent, breaks 2 guard primers
-Counter carries
-20% miminum damage from hit 1-4, 30% on 5th hit
-180F Heat gain cooldown
Imma Beat The Crap Outta You
214214C

Hold Dat L.

| Damage | Heat Gain | P1 | P2 | Startup | Active | Recovery | Frame Adv | Hitbox |
|---|---|---|---|---|---|---|---|---|
| 0, 3300 | 0 | 100 | 100, 20 | 5+11 | 10 | 5+50L | -- | Click! |
Covers some decent distance and can occasionally be useful against zoners, but other than that it has no really notable uses. If you have 100 heat you can combo pounce super into hexa edge for 3K unburstable damage.
Notes
-Invincible from 1F until 10F after superflash
-Airborne from 1F after superflash
-2nd hit floats opponent
-Homes in on opponent's location
-Can hit opponent in any state except crouching
-25% minimum damage
Almost Becoming Two
236236B
tao's attempt at ninjutsu.

| Damage | Heat Gain | P1 | P2 | Startup | Active | Recovery | Frame Adv | Hitbox |
|---|---|---|---|---|---|---|---|---|
| -- | -- | -- | -- | 1 | -- | 9 | -- | Click! |
This super is great for extending pressure or increasing your damage from 4k to 6K depending on the starter. You do 5B,5C,AB2 to extend your pressure in the corner and it frame traps so it is 100% mash safe. This becomes a very useful tool when your opponent has their back to the corner as this is where Tao's damage is at its highest but pressure is at its weakest, however be on the look out for reversals such as DP'S and reversal supers as you will be hit out of anything you do after AB2.
Notes
-Invincible from 1F through superflash
-Attack power reduced to 50% for duration of AB2 (untechable time is unaffected)
-Cannot remove guard primer during AB2
-Shadow clone does everything Tao does with a 12F delay
-Any effect on hit or guard (like float) is reduced by 8F
-If Tao whiffs a move, the shadow clone's move will whiff as well
-Normal moves can cancel into themselves twice and jump-cancelled
-Drives and specials can all be special-cancelled
-Effect ends after 540F (485F after recovery)
-Cooldown 180F
Astral Heat
Definitely Nyaa-mber One
[4]~128D

GG.

| Damage | Heat Gain | P1 | P2 | Startup | Active | Recovery | Frame Adv | Hitbox |
|---|---|---|---|---|---|---|---|---|
| death | 0 | -- | -- | 1F after wallstick | 10 | 55L | -- | Click! |
Good Games
Notes
-Invincible from 1F after wall cling to 11F after super freeze
-Airborne from 7F~
-Input charge time 30F
-Command can be done with: charge [1], then 2, 8+D (as opposed to just charging 4)
Strategy
The first thing to know when playing Taokaka is that she is a heavily movement-based character and against most characters, she excels at the mid-range neutral game. Through the use of things like sticky kitty in the corner,214D/2D-B/j.8D-B cross-ups and above average TRM setup potential, Tao is able to get some pressure started and although the lack of a solid meter-less comboable overhead hurts her slightly it doesn't take away from the fact that her pressure is definitely solid. In most instances a lot of your damage will be coming directly from random hits in neutral and corner carrying your opponent in order to combo into AB2 for big damage.
Offense
Up Close/Pressure Game
Taokaka got much safer with each version of the game especially in terms of drive canceling. For reference, C cancel is +2 on block (advantage!), A cancel is -2 on block, and B cancel is -5 variable on block (the later it is canceled, the less recovery it might have. You can assume that up close, it will ALWAYS be -5, and therefore not suitable for regular pressure. Therefore, be cautious of using B cancels on block! I cannot stress this enough. You may fall into habits regarding B cancels against bad players that cannot block cross-ups, or because of online, or because of players with poorer reaction times. Do not convince yourself that it is a safe thing to do. B cancels will also be slightly safer from different drive variants. Most numbers are based on 5D, which seems to be the worst case scenario.
As well, note than on normal hit, and at the end of combos, these will be safer. Ending off a small gatling combo with D~A and then doing a 5B/2B will beat out anybody mashing anything that isn't a reversal.
In terms of blockstrings, you will usually start off with D~A, D~C, j.C, j.B, 5B, 2B, or a 2A. From there:
- Drive cancels do not link into anything directly, but leave you at the aforementioned adv/disadvantage - A cancels can pretty much be considered neutral, but you're still at a slight (-2) disadvantage Therefore using your fastest moves is a requirement.
This pretty much means you're limited to 5B/2B/block if they don't respect your pressure yet. Of course if they do respect your pressure, you can do a lot of things and get away with it. After D~A is also a place you can safely block DPs.
- Normally, C cancels have a lot of paths you can take, because you're at an advantage regardless of block/hit. The problem is you're in the air, and almost every direct attack path will be anti-aired. The objective is to make them afraid to anti-air.
From any D~C
- vs. Anti-Air: JC9->j.B, 44->66->j.A->j.B->j.A, 44->j.4D~any, possibly j.D~B->66->j.A->j.B->j.A (a little risky, j.A->j.2B->j.A is generally ambiguous since if you're low enough, the final j.A won't come out and instead you'll get a grounded move, and can possibly do 2A instead (the same input will do both). It's also nice, since j.Ax3 has more landing recovery for some reason.)
- vs. Jump Back->Barrier: 66->j.B+C, 66->j.AxN->6A(2).
- vs. Mashing/Blocking: j.2D~B, j.C, 66->j.A->j.B->j.A
- j.C/j.B can link to a dash cancel, a jump cancel, 5B, 2A, or 2B. After the dash cancel, these three options (or a green grab), will probably be your best options, since they're your fastest grounded attacks.
- 5B can link into 2B, 5C, and both 2B and 5B link into 6A on crouching. It can also be jump canceled/super jump canceled/special canceled/dash canceled. If canceled into super jump or 214D, can dodge DPs. If a hit is confirmed you go into the standing hit confirm (5B -> 5C -> JC -> j.B -> j.2B -> j.C), and on crouching you can either confirm into 6A or into 5C, 2C, 6C and use 214D, dash 5B, 2B, for oki.
- 5C can generally only link into special attacks or drives and 6C on crouching only. It can also be jump canceled/super jump canceled.
- If you do 6C after 5B/5C, you do create a small opening, but if they respect your pressure and not mash immediately then it will trade in your favor.
- 2B can link into 6A (Crouching only), 5B (If you haven't done so already, only once per block string) or 5C. It also low profiles things like Makoto's DP so it makes for a good pressure tool in some match ups.
- 6A is usually jump/super jump canceled. The first hit can be canceled into 6B, but it you can be poked out so used this only on an opponent who has been conditioned to block. If you can't confirm it, do JC9->j.B->j.C, or JC9->j.A->j.B->j.A. The former can easily go into a combo, even if they jumped beforehand. If it's highly prorated and you confirmed it, you can always do some tech gimmicks like JC IAD->..->j.B+C. Or JC IAD->Land->6A. Or something of that nature for a reset.
- 236A in blockstrings should be kept to a minimum of one hit. If somebody knows how to IB, they can simply 5A out of it. Since 236A cannot be delayed after it has started, they can go on a rhythm and IB every single one. They don't need to IB to DP in the middle of it, remember this. 236AxN at the end of prorated gatlings is fine! And can combo into 5D~A(hit) or 5D~C(hit) for keeping advantage.
- any D~RC->2A/5B will usually beat out anything except for DP. If they're low on health and you need some easy damage, this might be a place to get it.
- In general, doing an extra jump after a jump cancel, then doing j.B will bait and punish anti airs that are mashed out or guessed, but will still lose to a well timed anti air. If an anti air has huge recovery, you can simply wait for it with using your two extra jumps, then j.B them in the recovery time.
Throw Reject Miss (TRM)
-Throws under the normal situation has the short input acceptable time (Green Grabs).
-Throws during block stun or mid-combo have a longer input acceptable time(Purple Throw).
Your opponent can tech throws by inputting B+C or 1A+B+C essentially the first method makes your throw animation come out and leaves you to be punished on whiff, but puts you less susceptible to throw reject miss. The second method is an option select that allows you to tech throws and block moves that are intended to bait your throw animation, and instead causes barrier to come up in instances where your throw animation would come out. However this option select makes you more susceptible to getting thrown reject missed.
There are some situations that throw can not be rejected:
-When a throw successfully counters an opponent's move, it will be counted as Throw Counter and is not breakable.
-After inputting B+C for breaking throw, there will be short period of time where the given player can not tech the throw again. Throws during this period of time will be counted as Throw Reject Miss and can not be teched.
Taokaka can easily setup a lot of throw scenarios due to her normals having no push back and her pressure being heavily oriented to being close to the opponent. If your opponent techs throws with B+C you can take advantage of this and use things like 6B/j.2D-B, j.C/j8D-B. j.C in close distances where it looks like your going to throw in order to make their animation whiff and get a free punish. However if your opponent uses 1A+B+C to tech throws you can do things like 2A,Dash,2A, Grab (Purple) when you see their barrier come up and it will count as a TRM. By effectively utilizing the throw system of the game Taokaka is able to make up for her lack of meter-less mix up potential.
Other Mixup Components
- Your overheads are: 6B, 236C (DON'T USE THIS), j.A/C/2B.
- Your lows are: 2A, 2B
- 6B can only combo on some characters crouching: Noel, Rachel, Tsubaki, Hazama, Rachel, Litchi, Tager. Some others are possible with stricter timing. 6B will always combo on CH and Fatals on CH as well.
- As well, nothing perfect gatlings into 6B, so there will always be a gap between whatever move and 6B. If they respect your defense enough, or their reactions are weak, and they're not mashing, this isn't a problem.
- 2A prorates too much for anything other than setup usually. If you confirm it, you can get 2.3k, but you probably aren't going to. If you don't confirm it, go into something simply like 2A->5B->5C->236AxN->5D~A/C. Or go for some reset gimmicks you think up. If you get a 2A hit, you're not going to end up with damage, it much better to end up in a good position for a setup.
- 2B is much more likely to confirm into a combo and can also be used with green throw setups.
- 236C is slower than 6B and therefore is generally terrible. This move should be used only if you have nothing better to do and have double your opponents health it is way to easy to hit Tao out of the animation.
- The oldest crossup trick in the book for Taokaka players is 2D~B->j.C, (or j.A/j.B). This is actually also very slow, and very susceptible to anti airs. Other cross up options are (Any JC normal), j8D-D or 214 D both of these can go into either a high or a low and with meter the lows can be confirmed for 3.8k.
Although, this can also be used to your advantage, since 2D~B stays in the air, giving you access to extra jumps and air dashes to trick people with. This is a really risky option too. 2D~B dodge dodge some defensive options though (like some DPs with specific hitboxes), so it's an option for that as well. - 214D crosses up much earlier. And since canceling into 214D can dodge a lot of stuff, this is nice.
- ~->JC9->j.B doesn't cross up, while ~->JC9->..->j.B will. That's more of a true cross-up, because of ambiguity.
- 5D~B is not a good crossover either, since 5A/2A easily will beat out your next move. And since it's -5, they have plenty of time. Do not see this as a mixup option!!!
-214D, j.C (High), 2B/2A(low) this is pretty good with respect as due to 214D auto correcting and generally being fast it makes for an excellent high cross up and a low that is almost impossible to react to.
-214D, IAD, J.A, IAD, j.B this one utilizes Tao's two air dashes to their fullest and sets up a nice opportunity foe high/low mix up mix up. The option of going into a throw is viable and adds to the mind games.
Green Grab Setups Up Close
- 2B->Throw
-2B->5B->Throw
- Any D~C->j.2D~B(blocked/whiffed)->Throw
- 6B->j.2D~B(blocked/whiffed)->Throw
- Any D~C->66->j.B+C
- Any D~C->j.D~B->66->j.B+C
- Any D~C->44->66->j.B+C
- D~A->66->Throw
- j.C->66->..->Throw
-Any JC normal into j.2B (hit/blocked)/j.A (whiff), J.C (Charge) whiff, throw
- Think of any situation where the enemy will keep blocking but you'll still be close enough to grab. Her grab range is really bad on the ground, so the situations where you can effectively grab are limited. Be creative!
- Most people will be expecting 2B->4B+C, use this to your advantage in order to do throw reject miss setups.
- Like Jin, 6B will generally beat out throw break attempts. Use it in place of 4B+C to screw with the opponent's reactions.
Defense
Tao doesn't really have much defensive options without meter and relies on basic defense options like barrier, IB, jumping out, backdashing, etc. Unfortunately with the counter assault hit box nerf your most consistent option is to IB Hexa Edge in most cases. Her backdash is very fast and depending on the match up works as a legitimate wake up option without meter. Occasionally you can use 6B to go over lows and use her crawl to low profile mids, but essentially these are both unsafe and put you at huge risk of eating big damage. In situations where you have 50 heat at your disposal counter assaulting is sub par at best as it will whiff randomly on an opponent that is either too close or depending on the normal they are using. Hexa Edge is a standard reversal and pounce super is good in some situations where your opponent is generally not paying attention. Finally Tao's best mashable normals are 2B (7 frames), 5B (6 frames,but no range), 2A(6 frames, but less overall damage than 5B) as you can see these normals are fast and with the exception of 5B have decent range. On opponents who are really jump happy 6A and 2D are your go to anti airs and both lead to solid damage with the proper confirm and meter. 6A is similar to a double edged sword as the 2 hits can both save you and if they whiff will be the end of your life so please use it in moderation.
Combos
| Combo Notation Guide: |
|---|
|
Combo Enders
Ender 1- j.8D~A -> 2D~C -> j.9D~5 -> j.6D~6 -> j.C -> .. -> j.9D~9 -> j.3D~3 -> j.236Bx5
Ender 2- 2D~5 -> j.6D~6 -> j.C -> .. -> j.9D~9 -> j.2D~C -> j.C -> .. -> j.9D~9 -> j.3D~3 -> j.236Bx5
Ender 3- 2D-C -> j.9D~9 -> j.3D~3 -> j.236Bx5
Ender 4- 2D-C -> j.9D~9 -> j.6D-6 -> j.C -> j.9D-9 -> j.3D~3 -> j.236Bx5
Ender 5- 2D -> j.C -> j.9D~C -> j.9D~9 -> j.3D~3 -> j.236Bx5
Ender 6- 2D~5 -> j.9D~5 -> j.6D~6 -> j.C -> j.9D~9 -> j.3D~3 -> j.236Bx5
Ender 7- 2D~9 -> j.2D~C -> j.C -> j.6D~6 -> j.C -> j.9D~9 -> j.C -> j.9D~9 -> j.3D~3 -> j.236Bx5
AB2 Ender
AB2 Ender - AB2 -> 6C -> s.JC7 -> j.236Bx5 -> JC9 -> j.236Bx5 -> JC8 -> j.236Bx5
All combos that end with "Ender 5" can replace that ender with "AB2 Ender" if you have the meter and want more damage.
Universal Starter Combos
The following combos are to be done in general situations and only require specific positioning on screen.
(Starter), 5C, 2C, 6C, 214D. j.4D-B, 22C (1), 5D, j.D-A, 6C, 4D-A, 6C, 236CC, Ender 5
Requirements:Near Corner
-Omit the 4D-A on Noel and Rachel
(Starter), 5C, 2C, 6C, 22C (1), 5D, j.D-A, 6C, 4D-A, 6C, 236CC, Ender 5
Requirements:Crouching opponent/Corner
-Omit 4D-A on Noel and Rachel
(Starter), 5C, 3C (3 hits), 22C (1), 5D, j.D-A, 6C, 4D-A, 6C, 236CC, Ender 5
Requirements:Corner
-Omit 4D-A on Noel and Rachel
-On Arakune omit the 5C for consistency as the 22C (1) will whiff after 3C if your not at point blank range.
Combos from A Moves
2A, 5B, 5C, 2C, 236A, 5D-A
Requirements:None
2A, 5B, 3C, 214C
Requirements:None
2A, 5B, 5C, 2C, 6C
Requirements:Crouching opponent
2A,5B, 3C (3 hits), 22C (1), 5D-6, j.D-A, Ender 5
Requirements:Corner
2A, 5B, 3C (3 hits), 22C (1), 5D-6, j.D-A, 6A (1), TK j.236Bx5
Requirements:Corner
- TK j.236Bx5 after a 6A (1) makes the opponent tech lower to the ground and opens up more options for Taokaka besides just returning to neutral.
6A (2), JC, J.8D-A, JC, j.C, j.8D-A, land, Ender 4
Requirements:None.
-Strict timing between the second j.8D-A and the ender. Alternatively you can omit this part and just go straight into ender 4 for consistency.
6A (1), 5D-6, j.D-A, 6C, 236CC, Ender 5
Requirements:Near corner/ Corner
-This combo is highly impractical off an Anti Air 6A, however serves better as a combo used for punishing something with a lot of recovery and no counter hit state.
6A (1), 5D-5, j.2D-5, j.C, j.D-A, 6C, 6C, 236CC, Ender 5
Requirements:Midscreen
-Used for punishing rather than hit confirming anti air 6A.
-This combo will go corner to corner if you add 5D-A (whiff) in between the two 6C's, however it is not required for any other distances.
Combos from B Moves
5B, 5C, rising j.B, j.2B, j.C, 6A (1), 5D-6, j.D-A, 6C, 236CC, Ender 5
Requirements:5B starter, standing opponent.
Does not work on- Makoto, Lambda, Carl, Platinum, Noel, Taokaka
Delay rising j.B on- Jin, Mu, Ragna, Tsubaki, Hazama,Rachel
5B, 5C, 3C, 22C (1), 5D, j.D-A, 6C, 4D-A, 6C, 236CC, Ender 5
Requirements:Corner
-On Rachel and Noel omit 4D-A.
5B, 5C, 2C, 6C, 22C (1), 5D, j.D-A, 6C, 4D-A, 6C, 236CC, Ender 5
Requirements:Crouching opponent in the corner
5B, 5C, 2C, 5D, RC. 6A (1), JC8, j.2B, j.D-A, 6C, 5D-A (Whiff), 6C, 236CC, Ender 5
Requirements:50 Heat, Midscreen/Near corner
j.B/j.2B, 5B, 5C, rising j.B, j.2B, j.C, 6A (2), 5D-B, 5C, Ender 4
Requirements:Standing opponent, Please read "standing Hit Confirm Notes" located above.
6B, 5B, 6A (1), 5D-6, j.D-A, 6C, 236CC, Ender 5
Requirements:Crouching Opponent,Relative close distance from the corner.
Only works on the following without RC- Noel, Rachel, Tsubaki, Hazama, Rachel, Litchi, Tager.
6B, RC, 3C, 22C (1), 5D, j.D-A, 6C, 4D-A, 6C, Ender 5
Requirements:50 Heat, Corner
-On Noel and Rachel omit the 4D-A.
FC 6B, 5B, 6A (2 hits), JC, j.8D~A (x3), Ender 4
Requirements:Fatal Counter Only combo
Combos from C Moves
CH 6C, 214D, Air Backdash (44), j.4D-A, 5C, 5D-6, j.D-A, 6C, 5D-A (whiff), 6C, 236CC, Ender 5
Requirements: Counter hit 6C
CH 6C, 5D-6, j.2D-6, j.C, j.D-A, 6C, 6C, 236C, Ender 5
Requirements:Counter hit 6C
-This combo can go corner to corner with 5D-A (whiff)in between the two 6C's.
-Used only for corner to corner situations.
CH 6C, 5C, 5D-6, j.D-A, 6C, 6C, 2236CC, Ender 5
Requirements:Counter hit 6C
-Same rules apply, but this combo is better for midscreen situations.
CH 6C. 5D-B, 5C, j.8D-A, JC, j.C, J8D-A, Ender 4
Requirements:Counter hit 6C
-Easy hit confirm for solid damage
CH 6C, 5B, 5C, j.8D-A, Ender 4
Requirements:Counter hit 6C
-This should be used on 6C's that traded.
CH 6C, 214D, j.2D, 22C (1), 5D-6, j.D-A, 6C, 6C, 236CC, Ender 5
Requirements:Counter hit 6C, Midscreen/Corner
236CC, Ender 7
Requirements:None
236CC, 5D-6, j.D-A, 6C, 4D-A, 6C, 236CC, Ender 5
Requirements:Corner
-On Noel and Rachel omit 4D-A
Combos from D Moves
j.D-B, 5C, JC, j.C, j.8D-A, Ender 6
Requirements:Low to the Ground j.D-B
CH j.D-B, dash, JC, j.C, j.8D-A, Ender 6
Requirements:Very low to the ground j.D-B or CH j.D-B from a one jump air space
-This combo works off of low to the ground counter hit j.D starters
CH j.D-B, dash, Ender 4
Requirements:Counter hit j.D
-Works from most heights and is the most consistent of the bunch
CH j.D-B, Air Dash, j.C, j.9D-9, j.3D-3, j.236Bx5
Requirements:Counter hit j.D
-This should only be done on counter hit j.D's down at a little over super jump height or higher
2D, Ender 2
Requirements:None
CH 2D, Air Backdash (44), j.4D-A, dash, 5C, 5D-6, j.D-A, 6C, 6C, 236CC, Ender 5
Requirements:Counter hit 2D
-The air back dash can be omitted, but it helps with hitting the j.4D-A at proper height.
CH 2D, Air Backdash (44), j.4D-6, j.2D-B, 5C, 5D-6, j.D-A, 6C, 5D-A (whiff), 6C, 236CC, Ender 3
Requirements:Counter hit 2D
- You need to hit 5C so that it hits around the lower waist of the opponents body in order to avoid 6C whiffing.
-Again you can omit the air backdash, but it helps with timing and height adjustments.
CH 2D, j.4D-6, j.2D-B, 5C, j.8D-A, Ender 4
Requirements:Counter hit 2D
-This should be done when you failed to adjust the height of j.2D-B, 5C and you know 5D-6 will not connect properly.
j.4D-A/CH j.4D-B/ CH j.4D-C, j.C -> 5B, 5C, rising j.B, j.2B, j.C, 6A (2), 5D-B, 5C, Ender 4
Requirements:Standing opponent
Does not work on- Makoto, Lambda, Carl, Platinum, Noel, Taokaka
Delay rising j.B on- Jin, Mu, Ragna, Tsubaki, Hazama,Rachel
-Regardless of hit or counter hit the combo is always the same for every starter.
j.4D-A/CH j.4D-B/ CH j.4D-C, j.C -> 5B, 5C, 2C, 6C, 5D-A (whiff), 6C, 236CC, Ender 5
Requirements:Crouching opponent, Midscreen/Near corner
-Same as above
j.4D-A/CH j.4D-B/ CH j.4D-C, j.C -> 5B, 5C, 2C, 6C, 22C (1), 5D, j.D-A, 6C, 6C, 236CC, Ender 5
Requirements:Corner/Crouching opponent
-It is possible to get a 4D-A in between the two 6C's on all characters besides Rachel and Noel, however the timing is strict and requires proper height to work properly.
j.4D-A/CH j.4D-B/ CH j.4D-C, j.C -> 5B, 5C, 3C, 22C (1),5D, j.D-A, 6C, 6C, 236CC, Ender 5
Requirements:Corner
-Same as above
Combos from Throws
Throw (B+C),JD-B, 5C, j.8D-A, Ender 4
Requirements:None
Throw (B+C) -> j.4D-B, 22C, 5D-5, j.D-A, 6C, 4D-A, 6C, 236CC, Ender 5
Requirements:Corner
-Although this combo will work on Rachel it will not work against Noel.
-You still need to omit 4D-A on Noel.
Throw(B+C), j.2D-B, 22C (1), 5D-5, j.D-A, 6C, 4D-A, 6C, 236CC, 2D-9, j.C, j.8D-9, j.8D-9, 236B x6
Requirement:Corner, Tager specific
-This combo is highly recommended on Tager as due to his faster descent, the other combos will have a stricter timing against him
Back-Throw (4B+C), 22C, 5D-6, j.D-A, 6C, 5D-A (whiff), 6C, 236CC, Ender 5
Requirements:Start of the match position or closer to the corner, 5D-A (whiff) needs to be canceled relative to how close you are to the corner.
Back-Throw (4B+C), 5B, 5C, j.8D-A, Ender 4
Requirements:None
Back-Throw (4B+C), 22C, 5D-6, j.D-A, 6C, 4D-A, 6C, 236CC, Ender 5
Requirements: Taokaka's back to the corner
-On Noel and Rachel omit the 4D-A.
Air throw(B+C in the air), 5D-B, 5C, j.8D-A, JC, j.C, j.8D-A, Ender 6
Requirements:None
Air throw(B+C in the air), 6A (1), 5D-6, j.D-A, 6C, 5D-A (whiff), 6C, 236CC, Ender 5
Requirements:Midscreen/ Corner
Air throw(B+C in the air), 5D-6, j.2D-6, j.C, j.D-A, 6C, 6C. Ender 5
Requirements:None
-Combo goes corner to corner
Air throw(B+C in the air), dash (Crossunder), 5C, JC, j.C, j.D-A, 6C, 4D-A, 6C, 236CC, Ender 5
Requirements:Opponents back to the corner
-This combo is hard against Makoto and Carl so you may want to replace the j.C with j.BB in order to help with consistency.
Air throw(B+C in the air), 22C (1), 5D, j.D-A, 6C, 4D-A, 6C, 236CC, Ender 5
Requirements:Taokaka's back to the corner
-On Noel and Rachel you need to omit the 4D-A.
Miscellaneous Combos
Gold Burst, dash (Crossunder), 5C, j.8D-A, JC, j.C, j.8D-A, Ender 6
Requirements:None
Gold Burst, dash (Crossunder), 5C, JC, j.C, j.D-A, 6C, 6C
Requirements:None
Gold Burst, 5D-6, j.D-A, 6C, 5D-A (whiff), 6C, 236CC, Ender 5
Requirements:Midscreen/Near Corner
Gold Burst, 5D-6, j.2D-6, j.C j.D-A, 6C, 6C, 236CC, Ender 5
Requirements:None
-This combo goes corner to corner
(Any Starter),Hexa Edge (236236D), RC, 6C, 4D-A, 6C, 236CC
Requirements:100 Heat/Corner
-On Noel and Rachel omit 4D-A
-This combo works best with good starters like 2C/5C/5B and should be used for quick damage when time is running low.
Alternate Colors

The following colors can be purchased in the gallery:
