This can be for a variety of reasons including but not limited to: spelling mistakes, unnecessary information, poor formatting, and other metrics per common sense reasoning.
Consider helping rewrite it.
Normal Moves
5L


Welcome to Pressure Town


- 6 frame jab.
- Good recovery, good for staggers.
Standard 5L poke with a good hitbox. Used for starting pressure and is your standard grounded poke.
- Blockstring and combo filler.
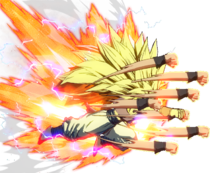
- -5 on block, good for staggers.
5LL has a strong hitbox and forward momentum. Useful in pressure and can be decent in neutral scrambles. Do not use this if 5L is reflected. You will die for it.
- Recovers in the air.
- Cancelling immediately is grounded, delaying the cancel slightly leaves Gotenks airborne.
5LLL's frame data is deceptive, this move has a lot of blockstun that you can take advantage of by canceling into specials. On hit it's a great optimal combo to follow up into Galactic Donut. On block, can be covered with Ghost Oki or an assist for a mixup.
While not as ambiguous as Hold Beam, you can IAD shortly after it connects for a high/low mixup, or backdash 6S to punish your opponent's 2H. This is best used sparingly as there are clear answers to both options. It's best to cover up the 3rd hit with an assist to allow Gotenks to go for a high/low with very little risk involved, though it does burn the assist.
5M

I didn't know that gotenks is a fan of warioland

- Can be a stagger point, but technically punishable on block.
- Important for combos due to it's jump cancel.
- Can be up to -1 on block if spaced.
Standard 5M with decent forward momentum but nothing to write home about. Mostly a combo tool instead of a neutral tool.
5H

- 5H > 5S generally has great frame advantage and can be up to 0 on block at max 5H range.
- Leads to above average damage with rejumps, but does not allow for sliding knockdown.
- [] is fully charged.
Gotenks' strongest grounded normal. Has great forward momentum and a solid hitbox, but loses strongly to aerial approaches.
If charged fully it is +1, does increased damage, and causes a strong wall bounce midscreen. Use the charged version sparingly as the startup is massive and the reward is minimal. The advantage on block is dependent on the distance Gotenks was before 5H. An uncharged 5H at its maximum distance can be up to -3 on block. A fully charged 5H at its maximum distance can be up to +6 on block.
5S

my neuch is godlike bro

- Can be repeated up to four times.
Your standard Ki Blast, not too much different from how other characters use it. Good for long range pokes. Gotenks also has easy ways around Ki Blasts himself with his 214X moves, which helps against characters that can out-zone him on the ground.
2L

- Fast low for pressure.
- Good stagger tool.
Gotenks' primary grounded mixup tool. Most often used in blockstrings as it's small size makes it a poor neutral tool.
2M

Like fathers like sons

- Incredibly weak hitbox. Can be stuffed by any aerial attack or a properly spaced 5L.
- 5L > 2M or 2L > 2M is anti reflect when used point blank
Important tool as it's the most forward momentum Gotenks has on a normal (aside from charge 5H), but still not to be pressed in neutral. Can be used as a stagger point, but it's on the dangerous side being -7.
2H

Kids seeing an airplane

- Unusually high reward due to rejumps.
- Hits high and on both sides of Gotenks.
Very slow 2H, but with a lot of active frames. Mostly used to punish aerial approaches and super dashes. This move whiffs hard, so make sure it's going to hit if you throw it out. Cancels into air special moves, but all that means is you can't cancel into 214S.
Will occasionally hit people who try to vanish behind him due to the lasting hitbox
6M
- DBFZ Gotenks 6M.png
- Standard overhead.
j.L

I now control the air

- Very active. You can usually just throw it out there, but rarely beats superdashes.
- Once a hit has been blocked, the remaining hits can be blocked low.
Amazing air-to-air option, probably his best. On block, it is very easy to just drag your opponent down to the ground and either continue pressure or reset them with a Dragon Rush.
j.M

- Weak hitbox, but high active frames.
Mostly hits above him, useful as an air-to-air on opponents higher than you. Decent as a mixup tool but not all that great overall as it's overshadowed by it's heavier cousin as a jump-in.
j.H

the no fly zone

- [] is on Smash hit.
Incredible hitbox and priority, can hit crouching opponents from almost apex of normal jump height. Standard combo ender and Air to Ground neutral tool.
The move brings Gotenks to the ground more quickly, allowing for extremely ambiguous mix ups.
j.S

Mixup City

- Pushes Gotenks back.
- Hold
 to roll forward.
j.S[6] is very useful for certain assist extensions and super jump combos, as the roll allows him to link into j.L.
j.2H

- Standard combo extender, jump cancellable.
Vital for combos as it leads to the most damage Gotenks can get while keeping Sliding Knockdown. Nothing to write home about but it gets the job done. Usually outshined by j.214M in the corner.
Special Moves
Miracle Super Punch
236L/M/H (Air OK)
Obligatory Jojo reference

- All Version
- [] is on hold.
- Can cancel into other special moves on whiff or hit, including itself. Moves cancelled into will be their air versions, and you can cancel as soon as the hitbox comes out.
- Deals above average chip damage.
- Moves forward.
- 236L
- Moves forward.
Mostly blockstring filler. Good frame advantage at -2, allowing you to safely backdash away.
- 236M
- Moves in an arc as if Gotenks jumps forward.
- Although has 16 maximum hits, Gotenks will stop punching once he touches the ground.
- Plus on block.
- Allows air actions afterwards but adds landing recovery.
Yeah, it's plus, but not really worth going for. There's a gap because of how it moves that leaves it vulnerable to getting 2H'd. Your opponent should not be letting you get away with this move.
- 236H
- Partial held does 16 hits.
- Can control speed with left and right, holding left makes you go less distance while holding right sends you much further.
- Can combo into 5L.
Really good in blockstrings, as it is the only plus on block move in the entire game that can be performed gaplessly from a blockstring with no strings attached. It's also pretty good at catching Superdashes, but this depends on positioning. The air version has no landing recovery, so you can use it after using another special on whiff to avoid said recovery frames. Due to the speed, it can also be helpful to allow you to try and escape the corner by doing 236H[6].
Great Special Rolling Kick
214L/M/H

SPEEEEEN

Beyblaaade!


- All Versions
- Deflect Ki Blasts and have head property.
- All grounded versions can be cancelled into other special moves on whiff or hit, including itself. You can cancel as soon as the hitbox for the move comes out. Moves cancelled into will be their air versions.
- Air versions will also cancel into other special moves on whiff or hit similar to the grounded variants, but they cannot cancel into themselves (or other strengths of 214X)
- 214L
- Hops forward very fast.
Can be used as a sneaky option if your opponent isn't ready for it, and with assists you can convert off of it. Not a great roundstart because it connects on frame 17. Most things will stuff it..
- 214M
- Jumps high up.
- Last kick wall bounces in the corner if Smash hasn't been used.
- Allows for air actions afterwards but adds landing recovery.
- Usful for very damaging combo routes in the corner
Can set up a left/right mixup by cancelling into 214H. Otherwise not much use for this one.
- Slowly moves straight forward.
- Can be directed with


 .
. - Last kick wall bounces in the corner if Smash hasn't been used.
- Loses to Super Dash.
Really good tool to annoy your opponent in neutral, however, it is unsafe and can not be used to reset pressure like 236H can. Gotenks can airdash or double jump once it is done. It can also be used to get you out of a corner situation if you can somehow pull it off, or just using it as a general retreat/stall tactic. Gotenks can only go so high with the move though, so be careful.
Air Great Special Rolling Kick
j.214L/M/H
SPEEEEEN
Beyblaaade!
- j.214L
- Spins diagonally downward.
- Stops spinning once Gotenks lands or if he gets all 7 hits in.
- Active frames until landing.
Depending on the height this is used at, it can set up for rejumps (such as off of 2H). It can be good for getting to the ground quickly as well, though you still suffer the recovery. Not as useful as it's grounded version in terms of neutral but makes a wicked fake crossup.
- j.214M
- Spins in an arc like the grounded version.
- Can be used to catch a raw vanish from your opponent.
- Last kick wall bounces in the corner if Smash hasn't been used.
Great combo filler as it enables j.H's sliding knockdown and therefore Ghost Oki.
- j.214H
- Slowly moves straight forward.
- Can be directed with .
- Last kick wall bounces in the corner if Smash hasn't been used.
- Loses to Super Dash.
Similar in usage to the ground version. Can't be combo-ed from unless you're in the corner.
Vengeful Shout
236S (Air OK)

DOCTOR OCTAGONAPUS BGAAAAAAAAH

- Gotenks leaps into the air and fires a beam from his mouth.
- 236[S] will feign the beam. Feign has 7 frames of landing recovery.
Useful tool for Gotenks in neutral, while it isn't as good as Super Saiyan Goku's Kamehameha, it still is nice to have, especially because it is air OK. Can be useful for catching buttons from afar, or just to keep pressure on from full/midscreen. Still is somewhat slow though, so try not to get too reliant on this one.
Feign beam can bait out reflects, but it will lose to most 5L/5Ms, so try to use it with caution. Getting too predictable with it can lead you to getting blown up very easily. It also has landing recovery, making it difficult to use as anything other than a pressure reset.
Galactic Donuts
214S

time to make the donuts

- Gotenks forms a ring that appears around the opponent as well before binding them with it.
- Tracks the opponent, it will spawn where they are when the input comes out.
- "Beats" super dash should it ever hits.
- Holding up during the move causes the donut to move upwards, allowing you to catch opponents who might jump out of it. Not entirely that useful, but it's something.
- Can cancel into other special moves as soon as the 2nd hit connects.
- You can get a superdash followup just by pressing S as the second hit connects.
Can have some applications in some weird blockstrings that take advantage of your opponent being focused solely on defense. It can beat some buttons as well, as mashing 5L will most likely lose to donut, but will lose to most reversals. Some buttons will even trade, and most will just hit Gotenks right out of it, such as 2M. Some will whiff (SSJ Vegeta 214H), but this is small compared to the amount of them that will hit Gotenks out of it. However, it is plus, so if you can perhaps scare your opponent into doing nothing but blocking, you might be able to get away with this. You can space this pretty well so that you might not get hit with 5H in blockstrings as well, so with that it functions well as a sort of blockstring reset, but it comes with some weaknesses as well. Use with caution.
In combos, it ends up being a lot more useful. While tracking is somewhat messy for some other options, it will always connect after Gotenks' 5LLL, and you can either cancel it into 236LM (or 236HS for some cool corner combos) or get an easy superdash followup. It's a very strong option for post-vanish combos anywhere on the screen, as it allows him to extend his damage.
DIE DIE Missile Barrage
j.214S

HYPER PLASMA SHURIKEN

- Gotenks fires a series of Ki blasts similar to Vegeta's Air Consecutive Energy Blast.
- Can be superdashed/reflected on block.
Does slightly more damage than j.214X in level 3 combos, but that's about all it's useful for. You can't really stop superdash with anything other than lvl3 and there are far better uses for your meter when playing Gotenks.
Z Assists
Assist A
Galactic Donuts
- DBFZ Gotenks AssistGalaticDonut-1.png
Space Bondage
- Great combo extension tool.
- Incredibly high blockstun.
On hit, will bind the opponent and hold them in place for an elongated period of time. This can be very useful as a means to expand combos, especially in the air, and has incredible utility in mix-ups and resets with its whopping 46 frames of blockstun.
It can also be useful in neutral but the tracking is poor. Quick movement can dodge this assist so you'll have to use it in more specific situations.
Assist B
Miracle Super Punch
Why play Yamcha anymore?
- Incredibly strong combo and pressure tool.
- Give the gift of Hands.
- Has Head property, making it hard to use to cover your landings.
Yamcha A assist, but on Gotenks. Neatly covers all the bases that Assist A does not, as it's helpful for characters that don't rely on blockstun as much. Sadly it's still not a true neutral assist, but it covers a good amount of the screen for how fast it is. Can stuff superdash.
Assist C
Vengeful Shout
The move that opens worlds
- Beam assist.
- On hit, adds a strike that knocks the opponent back towards you.
- Values in [ ] is when the opponent is in hitstun/untech.
Completes the holy trinity of assists. Having a beam assist, C Assist or not, fills the last niche that A and B do not.
While you give up some of the blockstring potential that A and B have due to having slightly less plus frames to work with, the neutral potential for this is strong, especially due to this beam allowing for explosive damage on hit if you play your cards right. Keep in mind that because it is a C assist, it will be available less often, so it can be a bit of a detriment if it doesn't actually end up hitting the opponent, either on block or on hit. Despite this, it is still a very legitimate assist choice. Play this with characters that need the help in neutral or can get a ton of mileage from a C Assist.
Super Moves
Super Ghost Kamikaze Attack
236L+M or 236H+S

All this time, actually pronounced "Kah-mee-kah-zeh". Oh well.

"Apply a little schmixturization"
- Dekillsage


- Gotenks spits out 6 ghosts, which immediately home in on and explode on the opponent.
- Minimum damage: 120*6 (720)
Somewhat low damage for a super, as well as it's speed being a bit of a detriment as it can tend to whiff midscreen, but with a Z-Change into a faster super, the ghosts can connect easily. Certain characters can get a Dragon Rush off of their super with ghosts, such as Tien or Videl.
- Gotenks spits out 4 ghosts, taunting the opponent as he does.
- Minimum damage: 180*4 (720)
- All 4 ghosts stay in place until the corresponding button is released, allowing you to do blockstrings and combos with the ghosts covering any opening.
- Ghosts will wait for inputs for about 4 seconds before attacking by themselves.
- Ghosts are affected by negative edge, which can be buffered by holding buttons during the super animation. This allows Gotenks to throw out the ghosts without having to actually use a button, at the cost of not having the button available.
Very strong tool for Gotenks, both for combos and for pressure. For combos, it allows Gotenks to set up solo snap and additional damage, and for pressure, it gives him a lot of freedom to work with and mix you up in ways that leave you constantly guessing and afraid of the ghosts. They can beat vanish on wakeup, as they will simply teleport into the ghosts, so it's useful for that as well. Usually Gotenks' best option post-sliding knockdown, even midscreen as he can superdash with ghosts to force the opponent to block, giving him a somewhat free approach option.
Charging Ultra Volleyball
214L+M or 214H+S (Air OK)

SUPAAAAH DONAT

- Costs 3 bars.
- Minimum damage: 120, 140*3, 1120 (1660)
- Beats level 2 projectiles but loses to level 3 projectiles.
- If performed with Piccolo on your team, he will help out, and then complain about helping out after the move.
Great ender for Gotenks, especially in his air strings. It's easy to hit due to him being able to cancel 236x into either 214x or 214S, and then cancelling that into this, which gives him great damage. His meter build in general isn't bad either, so he can use this somewhat often. His oki afterwards isn't bad either. However, the oki can be changeable, due to Gotenks's interesting Level 3 gimmick that changes his plus frames depending on which button or special you inputted before the Level Three (Will be listed). Great damage, easy to combo into, and good oki make this a stellar tool for Gotenks. If you want to get some explosive damage to make a hit count, this is absolutely your ender to go to.
[236S to Level 3: +34; 236X (L, M, H) to Level 3: +34; Any Face Button (L, M, H) except 5S/6S to Level 3: +34; 5S/6S to Level 3: +31; 214X to Level 3: +29; 214S to Level 3: +27]
[Direct Z Change, SKD, and DHC to Level 3: +34; 214X - 236X to Level 3: +27; 236X/214X - 236S to Level 3: +34]