Normal Moves
5L


Owari da


- 5L has decent range.
- Pushes the opponent back considerably.
Pairs beautifully with 2L. 2L > 5L pushes the opponent just far back enough so most 5Ls will whiff if they try to hit Jiren, enabling safe stagger pressure and very easy counters. Being safe on block is just a bonus. Note that there is an autotimed gap between this and every normal besides 5LL and 2L.
- 5LL lightly launches the opponent.
- Can also be jumped out of straight after.
Solid button. The most common follow up to a 5LL launch is an Instant Air-Dash (IAD) j.M. Even better given that 2L scales like a medium, meaning you can chain from there.
- 5LLL is a projectile
- [] is on Smash hit.
Easily the coolest looking autocombo ender in the game. Has decent corner carry to boot.
5M

Jiren's favorite family guy episode was the roundhouse one

- Jump-cancelable on hit.
- -6: not bad for staggers, but technically unsafe.
If Jiren's lights were anyting less than terrific, this would be his go-to for staggers. That being said, not half bad as a button on it's own. Mostly relegated to combo and assist/gapless blockstring filler.
5H

let me see if you have games on your phone

I'm blasting your nuts off and there's nothing you can do


- Slower than average grab.
- Can only be used once per combo.
It is very slow, but you can occasionally catch people being complacent. DO NOT overuse it, as it is very easy for your opponent to mash out, however, being a normal, you can option-select this move by Vanishing anything the opponent does as a failsafe.
Useful in corner combos, as you can go straight into 5S > 2S and then Superdash. At mid-screen, you can use 5S and then Vanish.
5S

This is a No Ki Blasts zone here

- Can destroy other Ki Blasts and hit the opponent at the same time.
- Projectile Invuln during startup.
- Cannot be superdashed through.
The closest thing Jiren has to a beam. Being a 5S move, it carries some interesting properties like being able to gatling into Heavies and 2S, as well as being vanish cancelable on whiff. Amazing as a neutral tool as it can be thrown out on reaction to Ki Blasts without worrying your opponent will level 3 you in retaliation. Super invalidates Z Broly, which is always a bonus.
Weirdly enough, it has enough hitstun to combo into 2H midscreen. It's most common use is combo-ing into 2S and 5H in the corner.
2L

So this is what Gohan had at launch day?

- Extremely good stagger button.
- Can be chained from 5LL.
- Can be jumped out of. This means if you poke the opponent while they're in the air, you can immediately follow up.
- Scales like a medium attack, making it a powerful starter.
This is what dreams are made of; the ultimate stagger pressure tool + ToD starter, and also makes the screen shake. Very fast and generous hitbox at eight frames. You must let the move fully end to let it pushback far enough to make enemy jabs whiff. Can still lose to characters with long-ranged jabs such as Vegito, Z Broly, and Zamasu.
Do not get hit by this.
2M

RICH BLONDE SWEEP

- Jiren's only low.
- Easily half screen range.
Mostly hits when the opponent is blocking poorly/mashing during blockstun, expecting IAD j.M, or some other option since Jiren's low threat isn't respected as much.
2H

Bounce 'em off the other wall

- Counts as grounded.
- Uses up Jiren's Smash.
- Launches higher with more hitstun if Smash hasn't been used.
- Causes a wallbounce behind Jiren.
An interesting 2H that only really sees use if you're in the corner. It bounces the opponent off the wall behind Jiren, causing a sideswitch.
2S

The other 2H

- Activates 1 frame after it catches something, but the overall invul is the same as 2H.
- Uses up Jiren's Smash.
- Launches higher with more hitstun if Smash hasn't been used.
- Possesses a capture state so it can't be safe jumped, and the capture state makes it easy to hit-confirm.
- Reflects weak projectiles.
- Always wallbounces in the corner.
Much better than Jiren's 2H as an anti-air for several reasons. It has a more generous hitbox, is about twice as fast in being invulnerable, cannot be safe-jumped, is immune to ki blasts, and for the cherry at the top, has less recovery.
If blocked in the air, Jiren can go into 236X or even 236S to put the opponent on block for a mix-up with assists, or also frametrap if the opponent does not continue blocking. This move is also Jiren's primary grounded way of comboing into superdash post-smash use, (I.E. after 5H).
6M
- DBFZ Jiren 6M.png
Jiren's been practicing his volleyball
- Counts as airborne.
- Uses the same hitboxes and hurtboxes of Jiren's j.H.
One of Jiren's mixup tools, albeit not great. Thanks to his counters, 5L, and 2L, Jiren is actually quite a threat in Clash scenarios. This is likely to happen frequently as Jiren doesn't have any other grounded overhead to threaten with.
j.L

- Double-jump cancelable.
Useful combo extention tool in the corner after j.2S. Hits a little higher than you'd like for mixups, but still usable. Good air jab overall.
j.M

What's that? "Rejump", you say?

- Good air-to-air button.
This singlehandedly gives Jiren the fastest IAD overhead in the game, as it'll hit most crouchers on its first hit within 9 frames of startup. Its huge hitbox also makes it great for neutral and jabbing out Superdash.
j.H

- [] is on Smash hit.
- Knockdown state changes depending on Jiren's usage of his Smash.
Mostly used for Okizeme and safejump set-ups, otherwise is an inferior sliding knockdown ender to j.2H or 236M > DR at the corner.
j.S

Air-to-air fireball and COMBO EXTENDER, BABY!

- Causes a light wallbounce.
- High untech time, can combo into tag for mid-combo character switches.
- Can be used immediately off the ground as a standard Ki Blast instead of 5S.
Enables near full-screen corner carry if done twice in a combo, and becomes full-screen with the right vanish combo.
In neutral, this can control the entire screen when combined with a horizontal beam assist, allowing for a very easy way to get in provided the opponent doesn't immediately Super Dash the j.S.
j.2H
- DBFZ Jiren j2H2.png
I don't need to sing the song, you get the idea.

- [] is on fully charged.
- Both the charged and uncharged versions cause a sliding knockdown when done in air. must use charged version to get sliding knockdown when opponent is grouded.
Primary way to get sliding knockdown mid-screen. To combo into the charged version, must be buffered right after j.2S at the corner provided the hitstun decay isn't at the minimum.
j.2S

"Oh great, he can fire it down too?!"

- Groundbounces
- Combos into fully charged j.2H in the corner.
- One of Jiren's best tools, as it can lead to full combos easily with assists.
- Can end combos relatively close to the ground with this & convert into Level 1 mid-screen.
- You can IAD out of this move using Sparking!. This is about as crazy at it sounds.
"Jails" into Super Dash at a certain distance (the opponent can GC Reflect since it's still just a Ki Blast), and can stuff the startup of a 2H from a slightly further distance.
Special Moves
Infinity Rush
236L/M/H (Air OK)

*Inevitability intensifies*

- Range of strikes becomes further the "heavier" the button. ( L < M < H )
- L/M wallbounces, they are mostly used at corner combos.
Jiren's best blockstring ender, being safe on block and a true string from his M/H buttons. If you plan on frametrapping, it's usually better to use 236S instead.
Because of its disjointed hitbox, the air version can be used to prevent superdashes after j.S/j.2S.
- H launches the opponent.
- Covers a wide range, being the longest distance of the 3 versions.
- Air version groundbounces; so long as Jiren doesn't touch the ground upon connecting with this version, j.H causes a sliding knockdown.
Jiren's primary way of extending combos from raw Superdash into sliding knockdown.
Shock Tornado
214L/M/H

I LAUGH AT YOUR ASSISTS

"PREDICTABO"


- When hit with a physical non-super attack, Jiren will freeze and spin the opponent into the air with a judo throw. The opponent cannot escape.
- Jiren is invulnerable to assists or projectiles in the duration.
- Builds half a bar on being hit by a strike or a projectile, and then up to 75% of a bar on successful counter.
- Duration is extended if it comes into contact with assists or projectiles.
Deals a good chunk of damage, but needs resources to combo after. Will only be triggered by the opponent's own physical hits, meaning 214H will ignore pretty much any set-up, even Piccolo 236S or Beerus Orbs.
If the opponent fires a beam at this and vanishes, they can still get punished by the Light and Heavy counters.
- 214L
- Stands and counters all physical hits.
The most common counter iteration of Shock Tornado Jiren will use, as it's 4 frame start-up will be useful for baiting the opponent into mashing a 6-frame jab on -2 situations, like after 236S or 2L.
- 214M
- Crouches, and only counters low attacks.
Extremely risky and best avoided in most scenarios, but it thankfully has low recovery. Ending a blockstring in his low parry gives considerable pushback to where only certain characters can challenge you without using their 2M. And if they do use 2M the move counters them, and if they use anything else the low recovery can make Jiren safe.
Since this move only counters lows, it is naturally less useful than the other two versions because of its linearity. This version does allow for a Super Jump extension after a Smash 2H, thanks to the low recovery.
- 214H
- Stands and counters all physical hits.
- Invincible from frame 1.
- Will deal only recoverable blue health damage.
A go-to panic button. If you have the meter, it's a great tool to try and save Jiren, or even throw out once in a while to check your opponent and make them respect it.
You can also gamble using this in a situation where all pressure resources have been expended, and the opponent proceeds to take their turn.
Grand Charge
236S

Shades of Juggernaut

- Invulnerable to projectiles and assists while the barrier is up.
- Ridiculously high damage combo filler.
- Frame-traps from any normal.
- Has medium scaling, leading to insane damage.
Travels 50% of the screen and is absolutely devastating to get hit by. Be a bit wary since it's on the slower side compared to other lariats.
Can be used after a j.2H ender for a tad-bit better Okizeme.
Counter Impact
214S

R.I.P. 2020-2021


- Guard point against all attacks except throws, Supers, and Sparking Blast.
- Hold the button to extend the parry duration.
- On successful parry, Jiren teleports to the opponent's location, performing a ground throw if they're grounded or an air throw if they're airborne.
- The opponent can punish this by correctly timing a Vanish, reversal, or specific move that can beat it, including a grounded 2H.
- Will whiff on a move that would go behind Jiren after the parry, except for Rebellion Spear.
- Values in [] are for the actual counterattack.
While the opponent has a handful of counter-play options for this move, it isn't always easy to do it on reaction in the midst of the game. Nonetheless, the move is useful for slowing down the pace of the match, as it counters nearly every type of move in the game. Don't overuse the move, otherwise the opponent might just raw level 3 and end your life right there.
Will whiff on most DPs, but alternatively this allows for a punish if the opponent does not Vanish out of it. Does not whiff against the DPs of SSJ Vegeta, Beerus, Cooler, Gogeta's Heavy DP, and both Gohans' Heavy DPs.
In the corner, you can convert off of it meterless with the right combo.
Z Assists
Assist A
Infinity Rush
- Causes a wallbounce.
Hits about mid-screen length. Absolutely fantastic as both a combo and blockstring assist, as it has great frame advantage as well as re-centering and wallbouncing the opponent on hit. It's also quite possible to use as a neutral tool if you use it like a wall on demand, as its disjoint makes it hard to challenge.
Assist B
Grand Charge
"I'M! UNSTOPPABLE!!!"
- Retains projectile and assist invul like the normal version.
A fast lariat-style assist, similar to Bardock A but in fact travels farther (Jiren spawns further). Projectile invulnerability makes it a compelling choice, but Assist A is the go-to unless your character relies on command grabs.
Assist C
Flash Fist
KAPOW!!
- Projectile invulnerable like 5S.
- Gives a free confirm on hit.
Another good assist. Mostly a neutral and combo assist, as +25 usually isn't enough frame advantage to get a mixup on block. As a neutral tool, it's fantastic. Blows through Ki Blasts, clashes with beams, and gives a free confirm on hit.
Super Moves
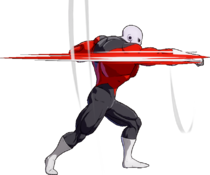
Colossal Slash
236L+M (Air OK)

tha WHEEL

BE FREE, WHEEL


- Minimum damage: 74*11 (814)
- If used on the ground/as a DHC, sets up an IAD safejump that beats 2H.
This is a pretty good super to DHC from, and in conjunction with a really fast/low recovery super, can set up for solid post level 1 oki at the corner, similar to Kid Buu's aerial super.
Colossal Uppercut
236H+S

Storing power, channeling Nirvana

GET THE F*CK OFF MY STAGE


- Minimum damage: 910
- Impaired horizontal range
The definitive super for finishing opponents, and grants very desirable oki post-use, but less than a regular sliding knockdown. Has some good DHC potential, such as enabling Goku's Super Spirit Bomb to land. Can also be DHC'd into by DHCing into a KO'd character slot.
Blazing Magnetron
214L+M or 214H+S

"This attack decides it!"

"I was joking the other times, but this one might actually blast your nuts off"


- Minimum Damage: 400*2, 989 (1789)
- Deceptive range; explosion and red smear all are hitboxes that lead to full connect. This means that it has a small hitbox behind Jiren as well, which also connects.
- Leaves Jiren +28 on hit.
High damage for a level 3, but below average advantage. Jiren's safest option is IAD j.M.