| Overview | Combos | Strategy/Counter Strategy | Full Frame Data | Discord |
You can help by editing it.
| "Hoooooh! Uhouhouhooooo!" | |
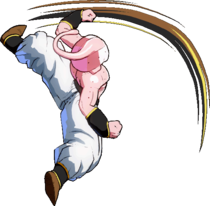
| Lore: | Small, diminutive, and insane beyond all reason, "Kid" Buu represents Majin Buu's "pure" form before absorbing powerful fighters. Without any sense of morality (or any sense at all), this form represents Buu not necessarily at its strongest, but at its most dangerous, driven by nothing other than the desire to destroy. Thankfully, the universe would be spared Kid Buu's wrath by Goku, who destroyed the terror with a Spirit Bomb. |
- Extremely Solid Mix-ups: 2S is a command jump that retains air options, Mystic Ball can be ridiculous on block with assists, and Arm Ball enables pure lockdown.
- Ridiculous Pressure: Can do several overheads from range on top of of Kid Buu's relentless capabilities.
- Frightening Neutral: Medium buttons go far distances, and Kid Buu is blessed with an aerial beam and good ki blasts.
- Small: Being short and small makes him difficult to hit compared to other more normal-sized characters.
- Anti-Air Grab: Mystic Arm Swing is an anti-air command grab that can become a substitute for the lackluster 2H.
- Great Assist Selection: A has the highest blockstun in the game and can enable nearly every type of mix-up, B is a fast strike assist, and C is a beam.
- Low Damage: Reliant on resources to extend damage output, and lots of moves have below-average scaling.
- Committal Anti-Air: Kid Buu's 2H has a comically small hitbox and Mystic Arm Swing is both more committal and less rewarding on hit.
- Post-Super Okizeme: Ironically, Planet Burst does not have a good knockdown, contrary to the rest of his kit.
| Kid Buu | |
|---|---|
 |
Normal Moves
5L

Flex those 6 frames

You can't escape


| 5L |
|---|
| 5LL |
| 5LLL |
- 5L it's a jab
Pretty far range for a jab. It's frame advantage is perfect for stagger pressure.
- 5LL moves Kid Buu forwards.
- Medium button in disguise.
- 5LLL after a vanish, this L autocombo can be used to continue your combo similarly to Goku Black's L autocombo.
There's really not much more to be said about this button. It's situational in combos, and it has very limited cancel options on block.
5M

Dhalsim would be proud

Wow! Kid Buu actually using its head for once!


- Pulls him forward about halfscreen.
- Second hit ground bounces on airborne opponents.
This is Kid Buu's primary anti-reflect blockstring tool. It pulls him forward far enough to completely negate the effects of reflect, and it is also one of the more damaging combo starters.
5H

Just like all the others

- Mostly useful for the optimal corner combos or blockstring filler.
- Moves very far forwards.
- Smash wallbounce can be linked off of in certain corner combos.
Midscreen, you're much better off going into an air combo with 2M > 5M, but it makes great blockstring filler as this is the move you're most likely to cancel into 214S.
5S

pew pew

- Fires a single Ki Blast across the screen.
- Pressing S again will make Kid Buu throw 2S afterwards.
Good for neutral and pressure resets. Because it's only -3, it's good up close for a stagger back to 5L. After 5H, the pushback means you can re-establish with 1M at a spacing that most characters can't challenge.
2L

Watch yo shins

- Kid Buu's primary mixup tool.
- Less range than 5L.
- Doesn't directly combos into 2M. The viable combo route is 2L > 5LL > 2M or 2L > 1M.
Behold: the low. An integral part of Kid Buu's pressure and mixups, but suffers from lackluster range.
2M

U N G A

- 2M and 3M have initial proration. 1M doesn't.
- Each version has some tracking, but will only hit in a certain range.
- 1M is the fastest one, hits from directly in front of Buu to almost half screen.
- 2M, 3M have relatively the same speed, 2M tracks from Buu to just over half screen while 3M tracks from half screen to about 3/4 of the screen.
- All versions pull the opponent in on block or hit.
- On hit, 2M and its variations can combo into themselves up to 3 times, with each version can only be used once.
- The order of moves used is 3M > 2M > 1M, trying to input a move that has already been used and Kid Buu will perform the next available one in line.
- Using 2 or more stomps makes the move special-cancellable only.
2H

Kid Buu at the Andrew W.K concert.

- Very bad horizontal hitbox, basically have to be touching the opponent if they are grounded.
- Vertical hitbox is pretty good, hits above Buu rather than in front.
This move looks a little better than it really is. It is a grounded 2H, so you can cancel it into specials, but there really aren't any good options. Everything you can cancel into either has a big gap or is punishable.
2S

pew pew

- Jumps up and throws a Ki blast in an upward arc.
- At close range, will throw the Ki blast downward.
- 5SS will also execute this attack.
- Recovery can be cancelled with an airdash.
- Has stored landing recovery.
6M
- DBFZ KidBuu 6M.png
The people's gummy elbow.
- Universal overhead.
- Another mix-up tool for a character brimming with them.
j.L

- Hits crouchers more often than it's animation would suggest.
Because of it's speed and how j.M messes with your air momentum, this is usually the other part of your high-low mixups.
j.M
- DBFZ KidBuu jM.png
Step into those DM's
- DBFZ KidBuu jM-2.png
Gotta love Metallica
- Pulls him forward about half-screen. An excellent air-to-air attack.
- First hit has a normal launch angle, second hit knocks the opponent down at a 60 degree angle.
- The first hit can reverse Gatling into j.L, the second can only chain into Heavies/Ki blasts.
j.H

The OTHER people's gummy elbow.

- [] is on Smash hit.
- Useful in mixups after j.M.
- Sometimes whiffs after j.M if it's used too close to the ground.
j.S

pew pew

- Halts Kid Buu's air momentum, useful for cross-ups.
- Has enough hitstun to combo into any of Kid Buu's aerial special moves or supers.
j.2H

Hello my baby, hello my honey

- Carries a lot of momentum.
- If smash hasn't been used, by delaying the super dash, Buu can switch sides with this move.
- Useful in non-Smash combos due to it's jump cancel properties.
Special Moves
Mystic Ball Attack
236L/M/H (Air OK)

Kano time

| Ground L |
|---|
| Air L |
| Ground M |
| Air M |
| Ground H |
| Air H |
- 236L lands close to start point.
- 236M will end further horizontally from the light version.
- 236H will initiate a small bounce that can extend combos.
- Hits twice during the fall, but only once when he bounces up.
- Retains smash when used.
Mystic Arm Swing
214L/M/H

Y O I N K

| L |
|---|
| M |
| H |
- Immune to air attacks.
- A better move to anti-air than 2H, although it has significantly worse scaling.
- 214L results in a sliding knockdown.
- Combos from 5LLL and Stomps.
- 214M results in a ground bounce that can be comboed after.
- Too slow to combo into.
- 214H air invulnerable from frame 1.
- Results in a ground bounce that can be comboed after.
- Often leads to more damage than Vanish in triple stomp confirms.
Candy Beam
236S

This move is as banned as Teen Gohan in Season 1

- Teleports to the opponent's position on hit, allowing you to easily combo into your Level 1 or Level 3 Super.
- Heals 400 blue health on Smash hit.
- Kid Buu is stuck until the beam hits something or the other side of the screen, not great for zoning.
A Tiger-Knee'd Kamehameha is better than this move in most scenarios, however this has its uses if the player wants to heal a bit and/or immediately go into Supers. It is the fastest beam in the game, which makes it excellent as a tool to go through an opponent's Ki Blasts, but you need to be very careful using it.
Kamehameha
j.236S

- Using a Tiger Knee motion (2369) will allow you to use this move while close to the ground.
One of the better moves to implement the Tiger Knee input solely because it's a standard beam, and can also replace the need for Candy Beam since it can be inferior to this move at times.
Arm Ball
214S


- On hit or block, holds the opponent in place for a ridiculous amount of time.
- 5H > 214S when covered by an assist is usually how this is utilized on block.
Powerful setplay and pressure reset tool, allowing for a mix-heavy character practically the ocean in terms of it's stupendous mélange of mix-up capabilities. Assists with 21 frames or more are required for this to be a true blockstring, but more is better as it becomes easier to time.
Z Assists
Assist A
Arm Ball


Aah yes. The enabler.
- Elite for pressure and lockdown, but piss-poor in neutral.
Considerable amount of start-up and must be timed correctly for blockstrings. Nonetheless, Kid Buu's Arm Ball assist is outstanding for pressure because it enables nearly every character to go for any high/low mix as well as left/right and even both if the point character has a low 2L.
Assist B
Mystic Ball Attack
Gogeta's spin2win but down
- 30-32 frames of blockstun ranging on how far the assist is if both hits connect on block.
- 20 frames if only the second hit connects.
Primarily just used for combos and as a better neutral assist than Assist A. Very good for characters that don't need the lockdown that Assist A provides. It also is excellent for Superdash + Assist, as it's angle will also catch an opponent trying to jump out.
Assist C
Kamehameha

Candy beam would have worked just fine, why'd they gift this little devil a true beam!?
- Fires a beam, then follows up with a j.H on hit for an easy pickup.
Kid Buu has a beam assist. Use it for beam assist things: controlling space, blockstrings, and combos. Being a C Assist, its combo usage is even easier than normal. Keep in mind that if this assist whiffs its cooldown is much longer than normal, which can hurt your team in neutral a lot more than a traditional beam assist.
Super Moves
Human Extinction Attack
236L+M or 236H+S

"IM NOT SUPER BUU BUT SCREW IT I'LL DO IT ANYWAYS"

- Minimum damage: 90, 35*17, 100*11 (785)
- Fires a volley of beams into the air that fall down after a delay.
- At close range will pull the opponent up into the air and drop them down right next to Buu.
- 5 beams fall in front and 5 in the back, these will never hit the opponent if they were caught during the liftoff.
- 1 extra beam (the second to fall) tracks the opponent.
- Immediate DHC (before the attack itself starts) or delay DHC (once the opponent is knocked back to the ground) is necessary for horizontal supers.
Good for DHC oki into fast recovery supers, such as with Adult Gohan's Potential Unleashed or Vegito's Spirit Excalibur. Also interesting to note that during non-cinematic supers, the projectiles will continue to fall which can potentially add more damage. An easy super to demonstrate this would be Final Flash.
Pearl Flash
j.236L+M or j.236H+S

Nyoooooooooom

- Minimum damage: 805
- Buu travels down to the ground before curving up, starting and ending in the air.
- If the opponent is hit in the first part of the arc, the hitstun is increased. Additionally, if the opponent is hit in midair, Buu will carry them to the ground, allowing for grounded DHCs to connect.
At certain heights, connecting this super after Smash j.H > j.2H (whiff) can set up a pseudo-hard knockdown with fast supers or Big Bang Attack-style supers. This super is generally preferred over his ground level 1 because of it's higher and more consistent damage.
Planet Burst
214L+M or 214H+S (Air OK)

9 year olds on Xbox live

One Bubble Gum flavored Spirit bomb, just for you!


| Ground |
|---|
| Air |
- Minimum damage: 180, 1520 (1700).
- Freezes sparking recovery, good burst damage.
- Advantage on hit is fixed at +35.
- Mediocre okizeme, 214S set-up from this is not true and is easily reflected/teched out of.
Kid Buu's level 3 does not have as good of frame advantage as most others, as +35 is a weird number to work with. The best you get is a Superjump IAD, as a normal jump won't be safe and an IAD is too fast.
External References
move and the move Full sections. One is shown on the character page, while the other is shown on the frame data page.