| Overview | Combos | Strategy/Counter Strategy | Full Frame Data |
Normal Moves
5L

So nice you'll wanna do it twice

Swats above for huge confirms

Airdashing over me? Fool.
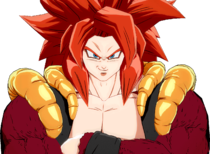
- DBFZ SS4Gogeta 5LLL2.png
Sideswapping anti-air


- 5L
- Good range for a jab
- Hits high enough to check opponents after a blocked superdash.
Standard speed 5L. Very nice for stagger pressure.
- 5LL
- 5L > 5LL will get Reflected twice, pushing Gogeta back to full screen. But delaying 5LL will make it Reflect proof.
Insane button. Large, sweeping high hitbox that can catch opponents behind Gogeta too, which can then lead straight into his 5LLL. Since it's a 5LL, it is a medium unscaled starter. It can be low profiled by some 2L and 2Ms, but that's just about its only fault.
- 5LLL
- Switches sides on hit.
Amazing anti-air. Extreme directional tracking allows it to easily snuff out aerial approaches and continue combos even when the 5LL launches high. Being unscaled too makes this an all-around great multi-purpose button. Although it still requires you to input 5LL beforehand, giving it technically high startup. On the bright side, it's still safe on block.
Its directional tracking is so wild that an aerial hit of 5LL, when positioned right beneath your opponent, allows the 5LLL to instantly side swap, where the follow up hit will then side swap again to keep the combo moving in the same direction. This, as you may expect, provides a massive amount of corner carry, functioning as a sold followup to vanish, such as after 236S.
5M

"The Ragna Button"

- Catches any jump except Superjump Back at round start.
Long range, high hitting 5M with fast startup. Being -5, you can also stagger with it. It will put you back at around the range you used it once it recovers, but you'll usually be in range to threaten with a 2M gatling or a 2L pressure reset. An overall excellent 5M, one of the best in the game along with Krillin, Adult Gohan and Kid Buu's.
Amazing as a roundstart option due to its speed, gatlings, and potential damage output. An easy roundstart with this move is 5M > 2H, as it gives you plenty of time to hitconfirm and either Superdash on hit or cancel into a special move on block for continued pressure.
5H

Huge range frametrap

- Smash hit wall splats.
- Catches opponents after reflecting Vanish.
- Does not truestring from any of Gogeta's normals, can be used as a frametrap.
Mostly combo filler or a frametrap on demand. Ground normals aren't all that useful as neutral tools in DBFZ and this one is no exception. As a frametrap, it will catch anything in the game that isn't invincible frame 1.
5S

The stare

- Tracks in front of Gogeta up until half-screen.
- Combos into superdash anywhere.
Not as useful as its airborne counterpart, but still good as a tool to control space. It's great to catch airborne opponents who are jumping around in front of you and forcing them into the ground.
2L

Basically 5L but lower

- 6-frame mid.
- Good range like its 5L counterpart.
2L comes out a frame faster than the average, best used for staggering or mashing out of pressure. Very comparable to the Goku shotos in this regard. Gogeta's main mixups are left/right, not high/low, and this button is a strong reason why. If you want to create a high/low situation, you're better off using his 6H chain.
2M

Disco with me Baby

- Good anti-reflect tool.
- Catches reflect > raw tag after 5L.
- Punishable up close but safe if spaced.
Gogeta's main low and combo starter. Spacing this move out will leave you -5 and at an ideal distance to bully Gogeta's other buttons.
2H

Deceptively huge

- Smash hit has higher hitstun, combos into SD.
- Moves Gogeta very far forwards.
- Catches airdash back after blocked superdash.
Because of how far it moves forwards, it might not anti-air a SD if the opponent superdashed near you vertically, as the SD will cross-up.
6M
- DBFZ SS4Gogeta 6M.png
eSports kick
- Can be spaced to be plus. In corner, after a j.H sliding knockdown, do 6S into 6M to make it meaty and become plus on block.
Usually can be followed after with 5L if it's +2 and 5M if it's +3 to maintain pressure. If used up close, Gogeta can use the threat of his 22S or 214S to scare the opponent into blocking and maintain his turn.
6H
Saiyan Kick

Time to gimmick

6H Overhead Follow-up: Crackin' skulls

3H Low Follow-up: Bustin' kneecaps


- 6H
- Jump cancelable on hit.
- Late cancelable into followups. At minimum, 6H~6H has a 5f gap on block, while 6H~3H has an 11f gap.
- High hitstun on air hit.
Very high hitting normal. Although unsafe on block, the threat of the followups will make opponents respect it. The followup chain is a big part of Gogeta's pressure, as he can do a lot here to either reset pressure or go for a mixup. Followups can be backdashed midscreen, so it's wise to use 5H to catch people attempting to do that. Gogeta's 214X moves will also catch backdash, but they're more risky to attempt if your opponent is ready for them.
Other than that, it can be good for extending Gogeta's blockstrings, or for his corner rejumps as 6H hits somewhat high, which allows him to convert off of his corner strings.
- 6H~6H
- Ground bounces on hit, can be converted with H/S normals or specials.
Fast overhead, will automatically catch people attempting to mash out of the chain. Delaying the button can make it harder to react to this and 3H, but doing so leaves Gogeta wide open. Decent combo filler if you want to keep your opponent close to the ground for assists, but using this solo forces you to spend your Superdash earlier than 6H > jumpcancel does.
- 6H~3H
- Launches on hit. Has very high hitstun that allow Gogeta to link into 2M.
Considerably slower than the overhead and leaves a large gap. Fortunately, it's very safe on block and has high hitstun. Being -2, it gives about the same situation as blocking a Vanish. Gogeta can either backdash to back off, cancel into a special or gatling into 5H, or simply restart his string.
6S
Finish Sign

New Unique Mechanic: Taunting

- Stands still and taunts. Gains level and cancelable into Vanish on frame 16. Gains 10% Ki gauge and cancelable into other actions on frame 33.
- When canceled into, loses the first 6F of its animation, and can be cancelled earlier (Total 52 → 46, Level on 16 → 10, Meter on 33 → 27)
- Each level gained adds a bit damage to Gogeta's next Super (~60 minimum damage)
Character defining. You can taunt in neutral, in blockstrings, and in combos. While the total animation is rather long, you can keep yourself safe by canceling into Vanish very early while still getting the Level. You also have a frame 4 counter and a DP to shut down the opponent's counterattack attempts. Don't be afraid to cash out on Supers either, since it's not hard to build Levels back up especially if you have assists to cover you.
In a blockstring, any M/H/S normals > 6S will leave an 11F window to counterattack (or a total 27F for them to react). If not overused, 6S can be used to reset string very efficiently. Mid-combo, it's possible to do ground normals > 6S > Vanish and get both the Level up and the wall bounce from Vanish.
Once at Level 7, Gogeta gains an Instant Kill Super, which is likely what you're aiming for with this. Read more about that here.
j.L

I don't even...

- Cannot be repeated twice on whiff
Gargantuan hitbox. Will win lots of air-to-air trades.
j.M

...need my hands...

- Very big, will cross up after an IAD in a blockstring from most ranges.
j.H

...to defeat you!

- 5LLLLLLL
- Smash hit can wall bounce.
- j.H
- Smash hit causes a sliding knockdown.
Gogeta's biggest jump-in and best oki ender. Soft knockdown setups are a lot easier than usual due to his second airdash being usable after his double jump. Use this to safejump if you don't have air options left, as j.M can threaten with an IAD j.LM fuzzy on grounded opponents.
j.S

The stop and stare

- Tracks in front of Gogeta up until half-screen.
- Combos into superdash in the corner and close by midscreen.
- Can combo after j.H at certain heights.
Gogeta loses all of his momentum after using this in the air, bringing him to a dead halt. If you're not using it in a combo, it's best used to stop air-to-air attempts, but be careful as an expectant opponent can superdash preemptively and catch you wide open. It can also be used as a post-superdash option on characters with 2H normals slower than 13 frames.
j.2H

"There are no goalies on my field!"

- Jump cancelable.
Pretty much every Saiyan's j.2H. Good upwards hitbox, otherwise it's a bog-standard air launcher.
Special Moves
Lightning Hammer
236L/M/H (Air OK)

Okay range, but goes through projectiles.

Owari da!


- All
Gogeta's lariat-style move. All versions have Ki Blast invulnerability during their startup. Weirdly enough, they also have very good scaling when used as combo starters.
- 236L
- Travels 1/3 of the screen.
Mostly a roundstart option if you want to meme on someone, as 5M is generally a better choice. Also doubles as a movement tool in the air, but it's much more committal than simply airdashing.
- 236M
- Travels 1/2 of the screen.
- Wallbounces with Smash, giving a combo in the corner. Can also extend combos midscreen with an airdash if you're not too high.
- Gives a mediocre sliding knockdown if U1 has been used and D1 has not.
- Opponent can airtech if both Smashes have been used.
Gogeta's primary combo extender besides j.2H. Air version leads to a rejump on every character but Krillin midscreen and the ground version gives a full combo in the corner.
- 236H
- Travels 1/2 of the screen.
- Ground bounces with Smash, giving a combo anywhere.
- Gives a bounce sliding knockdown if U1 has been used and D1 has not.
- Opponent can airtech if both Smashes have been used.
6H-6H is a good way to follow this up after a delay. If your back is to the corner, you can instantly pin the opponent, 6H-6H 5H to 5S then superdash/assist. Midscreen, 6H-6H then 5S and SD/assist. Good get out of jail free card against projectile heavy characters with fantastic follow up potential, key of Gogeta's whole design.
Meteor Strike
214L/M/H (Air OK)

speeeEEeEEeeEeen

Pressure restarter, combo ender.


- All
- Overhead.
- Uses D Smash on hit.
- All versions can be anti aired
- 214L
- -2 on block, allowing for a safe backdash.
- In the ballpark of +33 on most knockdowns, letting you SJ IAD j.H for a safejump.
Functions as an overhead mixup and combo ender. Use after j.H > j.S when you don't have smash for a knockdown.
- 214M
- +2 on block, allowing for RPS midscreen and pressure in the corner.
- In the ballpark of +55 on most knockdowns, giving you a similar setup to a Smash j.H.
A sometimes move due to its startup, but good to use nonetheless as it's +2 on block. It's also Gogeta's best okizeme ender if he still has D1 Smash available, usually in corner combos. You'll most likely use j.DR instead, but it's there nonetheless.
- 214H
- +2 on block, allowing for RPS midscreen and pressure in the corner.
IAD j.214H can get Gogeta in from fullscreen and be +2 on block, but getting predictable will end up with you getting 2H'd. It's +2 like 214M and 24f startup like 214L, so using it to continue pressure isn't a bad idea.
Bluff Kamehameha
236S

"My ultimate move!"

"Heh. Dumbass."


- Command grab.
- Switches sides on hit.
- Allows for a combo with Gogeta's back to the corner.
This has pretty good range for a command grab, as well as a deceptive animation, so you can use it if you think your opponent is blocking a bit too much to throw them off guard. Don't get reliant on it, as it's a bit slower than average - and if the opponent catches on, they can backdash or jump out and punish you.
Punisher Guard
214S (Air OK)

Stance

Hit me then if you wanna hit me then


- Frame 4 counter.
- Combos into superdash anywhere.
- Will not counter Ki Blast and beams, but will invul through if timed correct.
- Loses to command grabs and Dragon rush.
- Combos into Gogeta's Instant Kill.
Excellent as a defensive tool. It's usable anytime that Gogeta is -2 or better, which is a wide range of opportunities in DBFZ. The most prominent of which are after a blocked 6M or an opponent's blocked vanish. Getting predictable with this move will get you killed, but it's great when unexpected.
While this move doesn't activate against beams, it does activate against any strike property attacks including Hit's Time Release. This move not activating on contact with beams can also be a blessing, as beams extend its active time and it can potentially catch a Vanish from there if your opponent doesn't recognize it.
Plus Energy of Justice
22S

Meterless DP time

- Frame 1 reversal.
- Gains a Dragon Ball upon usage.
- Insane minimum damage with D1 Smash. 40%, or a free 480 damage at the end of your combo.
- Unlike most DPs, hits the opponent into a colossal sliding knockdown. Solid oki or even Finish Sign for basically free.
- Dragon Ball cycle is different than that of the Dynamic! property: Two-Star → Five-Star → Six-Star → Seven-Star → Four-Star → Three-Star → One-Star
- This is actually the order in which the Shadow Dragons were killed.
- The Dragon balls that appear also for a split second are the black star dragon balls, in reference to, well, the black star dragon balls.
Gogeta's omnidirectional reversal. Short range compared to other DPs. Technically a projectile, so moves like Z Broly 214S will completely invalidate it. If you still have your D1 property at the end of your combo, this makes for Gogeta's best okizeme ender. It's also his highest-damage move to tack on the end of a Combo DR before supers.
Z Assists
Assist A
Finish Sign
Farm to Win
- Grants half a bar
- Levels Gogeta up, but cannot go past Level 5 for obvious reasons.
Effectively a worse version of Base Goku's B assist due to the lesser meter build and only making Gogeta's supers stronger instead of giving him something like a Spirit Bomb. While you can hold Gogeta in the back and greatly reduce the risk it takes to get his instant kill, it's somewhat of a gimmicky gameplan. Still, if your characters don't really need frame advantage and are better off with meter, this can be a good choice.
Assist B
Lightning Hammer
The good one
- Generic strike assist with good advantage, beating most assists
- Holds the opponent in the air for a bit on hit
Practical assist with nothing wrong with it. Very basic, but very reliable.
Assist C
Plus Energy of Justice
Gives the term dragon punch a whole new meaning
- Gains a Dragon Ball on hit, block, or whiff.
- Dragon Ball cycle is different than that of the Dynamic! property: Two-Star → Five-Star → Six-Star → Seven-Star → Four-Star → Three-Star → One-Star
- Unfathomably less advantageous than every other C assist and some normal assists. This unusually low blockstun can allow it to be used for tick throws.
Just remember, Dragon Balls can be used against you too.
Super Moves
Ultimate Impact
236L+M (Air OK)
The smile of a man that knows he's going to hit you

Tajū Kage Bunshin no Jutsu!
- DBFZ SS4Gogeta UltimateImpactGround.png
Ground finisher
"Back to the corner with you!" - DBFZ SS4Gogeta UltimateImpactAir.png
Air finisher
Gogeta channels his inner Xrd Sol


- Minimum damage: 754 → 808 → 862 → 916 → 970 → 1024 → 1078 → 1154
- Has Head property, making it vulnerable to 2H.
- Tracks the entire screen.
- Side switches on hit for ground version. Regains side for air version.
- Ground version corner carries.
Tracks anywhere on the screen, but deals rather poor damage without levels. At Level 3 or so, it might actually be more worthwhile to use this than continue going for the Instant Kill as this becomes one of the most solidly damaging Level 1s in the game.
Ultra Big Bang Kamehameha
214L+M (Air OK)

It's ShadowRealm™ time.

"ULTRA BIG BANG KAMEHAMEHA!!!"


- Minimum damage: 1654 → 1708 → 1762 → 1816 → 1870 → 1924 → 1978 → 2054
- Adv. on hit: +44
Like most beam lvl3 supers, it's hard to get consistent pressure midscreen. The corner is a whole different story. Gogeta doesn't have access to a fast low, but he does have access to an easy fuzzy overhead thanks to his double airdash. After a lvl3 in the corner, [9]j.M (whiff) > j.M will leave you at the perfect height to either IAD j.LM or land 2M. On most characters, the IAD j.LM will be a true blockstring as well as a combo if the j.M connected. You're also free to go for a DR or 236S after the j.M for additional layers.
x100 Big Bang Kamehameha
214H+S while Level 7 (Air OK)

The original attack to end them all

There is no funny joke, just die


- Minimum damage: 100%.
Not reliable as a reversal due to its slow startup and Gogeta leaping up making the beam whiff on crouching or small characters at close range. However with its extremely high damage and minimum damage, this Super acts as an Instant Kill that can only be used once Gogeta reaches Level 7. Unlike another Instant Kill in the game, this one has no drawbacks and can be combo'd into from Smash 5H, U+ Smash 236M/j.236M, command grab, counter, DP, Smash Vanish, midcombo Sparking Blast, and so on. It doesn't matter how you combo into it or how scaled the combo is (even with Super Scaling), it will always kill. The beam is also multi-hit and stops applying damage right when the opponent is KO'd, so it won't give them 7 Ki gauges.
It is not all that hard to reach Level 7 in a real match. Even without his own A assist, Gogeta can easily rack up 3 to 4 Levels per combo with the right team. Once at Level 7, the threat of being IK'd is always there since it's so easy to combo into, and despite you can't DHC into IK, it's possible to tag Gogeta in midcombo and do something like Vanish > j.214H+S instead. It can IK the opponent's assists as well, but much less consistent.
As a side note, while you can IK off of any stray hit as long as you have enough meter, it's optimal to use your assists and push the combo as far as possible before ending with IK. The assists will regenerate immediately after the round transition, and you'd want to build extra meter for the next character.
Just wait for him to fall down and punish the landing recovery. Or if you tech right into the beam, please don't Reflect it. You'll have better frame advantage if you just block (+51 vs +49), and will also build 1.458 bars at the cost of 1458 blue health. That's 6.66 (repeating of course) times the meter gain per blue health rate of getting hit by a DP.