| Line 841: | Line 841: | ||
{{#cargo_query:tables=MoveData_DBFZ | {{#cargo_query:tables=MoveData_DBFZ | ||
|fields=input=name,damage,guard,smash,startup,active,recovery,onBlock,invuln | |fields=input=name,damage,guard,smash,startup,active,recovery,onBlock,invuln | ||
|where=chara="{{SUBPAGENAME}}" and (input=" | |where=chara="{{SUBPAGENAME}}" and (input="236H+S" or input="j.236H+S") | ||
|format=template|template=AttackData-DBFZ|named args=yes|order by=_ID | |format=template|template=AttackData-DBFZ|named args=yes|order by=_ID | ||
|delimiter=\n{{!}}-\n | |delimiter=\n{{!}}-\n | ||
| Line 875: | Line 875: | ||
}} | }} | ||
|- | |- | ||
{{AttackVersion|name=Ultimate Kamehameha|subtitle=Hold L/ | {{AttackVersion|name=Ultimate Kamehameha|subtitle=Hold L/M/H/S on hit}} | ||
{{#cargo_query:tables=MoveData_DBFZ | {{#cargo_query:tables=MoveData_DBFZ | ||
|fields=damage,guard,smash,startup,active,recovery,onBlock,invuln | |fields=damage,guard,smash,startup,active,recovery,onBlock,invuln | ||
Revision as of 16:32, 19 May 2022
Normal Moves
5L

Don't whiff this.

Gut punch: electric boogalo.
*BONK*


- 5L is Gogeta's fastest normal.
- Can cancel from the 1st hit, except dragon rush.
On whiff, Gogeta is forced to suffer through the second jab. Fortunately the second hit will always connect on a reflect, giving you extra time to react with 2M.
- 5LL launches on ground hit.
- Has enough hitstun to combo into j.DR, 6M or j.H.
Decent upwards hitbox, but rather unremarkable and not good for mashing due to 5L's long active frames. Very unsafe on block.
- 5LLL sides switches on hit or block, pulls the opponent out of corner.
- Stays airborne afterward, recovers midway through.
- Huge gap between 5LL and 5LLL, enough to be jabbed out or 2H'd.
- On block, can cancel into SD early to stay same side.
While it is a grounded overhead option, it is easily reactable. Though it can turn into a mix-up if you cover the large gap between 5LL and 5LLL, there is almost no need to try this when 6M is much safer and a less scaled starter, other than rarely knowledge-checking opponents.
In the rare case you want to use this in pressure, immediately cancelling into 236LLL will let you land without a post-SD scramble, giving you time to call an assist and continue offense.
5M

The Radio City kick

- High vertical reach.
- Moves Gogeta forward moderately.
Can be safe if blocked high enough in the air.
Great button, with amazing vertical and horitzonal hitbox, though outshined by 2M in neutral. Because it hits pretty high up, it can meaty the opponent's up tech well, and can generously catch them trying to chicken block out of your pressure. Can go into a very tight (though still not gapless) 6M or 2M for a good mix-up if air blocked.
5H

Got something on ya chin

- At long range, Gogeta will teleport closer.
- Very small invulnerability gap during the move.
One of Gogeta's best starters and buttons. It is good for catching opponent's counter buttons after their reflect, and likewise, is also good as a counter action after a successful reflect, all due to it's variable range. Be aware that if you read a back dash from point blank and are too quick, the teleport will not activate due to close proximity, leaving you wide open. Will lead into incredible corner carry with a rejump.
5S

Style over substance

- Beam property.
- Small wall bounce.
Not the best projectile, lacking swiftness and fast recovery, but the benefit of having a beam as a normal is being able to cancel it into specials or into vanish even on whiff. 236H goes hand in hand with this normal thanks to it both being a truestring and combo anywhere on the screen after 5S connects, letting Gogeta use this to get in very quickly.
In pressure this normal frametraps from any normal, but is obviously impossible to stagger with thanks to the very high recovery. Truestrings into Superdash in the corner, letting you go for the classic superdash mixup or other options.
2L

Will actually mix now

- Slides forward.
- Launches on hit like a 2M.
- Can be made 0 on block when spaced properly.
Massive range. Will catch backdash after a blocked Vanish.
Gogeta's 2L is slower than average, but will get the job done when doing a high/low mix-up.
2M

Your entire grounded gameplan

- Very long range, easily covers 2/3s of the screen.
- Catches backdash after blocked vanish as of patch 1.25
One of the best 2Ms in the game, due to the sheer amount of space it covers in a very short amount of time. Quite slower than 2L, but still great for catching backdashes along with reaping better rewards.
2H

The meanest uppercut you've ever seen.

- Recovers on his way down.
- Useful for corner mixups
A good anti-air on its own, but can be used for deceptive cross-up mixes midscreen. In the corner, any assist with at least 37 frames of blockstun can be used to create a simple, but true 50/50 that cannot be guard cancelled thanks to Gogeta's air DP. Just IAD j.M or empty 2L for a same frame mixup.
2S

More likely to blast the ground than the opponent

- Beam property.
- Causes a ground bounce, links into superdash only in the corner.
- Adds ten frames of landing recovery, not good for mixups or pressure.
2S > SD isn't a true blockstring, and the gap is no longer small enough to stuff 2H. Don't bother using this for mixups, Gogeta has much better tools.
Terrible move in neutral. Extremely long recovery, using this move at all outside of a combo is asking to die. If you miss, you can maybe play a game of superdash RPS to try and save your life, however you are ultimately still -75 and have 10f of landing recovery waiting for you, all for a high start-up move that your 2M would have covered anyway.
6M
- DBFZ Gogeta 6M.png
- Universal overhead.
5LL > 6M can link into another 5L in the corner, thanks to the hitstun of 5LL. Leads into one of his stronger non-2M/2L starter damage routes.
j.L

Fuzzy enabler

- Fast aerial hitting downward.
Absolutely superb air normal. Used for fuzzy-guard setups, gives safejumps, jabs out Superdash. Don't forget you have this.
j.M

You'll love this button, your opponent will hate it.

- Triple overheads.
- Can cancel on any hit.
- Great at maximizing damage in scaled combos.
- Gogeta's go-to air button for safejump set-ups.
Probably Gogeta's best air normal, among one of the best air normals in the game at that. It can shut down many approaches due to how active and large it is. j.L is still generally better for jabbing out Superdash.
Very annoying to block on IADs since any delay will make only two kicks come out instead of three, letting you go low and potentially catch opponents off guard.
j.H

The definition of high risk/high reward

- Kicks 70% of the screen forward.
- Big wall bounce on Smash hit.
5LL > j.H will lead into Gogeta's stronger 2L starter combos. On the occasion that Gogeta is in the sweet spot where both 214M or 214H won't lead into a corner combo, j.H must be the extension.
Although this move has lots of range and converts into combos, it carries high risk in neutral thanks to its very hefty recovery. Doesn't help that Gogeta is frozen in place during its last active frames, making him a sitting duck. Use wisely.
j.S

Not the best projectile, but a staple in combos.

- Beam property.
- Small wall bounce.
Covers a higher part of the screen which the majority of assists won't reach, so can be used for screen domination, or a safer option to stop Super Dash with. Be very careful.
Unlike 5S, j.236H will almost never land after unless perfectly spaced and it will incur extra landing recovery on block due to being airborne, so just vanish after this.
j.2H

Only useful in combos

- Smash on air-to-air, causes a ground bounce sliding knockdown on Smash hit.
- When opponent is grounded, is -2 on hit and will not have Smash property.
Has much better oki compared to j.236L > L > L, and leaves the opponent much closer, but is inferior to j.236L > M > M in the corner. When going for the DHC mid-screen, j.2H is needed to connect Gogeta's supers without an extremely tight link from j.236L > L > L into Big Bang Kamehameha.
Although it's an overhead, it's -2 on hit and gives no combos at all on grounded hit, and attempting to vanish will open you up. This button really shines in combos with new extensions and more damage, in the corner is used for assist conversions and rejumps, all due to the new ground bounce. For pressure, it might surprise overhead your opponent if they were expecting you to land out of j.M.
j.2S

Also known as the j.S followup

- Beam property.
- Causes a big ground bounce.
- Adds 10f landing recovery.
j.2S > SD is a common combination in Gogeta's combos, that work everywhere on screen. A superb, extremely useful combo tool that enables a lot of flashy combos, or simple low-execution routes that still manage to deal great damage.
Still pretty bad in neutral, but more useful than the grounded 2S. You have more options on where to position the beam, which you'd think would make it better, but the angle is still too steep and there's too much risk. You're better off using j.M for most situations this move can come in handy for. If nothing else, you can use it to beat some anti-airs very slowly or as an incredibly risky poke that, for whatever reason, you aren't using j.S instead for.
Special Moves
Soul Strike
236L/M/H (Air OK)

FULL SCREEN REKKA

| Version | Damage | GuardHow this attack can be guarded. | SmashWhich type of cinematic this attack can trigger. | StartupShows how many frame that the corresponding move needs to go through in order to reach its active frames. | ActiveShows how many frames where there is an attackbox, AKA the hitbox where if the opponent touches it, they will take damage. Occurs after Startup. | RecoveryShows how many frames that the character must go through after its active frames to automatically go back to a neutral stance. | Frame Adv.The difference between the attacker's recovery and the period that the opponent is in blockstun. This Frame Advantage value is based off the fact that the very first active frame touches the opponent. Throws list the amount of Frame Advantage upon successfully throwing the opponent. | Invul. |
|---|---|---|---|---|---|---|---|---|
| 236L | 650 | All | 12 | -8 | ||||
| 236M | 700 | All | 17 | -8 | ||||
| 236H | 750×2,900 / 750×2,900,400 | All×2, High | D1, U1 | 13 | -5 | |||
| j.236L | 650 | All | 12 | |||||
| j.236M | 700 | All | 17 | |||||
| j.236H | 750×2,900 / 750×2,900,400 | All×2, High | D1, U1 | 13 |
- Any followup can be used on whiff.
- Only ground L and L~L rekkas keep grounded opponents standing. The others launch on hit.
- Ground rekka doesn't have head property, air rekka does.
- Distance traveled: Air H > Ground H > Ground M > Ground L = Air L > Air M
- 236L
- Strikes half screen forward.
Your safest bet. Most opponents will expect you to truestring into the rest of the L chain, making staggering with this not as scary as the framedata would lead you to believe.
- 236M
- Can cancel into H followup during startup.
Reels back before the attack. Performing this with his back against the wall gives significantly better range than midscreen.
- 236H
- Each hit of 236H automatically does its next followup on hit, block, or reflect.
- Last hit causes a ground bounce, Smash hit adds sliding knockdown.
- After landing, does an extra hit that switches sides and causes a big wall bounce on Smash hit, and a sliding knockdown without.
- The second to last hit can also be cancelled instead for a grounded Super.
- The non-smash hit ALWAYS give sliding knockdown
236H should be treated more as a lariat than a rekka since the followups come out for you. It gives very good reward on hit with the proper combos, but consumes both smashes. There are setups to help mitigate the lack of a sliding knockdown besides using another EX move.
Soul Strike Follow-up 1
Soul Strike L/M > L/M

KNEE

- Ground 236L~L or 236M~L are true strings but recover on the ground.
- You can slightly delay these for more corner carry, even when finishing long combos.
- M followup always recovers in the air but leap a gap from 236L/M and their air versions.
Since it recovers in the air, you can airdash after to go into high/low mix-ups with late airdash j.M or land 2L.
Soul Strike Follow-up 2
Soul Strike Follow-up 1 > L/M/H or Soul Strike L/M > H

DUNK 'EM

H Automatic Follow Up


- Auto-corrects.
- Range: L > M > H
- L
- Only causes a short sliding knockdown on Smash hit.
Very poor oki. Extremely difficult to hit Big Bang Kamehameha after. M is superior and will always work in the corner, so only end combos with this instead of j.2H if your corner carry wasn't enough.
- M
- Smash hit causes a ground bounce and sliding knockdown.
- Hits below Gogeta.
- Leaves a gap from any 236X~X or j.236X~X
Doesn't scale as much as you'd be lead to believe, can be used for certain sparking routes. Otherwise, you'll be using this at the end of your combo or to do an assist extension.
- H
- Causes a ground bounce, Smash hit consumes sliding knockdown.
- After landing, does an extra hit that switches sides and causes a big wall bounce on Smash hit.
- The last hit can also be cancelled instead for a grounded Super.
- The non-smash hit ALWAYS give sliding knockdown
236L~H is a 100% unpunishable and gapless overhead. 236L~H is 25f, 236M~H is 26f, but at close range the opponent can block 236L before the H comes out, which doesn't happen to 236M.
The unfortunate weakness of the H followup is the expenditure of both smashes and swapping sides.
Rising Vortex
214L/M/H (Air OK)

L/M/Air H

Ground H
spin2win


- Hitbox completely surrounds Gogeta.
- 214L
- Frame 1 air invuln
- The fastest option Gogeta has
Your typical light DP. Unscaled starter, so perfect for TODs and beating super dashes mid-air, however what makes this particularly standout is the 360 hitbox letting you even use this to easily beat crossups, especially with the incredible startup.
Can also be used in clashes thanks to its speed, and is preferred over 214H thanks to its invincibility, multi-hits and TOD potential.
- 214M
- Frame 1 full invul, true DP.
- Goes slightly further than L versions.
- Adds an extra kick at the end which uses Smash.
- Smash hit wall bounces, can link into j.H even midscreen.
360 DP. Can link into airdash j.236L and j.236H mid screen, but the timing is only practical on big bodies, so confirm into j.H -> j.236H + assist extension if you aren't insane.
- 214H
- Frame 1 full invul, true DP.
- Ground version does a gut punch, air version is a faster j.214M
- Both versions switch sides, causes a big wall bounce on Smash hit.
- The non-smash hit causes sliding knockdown.
The grounded version is a blessing and a curse. Somewhat stubby range, but gives combos while Gogeta's back is against the wall. The air version however is mostly a combo tool, since j.214L is just as fast while still having air invincibility.
Multiplex Afterimage
236S (Air OK)

we Naruto now

- Can only be done once in the air.
- Fully invulnerable from frame 6-10 while Gogeta is invisible.
- Hold
 to use j.S clone, and
  or
or  to use j.2S clone.
 - During startup, the bottom clone is always the real one. Hitting fake ones will cause them to disappear.
- Normally does a tracking j.2H on block or hit, causes a ground bounce. Smash even on grounded hit and adds sliding knockdown.
- 5S clone true string into the dive kick, making it safe even at point blank.
- j.2S clone's beam pops the opponent up like a typical beam instead of ground bounces.
- Hold S to feint, can also choose which clone to warp to.
- Performing this at jump height will still give the ground version, so the feint into the 5S clone counts as landing, regaining your air options.
- Can super jump install into an airborne clone, retains super jump's momentum control.
j.2S Clone sets up for a high/low 50/50 and cross-up j.L/M.
5S Clone sets up for lows and command grab/DR.
Potentially a very potent mix-up tool when paired with a high blockstun assist. Unfortunately pretty weak when he's solo unless they're conditioned to block, and potentially disastrous in neutral if you decide to shoot and end up missing. You're a whopping -93 if you whiff, and while you could steal neutral by using an assist or vanish to steal your turn back after the j.2H follow-up, 5S or 236H will do that with much less risk than this. Use only if you know it'll work.
Punisher Drive
214S

psh....nothin personnel, kid....

- Full screen command grab, max range startup is 32.
- All assists immediately leave the screen on hit, also can't call any assist until after recovery.
- On hit, leaves Gogeta point blank behind the opponent, keeps grounded opponent standing.
- Whiffs on airborne. Can still hit airborne opponent mid-combo, causes sliding knockdown.
- Only hits once per combo, like most command grabs.
This move is better off used as a neutral tool than a mixup tool. In pressure it's too telegraphed due to the bright glow and startup, along with giving very little reward. You can gimmick some people by cancelling the first hit of 5L into this, but it still rounds out to more risk on your end than reward. Against passive opponents who don't want to try to challenge Gogeta in the air however, this move really shines thanks to its short recovery. Fullscreen people are less likely to notice the startup, and if they do then it's already too late for them to punish it.
214S is also excellent for combos. 5H into 214S scales very little and is a classic TOD starter for Gogeta.
Z Assists
Assist A
Super Dash Kick
- DBFZ Gogeta AssistjH.png
Base Goku assist on wheels
- Big wall bounce. Enough for GT Goku to combo into Spirit Bomb from midscreen.
- Has head property.
Really good. Has a good amount of blockstun and sets up a ton of utility for many characters, such as midscreen snap setups and confirms from beams, thanks to its wall bounce and being fullscreen. The only downside to it being it's rather slow, so you can't just throw it out whenever you please - and using it in combos can be tricky if you don't have the timing down completely. Regardless, Gogeta's A assist is very good for what it can do for a majority of the cast, and is one to be feared.
Assist B
Rising Vortex
Reverse Rolling Crush
- Blockstun is dependent on how far you are to the opponent when the assist is called, or how close the assist is to the opponent.
- Big, lenient, and omnidirectional pinwheel allows versatility for pressure, but even though it was a lot of hitstun is difficult to convert of because of the height.
Really handy for covering tech options (except for delay tech) after a sliding knockdown with its ascending hitbox, allowing pressure to continue.
Was one of many assists that ArcSys graced with extreme hitstun in a patch. Very easy to confirm off of.
Assist C
Galick Gun
A god's move.
Gogeta teleports to the opponent and 2S's them in the face. It does track anywhere on the screen, and given that it's a beam, it can be easy to hit depending on the situation; however, its tracking is not the fastest, so you may need to run it through a couple scenarios to get the hang of using this assist.
Super Moves
God Punisher
236L+M

A W K W A R D S T A N C E

MORE!

For good measure


- Minimum Damage: 821 (425 additional damage for the 1 bar follow up)
- Leaves Gogeta almost full screen away from the opponent after it connects, giving him no oki.
The full damage of God Punisher (2018) is coincidentally the year Dragon Ball Super: Broly was released.
And the max hits without the bar extension is 19 hits, which is the U.S release of Dragon Ball Super: Broly (2019)
Stardust Fall
j.236L+M

- DBFZ Gogeta StardustFall2.png
Makin' it rain

- Causes sliding knockdown, though he doesn't get any oki from it.
- Good for DHCs as it puts the opponent from the air to the ground.
- Minimum Damage: 750
Decent air ender for when you don't have SKD available.
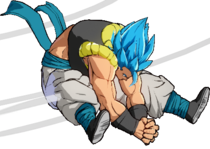
Big Bang Kamehameha
236H+S (Air OK)

Big Bang....
- DBFZ Gogeta BigBangKamehameha2.png
Kamehameha!

- This is his DHC.
- Lasts long enough that some characters can get a Dragon Rush off of it when they DHC in after this super, such as Nappa and Adult Gohan. Also sets up Base Goku's Spirit Bomb.
- Minimum Damage: 827
Meteor Explosion
214L+M or 214H+S


- Minimum Damage: 1790 (964 additional damage for the lvl 5 extension)
- Level 5 extension puts Gogeta full screen's length away from the opponent.
Great damage for a Level 3, with the most satisfying meterburn option available in the game. He doesn't get any dirty oki off of this though, and almost none at all from the Level 5, even in the corner. Still, it's good to use just for damage alone and is great at securing kills.
Colors

Color 1

Color 2

Color 3

Color 4

Color 5

Color 6

Color 7

Color 8

Color 9

Color 10

Color 11

Color 12


Color 131

Color 141

Color 151

Color 161

Color 592


