| Overview | Combos | Strategy/Counter Strategy | Full Frame Data | Discord |
You can help by editing it.
| "There's a certain degree of luck involved in battle. But I can't rely on that. I need to train more." | |
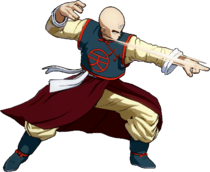
| Lore: | Tien Shinhan (or properly known as "Tianjinfan/Tenshinhan") is a student of the Crane School and was one of Goku's greatest childhood rivals. A descendant of the Three-Eyed People, Tien has access to several unique techniques due to his heritage, including the Multi-Form. Accompanied by his doll-like companion, Chiaotzu, Tien has continued to pursue strength as a martial artist throughout the series. During the Saiyan, Cell, and even Buu sagas, Tien played secondary though important roles in the final outcomes. |
![]() Tien
Tien ![]() Tien is a balanced, stalwart character that with resources, has insane damage potential with Super Moves.
Tien is a balanced, stalwart character that with resources, has insane damage potential with Super Moves.
- Solid Mix-ups: Has multiple quick lows, an overhead, and a command grab.
- Super Damage: All his Supers boast some of the highest damage in the game even after scaling and efficient meterburn options in both kinds of Tri-Beams.
- Upgrades: Sparking! or Limit Break halves the HP loss for Tri-Beams and together, erase his initial health penalty. Sparking! unlocks j.236H as an instant overhead.
- Potential Damage: Multipliers alongside Supers enable Tien to inflict massive damage off single conversions to down opponents with enough resources spent.
- Full-screen Okizeme: Telekinesis can put the opponent on block anywhere shortly after a sliding knockdown.
- Assist Variety: A is good for neutral, B is nice in blockstrings, and both are useful for combo extensions.
- Honest: Buttons are stubby, and has no reliably safe approach options in neutral.
- Meter Hog: Unremarkable damage without bar, and unreasonable to place in a position outside Anchor.
- Flawed Assists: A has very little blockstun and B has very poor tracking in neutral while dealing no damage; they can be outclassed by other similar anchor assists.
| Tien | |
|---|---|
 |
Normal Moves
5L


Gentle Fist Eight Trigrams Sixty Four Palms!


| 5L |
|---|
| 5LL |
| 5LLL |
- 5L has a little bit more range than most 5L, albeit slightly.
- 5LL has good forward momentum for long range confirms.
- Also does 2 hits, which also helps with confirms.
- 5LLL is a standard fair LLL launcher, does 9 hits allowing more time to think through next step than LLL usually allows if you ended up mashing it out.
5M

5H

- Has good horizontal reach.
Mostly used in his optimal corner combos, otherwise does not see much play.
5S

2L

- Can chain into itself but can sometimes whiff the 2nd time after a specific overhead, or what size opponent you're facing.
2M

2H

- If blocked, can be cancelled into 236H for a surprise overhead with sliding knockdown.
6M
- DBFZ Tien 6M.png
j.L

- Once a hit has been blocked, the remaining hit can be blocked low.
Both hits count towards scaling, and subtracting one of them can even enable slightly more damage early in a combo. Subsequently, should only be used late into a combo to mitigate the extra scaling.
j.M

j.H

- [] is on Smash hit.
Not used much as a combo ender, as j.2H > j.236M combos without smash and will always result in a sliding knockdown on it's first use. If you don't want the sliding knockdown, j.2H > j.236L has you covered too. j.H's only real purpose is as a high damage jump-in.
j.S

- Pushes Tien slightly away.
- Slow recovery.
- Has decent angle.
- Has enough hitstun to combo into superdash.
Can be used after Crane Strike on block after back dodge to cover yourself. Is still superdash-vulnerable so it's better not to overuse it.
j.2H
- DBFZ Tien j2H.png
- Combos into superdash on Smash hit.
- Combos into j.236X on non-Smash hit.
Usually followed up by 236M for a sliding knockdown at the end of air combos. It's not fast enough for neutral use so you'll mostly see it in combos.
Special Moves
Volleyball Fist
236L/M/H

M guardpoint

scoop

H version


| L |
|---|
| M |
| H |
- 236L performs a sliding low attack.
- Press additional buttons on hit-confirm to extend the special.
The quick version of the Volleyball Fist. Useful for catching opponents off guard or spamming high attacks.
- 236M strikes a pose, gaining guard point before doing a sliding low attack.
- Press additional buttons on hit-confirm to extend the special.
- Guard point does not activate on frame 1, but it’s very early.
- Blocks projectiles, mid and low attacks.
- Loses to throws, supers, and overheads, ironic since it's a volleyball bump.
- Due to having guard point, this version will scale your combos and followups more than L version.
- Reaches full-screen.
Even though only the pose has guard point, successfully blocking incoming attack will make the slide invulnerable to strikes and projectiles that aren't Supers. If timed correctly, Tien can go right through beams.
- 236H is a short ranged command grab that costs half a bar.
- Follow-up hits are automatic and cannot be vanished out of.
- Stays same side.
- Causes a sliding knockdown.
- Scales like 236M.
An useful tool to confuse someone who's blocking too much in a corner.
Volleyball Fist
Follow-up 1
Volleyball Fist L/M > L/M/H on hit

| L |
|---|
| M |
| H |
- L/M switches side.
- An important tool if you want to reposition yourself behind the enemy. Usually most useful if the "wall" behind you is closer than the one in front of you.
- H leaves Tien enough time to land j.M.
- By delaying button press so that Tien doesn't do Follow-up 2, you can start air combos with this. Very useful when you want to get a sliding knockdown with good oki, along with some relatively decent damage off a special move.
- Damage depends on what the starter is. 236L will scale better and do more damage than 236M.
- All version launches the enemy vertically and follows them into the air.
- Pressing an additional button will cause Tien to slam the enemy to the ground.
Volleyball Fist
Follow-up 2
Volleyball Fist Follow-up 1 > L/M/H on hit

BOI

| L |
|---|
| M |
| H |
- L knocks the opponent straight down.
- M knocks the opponent a little further away than the L version.
- H knocks the opponent even further away into a sliding knockdown.
- Using this after the H version of Follow-up 1 will keep Tien grounded for additional combos. Given that the cost for an EX special is now half of a bar instead of a full bar, and the damage done by this alone is considerable, it's probably worth going for this now.
- Damage depends on what the starter is. Starts with 236L will do more damage than 236M.
- If you time it perfectly on any version, it does extra damage and has Smash property.
- [] is on just frame.
Air Volleyball Fist
j.236L/M/H
| L |
|---|
| M |
| H |
- L causes a soft knockdown.
- M causes a sliding knockdown.
- Brings Tien higher in the air to hit, whiffs if opponent is directly in front of Tien.
- Can link from j.2H if smash has already been used.
- H causes a sliding knockdown.
- Nearly unreactable overhead during Sparking! if you TK the move, but you can only continue pressure or use a Super if it lands since this immediately puts the opponent in sliding knockdown.
Crane Strike
214L/M/H (Air OK)

Yamcha's Big Break (i.e. his legs)

| Ground L |
|---|
| Air L |
| Ground M |
| Air M |
| Ground H |
| Air H |
- All versions pops Tien back upwards on block.
- Light version pops Tien back upwards on hit.
- Causes a sliding knockdown.
- Brings Tien higher in the air to hit, whiffs if opponent is directly in front of Tien.
- Can link from j.2H if smash has already been used.
Mostly used at the end of corner combos to optimize damage, or as an overhead outside of Sparking! (still 2H'able).
Dodon Ray
236S (Air OK)

A move originally developed to be superior to the Kamehameha.

| Ground |
|---|
| Air |
- Pops up the opponent.
- Despite only being 1 hit, this will still clash with other beams.
Dodon Ray's thin hitbox leads it to be a poor neutral tool. It also gains a ton of recovery if it's used in the air, and the thin hitbox once again makes it hard to control airspace with. Being one hit, it also is harder to confirm than the average beam.
Telekinesis
214S

| Normal |
|---|
| Fail |
- Tracks the opponent anywhere on screen. Deals very high hitstop and hitstun on hit.
- Won't perform the move if Chiaotzu is still on screen or after he self-destructs.
- Every third use will not work and will leave Tien vulnerable.
- Beside the Ki gain on hit, normal calls also build 10% Ki gauge even on whiff and 25% on failed call. This special Ki gain is not affected by Ki gain penalty.
On hit, can be converted into a solo combo anywhere on screen.
Can be used after every knockdown, but best at the corner.
Z Assists
Assist A
Dodon Ray
- DBFZ Tien AssistDodonRay.png
- Is very unique as a beam assist, since it pops the opponent up instead of sending them towards the wall, allowing for better midscreen confirms.
- Allows for longer combos due to the single hit compared to other multi hitting beam assists.
Better for combos than other beam assists, but much worse for blockstrings. Generally the preferred assist, but there are characters who like the tracking of Assist B.
Assist B
Telekinesis

Oh NOW you don't mess up..
- Does 214S but unlike the point version, this assist doesn't fail every third use.
- Builds 10% Ki Gauge each call. Is not affected by Ki gain penalty.
- After Chiaotzu self-destructs, Tien does not attack and only shows up to build meter.
Similar to Gotenks A assist as it holds opponent in place, allowing for vast utility to expand combos full-screen, help get sliding knockdowns or meterless snapbacks, and fortify pressure with its high blockstun. Rather slow start-up and has worse tracking than his own 214S, so needs some labbing and getting used to.
Assist C
Volleyball Fist
- Blockstun C assist.
- Tracks to the opponent.
- Spikes the opponent towards you on hit.
Arguably the best of his assists. The tracking of Assist B may be better for some characters, but almost everyone can use a high-blockstun tracking assist.
Super Moves
Tri-Beam
236L+M or 236H+S (Air OK)


Dodeca-Beam


| Ground |
|---|
| Air |
| Ground Extension |
| Air Extension |
- Deals unrecoverable 750 damage to Tien. Tien cannot die from self damage, and can use this even at 1 HP.
- Self damage decreases during Sparking or Limit Break, and becomes 0 with both activated (See here)
- Minimum damage: 1032.
This is the second highest damaging Lv1 Super at max scaling, losing only to Base Goku's Kaioken x20.
- Hold L/M/H/S during Tri-Beam's startup for this version.
- L or M keeps the Tiens lined up on the same side, H or S shoots from both sides.
- Minimum damage: 1426.
Can whiff sometimes on DHCs or high hitstun decay combos.
Neo Tri-Beam
214L+M (Air OK)

"Well, you know what? F*ck power levels... F*ck Super Saiyans... AND F*CK YOU!"

"SHIIIIN KIKOUHOOOOU!!!"


| Ground |
|---|
| Air |
| Additional Hits |
- Holding L/M/H/S allows Tien to tack on additional damage at the cost of one meter per extension. Deals unrecoverable damage to Tien per use.
- Self damage decreases during Sparking or Limit Break, and further decreases with both activated (See here)
- Minimum damage: 1872, followed by 600 for every subsequent use.
Tien's high damage combo ender super. Tracks the opponent and puts Tien next to them.
Farewell, Tien...
214H+S

What are you doing Chiaotzu??

Chiaotzu!!!!!!!!!


- Travels in a straight horizontal line, level with the enemy when the move is initiated. Whiffs on crouching characters.
- Cannot be cancelled into.
- Won't come out if Chiaotzu is still doing Telekinesis. Chiaotzu also goes away if Tien is hit during the attack.
- On hit, Telekinesis, B Assist, and this super become unavailable for the rest of the match.
- Minimum damage: 2610.
Absurdly high damaging combo ender but lacks the versatility of his other Supers.
On hit, plays a really long grieving animation after the explosion that doesn't freeze time, allowing Sparking opponents to regenerate their health. This along with the low raw damage makes the Super useless for damage if they survive.
External References
move and the move Full sections. One is shown on the character page, while the other is shown on the frame data page.