< GBVS
This can be due to patches to the game, or developments in the metagame. You can help by updating it.
Overview
Percival is a pressure heavy character whose playstyle ramps up as he picks up momentum throughout the course of matches, effectively swinging the tide into his favor.
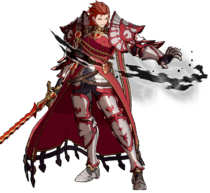
![]() Percival
Percival ![]() Percival is a slow footsies-rushdown character who pressures the opponent by charging up stocks to empower his big special moves.
Percival is a slow footsies-rushdown character who pressures the opponent by charging up stocks to empower his big special moves.
Pros
Cons
- Well Rounded: Percival is blessed with strong normals, whiff punish tools, and a passable fireball as well as a good meterless reversal on defense.
- Pressure: long reaching L normals and spaced Anzünden give Percival strong and consistent pressure up close and midscreen. He can also capitalize on conditioned opponents with X-Seele, a command grab that he can combo off of.
- Whiff Punishment: his aforementioned strong normals convert into high damage and a knockdown with Zerreissen.
- Damage: Percival's damage is above average and becomes extremely high if he has Träumerei stocks or lands a counterhit.
 | |
| Health | |
| 10000 | |
| Prejump | |
| 4f | |
| Backdash | |
| 22f | |
| Backshift | |
| High Recovery (30f) | |
| Unique Movement Options | |
| Lord's Strike | |
Normal Moves
c.L


| Damage | Guard | Startup | Active | Recovery | On-Block | On-Hit | Invuln |
|---|---|---|---|---|---|---|---|
| 400 | Mid | 5 | 3 | 6 | +2 | +6 |
- 5 frames, the fastest button.
This is where the party starts. The damage this move leads to isn't much, but being +2 on block is good enough to merit its use in combination with its speed.
| Level | Attribute |
|---|---|
| 0 |
c.M


| Damage | Guard | Startup | Active | Recovery | On-Block | On-Hit | Invuln |
|---|---|---|---|---|---|---|---|
| 700 | Mid | 7 | 3 | 12 | 0 | +4 |
- 0 on block, decent for pressure.
This move is Percival's pressure normal out of c.L range. It's really good vs. Charlotta, as it completely shuts down her Noble Strategy.
Also a good button to anti air opponents when in proximity range.
| Level | Attribute |
|---|---|
| 2 |
c.H

Welcome to punish city


| Damage | Guard | Startup | Active | Recovery | On-Block | On-Hit | Invuln |
|---|---|---|---|---|---|---|---|
| 1200 | Mid | 10 | 6 | 15 | -2 | +2 |
- Only -2, it looks worse than it is.
This is where the damage starts. On counterhit Percival is +14; you can link it into another c.H OR f.H when not close enough. If you don't get a counterhit, you still get a beefy combo in the corner and above-average damage midscreen. Its long active frames lend it to being a decent meaty, in theory the maximum frame advantage is +3 on block and +7 on hit, enough for a c.M.
| Level | Attribute |
|---|---|
| 4 |
Auto Combo


| Version | Damage | Guard | Startup | Active | Recovery | On-Block | On-Hit | Invuln |
|---|---|---|---|---|---|---|---|---|
| c.XX | 350 | Mid | 9 | 3 | 15 | -3 | +1 | |
| c.XXX | 350 | Mid | 12 | 3 | 18 | -4 | 0 |
It's an autocombo. Useful midscreen as combo filler and sometimes useful in the corner to gain height in EX Platzen combos.
| Version | Level | Attribute |
|---|---|---|
| c.XX | 2 | |
| c.XXX | 3 |
c.XX:
c.XXX:
f.L


Frame 6

Frame 7~8


| Damage | Guard | Startup | Active | Recovery | On-Block | On-Hit | Invuln |
|---|---|---|---|---|---|---|---|
| 400 | Mid | 6 | 3 | 15 | -5 | -1 |
- Whiffs on crouchers at max range.
This move is a lot better than it looks. It's very fast and very long compared to most other f.L attacks. It has enough hitstun to combo into Zerreissen with stocks, which makes it very good as a whiff punish tool.
| Level | Attribute |
|---|---|
| 1 |
f.M


| Damage | Guard | Startup | Active | Recovery | On-Block | On-Hit | Invuln |
|---|---|---|---|---|---|---|---|
| 700 | Mid | 9 | 5 | 16 | -6 | -2 |
This is it. This is the button. It's fast, scooches Percival forwards, special cancels, and it has massive range. It's an excellent whiff punish and combo tool midscreen. Using this move in the corner alongside Anzünden is very tricky to get out of, and it is a cornerstone of his corner pressure.
| Level | Attribute |
|---|---|
| 2 |
f.H

It's still my turn


Frame 12~14

Frame 15~17


| Damage | Guard | Startup | Active | Recovery | On-Block | On-Hit | Invuln |
|---|---|---|---|---|---|---|---|
| 1100 | Mid | 12 | 6 | 26 | -15 | -11 |
- Percival's defining move.
- Crushingly massive range.
- Lingering hurtbox.
Percy's f.H is by far his biggest button, as it hits nearly 3/4 of the screen. This button is ridiculous, but it has some downsides to complement its massive range, primarily its hurtbox. The hurtbox is active before the hitbox is, leading to some weird-looking interactions where he gets hit by a button a screen away. It's not just when the move starts up, either. The hurtbox lingers far after it looks like it would be over, allowing for easy whiff punishes by most of the cast. To counteract these weaknesses, all you have to do is make sure it doesn't whiff. If it gets blocked, you can cancel into Dodge (4G), Light Träumerei, or any version of Anzünden to stay safe.
| Level | Attribute |
|---|---|
| 3 |
2L


| Damage | Guard | Startup | Active | Recovery | On-Block | On-Hit | Invuln |
|---|---|---|---|---|---|---|---|
| 400 | Low | 6 | 3 | 6 | +2 | +6 |
Percival's primary close-range pressure tool. It's plus on block and hits low, what more could you ask for?
| Level | Attribute |
|---|---|
| 0 |
2M

Does not hit low


Frame 7~9

Frame 10~11


| Damage | Guard | Startup | Active | Recovery | On-Block | On-Hit | Invuln |
|---|---|---|---|---|---|---|---|
| 700 | Mid | 7 | 5 | 13 | -3 | +1 |
- Combos from 2L on crouchers.
- Great as a counterpoke after f.M.
- Does not hit low.
Percival's 2M is good on its own, but its main purpose is to act as a complement to f.M. It hits lower where f.M would whiff at the cost of less range, but f.M > 2M can catch people trying to punish f.M at a distance.
| Level | Attribute |
|---|---|
| 2 |
2H


Frame 11~12

Frame 13~15


| Damage | Guard | Startup | Active | Recovery | On-Block | On-Hit | Invuln |
|---|---|---|---|---|---|---|---|
| 1000 | Mid | 11 | 5 | 24 | -12 | -8 |
While it is a decent anti-air, it's a really slow one that's also cursed with a bad hurtbox. Where it really shines is in combos, as it allows 236L > 2H to loop on an airborne opponent in the corner. If you land it as a counter hit AA, canceling into 214L or 214M allows you to pick what side you want to end up on and still get a combo.
- Patch 1.2 inproved the hitbox AND hurtbox of this move, making it a lot stronger and more reliable
| Level | Attribute |
|---|---|
| 3 |
2U

Shorter reach than one would expect


| Damage | Guard | Startup | Active | Recovery | On-Block | On-Hit | Invuln |
|---|---|---|---|---|---|---|---|
| 700 | Low | 7 | 6 | 21 | -12 | HKD |
Universal sweep. Decent range and speed though nothing impressive. Can be special cancelled, provides a way to safely charge up stocks with Träumerei. Also sets up for a safe jump. One of the main ways to continue a combo after Heavy Anzünden in the corner or Schneiden(with stock).
| Level | Attribute |
|---|---|
| 2 |
j.L


| Damage | Guard | Startup | Active | Recovery | On-Block | On-Hit | Invuln |
|---|---|---|---|---|---|---|---|
| 400 | High/Air | 5 | Until L | 0 |
- Active until landing.
Easy safejump tool and Percy's fastest air normal. Can be used as a last-minute jump-in, but j.M is better all around.
| Level | Attribute |
|---|---|
| 1 |
j.M


| Damage | Guard | Startup | Active | Recovery | On-Block | On-Hit | Invuln |
|---|---|---|---|---|---|---|---|
| 550 | High/Air | 7 | 6 | Until L |
- Can cross up.
This is your main jump in as it has decent hitstun, blockstun, and it can cross up. It doesn't have great horizontal range in front of Percival, but j.H fills that niche nicely.
| Level | Attribute |
|---|---|
| 1 |
j.H

The jump-in of a king


The jump-in of a king

| Damage | Guard | Startup | Active | Recovery | On-Block | On-Hit | Invuln |
|---|---|---|---|---|---|---|---|
| 800 | High/Air | 10 | 6 | Until L |
- Really good at catching people using far buttons to AA.
The big jump in. Not useful for much outside that. Notable as Percival's longest-range air-to-air attack.
- Patch 1.2 improved the startup of this move, making it better as an air-to-air.
| Level | Attribute |
|---|---|
| 2 |
j.U

Entirely unrewarding


| Damage | Guard | Startup | Active | Recovery | On-Block | On-Hit | Invuln |
|---|---|---|---|---|---|---|---|
| 800 | All | 20 | Until L+1 | 12 | KD |
Not an overhead, can be blocked while crouching. But can be useful for changing jump in timing and baiting out a 2H. Other than that, it's minus on block and gets you a knockdown on hit.
| Level | Attribute |
|---|---|
| 2 |
- Clash Level 1
Unique Action
X-Seele
5U
An extra grab is a precious rarity afforded only to the rich.


| Damage | Guard | Startup | Active | Recovery | On-Block | On-Hit | Invuln |
|---|---|---|---|---|---|---|---|
| 0 | Throw | 14 | 3 | 41 | +12 |
- Counts as 2 hits for damage scaling purposes
Doesn't deal any damage, but can be followed up with additional attacks. If opponent is in corner can follow up with proximity normal, otherwise can use a far normal like f5H to convert into a knockdown or a super. This move is complemented by Macht as it beats blocking as opposed to c.L beating mashing.
- As of v1.2, Percival is now +12 after 5U, allowing for a f.H to link midscreen, while also making the c.H in the corner easier and other options midscreen such as f.M and 2U more consistent.
| Level | Attribute |
|---|---|
| 0, 4 |
Universal Mechanics
Ground Throw

Forward throw, reminiscent of a certain flaming swordswoman

Back throw, break their spine


| Damage | Guard | Startup | Active | Recovery | On-Block | On-Hit | Invuln |
|---|---|---|---|---|---|---|---|
| 1500 | Throw | 7 | 3 | 31 | HKD | HKD |
A faster but less rewarding version of 5U. Leaves the opponent pretty far away from Percival, which can be good or bad depending on the matchup. Backthrow switches sides and keep the opponent close to Percival, and allows for a meaty Macht anywhere. Forward throw in the corner allows for a safejump by super jumping immediately afterwards. Alternatively, if you want stocks you can 22M midscreen and 22L > c.H in the corner for a meaty as well.
| Level | Attribute |
|---|---|
| 0, 4 |
Air Throw

Callout AA and not much more


| Damage | Guard | Startup | Active | Recovery | On-Block | On-Hit | Invuln |
|---|---|---|---|---|---|---|---|
| 1500 | Throw | 5 | Until L+6 | HKD | HKD |
This move isn't seen very much as 2H CH AA combos typically deal far more damage. It's a good tool to have, but Percy has stronger ones.
| Level | Attribute |
|---|---|
| 0, 4 |
Overhead Attack

Shorter range than one would expect


Frame 26~28

Frame 29~31


| Damage | Guard | Startup | Active | Recovery | On-Block | On-Hit | Invuln |
|---|---|---|---|---|---|---|---|
| 1000 | High | 26 | 6 | 17 | -4 | +1 | 4-40 Throw 12-37 Low 11-39 Airborne |
Percival's Universal Overhead has less range than it looks with how his sword bends, but by no means does that make it bad. Percival has a lot of ways to set up a meaty UOH, most of which involve a combo with H Platzen.
| Level | Attribute |
|---|---|
| 4 |
Special Moves
Träumerei
![]() 22X or 2S
22X or 2S

The win condition


| Version | Damage | Guard | Startup | Active | Recovery | On-Block | On-Hit | Invuln |
|---|---|---|---|---|---|---|---|---|
| 22L | 400 | Mid | 11 | 14 | 12 | -13 | ||
| 22M | 400 | Mid | 11 | 28 | 12 | -27 | ||
| 22H | 400 | Mid | 11 | 38 | 12 | -37 |
Percival's most important move. Stores orbs that enhance M and H versions of skills. L stores one orb, M stores 3, and H stores 5. The number of orbs stored will be displayed under Percival's HP bar. These have hitbox directly above him that can be used to juggle opponents mid-combo. The L version is also a good move to cancel into off a f.H.
| Version | Level | Attribute |
|---|---|---|
| 22L | 1 | |
| 22M | 1 | |
| 22H | 1 |
22L:
- Cooldown: 20F (Technical) 200F (Easy)
- Gains 1 Orb
22M:
- Cooldown: 20F (Technical) 200F (Easy)
- Gains 3 Orb
22H:
- Cooldown: 480F (Technical) 600F (Easy)
- Gains 5 Orb
Anzünden
![]() 236X or 5S
236X or 5S


Initial hitbox

Later active frames


| Version | Damage | Guard | Startup | Active | Recovery | On-Block | On-Hit | Invuln |
|---|---|---|---|---|---|---|---|---|
| 236L | 900→800 | All | 22 | Total 53 | -7 | -3 | ||
| 236M | 900→800 [1000→900] | All | 22 | Total 53 | -7 | -3[KD] | ||
| 236H | 350×2+400→300×2+400 [400×3→350×2+400] | All | 19 | Total 53 | 0 | +4[HKD] |
Percival swings his sword and launches a projectile that travels along the ground. The slow speed and way it travels along the ground makes this a really hard move to dodge, and if there's any amount of distance between you and your opponent, it will be meaty enough to be plus. Since it has slower startup and Percival's hurtbox extends below and in front of him, it is prone to end up trading with other normals such as f.M.
- Data in [] is for when it consumes a Träumerei orb.
- L Version
- Travels to about f.H range and stops fizzles out.
- Doesn't take a stock.
- M Version
- Travels farther than the L version, and travels fullscreen with a stock.
- Takes a stock when one is available.
- H Version
- Travels similarly to the M version, but is slower and even at point blank.
- Takes a stock when one is available.
| Version | Level | Attribute |
|---|---|---|
| 236L | 2 | |
| 236M | 2 | |
| 236H | 2 |
236L:
- Damage decreases as projetiles moves forward (see →)
- Cooldown: 42-69F (Technical) 42-69F (Easy)
- Easy input damage: 800→700
236M:
- Values in [] are when using an Orb
- Damage decreases as projetiles moves forward (see →)
- Cooldown: 45-56F (Technical) 65-76F (Easy)
- Easy input damage: 800→700 [900→800]
236H:
- Values in [] are when using an Orb
- Damage decreases as projetiles moves forward (see →)
- Cooldown: 520-523F (Technical) 640-643F (Easy)
- Easy input damage: 350×3→300×3 [400×3→350×3]
Platzen
![]() 623X or 6S
623X or 6S


623M/623H dash


| Version | Damage | Guard | Startup | Active | Recovery | On-Block | On-Hit | Invuln |
|---|---|---|---|---|---|---|---|---|
| 623L | 700, 400 | Mid, All | 9 | 2(2)6 | 37 | -26 | KD | 1~12 All |
| 623M | 300,700,400 [300,700,120×5] | Mid×2, All | 11 | 17[21] | 37[49] | -24 [-40] | KD | 1~10 All, 11~27 Strike/Throw [11~31 Strike/Throw] |
| 623H | 300,600,200×3 [300,700,100×7] | Mid | 9 | 26[28] | 40[43] | -33 [-38] | HKD | 1~8 All, 9~13 Strike/Throw |
Performs a rising attack that cannot be blocked by midair foes immediately after start-up. M/H version advances Percival forward before rising. Rises higher and deals increased damage with a Träumerei orb but also makes the move more unsafe on block.
- Data in [] is for when it consumes a Träumerei orb.
| Version | Level | Attribute |
|---|---|---|
| 623L | 4, 3 | |
| 623M | 4 | |
| 623H | 4 |
623L:
- Cooldown: 20F (Technical) 200F (Easy)
- Clash Level 14 (Technical) 10 (Easy)
623M:
- Cooldown: 20F (Technical) 200F (Easy)
- Clash Level 16 (Technical) 10 (Easy)
623H:
- Cooldown: 480F (Technical) 600F (Easy)
- Clash Level 18 (Technical) 10 (Easy)
Lord's Strike
![]() 214X or 4S
214X or 4S

| Version | Damage | Guard | Startup | Active | Recovery | On-Block | On-Hit | Invuln |
|---|---|---|---|---|---|---|---|---|
| 214L | 11 | Total 32 | ||||||
| 214M | 11 | Total 32 | ||||||
| 214H | 11 | Total 27 |
Performs a forward dash that can be canceled into various skills while in motion. M/H version enhances follow-up skills upon consuming a Träumerei orb. M version and H version are generally the same when not Träumerei empowered, but H version does more damage and allows the 214H~L to be -1 on block instead of -8
| Version | Level | Attribute |
|---|---|---|
| 214L | ||
| 214M | ||
| 214H |
214L:
- Cooldown: 20F (Technical) 200F (Easy)
214M:
- Cooldown: 20F (Technical) 200F (Easy)
214H:
- Cooldown: 480F (Technical) 600F (Easy)
Schneiden
Lord's Strike > L

Hits low but minus on hit without an Orb


| Version | Damage | Guard | Startup | Active | Recovery | On-Block | On-Hit | Invuln |
|---|---|---|---|---|---|---|---|---|
| 214L > L | 800 | Low | 7 | 3 | 20 | -6 | -2 | |
| 214M > L | 800 [850] | Low | 7 | 3 | 20 | -6 | -2 [KD] | |
| 214H > L | 850 [900] | Low | 7 | 3 | 20 | -4 | 0 [HKD] |
Performs a low slash attack during Lord's Strike. When enhanced with a Träumerei orb, it'll cause knockdown upon connecting.
- Data in [] is for when it consumes a Träumerei orb.
- 214H!~L launches, but only allows c.L in the corner.
- on CH, 214H~L It allows a link into c.M, 2M, or 2U making it very good for people who will challenge you after moves like f.M and f.H.
| Version | Level | Attribute |
|---|---|---|
| 214L > L | 2 | |
| 214M > L | 2 | |
| 214H > L | 2 |
214L > L:
- Clash Level 3
214M > L:
- Values in [] are when using an Orb
- Clash Level 3
214H > L:
- Clash Level 3
Macht
Lord's Strike > M

Plus on block mid, explodes people on counterhit


| Version | Damage | Guard | Startup | Active | Recovery | On-Block | On-Hit | Invuln |
|---|---|---|---|---|---|---|---|---|
| 214L > M | 1400 | Mid | 20 | 6 | 21 | +2 | KD | |
| 214M > M | 1400 [1700] | Mid | 20 | 6 | 21 | +2 | KD[HKD] | |
| 214H > M | 1500 [1800] | Mid | 17 | 6 | 21 | +2 | HKD |
Performs a downward slash attack during Lord's Strike. Very good frame advantage, so Percival can start his shenanigans before the opponent recovers even on block, with a guess between throw/5U and mashing. When enhanced with a Träumerei orb, causes an unrecoverable knockdown.
- Data in [] is for when it consumes a Träumerei orb.
- Every version of Macht launches different on CH, 214L/M~M allows a c.M juggle, 214M/H!~M allows a c.H or a 2H juggle
| Version | Level | Attribute |
|---|---|---|
| 214L > M | 4 | |
| 214M > M | 4 | |
| 214H > M | 3 |
214L > M:
- Values in [] are when using an Orb
- Clash Level 3
214M > M:
- Values in [] are when using an Orb
- Clash Level 3
214H > M:
- Values in [] are when using an Orb
- Clash Level 3
Zerreissen
Lord's Strike > H

Whiff punish converter

Clean Hit


| Version | Damage | Guard | Startup | Active | Recovery | On-Block | On-Hit | Invuln |
|---|---|---|---|---|---|---|---|---|
| 214L > H | 1400 | Mid | 10 [4] | 3 | 52 | -16 | KD | |
| 214M > H | 1400 [2000→1500] | Mid | 10 [4] | 3[9] | 52 | -16 [-4] | KD | |
| 214H > H | 1500 [2300→1500] | Mid | 9 [4] | 3 | 52 | -16 [-4] | HKD |
Performs a piercing attack during Lord's Strike. When enhanced with a Träumerei orb, it'll cause more damage if it connects at close range, as indicated by a zoom-in effect. This is the move you want to combo into when you hit a far normal.
- Data in [] is for when it consumes a Träumerei orb.
| Version | Level | Attribute |
|---|---|---|
| 214L > H | 4 | |
| 214M > H | 4 | |
| 214H > H | 4 |
214L > H:
- Values in [] are when using an Orb
214M > H:
- Values in [] are when using an Orb
214H > H:
- Values in [] are when using an Orb
Skybound Art
Lohenwolf
236236H or 236S

Charge for an unblockable

Clean Hit


| Damage | Guard | Startup | Active | Recovery | On-Block | On-Hit | Invuln |
|---|---|---|---|---|---|---|---|
| 3600→2600 | Mid [Unblockable] | 6+7~146 | 6 | 30 | -18 | HKD |
Performs a powerful advancing attack that can be charged by holding down the button. If fully charged, this skill becomes unblockable. Since it covers a long range, it can be used as both a combo finished or a counter from afar. However, it will not hit at full-screen. The simple input version of this super makes the cinematic trigger smaller, but this typically doesn't matter when confirming out of a poke.
Min Damage: Technical 900→650, Simple 540→390
| Level | Attribute |
|---|---|
| 4 |
- Clash Level: 25 (Technical) 20 (Easy)
Super Skybound Art
Feuerrote Krone
236236U or 236S+U

Charge for more damage


Activation/charging hitbox

Initial projectile hitbox

Later projectile hitbox


| Damage | Guard | Startup | Active | Recovery | On-Block | On-Hit | Invuln |
|---|---|---|---|---|---|---|---|
| 3800→2900 [4800→3800] | Mid, All | 9+7 | 37~91 | Total 143~197 | -18 | HKD |
Unleashes a spiral of flames from the hilt of Percival's sword that deals additional hits when holding down the button. If this skill connects at close range, Percival will perform an enhanced version for increased damage. This move can be hard to combo into from midscreen juggles because of the flame spiral causing them to fall out. This leads to it being very unsafe as the opponent will typically tech through the fireball itself.
- This super can be charged, which increases the hits of the initial tornado from a minimum 6 hits to a maximum of 12 hits. When charged for 6-11 hits, the final hit will do 1900 but when fully charged to 12 hits, the final hit will do 2000.
- When not at close range, the final swing will fire a bigger version of Anzünden that travels full screen. In certain situations in the corner, you can combo off this when setup properly.
Min Damage: Technical 950→580[1160→760], Simple 760→580[960→760]
| Level | Attribute |
|---|---|
| 4 |
- Clash Level: 35 (Technical) 30 (Easy)
Colors
 |
 |
 |
 |
 |
 |
 |
 |
 |
 |
 |
 |
 |
 |
 |
 |
 |
 |
 |
 |
 |
 |
 |
 |
 |
 |
 |
 |
External References
To edit frame data, edit values in GBVS/Percival/Data.
Click [★] for character's full frame data
Essentials
• HUD •
Controls •
The Basics
• Movement/Canceling •
Offense •
Defense •
Gauges •
Attack Attributes •
Detailed & Advanced Information
• Damage/Combo •
Frame Data & System Data •
Misc •
Archived Information
• Patch Notes •