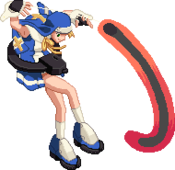
GGReload/Bridget

From Dustloop Wiki
< GGReload
Revision as of 12:00, 1 June 2019 by Pivotkraner (talk | contribs) (Created page with "{| class="wikitable" style="float:right; margin-left: 10px; width:400px" |- !Bridget |- || 350px|center |- || {{#lsth:GGReload/Bridget/D...")
(diff) ← Older revision | Latest revision (diff) | Newer revision → (diff)
Bridget
GGReload Bridget Portrait.jpg

Defense Modifier: x1.07

Guts Rating: 0

Weight: Lightest (x1.10)

Stun Resistance: 55

Jump Startup: 3F

Backdash Time: 15F / Invul: 1~8F

Wake-Up (Face Up/Down): 36F / 34F

Movement Options
Double Jump, 1 Air Dash, 2 Rolling Movements Dash Type: Run

Overview

replace with GAMEPLAY overview, not lore info

Strengths and Weaknesses


Strengths Weaknesses
  • Excellent runaway/keepaway potential, and even gains meter while running away thanks to forward movement and whiffed Roger specials.
  • Great mobility.
  • Multi-hitting DP that never leaves the ground with tons of strike invulnerability, an FRC point, and damaging potential follow-ups provides a strong meterless reversal option.
  • Overdrives also provide strong reversal options.
  • Roger provides space control, aids defense, and more.
  • Has unblockable setups.
  • Delayed get up sets up yo-yo, and may mess up with other characters okizeme.
  • Has one of the easiest times of getting out of pressure.
  • May have up to 4 jumps.
  • Heavy Slash not having any normals attached to it allows for free throw attempts when Roger is active.
  • Lowest effective health in the game, with low defense value, zero Guts, and light weight leaving him vulnerable to extended combos.
  • Harder to maintain pressure than with most of the cast.
  • Good damage is extremely situational.
  • Low damage output and low health combine to leave very little room for error. It's easy to die, and hard to regain the life lead.
  • Good movement requires FD canceling Rolling Movement, meaning that you need meter.
  • Unblockable setups are more easily beaten than those belonging to other characters.
  • Cannot option select throw with a normal unless Roger is active, as the game considers Yoyo Set and Yoyo Recall to be special moves.
  • Variety of movement options, subpar damage output, and low HP combined can make for a difficult character to pick up and learn.

Unique Mechanics


Yo-Yo

throw the yoyo at the opponent's nuts and if it hits you get a 999f stagger

Normals

5P
GGAC Bridget 5P.png
Damage Guard Cancel Startup Active Recovery Frame Adv.
12 Mid CSJR 6 2 9 -1

Bridget throws the yo-yo horizontally in front of himself. This move may be ducked under which may allow you to tick throw the opponent if they do not react to it, not used often in favor of 2p. At maximum range it can be used as an anti air, but you are probably better off using 6p instead.

5K
GGAC Bridget 5K.png
Damage Guard Cancel Startup Active Recovery Frame Adv.
22 Mid SJR 6 5 11 -2

Bridget will tilt his body horizontally and kick the opponent. Decent range and can be used as a meaty attack for okizeme. When the opponent is hit airborne with this move (during combos, it is not an anti air) you can gatling into 6s and jump into an air combo.

c.S
GGAC Bridget cS.png
Damage Guard Cancel Startup Active Recovery Frame Adv.
22*2 Mid SJR 7 2(10)2 12 +3

Bridget will do a yo-yo trick and hit the opponent twice. Dealing decent damage you will mostly see this move in combos. If the opponent faultless defense, this move may whiff leaving you vulnerable to a counter attack. If you are looking for a simple knockdown use 2d after this move. The optimal time to use kick start my heart is on crouching opponents. If you hit a standing opponent with 5c.s the kick start my heart will not hit them because there is not enough hit stun for it to connect. That is why kick start my heart works on crouching opponents because 5c.s will leave enough hit stun for it to connect.

f.S
GGAC Bridget fS.png
Damage Guard Cancel Startup Active Recovery Frame Adv.
34 Mid SR 7 6 18 -10

Bridget does a hand stand and flings the yo-yo at full length away from himself. Probably one of Bridget's most used pokes, it will annoy opponents to no end. It can combo into 2d when it does not connect at maximum range. Can also combo into 6s on characters with tall hit boxes. However do not overly use the move as because if it whiffs, it takes time for the yo-yo to extend and then come back. Because of this, it is vulnerable to instant air dash approaches.

6P
GGAC Bridget 6P.png
Damage Guard Cancel Startup Active Recovery Frame Adv.
30 Mid SR 11 6 14 -6

Like other 6p's in guilty gear this is a universal anti air move with upper body invincibility. You usually do not use this move to start blockstrings, and you should just stick to using this move as an anti air. If you hit an opponent with 5c.s you can backward gatling into 6p which can gatling back into 5c.s. When using as an anti-air you can also gatling into 6s and continue into an air combo. While there are better 6p's in the game you take what you can get.

6K
GGAC Bridget 6K.png
"Unblockable"
Damage Guard Cancel Startup Active Recovery Frame Adv.
20*2 High R 17 3(3)6 15 -4

Bridget will flip and drop his foot on the opponent. This move is an overhead, and has an FRC point on it. It can also be canceled meterlessly into non-yoyo specials, and canceling into Kickstart My Heart on hit is highly advised. However be wary of this move as it takes time for Bridget to hit the opponent. During that time people can easily jab out of this move and get a knockdown on you. In order to prevent that use the yo-yo/Roger to keep the opponent blocking and allow you to have enough time to complete the attack. If the opponent blocks the attack you can use the FRC point to continue the pressure or as a means of escape.

6S
GGAC Bridget 6S.png
Damage Guard Cancel Startup Active Recovery Frame Adv.
46 Mid SJR 9 5 26 -14

The farthest move Bridget has. He will throw the yo-yo at around a 30 angle upward. Don't let this move trick you into continuously spamming it. It can be ducked by almost every character in the game, and Bridget will be vulnerable to a counter attack. This move only really hits characters with tall hit boxes, the recovery on this move hurts the moment it whiffs so be very careful when using this move. However due to the angle that Bridget throws the yo-yo it can be used as an effective anti air dash move, and at favorable ranges an anti air move. On counter hit it can wall bounce depending on both characters position on the screen.

3P
GGAC Bridget 3P.png
Dat Ass
Damage Guard Cancel Startup Active Recovery Frame Adv.
24 Mid SR 8 12 7 -5

Bridget slams his butt towards the opponent. Staggers on ground counter hit. It is a very fast attack and people underestimate the potential of this move. This move can avoid certain moves (Potemkin's slidehead) due to having some frames of foot invincibility. If you do not get a counter hit, this move can be canceled into starship for some extra damage. While this move is a powerful tool Bridget, do not spam this move since it can be punished.

5D
GGAC Bridget 5D.png
Damage Guard Cancel Startup Active Recovery Frame Adv.
17 High 28 6 24 -16

Bridget's neutral Dust. Bridget will do a spin and then slam the yo-yo upward, launching the opponent if it connects. This move you do not see often. It just takes way too long to start it up. The opponent can either counter hit you during this move, or you just give them enough time to react and block it. However if you use Roger setups in certain cases you may be able to pull the move off while Roger deals with them.

2P
GGAC Bridget 2P.png
Damage Guard Cancel Startup Active Recovery Frame Adv.
8 Mid CSR 7 4 3 +3

Bridget throws the yo-yo horizontally in front of himself while crouching. The other poke that will annoy the hell out of people. This move is one of Bridget's burst bait attacks. Not only does it have good range for a 2p, but the recovery on the move is amazing. Say you confirm a hit on an opponent with 2p. After that you keep hitting them with 2p and the opponent decides to burst. You will have enough time to whiff a 2p, block the burst, and punish them for it. Using 2p is also a good way for trying to get some distance from the opponent if they block this move as you can repeatedly use it pushing the opponent farther and farther back. However starting a combo with this move usually ends up in very low damage.

2K
GGAC Bridget 2K.png
Damage Guard Cancel Startup Active Recovery Frame Adv.
12 Low SR 5 3 6 +1

Bridget goes on the floor and kicks the opponent. Bridget's only other normal low hitting move besides 2d. Because of that you will find some use for this move. The biggest problem with this move however is the range. It is one of Bridget's shortest attack which will make it tricky to use. You will be entering enemy range with this move which is very risky. However the recovery on this move is very fast like 2p. So it can be used as a safe burst bait, or even a tick throw because you will be very close to the opponent.

2S
GGAC Bridget 2S.png
Damage Guard Cancel Startup Active Recovery Frame Adv.
30 Mid SJR 10 12 12 -10

Bridget does a back flip while the yo-yo is fully extended. Can be jump cancelled. On counter hit, it causes float and vacuum effect. If you manage to get a counter hit with this move cancel into 6s and jump in for an air combo. While the range of this move is long, it has lower priority compared to Bridgets other pokes. The start up is pretty lengthy and you probably would use a different poke. However this move has an important cancel for blockstrings. This move can cancel into a whiffed 2k. That is beneficial because of the recovery of 2k. Using 2s into 2k will allow you to continue pressure or if anything allow you to gain distance from the opponent.

2D
GGAC Bridget 2D.png
Damage Guard Cancel Startup Active Recovery Frame Adv.
32 Low SRF 7 4 20 -7

While crouching, Bridget does a small hop and sweeps the yo-yo around. 2d will knock your opponent down and this is very important for Bridget. When you knockdown with this move it will leave you enough time to set up a yo-yo and actually pressure the opponent. Not only is the range good, but has an FRC point which can allow you to combo off 2d, set up for an unblockable, or even continue pressure on the opponent. While the move is unsafe if guarded, when done at optimal ranges its hard for most characters to punish. 2d can also be canceled into any non yo-yo special move (starship, kick start my heart,).

j.P
GGAC Bridget jP.png
Damage Guard Cancel Startup Active Recovery Frame Adv.
16 High/Air CSR 6 4 6 -

Bridget throws the yo-yo at a downward angle. Actually a very useful attack. If you jump and immediately use 6p it can beat out certain moves. The recovery on the move is very fast and can be used many times in the air. If you hit an opponent during an air combo and then they become too high you can cancel this move into j.2s, jump again and finish your air combo.

j.K
GGAC Bridget jK.png
Damage Guard Cancel Startup Active Recovery Frame Adv.
20 High/Air SJR 6 8 12 -

Bridget does a split in the air and kicks the opponent. Outside of combos you are not going to really use this move too often. You are much better off using j.p, or j.s in the air. J.p has a faster recovery, while j.s has farther range. The move is jump cancelable, and can cancel into j.s and j,p. Be careful when doing air combos. If you hit the opponent with j.k and then they become too high you are going to have to jump in order to continue, but if you cancel into j.s then you will drop the combo.

j.S
GGAC Bridget jS.png
Damage Guard Cancel Startup Active Recovery Frame Adv.
32 High/Air SR 10 6 22 -

Bridgets longest air move. This move can be used for air spacing, and you will use this move mostly in combos. Take care when using this move because it can not be jump canceled. In order to jump cancel you must gatling into j.2s

j.2S
GGAC Bridget j2S.png
Damage Guard Cancel Startup Active Recovery Frame Adv.
35 High/Air SJR 10 6 25 -
j.D
GGAC Bridget jD.png
Damage Guard Cancel Startup Active Recovery Frame Adv.
16*3 High/Air SR 15 3*6 16+6L -

Bridget goes crazy and swings the yo-yo around, in an adorable way.


Universal Mechanics

Ground Throw
GGAC Bridget throw.png
Damage Guard Cancel Startup Active Recovery Frame Adv.
48 Throw: 45 Pixels - - - -
Air Throw
GGAC Bridget airThrow.png
Damage Guard Cancel Startup Active Recovery Frame Adv.
55 Throw: 110 Pixels - - - - -
Dead Angle Attack
GGAC Bridget 6P.png
For just 50% meter, you can (possibly) get your opponent off of you!
Damage Guard Cancel Startup Active Recovery Frame Adv.
25 All R 11 6 14 -6

Animation is the same as 6P. Best and only used when you're too lazy to block and have 50 meter. Because it's Bridget's 6p animation its one of the weaker dead angles in the game in terms of usefulness. However the good part about this move is if the yo-yo is out in a certain position, you can roll to the yo-yo and combo off this Dead Angle Attack.


Specials

Yoyo Placement
GGAC Bridget GroundSet.png
You can use yo-yo related attacks even while it's still moving!
GGAC Bridget AirSet.png
Version Damage Guard Cancel Startup Active Recovery Frame Adv.
Ground
Air

Bridget sets his yoyo. A directional input will change where he sets the yoyo. Refer to the image for which inputs provide which set. As this is considered a special move, you can cancel special cancelable normals into it allowing you to recover much faster from them than normal.

Knockdown Yoyo Placement
hold H while knocked down
GGAC Bridget KnockdownSet.png
Delays wakeup. Only available when yoyo is not set
Damage Guard Cancel Startup Active Recovery Frame Adv.
Yoyo Recall
Yoyo Set -> H
GGAC Bridget YoyoCallback.png
You can delay the callback by holding H!
Version Damage Guard Cancel Startup Active Recovery Frame Adv.
Ground
Air

Bridget recalls his yoyo. Pressing H will trigger the startup animation, while holding H will delay the yoyo's actual movement for up to ~2.5 seconds. Pressing H again can cancel the callback, allowing you to move the yoyo closer without having to set it again. Can be used to extend combos or pressure, or as a zoning tool. Provides plenty enough time to confirm into a combo on hit. As this is considered a special move, you can cancel special cancelable normals into it allowing you to recover much faster from them than normal. It's actually still possible for Bridget to use Rolling Movement while delaying a yoyo recall, but the input has to be TK'd to avoid him just Faultless Defending in place (in other words, the input becomes 2147K).

Kick Start My Heart
Kick Start My Heart
236K
GGAC Bridget 236K.png
Damage Guard Cancel Startup Active Recovery Frame Adv.
30 Mid R 11 34 9 -26

Bridget uses his yo-yo's like roller blades and rides on them across the screen.

Stop
KSMH -> P
GGAC Bridget 236KP.png
Damage Guard Cancel Startup Active Recovery Frame Adv.
40 Mid - 11+7 6 28 -10

A follow up to KSMH. Bridget stops on his tracks.

Shoot
KSMH -> K
GGAC Bridget 236KK.png
Damage Guard Cancel Startup Active Recovery Frame Adv.
50 Mid R 11+2 12 21+20L -39

A follow up to KSMH. Bridget flings himself across the screen while swinging the yo-yos around.

Starship
623P air OK
GGAC Bridget 623P.png
Version Damage Guard Cancel Startup Active Recovery Frame Adv.
Ground 22*4 Mid RF 13 3*5 24 -19
Air 18*3 - R 13 3*5 Until L+10 -

Bridget's DP. Bridget does a trick in which he uses not one, but two yo-yos and swings them around.

Roger Rush
Yoyo Set -> 236H air OK
GGAC Bridget 236H.png
"Come at me bro"
Version Damage Guard Cancel Startup Active Recovery Frame Adv.
Ground 36*5 - F 28 2(10)1 Total 32 +52
Air

Bridget summons Roger ready to punch people's faces. Roger will appear wherever the yo-yo is set and will make his way back to Bridget while punching. Roger Rush will end once either he or Bridget is hit, he makes it back to Bridget, the move's duration expires, or if hits to a max of 3 times. The FRC window is at 16-17F.

Jagged Roger
Yoyo Set -> 214H air OK
GGAC Bridget 214H.png
Version Damage Guard Cancel Startup Active Recovery Frame Adv.
Ground 20*3 - F 38 105 Total 39 +36
Air 20*3 - - 29 105 Total 37 -

Bridget summons Roger equipped with a saw around its body. Like in Roger Rush, or any of Bridget's moves that involve a yo-yo set for that matter, Roger will appear wherever the yo-yo is set and make its way back to Bridget while the saw blade spins. As opposed to Roger Rush, Jagged Roger returns to Bridget at a slower speed and stays out even when Bridget is hit after 22F. Jagged Roger will end once he is hit, he makes it back to Bridget, or if it hits to a max of 3 times. The FRC window is a 22-23F.

Roger Hug
Yoyo Set -> 623H
GGAC Bridget 623H.png
Damage Guard Cancel Startup Active Recovery Frame Adv.
30 - - 30 27 Total 39 +17

The Yo-Yo becomes a sort of mechanism and homes in on the the opponent for a set distance. If it connects, it will stick with the opponent. The mechanism acts just like a set yo-yo (i.e. any yo-yo move will occur right where the opponent is). Roger Hug will end when 600F pass after sticking to opponent, Bridget is hit, or a yo-yo move other than Rolling Idou/214K is done.

Roger Get
Yoyo Set -> 421H air OK
GGAC Bridget 421H.png
Version Damage Guard Cancel Startup Active Recovery Frame Adv.
Ground, Low Altitude
Air, Low Altitude
Ground, High Altitute
Air, High Altitude

Bridget summons Roger who will then do a body slam and slide upon landing on the ground. Bear in mind that the direction which Roger drops depends on what direction you were facing when you set the yo-yo (i.e. if you set the yo-yo while facing the right side, Roger will drop towards the right side no matter what). Also, depending on the height at which the yo-yo is placed, the move will have different properties. The FRC window is at 20-21F.

Rolling Movement
Yoyo Set -> 214K air OK
GGAC Bridget 214K.png
Damage Guard Cancel Startup Active Recovery Frame Adv.
- - - - - - -

Bridget rolls to his yoyo, wherever it is. Despite what you might at first think, this is the most important tool in Bridget's arsenal. Aside from the obvious movement option this provides, this can also allow for very quick and low overheads since this leaves Bridget in an aerial state. What makes this move a cornerstone of Bridget's game, however, is that when immediately canceled into Faultless Defense, it provides a very fast "jump" that doesn't actually take up one of your aerial movement options when done in the air. Bridget's movement becomes very, very strong with this tool. Since it's a special move, all his normals (except 5D) can cancel into it. Thus, it can be used as a pseudo-jump cancel on moves that aren't normally jump cancelable (such as f.S). Canceling into it allows Bridget to extend pressure, confirm from situations he normally couldn't, and escape after a potentially unsafe poke. It can also be immediately canceled into a normal, making it extremely useful for extending combos.


Overdrives

Loop the Loop
632146S
GGAC Bridget 632146S.png
Damage Guard Cancel Startup Active Recovery Frame Adv.
20*7,60 Mid*7, HF R 5+1 2(6)2(3)20(12)30 16 -24

active frames are: 3(6)3(3)30(12)20

Maintenance Disaster
4123641236S
GGAC Bridget 4123641236S.png
"Bukkake Tsunami"
Damage Guard Cancel Startup Active Recovery Frame Adv.
24*16 - - 1+7 48 Total 47 -
Me and My Killing Machine
Yoyo Set -> 632146H or 412364H
GGAC Bridget 632146H.png
Version Damage Guard Cancel Startup Active Recovery Frame Adv.
Normal
632146H
30*12 - - 1+23 117 Total 32 -
Delay
412364H


Instant Kill

Shoot the Moon
in IK Mode: 236236H
GGAC Bridget IK1.png
GGAC Bridget IK2.png
"Space, the final frontier."
Damage Guard Cancel Startup Active Recovery Frame Adv.
DESTROY - - 7+6 12 91 -86


Navigation


To edit frame data, edit values in GGReload/Bridget/Data. Be sure to update both the move and the move Full sections. One is shown on the character page, while the other is shown on the frame data page.
Guilty Gear XX ♯Reload
Click [*] for character's frame data
System Explanations

HUDControlsFrame Data & System Data


Movement/CancelingOffenseDefenseDamage/Combo SystemTension/Burst GaugeMisc