GGReload/Eddie

From Dustloop Wiki
  Overview   Combos   Strategy/Counter Strategy   Full Frame Data    
Eddie
GGReload Eddie Portrait.jpg

Defense Modifier: x1.06

Guts Rating: 0

Weight: Medium (x1.00)

Stun Resistance: 60

Jump Startup: 3F

Backdash Time: 16F / Invul: 1~7F

Wake-Up (Face Up/Down): 36F / 33F

Movement Options
Double Jump, 1 Airdash, Flight Mode (as his second jump), Dash Type: Run
Colors
P K S H D Start
Normal
GGReload Eddie P.png
GGReload Eddie K.png
GGReload Eddie S.png
GGReload Eddie H.png
GGReload Eddie D.png
GGReload Eddie Start.png
SP
GGReload Eddie P(Sp).png
GGReload Eddie K(Sp).png
GGReload Eddie S(Sp).png
GGReload Eddie H(Sp).png
GGReload Eddie D(Sp).png
GGReload Eddie Start(Sp).png

Overview

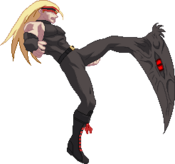
The shadow, Eddie, of the former head of the Assassin's Guild, Zato-1, is an archetype-defining puppet character with a myriad of overwhelming offensive pressure. Eddie has unblockables, pressure for days, flight, and plenty of dual attacking options to deal with opponent's defensive options. Letting Eddie get the initiative is suicide and all of the pressure is placed on the opponent once Eddie gets in and runs his game.

On the flip side, Eddie is horribly weak defensively. When his shadow gauge is emptied, he must often run away, or contend with his overall subpar normals. He has the worst guts in the game with a bad defense modifier, a poor backdash, slower buttons, and no meterless reversal. His Dead Angle is barely passable and his reversal super is downright awful. Eddie is a character who wants to get in and stay on the absolute offensive, giving the opponent zero chance to breathe.

Strengths and Weaknesses


Strengths Weaknesses
  • Suffocating offensive game with pressure and strong mixup
  • Best okizeme in the game with man reversal safe setups
  • Shadow can take a hit for Eddie
  • Practical unblockables with meter
  • Huge damage and stun output
  • Several intangibles such as Flight, Drunkard shade (214S), and Break The Law (214K)
  • Below average health and defense stats
  • Horrid reversal options, including Dead Angle
  • Demands high execution to use effectively
  • Large, easy to combo hurtbox
  • Slow buttons with overall poor hurtboxes
  • Without Shadow ready, Eddie is sorely limited

Unique Mechanics


Eddie Gauge

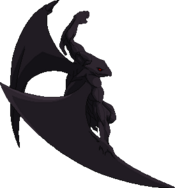
The shadow, Little Eddie, can only be used while the gauge is not depleted. Every shadow attack will drain some of this bar.

Controlling Little Eddie with Negative Edge

Little Eddie, attacks only when corresponding buttons are released, not pressed.

With proper meter management and execution, Eddie is capable of attacking alongside the shadow for devastating simultaneous attacks. This gives Eddie his extensive offensive pressure game and allows tandem attacks to prevent escapes and multiple mixup opportunities per blockstring, with varying levels of punishment depending on how much meter is left. If it is emptied however, Eddie loses access to this shadow for several seconds, and cannot summon, leaving him susceptible to being stuck in a very bad defensive position. Proper control of this gauge is key.


Move List

Normal Moves

5P
GGAC Eddie 5P.png
Damage Guard Cancel Startup Active Recovery Frame Adv.
9 Mid CSJR 5 4 7 -1
  • Situational Anti-Air.
  • Can be used to set up tick-command grabs.
  • Whiffs on some smaller crouching characters.
  • Combos into 2D for a knockdown into oki and setplay shenanigans
5K
GGAC Eddie 5K.png
Damage Guard Cancel Startup Active Recovery Frame Adv.
12 Low SJR 6 4 8 -2
  • Standing low, go-to low starter in pressure
  • Great for ticking into Damned Fang
c.S
GGAC Eddie cS.png
Damage Guard Cancel Startup Active Recovery Frame Adv.
30 Mid SJR 9 5 9 ±0
  • Primarily blockstring/combo filler
  • Very situational AA
  • Gattles into just about every normal except K buttons
  • Generally not true blockstrings but are true hit strings
  • Can not go into this move from 2K, you will always get f.S
  • Generally best punish starter without the shadow out prior
f.S
GGAC Eddie fS.png
Damage Guard Cancel Startup Active Recovery Frame Adv.
20*4 Mid SR 7 3*4 20 -9
  • Decent ranged poke
  • Stuff>Far 5S>2S is a useful in blockstring to push opponent into far drill range
  • Goes into many of his normals, including 5H, 2H and 2D
5H
GGAC Eddie 5H.png
Damage Guard Cancel Startup Active Recovery Frame Adv.
25*3 Mid SR*2, R 14 2,6,3 15 +1
  • Primarily combo/blockstring filler
  • Only first and second hits are special cancelable
  • 5HS xx Mawaru is a decent way to start pressure but can be escaped.
6P
GGAC Eddie 6P.png
Damage Guard Cancel Startup Active Recovery Frame Adv.
22*2 Mid SJR 13 4,4 12 -2
  • Go to AA when opponent is at IAD height
  • Good upper body invul
  • Upper body allows it to be a good pressure starter against DP characters since invul in tandem with the shadow taking a hit will cause DP to whiff
6K
GGAC Eddie 6K.png
Damage Guard Cancel Startup Active Recovery Frame Adv.
30 High RF 23 5 12 -3
  • Standing overhead, go-to overhead starter
  • Staggers on hit, can combo a 5p/2p into a knockdown
  • Has an FRC point though it's never really used unless you're feeling yourself that much
6H
GGAC Eddie 6H.png
Damage Guard Cancel Startup Active Recovery Frame Adv.
60 Mid R 13 12 23 -16
  • Very large normal, useful as an AA when opponent is in upper-corner of screen
  • Slow startup and bad hit box mean it must be use quite preemptively
  • On counter hit, it massives big reward as on most heights it's untechable unless it hits at the general apex of where the arm is
  • Not a great hit box but generally can be used in conjunction with the shadow to catch jumps
5D
GGAC Eddie 5D.png
Damage Guard Cancel Startup Active Recovery Frame Adv.
18 High R 24 3 24 -13
  • Slower than 6K but can be a decent reset tool
  • Confirms into large damage in the corner when little Eddie is out
  • Can combo from either shadow -K- or link into with shadow -P-
2P
GGAC Eddie 2P.png
Damage Guard Cancel Startup Active Recovery Frame Adv.
8 Mid CSR 5 4 8 -2
  • Eddie's fastest normal, decent hitbox, go-to close range poke
  • Combos into 2D for a knockdown to start off your oki and setplay shenanigans
2K
GGAC Eddie 2K.png
Damage Guard Cancel Startup Active Recovery Frame Adv.
18 Low SR 7 2 9 +3
  • No hurtbox where leg is underground allows it to be used pretty creatively
  • VERY situational AA when opponent is very close to the ground
  • Plus on block so it's perfect for tick throws into Damned Fang command grab
2S
GGAC Eddie 2S.png
Damage Guard Cancel Startup Active Recovery Frame Adv.
18 Mid SR 9 4 16 -6
  • Good mid-range poke, decent speed and range
  • Combos into drill on counter hit
  • Provides decent opportunity to summon on block, but not true string
2H
GGAC Eddie 2H.png
Damage Guard Cancel Startup Active Recovery Frame Adv.
24 Mid SR 11 6 19 -6
  • Ideal AA for when opponent approaches from high above you
  • Counter hit grants hard knockdown
  • Hitbox extends surprisingly far forward and down, allowing it to be used in conjunction with shadow -S- in the corner for pressure
2D
GGAC Eddie 2D.png
Damage Guard Cancel Startup Active Recovery Frame Adv.
20 Low SJR 9 6 15 -7
  • Best way to end combos when little eddie is unsummoned as it grants hard knockdown
  • Special cancleable on block/hit, so plenty of time to summon eddie and start oki
j.P
GGAC Eddie jP.png
Damage Guard Cancel Startup Active Recovery Frame Adv.
13 High, Air CSR 8 4 16 -
  • Mashable in the air
  • Least used air button but has some purpose
  • can be used in fuzzy guard mix up
  • decent air to air
j.K
GGAC Eddie jK.png
Damage Guard Cancel Startup Active Recovery Frame Adv.
18 High, Air SJR 5 8 6 -
  • Eddie's only jump cancelable air normal
  • Used for fuzzy guard mix ups
  • Excellent air to air to contest many approaches
j.S
GGAC Eddie jS.png
Damage Guard Cancel Startup Active Recovery Frame Adv.
22 High, Air SR 7 12 12 -
  • God button for the hitbox it has
  • Hits very deep for air to ground and fuzzy mix ups
  • Used also for late airdash mix ups
  • Only move it gattles into is jH so you're mostly either committing to that or not going into that and fake them out with a command grab
j.H
GGAC Eddie jH.png
Damage Guard Cancel Startup Active Recovery Frame Adv.
40 High, Air SR 11 6 12 -
  • Good damaging normal, usually used for the end of high fuzzy mix ups
  • Combo filler for going into jD
j.D
GGAC Eddie jD.png
Damage Guard Cancel Startup Active Recovery Frame Adv.
55 High, Air SR 11 4 19+5L -
  • RIDICULOUS button
  • Has a huge amount of hitstun so has a number of good follow ups
  • Counter hit, it knockdowns down from anywhere on the screen
  • Can be used to control the space in the air with the shadow around


Universal Mechanics

Ground Throw
GGAC Eddie throw.png
Damage Guard Cancel Startup Active Recovery Frame Adv.
50 Throw: 49 Pixels - - - - -
  • Second largest ground throw range in the game
  • Good for setting up the shadow afterwards
  • A good reversal for the lack of them Eddie has
Air Throw
GGAC Eddie airThrow.png
Damage Guard Cancel Startup Active Recovery Frame Adv.
60 Throw: 110 Pixels - - - - -
  • Used to score knockdowns
  • Integral part to gameplay due to Eddie's lack of particularly strong anti air buttons
  • Just looks really cool
Dead Angle Attack
GGAC Eddie 2H.png
Damage Guard Cancel Startup Active Recovery Frame Adv.
25 All R 13 9 18 -13
  • Knocks back on hit, air techable
  • Can be low profiled with something like Sol or Venom 2D
  • On counter hit, it's an untechable knockdown which means more setplay shenanigans

Specials

Invite Hell
22S/H
GGAC Eddie 22S.png
Version Damage Guard Cancel Startup Active Recovery Frame Adv.
S 40 Low, Air - 18 48 Total 42 +2
H 40 Low, Air F 18 36 Total 42 +2
  • Slash version hits up close, is more active and is generally used for oki either after a knockdown to stall time or make them block so the shadow gets in
  • Heavy version is used in blockstrings and while being less active, has an FRC point so you can continue pressure and can be used for unblockables in conjunction with Shadow -D-
  • Use this a lot to control space to score a knockdown and start offense, everyone always gets caught by this because it hits low
Break the Law
214[K]
GGAC Eddie 214K.png
Damage Guard Cancel Startup Active Recovery Frame Adv.
- - - - - - -
  • Used in tandem with the shadow to bait out mashing and bursts
  • Also used for a lot of escapes situations, recovers faster than you think
  • Recovery depends on how long you hold the button for
Shadow Gallery
j.41236S
GGAC Eddie 41236S.png
Damage Guard Cancel Startup Active Recovery Frame Adv.
25,50 Mid RF 15~ 6(12)3 24+3L -13
  • Combo filler move in the corner, used for loops when confirming off of a mix up into shadow -S-
  • Grants a knockdown anywhere on screen if the second hit connects
  • If the first hit is the only one that connects, it will not knockdown
  • However, if the first hit is counter hit and the only one to connect, it will knockdown right next to you
  • has an FRC point before the second hit to make it safer
Shadow Summon
236P/K/S/H
GGAC Eddie Summon.png
Damage Guard Cancel Startup Active Recovery Frame Adv.
- - - - - Total 38 -
  • Doing a summon with either P, K or S will have the shadow do an immediate attack
  • Use H to make the summon empty so you do not immediately use an attack
  • To recall the shadow, simply redo the motion to summon him with any button except Dust
Small Attack
Release P with Shadow
GGAC Eddie LilEddieWeissP.png
Damage Guard Cancel Startup Active Recovery Frame Adv.
25 All - 7 2 16 -
  • decent neutral tool
  • used to make ambiguous offense and to pester around drills in neutral
  • Combo filler for many Drill, Shadow Gallery and 5D links into Unblockable
Traversing Attack
Release K with Shadow
GGAC Eddie LilEddieWeissK.png
Damage Guard Cancel Startup Active Recovery Frame Adv.
20*3 All - 14 29 25 -
  • Pressure tool
  • controls ground horizontal space
  • Absolutely cranks of the guard gauge, one block string from it fills it up to the point the hitting mix up can do over 70%
Anti-Air Attack
Release S with Shadow
GGAC Eddie LilEddieWeissS.png
Damage Guard Cancel Startup Active Recovery Frame Adv.
50 Mid - 9 12 31 -
  • God anti air and space control button
  • Becomes better in the corner for pressure
  • Cranks the guard gauge a ton
  • Used to start corner combos into shadow gallery loops into unblockables
Drill Special
Release H with Shadow
GGAC Eddie LilEddieWeissH.png
Damage Guard Cancel Startup Active Recovery Frame Adv.
34*3 Low, Air, All*2 - 147 36 - -
  • Hits low 3 times for some reason
  • Goes for unblockables you don't even need too time since all the hits are low just go high once and your opponent is literally done
  • Once it is set, you cannot use Eddie again and the shadow gauge will not refill until the move has completely finished
  • Rare cases when you get hit just before shadow -H- becomes active, it will go away and the shadow gauge will refill as normal
Overhead Attack
Release D with Shadow
GGAC Eddie LilEddieWeissD.png
Damage Guard Cancel Startup Active Recovery Frame Adv.
25 High, Air - 19 16 22 -
  • Has a huge arc and travels between where S and H Drill are
  • Can be used for unblockables with either 5K or H Drill
Drunkard Shade
214S
GGAC Eddie 214S.png
Damage Guard Cancel Startup Active Recovery Frame Adv.
30 Mid R 9 10 10 -6
  • Projectile reflector with an active hitbox
  • Reflects projectiles such as Sol's Gun Flame, Ky's Stun Edge and Sacred Edge, I-no's Chemical Love and Antidepressant Scale, Millia's Tandem Disc, Anji's Butterfly and Venom's pool ball projectiles
  • Does not reflect: Zappa's f.S, Johnny's coin, Robo Ky's projectiles, Potemkin's projectile F.D.B, Testaments's projectiles
  • 1 Frame throw invul so can be used to bait throw mash
Damned Fang
623S
GGAC Eddie 623S.png
Damage Guard Cancel Startup Active Recovery Frame Adv.
92 Throw: 70 Pixels - 7 1 - -
  • Command grab in case you can't open up the opponent with unreactable fuzzy mix ups
  • Great in tandem with the shadow for extra damage and unblockables
  • Option selects into shadow -S- once you let go of the button since the button input and release overlap
  • Has really good recovery on whiff and shadow -S- is plus on block so go ham
Flight
7/8/9 while airborne
GGAC Eddie Flight.png
Damage Guard Cancel Startup Active Recovery Frame Adv.
- - - - - - -
  • instead of a double jump, he has flight
  • pretty fast and travels far even from a swallow jump
  • great for movement, stalling and used heavily in Eddie's mix up game
  • Can block in the air from flight
  • Once Eddie's wings flap 3 times, flight ends and you can cancel early by either pressing a button or by FD breaking


Overdrives

Amorphous
632146H
GGAC Eddie 632146H.png
Damage Guard Cancel Startup Active Recovery Frame Adv.
82*2 Mid - 8+8 6,3 28 -17
  • Used as a reversal and combo ender
  • Decently fast but hitbox isn't the best since the move has a gap between him and the active hitbox
  • Despite being minus, the ridiculous pushback makes it very hard to punish on block
  • Barely scales to beat guts
Megalith Head
632146S
GGReload Eddie 632146S.png
Damage Guard Cancel Startup Active Recovery Frame Adv.
44*3 All - 5+5 3*3 30 +7
  • Similar to Amorphous but with the shadow out and uses up the whole shadow meter
  • Plus on block and also deals amazing damage
  • Used to close out rounds
Executor-X
j.236236S
GGAC Eddie j236236S.png
Damage Guard Cancel Startup Active Recovery Frame Adv.
16*30 All R 8+5 Until Wall Until L -
  • Air super used to score knockdowns
  • Used for heights Shadow Gallery won't reach and for Unblockable set ups
  • Damage and number of hits vary on distance traveled


Instant Kill

Black in Mind
in IK Mode: 236236H
GGAC Eddie IK.png
Damage Guard Cancel Startup Active Recovery Frame Adv.
DESTROY Mid - 9+4 16 16 -13
  • Not much to say on this other than once it hits, you win
  • Short range, not used much at all other than style
  • Sometimes used after a stun

Navigation


To edit frame data, edit values in GGReload/Eddie/Data. Be sure to update both the move and the move Full sections. One is shown on the character page, while the other is shown on the frame data page.
Guilty Gear XX ♯Reload
Click [*] for character's frame data
System Explanations

HUDControlsFrame Data & System Data


Movement/CancelingOffenseDefenseDamage/Combo SystemTension/Burst GaugeMisc