DarthPhallus (talk | contribs) No edit summary |
DarthPhallus (talk | contribs) No edit summary |
||
| Line 3: | Line 3: | ||
===<big> | ==Special Moves== | ||
===<big>Flight</big>=== | |||
<span class="input-badge">'''Dash in any direction (Air Only)'''</span> | |||
<div class="attack-container"> | <div class="attack-container"> | ||
<div class="attack-gallery"> | <div class="attack-gallery"> | ||
| Line 9: | Line 11: | ||
Images = | Images = | ||
<gallery widths="210px" heights="210px" mode="nolines"> | <gallery widths="210px" heights="210px" mode="nolines"> | ||
GGST_Zato- | GGST_Zato-1_Flight.png| | ||
</gallery> | </gallery> | ||
|-| | |-| | ||
Hitboxes = | Hitboxes = | ||
<gallery widths="210px" heights="210px" mode="nolines"> | <gallery widths="210px" heights="210px" mode="nolines"> | ||
GGST_Zato- | GGST_Zato-1_Flight_Hitbox.png | ||
</gallery> | </gallery> | ||
</tabber> | </tabber> | ||
</div> | </div> | ||
<div class="attack-info"> | <div class="attack-info"> | ||
By inputting the same direction quickly twice while airborne or pressing the dash button while holding a direction, Zato will fly in the specified direction (e.g. 66 to fly forwards). Dashing directly up, will cause Zato to fly in place. While flight is activated, Zato can be move around freely in 8 different directions and ends either when an attack is inputted during flight, Zato lands, a {{keyword|Faultless Defense}} cancel is used, or Zato has been flying for too long. Zato can cancel {{clr|H|6H}} and all air normals into flight on hit or block as long as he still has an air action available. | |||
Flight as a replacement to a normal airdash is both a strength and a weakness for Zato. Flight allows Zato to have very tricky air movement that can be used both offensively and defensively as well as enabling him to mix in ways not available to any other character. However, Flight is slow compared to a normal airdash and when combined with his slow dash speed Zato can have a very tough time getting in and chasing down quick characters and Zoners. | |||
{{CloseCard}} | {{CloseCard}} | ||
===<big>{{clr| | ===<big>Summon Eddie</big>=== | ||
<span class="input-badge">'''{{clr|H|214H}}'''</span> | |||
<div class="attack-container"> | <div class="attack-container"> | ||
<div class="attack-gallery"> | <div class="attack-gallery"> | ||
| Line 52: | Line 33: | ||
Images = | Images = | ||
<gallery widths="210px" heights="210px" mode="nolines"> | <gallery widths="210px" heights="210px" mode="nolines"> | ||
GGST_Zato- | GGST_Zato-1_Summon_Eddie.png| | ||
</gallery> | </gallery> | ||
|-| | |-| | ||
Hitboxes = | Hitboxes = | ||
<gallery widths="210px" heights="210px" mode="nolines"> | <gallery widths="210px" heights="210px" mode="nolines"> | ||
GGST_Zato- | GGST_Zato-1_Summon_Eddie_hitbox_2.png| First startup frame | ||
GGST_Zato-1_Summon_Eddie_hitbox.png| First frame with Eddie vulnerable | |||
</gallery> | </gallery> | ||
</tabber> | </tabber> | ||
| Line 63: | Line 45: | ||
<div class="attack-info"> | <div class="attack-info"> | ||
{| class="wikitable attack-data" | {| class="wikitable attack-data" | ||
{{FrameDataHeader-GGST}} | {{FrameDataHeader-GGST|version=yes}} | ||
|- | |- | ||
{{#cargo_query:tables=MoveData_GGST | {{#cargo_query:tables=MoveData_GGST | ||
|fields=damage,guard,startup,active,recovery,onBlock,invuln | |fields=name,damage,guard,startup,active,recovery,onBlock,invuln | ||
|where=chara=" | |where=chara="{{SUBPAGENAME}}" and (name="Summon Eddie" or name="Unsummon Eddie") | ||
|format=template|template=FrameData-GGST|named args=yes|order by=_ID | |format=template|template=FrameData-GGST|named args=yes|order by=_ID | ||
|delimiter=\n{{!}}-\n | |||
}} | }} | ||
|} | |} | ||
==== ==== | ==== ==== | ||
* | * Summon/Unsummon Eddie | ||
* | * Integral move to playing Zato | ||
* | * Consumes 3 HP (of 3000 total) of the Eddie gauge per frame Eddie is summoned. | ||
* When summoning, Eddie becomes actionable on frame 21 | |||
* When unsummoning, Eddie disappears on frame 1 as long as he is not locked in an attack. | |||
Zato summons Eddie, which can then use all of his following attacks by releasing {{clr|P|P}}, {{clr|K|K}}, {{clr|S|S}} or {{clr|H|H}}. By inputting 236{{clr|P|P}}/{{clr|K|K}}/{{clr|S|S}}/{{clr|H|H}} Zato can cancel Eddie attacks into other Eddie attacks (e.g. {{clr|P|]P[}} > {{clr|S|236S}}), but is locked into an animation and the Eddie attacks have 4 additional frames of startup over the normal versions of 236{{clr|P|P}}/{{clr|K|K}}/{{clr|S|S}}/{{clr|H|H}}. | |||
Use this summon after a knockdown to set up okizeme with a ]X[ released special. Also used in neutral to summon Eddie without doing an attack immediately, allowing for a reactive Eddie option when the opponent attempts to approach. | |||
Note that Eddie becomes actionable before Zato does. This little gap allows for Eddie to be moved and attack to be input without having to worry about negative edge. | |||
To unsummon Eddie, input {{clr|H|214H}} while Eddie is already summoned, preserving Eddie's longevity and allowing him to be summoned again much more quickly. | |||
{{CloseCard}} | {{CloseCard}} | ||
===<big>{{clr| | ===<big>"Pierce"</big>=== | ||
<span class="input-badge">'''{{clr|P|]P[}} when summoned or {{clr|P|236P}}'''</span> | |||
<div class="attack-container"> | <div class="attack-container"> | ||
<div class="attack-gallery"> | <div class="attack-gallery"> | ||
| Line 92: | Line 77: | ||
Images = | Images = | ||
<gallery widths="210px" heights="210px" mode="nolines"> | <gallery widths="210px" heights="210px" mode="nolines"> | ||
GGST_Zato- | GGST_Zato-1_Pierce.png| | ||
</gallery> | </gallery> | ||
|-| | |-| | ||
Hitboxes = | Hitboxes = | ||
<gallery widths="210px" heights="210px" mode="nolines"> | <gallery widths="210px" heights="210px" mode="nolines"> | ||
GGST_Zato- | GGST_Zato-1_Pierce_Hitbox1.png|Active frames 1-3 | ||
GGST_Zato-1_Pierce_Hitbox2.png|Active frames 4-5 | |||
</gallery> | </gallery> | ||
</tabber> | </tabber> | ||
| Line 103: | Line 89: | ||
<div class="attack-info"> | <div class="attack-info"> | ||
{| class="wikitable attack-data" | {| class="wikitable attack-data" | ||
{{FrameDataHeader-GGST}} | {{FrameDataHeader-GGST|version=yes}} | ||
|- | |- | ||
{{#cargo_query:tables=MoveData_GGST | {{#cargo_query:tables=MoveData_GGST | ||
|fields=damage,guard,startup,active,recovery,onBlock,invuln | |fields=input=name,damage,guard,startup,active,recovery,onBlock,invuln | ||
|where=chara=" | |where=chara="{{SUBPAGENAME}}" and (input="]P[" or input="236P") | ||
|format=template|template=FrameData-GGST|named args=yes|order by=_ID | |format=template|template=FrameData-GGST|named args=yes|order by=_ID | ||
|delimiter=\n{{!}}-\n | |||
}} | }} | ||
|} | |} | ||
==== ==== | ==== ==== | ||
* {{clr|P|]P[}} only works when Eddie is already summoned, whereas {{clr|P|236P}} can be done regardless if Eddie is summoned or not. | |||
* | * Quick, long ranged, two hit pressure starter and grounded space control tool. | ||
* | * {} refers to the value when {{clr|P|236P}} is performed with Eddie already summoned. | ||
* | * {{clr|P|]P[}} and {{clr|P|236P}} use 500 HP of the Eddie gauge for each attack (1000 HP total). If Eddie is already summoned {{clr|P|236P}} uses 325 HP of the Eddie gauge for each attack (650 HP total). | ||
* | * Between the first and second hit there is a 6f gap on block, 3f on hit. On block 5f or faster normals can hit Eddie and kill him in this gap. | ||
* Zato is +4 if the first hit of {{clr|P|236P}} is blocked, meaning at close range the gap can be filled to frametrap the opponent. | |||
* Zato is +19 if the first hit of {{clr|P|]P[}} is blocked, making if significantly easier to fil the gap between hits. | |||
* On grounded opponents the first hit does not combo into second hit, but can on airborne opponents and after some counter hit starters. | |||
Can be used to cover ground space approach safely behind Eddie. Also an essential move in Zato's pressure strings. {{clr|P|236P}} can be used after a blocked {{clr|H|5H}} to create a frametrap for slower than 3f buttons while summoning Eddie. | |||
{{ | There is {{keyword|rps}} around the gap in "Pierce" that is very important to play correctly. Using "Clap Cancels" like {{clr|P|236P(1)}} > 236{{clr|P|P}}/{{clr|K|K}}/{{clr|S|S}}/{{clr|H|H}} and {{clr|S|214S}} can all beat different options an opponent might attempt. It's very important to identify whether an opponent tends to attack, jump, dash, or do nothing during the gap. If they do not attempt to contest the gap simply letting both hits of "Pierce" come out is often the best option. | ||
When using {{clr|P|]P[}} Zato is at much more frame advantage after the first hit and it's much easier to fill the gap with large buttons such as {{clr|S|2S}} and keep pressure going. Filling the gap in "Pierce" also has the benefit of usually allowing both hits of pierce to combo. | |||
{{CloseCard}} | {{CloseCard}} | ||
===<big>{{clr| | ===<big>"That's a lot!"</big>=== | ||
<span class="input-badge">'''{{clr|K|]K[}} when summoned or {{clr|K|236K}}'''</span> | |||
<div class="attack-container"> | <div class="attack-container"> | ||
<div class="attack-gallery"> | <div class="attack-gallery"> | ||
| Line 137: | Line 122: | ||
Images = | Images = | ||
<gallery widths="210px" heights="210px" mode="nolines"> | <gallery widths="210px" heights="210px" mode="nolines"> | ||
GGST_Zato- | GGST_Zato-1_That's_a_lot.png|Tendies! | ||
</gallery> | </gallery> | ||
|-| | |-| | ||
Hitboxes = | Hitboxes = | ||
<gallery widths="210px" heights="210px" mode="nolines"> | <gallery widths="210px" heights="210px" mode="nolines"> | ||
GGST_Zato- | GGST_Zato-1_That's_a_lot_Hitbox.png|Tendies! | ||
</gallery> | </gallery> | ||
</tabber> | </tabber> | ||
| Line 149: | Line 133: | ||
<div class="attack-info"> | <div class="attack-info"> | ||
{| class="wikitable attack-data" | {| class="wikitable attack-data" | ||
{{FrameDataHeader-GGST}} | {{FrameDataHeader-GGST|version=yes}} | ||
|- | |- | ||
{{#cargo_query:tables=MoveData_GGST | {{#cargo_query:tables=MoveData_GGST | ||
|fields=damage,guard,startup,active,recovery,onBlock,invuln | |fields=input=name,damage,guard,startup,active,recovery,onBlock,invuln | ||
|where=chara=" | |where=chara="{{SUBPAGENAME}}" and (input="]K[" or input="236K") | ||
|format=template|template=FrameData-GGST|named args=yes|order by=_ID | |format=template|template=FrameData-GGST|named args=yes|order by=_ID | ||
|delimiter=\n{{!}}-\n | |||
}} | }} | ||
|} | |} | ||
==== ==== | ==== ==== | ||
* {{clr|K|]K[}} only works when Eddie is already summoned, whereas {{clr|K|236K}} can be done regardless if Eddie is summoned or not | |||
* | * {} refers to the value when {{clr|K|236K}} is performed with Eddie already summoned. | ||
* Uses 375 HP of Eddie gauge for each attack (upwards to 1500 HP). If Eddie is already summoned {{clr|K|236K}} uses 281 HP of the Eddie gauge for each attack (1124 HP total). | |||
* Staple okizeme, zoning, and pressure tool. | |||
Eddie creates 4 lingering drills that, one after the other, go across the screen horizontally. | |||
Because of the attack's long duration, it's an effective tool to lock an opponent in blockstun, allowing Zato to close distance or create a variety of ambiguous mixups. | |||
In neutral it can be used to cover a lot of ground, denying an opponent space and allowing Zato to take it. This move also makes it very tricky for certain characters, such as I-no, to approach Zato. | |||
Unsummoning during this move is also safer than usual, since the lingering drills will continue to cover the space in front of Zato during the unsummon recovery. | |||
{{CloseCard}} | {{CloseCard}} | ||
===<big>{{clr| | ===<big>"Leap"</big>=== | ||
<span class="input-badge">'''{{clr|S|]S[}} when summoned or {{clr|S|236S}}'''</span> | |||
<div class="attack-container"> | <div class="attack-container"> | ||
<div class="attack-gallery"> | <div class="attack-gallery"> | ||
| Line 179: | Line 163: | ||
Images = | Images = | ||
<gallery widths="210px" heights="210px" mode="nolines"> | <gallery widths="210px" heights="210px" mode="nolines"> | ||
GGST_Zato- | GGST_Zato-1_Leap.png| | ||
</gallery> | </gallery> | ||
|-| | |-| | ||
Hitboxes = | Hitboxes = | ||
<gallery widths="210px" heights="210px" mode="nolines"> | <gallery widths="210px" heights="210px" mode="nolines"> | ||
GGST_Zato- | GGST_Zato-1_Leap_Hitbox1.png|Active frames 1-2 | ||
GGST_Zato- | GGST_Zato-1_Leap_Hitbox2.png|Active frames 3-5 | ||
GGST_Zato- | GGST_Zato-1_Leap_Hitbox3.png|Active frames 6-11 | ||
GGST_Zato-1_Leap_Hitbox4.png|Active frames 12-17 | |||
GGST_Zato-1_Leap_Hitbox5.png|Active frames 18-26 | |||
</gallery> | </gallery> | ||
</tabber> | </tabber> | ||
| Line 192: | Line 178: | ||
<div class="attack-info"> | <div class="attack-info"> | ||
{| class="wikitable attack-data" | {| class="wikitable attack-data" | ||
{{FrameDataHeader-GGST}} | {{FrameDataHeader-GGST|version=yes}} | ||
|- | |- | ||
{{#cargo_query:tables=MoveData_GGST | {{#cargo_query:tables=MoveData_GGST | ||
|fields=damage,guard,startup,active,recovery,onBlock,invuln | |fields=input=name,damage,guard,startup,active,recovery,onBlock,invuln | ||
|where=chara=" | |where=chara="{{SUBPAGENAME}}" and (input="]S[" or input="236S") | ||
|format=template|template=FrameData-GGST|named args=yes|order by=_ID | |format=template|template=FrameData-GGST|named args=yes|order by=_ID | ||
|delimiter=\n{{!}}-\n | |||
}} | }} | ||
|} | |} | ||
==== ==== | ==== ==== | ||
* | * {{clr|S|]S[}} only works when Eddie is already summoned, whereas {{clr|S|236S}} can be done regardless if Eddie is summoned or not | ||
* | * {} refers to the value when {{clr|S|236S}} is performed with Eddie already summoned. | ||
* | * Uses 1500 HP of Eddie gauge. If Eddie is already summoned {{clr|S|236S}} uses 1125 HP of the Eddie gauge. | ||
* | * Devastating Anti air and combo tool. | ||
* | * First hit whiffs on crouchers. | ||
* Second hit causes hard knockdown. | |||
Anti air attack that drags the opponent back to the ground when blocked, allowing Zato to continue his offense. If the second hit connects, it will cause a hard knockdown, allowing time to dash up and continue the string with {{clr|S|2S}} > {{clr|H|2H}} > ... | |||
Very plus on block. Use this move to make an opponent think twice about jumping and airdashing. Do keep in mind that opponents can use anti-airs to hit Eddie out of it if a gap is left. | |||
Also a staple in Zato's higher damage combos, as Zato can loop into this move so long as he has enough Eddie gauge available. | |||
While Eddie is off the ground, any 236X Eddie move or {{clr|H|214H}} can be input and the action will be "buffered" - causing Eddie to perform it after he lands and recovers. {{clr|S|236S}}/{{clr|S|]S[}} > {{clr|H|214H}} in particular is incredibly useful since Leap will cover the entire unsummon animation, even leaving Zato plus on block if both hits of the move are blocked, allowing him to continue his pressure and summon again. | |||
{{CloseCard}} | {{CloseCard}} | ||
===<big>{{clr| | ===<big>"Oppose"</big>=== | ||
<span class="input-badge">'''{{clr|H|]H[}} when summoned or {{clr|H|236H}}'''</span> | |||
<div class="attack-container"> | <div class="attack-container"> | ||
<div class="attack-gallery"> | <div class="attack-gallery"> | ||
| Line 223: | Line 210: | ||
Images = | Images = | ||
<gallery widths="210px" heights="210px" mode="nolines"> | <gallery widths="210px" heights="210px" mode="nolines"> | ||
GGST_Zato- | GGST_Zato-1_Oppose_Armor.png|Guardpoint | ||
GGST_Zato-1_Oppose_Attack.png|Attack | |||
</gallery> | </gallery> | ||
|-| | |-| | ||
Hitboxes = | Hitboxes = | ||
<gallery widths="210px" heights="210px" mode="nolines"> | <gallery widths="210px" heights="210px" mode="nolines"> | ||
GGST_Zato-1 | GGST_Zato-1_Oppose_Armor_Hitbox.png|Guardpoint | ||
GGST_Zato-1_Oppose_Attack_Hitbox1.png|Active frames 1-3 | |||
GGST_Zato-1_Oppose_Attack_Hitbox2.png|Active frames 4-6 | |||
GGST_Zato-1_Oppose_Attack_Hitbox3.png|Active frames 7-10 | |||
GGST_Zato-1_Oppose_Attack_Hitbox4.png|Active frames 11-13 | |||
GGST_Zato-1_Oppose_Attack_Hitbox5.png|Active frames 14-18 | |||
</gallery> | </gallery> | ||
</tabber> | </tabber> | ||
| Line 237: | Line 230: | ||
|- | |- | ||
{{#cargo_query:tables=MoveData_GGST | {{#cargo_query:tables=MoveData_GGST | ||
|fields=name,damage,guard,startup,active,recovery,onBlock | |fields=input=name,damage,guard,startup,active,recovery,onBlock,invuln | ||
|where=chara=" | |where=chara="{{SUBPAGENAME}}" and (input="]H[" or input="236H") | ||
|format=template|template=FrameData-GGST|named args=yes|order by=_ID | |format=template|template=FrameData-GGST|named args=yes|order by=_ID | ||
|delimiter=\n{{!}}-\n | |delimiter=\n{{!}}-\n | ||
}} | }} | ||
|} | |} | ||
==== ==== | ==== ==== | ||
* {{clr|H|]H[}} only works when Eddie is already summoned, whereas {{clr|H|236H}} can be done regardless if Eddie is summoned or not | |||
* {} refers to the value when {{clr|H|236H}} is performed with Eddie already summoned. | |||
* | * Uses 20 HP of Eddie gauge each frame the move is active and each hit from the attack portion uses 500HP (upwards to 1500 HP). If Eddie is already summoned {{clr|H|236H}} uses 15 HP of the Eddie gauge each frame the move is active and each hit from the attack portion uses 375 HP (upwards to 1125). | ||
* | * Key part of Zato's neutral and offense. | ||
* | * Can guardpoint nearly everything except throws, supers, burst, and RRC. | ||
Eddie enters an armored stance while very slowly advancing forwards. Almost any attack Eddie comes into contact with during this stance is nullified, making it an incredible neutral tool with many applications. After a set period of time spent in the armored stance, Eddie attacks. | |||
In neutral "Oppose" is used in response to predictable approaches or overly aggressive opponents. Examples include anti-airing blocked aerial attacks with {{clr|H|2H}}, usually to be followed up by a damaging [[GGST/Zato-1#"Leap"|Leap]] Combo, or taking advantage of blocked grounded attacks by using {{clr|S|623S}} or {{clr|S|2S}} > {{clr|S|214S}} > [[GGST/Zato-1#"Leap"|Leap]]. Taking advantage of blocked hits will often net a counter hit, granting very damaging combos. | |||
{{ | |||
Other applications include moving Eddie forwards and then activating "Oppose", allowing Zato to safely take space, or cancelling the first hit of {{clr|P|236P}} into "Oppose" to protect Eddie from harm if Zato isn't in range. | |||
{{ | |||
| | |||
}} | |||
In most situations avoiding letting Eddie do the attack portion of this move is for the best as Zato will be out of Eddie meter, leaving him without Eddie for the maximum amount of time. Aim to "Clap Cancel" into another Eddie move or unsummon Eddie. Bear in mind as soon as a cancel cancel or unsummon is input, the guardpoint of "Oppose" ends; smart opponents will target this. Try to force an opponent to block a normal before cancelling oppose if they is in range to threaten. | |||
Note that supers, bursts, RRC, and Happy Chaos' gunshots cannot be armored. Zato can also still be grabbed in the armor of "Oppose". | |||
{{CloseCard}} | {{CloseCard}} | ||
===<big>{{clr| | ===<big>Invite Hell</big>=== | ||
<span class="input-badge">'''{{clr|H|22H}}'''</span> | |||
<div class="attack-container"> | <div class="attack-container"> | ||
<div class="attack-gallery"> | <div class="attack-gallery"> | ||
| Line 317: | Line 261: | ||
Images = | Images = | ||
<gallery widths="210px" heights="210px" mode="nolines"> | <gallery widths="210px" heights="210px" mode="nolines"> | ||
GGST_Zato- | GGST_Zato-1_Invite_Hell_1.png|Tallest point | ||
GGST_Zato-1_Invite_Hell_2.png|Widest point | |||
</gallery> | </gallery> | ||
|-| | |-| | ||
Hitboxes = | Hitboxes = | ||
<gallery widths="210px" heights="210px" mode="nolines"> | <gallery widths="210px" heights="210px" mode="nolines"> | ||
GGST_Zato- | GGST_Zato-1_Invite_Hell_1_Hitbox.png|Tallest point | ||
GGST_Zato-1_Invite_Hell_2_Hitbox.png|Widest point | |||
</gallery> | </gallery> | ||
</tabber> | </tabber> | ||
| Line 332: | Line 278: | ||
{{#cargo_query:tables=MoveData_GGST | {{#cargo_query:tables=MoveData_GGST | ||
|fields=damage,guard,startup,active,recovery,onBlock,invuln | |fields=damage,guard,startup,active,recovery,onBlock,invuln | ||
|where=chara=" | |where=chara="{{SUBPAGENAME}}" and input="22H" | ||
|format=template|template=FrameData-GGST|named args=yes|order by=_ID | |format=template|template=FrameData-GGST|named args=yes|order by=_ID | ||
}} | }} | ||
|} | |} | ||
{{#invoke:FrameChart|drawFrameData | {{#invoke:FrameChart|drawFrameData | ||
|startup = | |startup = 18 | ||
|active = | |active = 32 | ||
|recovery = | |recovery = 2 | ||
}} | }} | ||
==== ==== | ==== ==== | ||
* | * Very active grounded projectile | ||
* | * Solo combo and blockstring ender | ||
* Combo and blockstring filler when Eddie is in play | |||
* Soft knockdown on hit | |||
Good move for controlling neutral. This move has a ton of active frames, which make it easy to meaty people on wakeup and can be very advantageous if it meaties on later active frames. Often cancelled into after a blocked {{clr|S|2S}} and {{clr|H|5H}}. {{clr|S|2S}} > {{clr|H|22H}} cannot be jumped, the opponent will be forced to block in the air or take a hit. {{clr|H|5H}} > {{clr|H|22H}} is a true string or can be delayed for a frametrap. This attack is also often used to cover a blocked Eddie attack from afar, allowing Eddie to continue his onslaught. | |||
Cancelling this move with Drift PRC can also allow Zato to cover the ground while being able to react to what the opponent is doing, such as anti airing someone who jumped over the drill. | |||
{{CloseCard}} | {{CloseCard}} | ||
===<big>{{clr| | ===<big>Break The Law</big>=== | ||
<span class="input-badge">'''{{clr|K|214K}} (Hold OK)'''</span> | |||
<div class="attack-container"> | <div class="attack-container"> | ||
<div class="attack-gallery"> | <div class="attack-gallery"> | ||
<gallery widths="210px" heights="210px" mode="nolines"> | <gallery widths="210px" heights="210px" mode="nolines"> | ||
GGST_Zato- | GGST_Zato-1_Break_The_Law.png|VANISH INTO DARK | ||
</gallery> | </gallery> | ||
</div> | </div> | ||
<div class="attack-info"> | <div class="attack-info"> | ||
| Line 371: | Line 312: | ||
{{#cargo_query:tables=MoveData_GGST | {{#cargo_query:tables=MoveData_GGST | ||
|fields=damage,guard,startup,active,recovery,onBlock,invuln | |fields=damage,guard,startup,active,recovery,onBlock,invuln | ||
|where=chara=" | |where=chara="{{SUBPAGENAME}}" and input="214K" | ||
|format=template|template=FrameData-GGST|named args=yes|order by=_ID | |format=template|template=FrameData-GGST|named args=yes|order by=_ID | ||
}} | }} | ||
|} | |} | ||
==== ==== | ==== ==== | ||
* Zato | * Values in [] refer to when the move is fully held down | ||
* | * Situational alternative movement tool that turns Zato invulnerable | ||
* Often used to shorten the recovery of certain normals such as {{clr|H|2H}} | |||
Zato sinks into the ground, becoming invincible as long as {{prompt|GGST|K}} is held. The longer Zato spends invincible, the longer the move's recovery becomes once he resurfaces. Zato will resurface once {{prompt|GGST|K}} is released or after a set period of time. | |||
This move synergizes well with Eddie out, as Eddie can still be controlled while Zato is safe from any danger. This becomes particularly useful during blockstrings in which the opponent is between Zato and Eddie, allowing Zato to cross under the opponent between the hits of "Pierce", creating an ambiguous left/right mixup. | |||
Other applications include cancelling normals such as {{clr|H|2H}} into this move. This allows Zato to recover quicker from 2H than normal, as the total duration of this move is shorter than the active frames + recovery of some normals. Additionally, Zato can use bait bursts, reversals, and YRC with this move in combos and in blockstrings. The invulnerability when the move is not held is still longer than the active frames of YRC and Burst. Baiting this way rather than by blocking allows for better punishes as the recovery of Break the Law is shorter than the blockstun of Burst and YRC and Zato isn't pushed away. Note that YRC does not kill Eddie unless it connects with Zato, so if break the law is used to bait YRC Eddie will remain out and ready for a punish. | |||
PRC while Zato is inside the ground can be used to reduce the amount of recovery on Break the Law to just the relatively short startup of the PRC. This can catch opponents off guard. | |||
{{CloseCard}} | {{CloseCard}} | ||
===<big>{{clr| | ===<big>Damned Fang</big>=== | ||
<span class="input-badge">'''{{clr|S|623S}}'''</span> | |||
<div class="attack-container"> | <div class="attack-container"> | ||
<div class="attack-gallery"> | <div class="attack-gallery"> | ||
<tabber> | <tabber> | ||
Images = | Images = | ||
<gallery widths="210px" heights="210px" mode="nolines"> | <gallery widths="210px" heights="210px" mode="nolines"> | ||
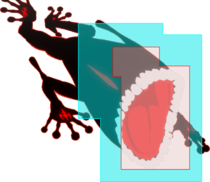
GGST_Zato- | GGST_Zato-1_Damned_Fang.png| "I love shark week!" - Eddie | ||
</gallery> | </gallery> | ||
|-| | |-| | ||
Hitboxes = | Hitboxes = | ||
<gallery widths="210px" heights="210px" mode="nolines"> | <gallery widths="210px" heights="210px" mode="nolines"> | ||
GGST_Zato- | GGST_Zato-1_Damned_Fang_hitbox.png| "Ah..." - Zato | ||
</gallery> | </gallery> | ||
</tabber> | </tabber> | ||
| Line 450: | Line 353: | ||
{{#cargo_query:tables=MoveData_GGST | {{#cargo_query:tables=MoveData_GGST | ||
|fields=damage,guard,startup,active,recovery,onBlock,invuln | |fields=damage,guard,startup,active,recovery,onBlock,invuln | ||
|where=chara=" | |where=chara="{{SUBPAGENAME}}" and input="623S" | ||
|format=template|template=FrameData-GGST|named args=yes|order by=_ID | |format=template|template=FrameData-GGST|named args=yes|order by=_ID | ||
}} | }} | ||
|} | |} | ||
{{#invoke:FrameChart|drawFrameData | {{#invoke:FrameChart|drawFrameData | ||
|startup = | |startup = 6 | ||
|active = | |active = 1 | ||
|recovery = | |recovery = 39 | ||
}} | }} | ||
==== ==== | ==== ==== | ||
* | * Command grab | ||
* Hard knockdown on | * Animation is long enough to recover an empty Eddie gauge to full. | ||
* | * Hard knockdown on hit, +7. | ||
* Range of 12000 | |||
A command grab with more damage and range than Zato's regular throw. When it connects, Eddie is unsummoned and a long attack animation plays, giving the Eddie Gauge plenty of time to refill. With a full Eddie Gauge and 50% of tension. RRC can be used for better okizeme midscreen or for a wallbreak at the corner. See the [[GGST/Zato-1/Combos| Combos section]] for more information. | |||
Combos | |||
While this command throw has mediocre oki midscreen, the distance it leaves Zato from an opponent after it connects in the corner is very favorable. See the [[GGST/Zato-1/Strategy#Okizeme| Oki section]] for more info. | |||
Zato can mix Damned Fang into his pressure to punish opponents for overcommitting to blocking. | |||
{{CloseCard}} | {{CloseCard}} | ||
===<big>{{clr| | ===<big>Drunkard Shade</big>=== | ||
<span class="input-badge">'''{{clr|S|214S}}'''</span> | |||
<div class="attack-container"> | <div class="attack-container"> | ||
<div class="attack-gallery"> | <div class="attack-gallery"> | ||
| Line 475: | Line 382: | ||
Images = | Images = | ||
<gallery widths="210px" heights="210px" mode="nolines"> | <gallery widths="210px" heights="210px" mode="nolines"> | ||
GGST_Zato- | GGST_Zato-1_Drunkard_Shade.png|Ky somehow never expects this | ||
GGST_Zato-1_Drunkard_Shade_Dash.png|Eddie Dash | |||
</gallery> | </gallery> | ||
|-| | |-| | ||
Hitboxes = | Hitboxes = | ||
<gallery widths="210px" heights="210px" mode="nolines"> | <gallery widths="210px" heights="210px" mode="nolines"> | ||
GGST_Zato- | GGST_Zato-1_Drunkard_Shade_Hitbox.png|Ky somehow never expects this | ||
</gallery> | </gallery> | ||
</tabber> | </tabber> | ||
| Line 487: | Line 394: | ||
<div class="attack-info"> | <div class="attack-info"> | ||
{| class="wikitable attack-data" | {| class="wikitable attack-data" | ||
{{FrameDataHeader-GGST}} | {{FrameDataHeader-GGST|version=yes}} | ||
|- | |- | ||
{{#cargo_query:tables=MoveData_GGST | {{#cargo_query:tables=MoveData_GGST | ||
|fields=damage,guard,startup,active,recovery,onBlock,invuln | |fields=name,damage,guard,startup,active,recovery,onBlock,invuln | ||
|where=chara=" | |where=chara="{{SUBPAGENAME}}" and (name="Drunkard Shade" or name="Eddie Dash") | ||
|format=template|template=FrameData-GGST|named args=yes|order by=_ID | |format=template|template=FrameData-GGST|named args=yes|order by=_ID | ||
|delimiter=\n{{!}}-\n | |||
}} | }} | ||
|} | |} | ||
{{#invoke:FrameChart|drawFrameData | {{#invoke:FrameChart|drawFrameData | ||
|startup = | |startup = 9 | ||
|active = | |active = 10 | ||
|recovery = 12 | |recovery = 12 | ||
}} | }} | ||
==== ==== | ==== ==== | ||
* | * Anti-projectile and Eddie-repositioning tool | ||
* On | * Reflects projectiles starting Frame 3 | ||
* On | * Surprisingly active | ||
* On aerial hit, causes hard knockdown | |||
* On grounded counterhit, launches opponent and causes hard knockdown | |||
Attack that covers the space in front of Zato - mostly vertically. Often trades with opponent's attacks leading to a CH, this is almost always in Zato's favor. | |||
Can reflect a variety of non-overdrive projectiles such as Sol's Gunflame or Ky's Stun Edge. | |||
This | In addition, if Eddie is summoned and nearby while this move is performed, Eddie will swiftly dash forwards with a bit of invulnerability. This will cancel whatever Eddie is doing. | ||
If the opponent is within Eddie's dash range, Eddie will cross them up and stop dashing, making it a great way to sandwich the opponent between Zato and Eddie, allowing for the duo's scariest pressure. | |||
Note that Eddies invulnerability only lasts for a short duration at the start of his dash - smart opponents will kill Eddie for free if Zato just throws him at them without much thought. | |||
{| class="mw-collapsible mw-collapsed wikitable" | |||
|- | |||
|+'''Drunkard Shade Reflectable Projectiles Table''' | |||
|- | |||
!Character | |||
!Move | |||
|- | |||
|{{Character Label|GGST|Anji Mito|label=Anji Mito}} | |||
| | |||
*{{MiniMoveCard|game=GGST|chara=Anji Mito|input=236P|label=Shitsu}} (Both the first and second hits) | |||
|- | |- | ||
{{ | |{{Character Label|GGST|Axl Low|label=Axl Low}} | ||
| | |||
*''N/A'' | |||
| | |||
| | |||
* | |||
|- | |- | ||
{{ | |{{Character Label|GGST|Bridget|label=Bridget}} | ||
| | |||
*''N/A'' | |||
}} | |||
| | |||
* | |||
|- | |||
|{{Character Label|GGST|Baiken|label=Baiken}} | |||
| | |||
*''N/A'' | |||
|- | |- | ||
{{ | |{{Character Label|GGST|Chipp Zanuff|label=Chipp Zanuff}} | ||
| | |||
*''N/A'' | |||
}} | |||
| | |||
* | |||
|- | |||
|{{Character Label|GGST|Faust|label=Faust}} | |||
| | |||
*{{MiniMoveCard|game=GGST|chara=Faust|input=j.236P|label=Love }} / {{MiniMoveCard|game=GGST|chara=Faust|input=j.236P (With Afro)|label=Love (With Afro)}} | |||
|- | |||
|{{Character Label|GGST|Giovanna|label=Giovanna}} | |||
| | |||
*''N/A'' | |||
|- | |- | ||
{{ | |{{Character Label|GGST|Goldlewis Dickinson|label=Goldlewis Dickinson}} | ||
| | |||
*''N/A'' | |||
}} | |||
| | |||
* | |||
|- | |||
|{{Character Label|GGST|Happy Chaos|label=Happy Chaos}} | |||
| | |||
*''N/A'' | |||
|- | |||
|{{Character Label|GGST|I-No|label=I-No}} | |||
| | |||
*{{MiniMoveCard|game=GGST|chara=I-No|input=214P|label=Antidepressant Scale {{clr|P|214P}}}} / {{MiniMoveCard|game=GGST|chara=I-No|input=j.214P|label={{clr|P|j.214P}}}} | |||
*{{MiniMoveCard|game=GGST|chara=I-No|input=214K|label=Chemical Love {{clr|K|214K}}}} / {{MiniMoveCard|game=GGST|chara=I-No|input=j.214K|label={{clr|K|j.214K}}}} ''(Nullifies it.)'' | |||
{{ | |- | ||
|{{Character Label|GGST|Jack-O|label=Jack-O'}} | |||
| | |||
*{{MiniMoveCard|game=GGST|chara=Jack-O|input=j.D|label={{clr|D|j.D}}}} | |||
|- | |- | ||
{{ | |{{Character Label|GGST|Ky Kiske|label=Ky Kiske}} | ||
| | | | ||
| | *{{MiniMoveCard|game=GGST|chara=Ky Kiske|input=j.D|label={{clr|D|j.D}}}} ''(Nullifies it.)'' | ||
| | *{{MiniMoveCard|game=GGST|chara=Ky Kiske|input=236S|label=Stun Edge}} | ||
}} | *{{MiniMoveCard|game=GGST|chara=Ky Kiske|input=236H|label=Charged Stun Edge}} | ||
*{{MiniMoveCard|game=GGST|chara=Ky Kiske|input=j.236S|label=Aerial Stun Edge {{clr|S|j.236S}}}} / {{MiniMoveCard|game=GGST|chara=Ky Kiske|input=j.236H|label={{clr|H|j.236H}}}} | |||
{{ | |||
| | |||
| | |||
| | |||
}} | |||
==== ==== | |||
|- | |||
|{{Character Label|GGST|Leo Whitefang|label=Leo Whitefang}} | |||
| | |||
*{{MiniMoveCard|game=GGST|chara=Leo Whitefang|input=[4]6S|label=Gravierte Würde {{clr|S|[4]6S}}}} / {{MiniMoveCard|game=GGST|chara=Leo Whitefang|input=[4]6H|label={{clr|H|[4]6H}}}} | |||
|- | |||
|{{Character Label|GGST|May|label=May}} | |||
| | |||
*''N/A'' | |||
{{ | |- | ||
|{{Character Label|GGST|Millia Rage|label=Millia rage}} | |||
| | |||
*{{MiniMoveCard|game=GGST|chara=Millia Rage|input=236S|label=Tandem Top {{clr|S|236S}}}} / {{MiniMoveCard|game=GGST|chara=Millia Rage|input=236H|label={{clr|H|236H}}}} | |||
|- | |- | ||
{{ | |{{Character Label|GGST|Nagoriyuki|label=Nagoriyuki}} | ||
| | |||
*''N/A'' | |||
}} | |||
| | |||
* | |||
|- | |||
|{{Character Label|GGST|Potemkin|label=Potemkin}} | |||
| | |||
*{{MiniMoveCard|game=GGST|chara=Potemkin|input=Reflect Projectile|label=F.D.B. (Projectile)}} | |||
|- | |||
|{{Character Label|GGST|Ramlethal Valentine|label=Ramlethal Valentine}} | |||
| | |||
*{{MiniMoveCard|game=GGST|chara=Ramlethal Valentine|input=236S|label=Bajoneto {{clr|S|236S}}}} / {{MiniMoveCard|game=GGST|chara=Ramlethal Valentine|input=236H|label={{clr|H|236H}}}} ''(Follow-up explosion only, nullifies it.)'' | |||
{{ | |- | ||
|{{Character Label|GGST|Sol Badguy|label=Sol Badguy}} | |||
| | |||
*{{MiniMoveCard|game=GGST|chara=Sol Badguy|input=236P|label=Gun Flame}} | |||
|- | |- | ||
{{ | |{{Character Label|GGST|Testament|label=Testament}} | ||
| | |||
*''N/A'' | |||
}} | |||
| | |||
* | |||
|- | |||
|{{Character Label|GGST|Zato-1|label=Zato-1}} | |||
| | |||
*{{MiniMoveCard|game=GGST|chara=Zato-1|input=236K|label="That's a lot!"}} ''(Only reflects one drill.)'' | |||
*{{MiniMoveCard|game=GGST|chara=Zato-1|input=22H|label=Invite Hell}} ''(Nullifies it.)'' | |||
|} | |||
{{CloseCard}} | {{CloseCard}} | ||
Revision as of 07:01, 17 August 2022
Experiment to try to show Eddie framedata like it is represented on the P4U2R Ken page https://www.dustloop.com/w/P4U2R/Ken_Amada
Special Moves
Flight
Dash in any direction (Air Only)


By inputting the same direction quickly twice while airborne or pressing the dash button while holding a direction, Zato will fly in the specified direction (e.g. 66 to fly forwards). Dashing directly up, will cause Zato to fly in place. While flight is activated, Zato can be move around freely in 8 different directions and ends either when an attack is inputted during flight, Zato lands, a Faultless Defense This keyword does not have an entry in the Glossary cancel is used, or Zato has been flying for too long. Zato can cancel 6H and all air normals into flight on hit or block as long as he still has an air action available.
Flight as a replacement to a normal airdash is both a strength and a weakness for Zato. Flight allows Zato to have very tricky air movement that can be used both offensively and defensively as well as enabling him to mix in ways not available to any other character. However, Flight is slow compared to a normal airdash and when combined with his slow dash speed Zato can have a very tough time getting in and chasing down quick characters and Zoners.
Summon Eddie
214H


First startup frame

First frame with Eddie vulnerable


No results
- Summon/Unsummon Eddie
- Integral move to playing Zato
- Consumes 3 HP (of 3000 total) of the Eddie gauge per frame Eddie is summoned.
- When summoning, Eddie becomes actionable on frame 21
- When unsummoning, Eddie disappears on frame 1 as long as he is not locked in an attack.
Zato summons Eddie, which can then use all of his following attacks by releasing P, K, S or H. By inputting 236P/K/S/H Zato can cancel Eddie attacks into other Eddie attacks (e.g. ]P[ > 236S), but is locked into an animation and the Eddie attacks have 4 additional frames of startup over the normal versions of 236P/K/S/H.
Use this summon after a knockdown to set up okizeme with a ]X[ released special. Also used in neutral to summon Eddie without doing an attack immediately, allowing for a reactive Eddie option when the opponent attempts to approach.
Note that Eddie becomes actionable before Zato does. This little gap allows for Eddie to be moved and attack to be input without having to worry about negative edge.
To unsummon Eddie, input 214H while Eddie is already summoned, preserving Eddie's longevity and allowing him to be summoned again much more quickly.
"Pierce"
]P[ when summoned or 236P


Active frames 1-3

Active frames 4-5


No results
- ]P[ only works when Eddie is already summoned, whereas 236P can be done regardless if Eddie is summoned or not.
- Quick, long ranged, two hit pressure starter and grounded space control tool.
- {} refers to the value when 236P is performed with Eddie already summoned.
- ]P[ and 236P use 500 HP of the Eddie gauge for each attack (1000 HP total). If Eddie is already summoned 236P uses 325 HP of the Eddie gauge for each attack (650 HP total).
- Between the first and second hit there is a 6f gap on block, 3f on hit. On block 5f or faster normals can hit Eddie and kill him in this gap.
- Zato is +4 if the first hit of 236P is blocked, meaning at close range the gap can be filled to frametrap the opponent.
- Zato is +19 if the first hit of ]P[ is blocked, making if significantly easier to fil the gap between hits.
- On grounded opponents the first hit does not combo into second hit, but can on airborne opponents and after some counter hit starters.
Can be used to cover ground space approach safely behind Eddie. Also an essential move in Zato's pressure strings. 236P can be used after a blocked 5H to create a frametrap for slower than 3f buttons while summoning Eddie.
There is rps Rock Paper ScissorsA situation wherein an attacker and a defender have options that only beat certain responses from their opponent. For example, on wakeup a defending opponent may use a reversal to stop an attacker from using an attack, but the attacker can also block to defeat the reversal. If the attacker blocks, the defender can use the opportunity to take the offensive. around the gap in "Pierce" that is very important to play correctly. Using "Clap Cancels" like 236P(1) > 236P/K/S/H and 214S can all beat different options an opponent might attempt. It's very important to identify whether an opponent tends to attack, jump, dash, or do nothing during the gap. If they do not attempt to contest the gap simply letting both hits of "Pierce" come out is often the best option.
When using ]P[ Zato is at much more frame advantage after the first hit and it's much easier to fill the gap with large buttons such as 2S and keep pressure going. Filling the gap in "Pierce" also has the benefit of usually allowing both hits of pierce to combo.
"That's a lot!"
]K[ when summoned or 236K

Tendies!


Tendies!

No results
- ]K[ only works when Eddie is already summoned, whereas 236K can be done regardless if Eddie is summoned or not
- {} refers to the value when 236K is performed with Eddie already summoned.
- Uses 375 HP of Eddie gauge for each attack (upwards to 1500 HP). If Eddie is already summoned 236K uses 281 HP of the Eddie gauge for each attack (1124 HP total).
- Staple okizeme, zoning, and pressure tool.
Eddie creates 4 lingering drills that, one after the other, go across the screen horizontally. Because of the attack's long duration, it's an effective tool to lock an opponent in blockstun, allowing Zato to close distance or create a variety of ambiguous mixups. In neutral it can be used to cover a lot of ground, denying an opponent space and allowing Zato to take it. This move also makes it very tricky for certain characters, such as I-no, to approach Zato.
Unsummoning during this move is also safer than usual, since the lingering drills will continue to cover the space in front of Zato during the unsummon recovery.
"Leap"
]S[ when summoned or 236S


Active frames 1-2

Active frames 3-5

Active frames 6-11
Active frames 12-17
- GGST Zato-1 Leap Hitbox5.png
Active frames 18-26


No results
- ]S[ only works when Eddie is already summoned, whereas 236S can be done regardless if Eddie is summoned or not
- {} refers to the value when 236S is performed with Eddie already summoned.
- Uses 1500 HP of Eddie gauge. If Eddie is already summoned 236S uses 1125 HP of the Eddie gauge.
- Devastating Anti air and combo tool.
- First hit whiffs on crouchers.
- Second hit causes hard knockdown.
Anti air attack that drags the opponent back to the ground when blocked, allowing Zato to continue his offense. If the second hit connects, it will cause a hard knockdown, allowing time to dash up and continue the string with 2S > 2H > ... Very plus on block. Use this move to make an opponent think twice about jumping and airdashing. Do keep in mind that opponents can use anti-airs to hit Eddie out of it if a gap is left.
Also a staple in Zato's higher damage combos, as Zato can loop into this move so long as he has enough Eddie gauge available.
While Eddie is off the ground, any 236X Eddie move or 214H can be input and the action will be "buffered" - causing Eddie to perform it after he lands and recovers. 236S/]S[ > 214H in particular is incredibly useful since Leap will cover the entire unsummon animation, even leaving Zato plus on block if both hits of the move are blocked, allowing him to continue his pressure and summon again.
"Oppose"
]H[ when summoned or 236H

Guardpoint

Attack


Guardpoint

Active frames 1-3

Active frames 4-6

Active frames 7-10

Active frames 11-13

Active frames 14-18


No results
- ]H[ only works when Eddie is already summoned, whereas 236H can be done regardless if Eddie is summoned or not
- {} refers to the value when 236H is performed with Eddie already summoned.
- Uses 20 HP of Eddie gauge each frame the move is active and each hit from the attack portion uses 500HP (upwards to 1500 HP). If Eddie is already summoned 236H uses 15 HP of the Eddie gauge each frame the move is active and each hit from the attack portion uses 375 HP (upwards to 1125).
- Key part of Zato's neutral and offense.
- Can guardpoint nearly everything except throws, supers, burst, and RRC.
Eddie enters an armored stance while very slowly advancing forwards. Almost any attack Eddie comes into contact with during this stance is nullified, making it an incredible neutral tool with many applications. After a set period of time spent in the armored stance, Eddie attacks.
In neutral "Oppose" is used in response to predictable approaches or overly aggressive opponents. Examples include anti-airing blocked aerial attacks with 2H, usually to be followed up by a damaging Leap Combo, or taking advantage of blocked grounded attacks by using 623S or 2S > 214S > Leap. Taking advantage of blocked hits will often net a counter hit, granting very damaging combos.
Other applications include moving Eddie forwards and then activating "Oppose", allowing Zato to safely take space, or cancelling the first hit of 236P into "Oppose" to protect Eddie from harm if Zato isn't in range.
In most situations avoiding letting Eddie do the attack portion of this move is for the best as Zato will be out of Eddie meter, leaving him without Eddie for the maximum amount of time. Aim to "Clap Cancel" into another Eddie move or unsummon Eddie. Bear in mind as soon as a cancel cancel or unsummon is input, the guardpoint of "Oppose" ends; smart opponents will target this. Try to force an opponent to block a normal before cancelling oppose if they is in range to threaten.
Note that supers, bursts, RRC, and Happy Chaos' gunshots cannot be armored. Zato can also still be grabbed in the armor of "Oppose".
Invite Hell
22H

Tallest point

Widest point


Tallest point

Widest point


No results
Total: 51
- Very active grounded projectile
- Solo combo and blockstring ender
- Combo and blockstring filler when Eddie is in play
- Soft knockdown on hit
Good move for controlling neutral. This move has a ton of active frames, which make it easy to meaty people on wakeup and can be very advantageous if it meaties on later active frames. Often cancelled into after a blocked 2S and 5H. 2S > 22H cannot be jumped, the opponent will be forced to block in the air or take a hit. 5H > 22H is a true string or can be delayed for a frametrap. This attack is also often used to cover a blocked Eddie attack from afar, allowing Eddie to continue his onslaught.
Cancelling this move with Drift PRC can also allow Zato to cover the ground while being able to react to what the opponent is doing, such as anti airing someone who jumped over the drill.
Break The Law
214K (Hold OK)

VANISH INTO DARK

No results
- Values in [] refer to when the move is fully held down
- Situational alternative movement tool that turns Zato invulnerable
- Often used to shorten the recovery of certain normals such as 2H
Zato sinks into the ground, becoming invincible as long as ![]() is held. The longer Zato spends invincible, the longer the move's recovery becomes once he resurfaces. Zato will resurface once
is held. The longer Zato spends invincible, the longer the move's recovery becomes once he resurfaces. Zato will resurface once ![]() is released or after a set period of time.
is released or after a set period of time.
This move synergizes well with Eddie out, as Eddie can still be controlled while Zato is safe from any danger. This becomes particularly useful during blockstrings in which the opponent is between Zato and Eddie, allowing Zato to cross under the opponent between the hits of "Pierce", creating an ambiguous left/right mixup.
Other applications include cancelling normals such as 2H into this move. This allows Zato to recover quicker from 2H than normal, as the total duration of this move is shorter than the active frames + recovery of some normals. Additionally, Zato can use bait bursts, reversals, and YRC with this move in combos and in blockstrings. The invulnerability when the move is not held is still longer than the active frames of YRC and Burst. Baiting this way rather than by blocking allows for better punishes as the recovery of Break the Law is shorter than the blockstun of Burst and YRC and Zato isn't pushed away. Note that YRC does not kill Eddie unless it connects with Zato, so if break the law is used to bait YRC Eddie will remain out and ready for a punish.
PRC while Zato is inside the ground can be used to reduce the amount of recovery on Break the Law to just the relatively short startup of the PRC. This can catch opponents off guard.
Damned Fang
623S

"I love shark week!" - Eddie


"Ah..." - Zato

No results
Total: 45
- Command grab
- Animation is long enough to recover an empty Eddie gauge to full.
- Hard knockdown on hit, +7.
- Range of 12000
A command grab with more damage and range than Zato's regular throw. When it connects, Eddie is unsummoned and a long attack animation plays, giving the Eddie Gauge plenty of time to refill. With a full Eddie Gauge and 50% of tension. RRC can be used for better okizeme midscreen or for a wallbreak at the corner. See the Combos section for more information.
While this command throw has mediocre oki midscreen, the distance it leaves Zato from an opponent after it connects in the corner is very favorable. See the Oki section for more info.
Zato can mix Damned Fang into his pressure to punish opponents for overcommitting to blocking.
Drunkard Shade
214S

Ky somehow never expects this

Eddie Dash


Ky somehow never expects this

No results
Total: 30
- Anti-projectile and Eddie-repositioning tool
- Reflects projectiles starting Frame 3
- Surprisingly active
- On aerial hit, causes hard knockdown
- On grounded counterhit, launches opponent and causes hard knockdown
Attack that covers the space in front of Zato - mostly vertically. Often trades with opponent's attacks leading to a CH, this is almost always in Zato's favor. Can reflect a variety of non-overdrive projectiles such as Sol's Gunflame or Ky's Stun Edge.
In addition, if Eddie is summoned and nearby while this move is performed, Eddie will swiftly dash forwards with a bit of invulnerability. This will cancel whatever Eddie is doing. If the opponent is within Eddie's dash range, Eddie will cross them up and stop dashing, making it a great way to sandwich the opponent between Zato and Eddie, allowing for the duo's scariest pressure.
Note that Eddies invulnerability only lasts for a short duration at the start of his dash - smart opponents will kill Eddie for free if Zato just throws him at them without much thought.
| Character | Move |
|---|---|
| |
| |
| |
| |
| |
| |
| |
| |
| |
| |
| |
| |
| |
| |
| |
| |
| |
| |
| |
| |
|


