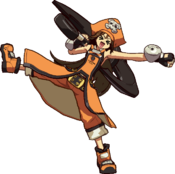
GGXRD-R/May

From Dustloop Wiki
May
GGXRD-R May Portrait.png

Defense Modifier: x1.06

Guts Rating: 3

Weight:

Stun Resistance: 70

Jump Startup: 3F

Backdash Time 13F / Invul: 1-9F

Movement Options
Double Jump, 1 Air Dash, Dash Type: Run
  

Overview

22-year-old little girl with an anchor. Pixie brawler of the game.

Strengths

  • Great ability to control space thanks to the new Beach Ball and Applause for the Victim mechanics
  • Above average damage output
  • Beefy normals with good rewards on counter hit
  • Great oki and solid mixups with high/low and command grab

Weaknesses

  • No real way to escape pressure outside of universal system mechanics
  • Has difficulty keeping safe pressure on opponent without summons
  • Requires certain summons out to meterless damage midscreen


Normal Moves

5P
5P
GGXRD May 5P.png
Damage Guard Cancel Roman Startup Active Recovery Frame Adv.
10 Mid CSJ YRP 5 4 6 0
  • Used for pressure, setting up tick throws or frame traps, Burst-safe confirms, anti-airing, and disrespecting pressure.
  • Proration: 80%
  • Gatling Options: 5P, 2P, 6P, 5K, 2K, 6K, c.S, f.S, 2S, 5H, 2H, 6H, 5D, 2D

Your fastest anti-air button, although not a particularly good one. Useful to catch air techs. Occasionally useful to disrespect pressure e.g. Raven IAD pressure resets or Ino's hover. It is a strong pressure tool, leading into easy hit confirms, frame traps, and throw set-ups. Do a few of this before c.S into air combo on an airborne opponent to create Burst-safe points.

5K
5K
GGXRD May 5K.png
Damage Guard Cancel Roman Startup Active Recovery Frame Adv.
20 Mid SJ YRP 9 6 9 -3
  • Used as a fast, long-range poke. Also used for ranged pressure, jump-checks and punishes.
  • Foot invulnerability from frames 4-17.
  • Gatling Options: 6P, 2K, 6K, c.S, f.S, 2S, 5H, 2H, 5D, 2D

May's main poke. Good at stopping your opponent's advance and whiff punishing. Relatively safe on whiff with only 9f recovery, and pretty safe on block. On block, whiff cancel with 2K or frametrap with stagger f.S / 5H. On hit, cancel to 2D for knockdown or f.S when 2D does not reach. Dodges some low moves, notably Sol's 2D and Potemkin's Slide Head. 5K after a blocked Applause for the Victim / Beach ball / 5H is a good way to jump-check your opponent.

6K
6K
GGXRD May 6K.png
Damage Guard Cancel Roman Startup Active Recovery Frame Adv.
35 High / Air - YRP 20 5 8 +1
  • Used as an overhead attack in pressure, baiting wake-up throws, and setup her Hop on Dolphin mixups.
  • Airborne from frame 6
  • Feet invulnerability from frames 6-24
  • Proration: 80%

May's new overhead. It's quick and good for keeping your opponent from getting too comfortable blocking down back. Also great for baiting throws due to its airborne nature. Normally, May can not convert it into a combo without meter. However, if you have an Applause for the Victim Dolphin on hold from oki, you can cancel 6K to Hop on Dolphin and cancel that into an airdash or an air normal to continue. If it hits meaty, a link to 2P is possible. On counter-hit, a link to 2K is also possible. Able to dodge some projectiles such as Ky's Stun Edge and Raven's needle.

c.S
c.S
GGXRD May cS.png
Damage Guard Cancel Roman Startup Active Recovery Frame Adv.
30 Mid SJ YRP 7 3 15 -1
  • Used for air converts, punishing, pressure, option selecting with forward throw, anti-airing, and setting up tick throws.
  • Gatling Options: 6P, 6K, f.S, 2S, 5H, 2H, 6H, 5D, 2D

Combo filler, jump cancel this for an air combo, or cancel into 2D for a knockdown on ground hit. Go-to starter for a fat corner punish. Can be used for throw OS (6S+H), however S horizontal dolphin will come out instead if done immediately from blocking. Prevent this by doing throw OS after instant blocking. Situational anti-air. Can be used to tick throw OHK, but you need to be dashing into point blank.

f.S
f.S
GGXRD May fS.png
Damage Guard Cancel Roman Startup Active Recovery Frame Adv.
33 Mid SJ YRP 12 3 20 -9
  • Used as a long-range poke. Also used for ranged pressure and punishes.
  • Gatling Options: 6K, 2S, 5H, 2H, 5D, 2D

May extends her anchor out as far as she can at waist height. May's longest range poke and is a good followup after 5K on block or hit. Detached hitbox at the tip of the animation (no hurtbox there) and hence can be used to safely meaty against many uppercut-type reversals including Sol's Volcanic Viper. Hitbox reaches low to the ground, making f.S generally good against 6P counterpokes as well as low profile moves e.g. Sol's 2D.

5H
5H
GGXRD May 5H.png
Somehow not an overhead...
Damage Guard Cancel Roman Startup Active Recovery Frame Adv.
50 Mid SJ YRP 13 4 8 +7
  • Used for counter poking, anti-airing, pressure, frame traps, combo filler, and punishing.
  • Causes stagger on ground CH.
  • Foot invulnerability from frames 13-16.
  • Gatling Options: 6K, 5D, 2D

May slams her anchor to the ground, creating a defensive wall of hitbox. Great counterpoke in general against forward moving specials and normals with extended hurtbox. Situational anti-air, effective against IAD attempts. Occasionally using 5H in neutral can be good to both fish to hit the opponent out of these options and to remind them that you have this option, discouraging them from using these moves too often. It's also good for resetting pressure up close due to great frame advantage.

6P
6P
GGXRD May 6P.png
Version Damage Guard Cancel Roman Startup Active Recovery Frame Adv.
Normal 44 Mid S YRP 16 6 18 -7
6P Charged 44 Mid S YRP 16~47 6 18 -7~+11
  • Used for counter poking, anti-airing, pressure, frame traps.
  • Above knees invulnerability from frames 1-18 (1-9 for charged version)
  • Wallstick on full charge
  • Gatling Options: 6K, c.S, 5H, 2H, 5D, 2D

May punch. Great priority in anti-air situations, however difficult to use due to its slow startup. Useful counterpoke against long-reaching mid moves with extended hurtbox e.g. Ky and Johnny's f.S. Gattling to c.S for a quick confirm. Charge it in blockstring for frame traps and mind games. Does crazy amount of stun, especially on counter hit.

6H
6H
GGXRD May 6H.png
Version Damage Guard Cancel Roman Startup Active Recovery Frame Adv.
Normal 70 Mid S YRP 16 6 34 -21
Charged 70-90 Mid S YRP 16~26 6 34 -21~-8
Maximum Charge 90 High SR YRP 26 6 34 -8
  • Used for frame traps, catching jump outs, combo filler and combo ender.
  • Knockdown on air hit, ground bounces on air hit at maximum charge

May's other overhead when fully charged. Mostly used in combo to score a hard knockdown on airborne opponent, while charged version is May's best combo filler in corner. Because of its reach and the ability to play with the timing by charging, 6HS can be good for catching attempts to jump out of pressure as well. Cancel to Applause for the Victim or Beach ball on hit to setup okizeme.

5D
5D
GGXRD May 5D.png
Damage Guard Cancel Roman Startup Active Recovery Frame Adv.
25 High - YRP 27 3 18 -7
  • Used as an overhead attack in pressure and combo extender.
  • Hits overhead, cancels to Homing Jump or Dash on hit only.
  • Proration: 80%

May performs a spinning lariat from her anchor. Hits overhead. Pretty slow with an obvious animation and she can no longer feint it to go low anymore. Somewhat safe on block, cover yourself a dolphin hoop before trying to make it safer. Great for extending combo after a ground hit S horizontal dolphin RC, or 5H on counter hit. Has some burst-safe points when done at max range.

2P
2P
GGXRD May 2P.png
Damage Guard Cancel Roman Startup Active Recovery Frame Adv.
10 Mid CSJ YRP 4 4 6 0
  • Used for pressure, setting up tick throws or frame traps, and Burst-safe confirms
  • Proration: 80%
  • Gatling Options: 5P, 2P, 6P, 5K, 2K, 6K, c.S, f.S, 2S, 5H, 2H, 5D, 2D

May does a short range poke with the small end of her anchor. Her fastest ground normal but has less range than 5P. Strong pressure tool, leading into easy hit confirms, frame traps, and throw set-ups. Useful for mashing out of gaps in close range pressure and can be hit confirmed into a 2D knockdown.

2K
2K
GGXRD May 2K.png
Damage Guard Cancel Roman Startup Active Recovery Frame Adv.
14 Low S YRP 5 4 9 -3
  • Used as a quick low hit in pressure and okizeme, mid-range poke, setup for tick throws, and low profile under pokes/airdashes.
  • Proration: 80%
  • Gatling Options: 6P, 6K, c.S, f.S, 2S, 5H, 2H, 5D, 2D

May slides down on the ground and pokes with her foot. Use this to keep your opponent honest. Important part of her mixups together with 6K / OHK. Also, good for a close/medium range poke that can lead to knockdown/combo with 2D. Decent tick-throw. Has low profile until the move hits, so can be used to anti-air specific attacks like Bandit Bringer, dodge IAD attempts, and even dodge some mid pokes (notably Johnny's K Mist Finer).

3K
3K
GGXRD May 3K.png
Damage Guard Cancel Roman Startup Active Recovery Frame Adv.
24 Low - YRP 8 21 18 -27
  • Used for low profiling oncoming attacks or catching your opponent off-guard.
  • Low profile from frames 8-28

May slides on the ground head first about 1/3-1/2 of the screen. Very good at low profiling at the cost of being incredibly unsafe on block and in CH state until recovery. Must be YRC/RRCed to make safe. Knocks down on hit. Can be very useful in dealing with characters with projectiles but easily baited and punished harshly if done predictably.

2S
2S
GGXRD May 2S.png
Damage Guard Cancel Roman Startup Active Recovery Frame Adv.
26 Mid SJ YRP 9 3 15 -4
  • Used for counter poking, stopping ground approaches.
  • Gatling Options: 6K, 5H, 2H, 5D, 2D

May extends her anchor out in front of her fairly far while crouched. Great as a medium/far range poke. Has detached hitbox at the tip of the anchor (no hurtbox there) and will stuff a lot of things. However, has longer recovery compared to her 5K, making it more prone to whiff punishes. Cancel into a S horizontal dolphin for a quick confirm, or whiffed S vertical dolphin for a gimmicky low/tick throw.

2H
2H
GGXRD May 2H.png
Damage Guard Cancel Roman Startup Active Recovery Frame Adv.
40 Mid S YRP 11 13 29 -25

Old 2H got replaced with a new anti-air. It comes out quicker than 6P, has lots of active frames and a wide sweeping hitbox. May's hurtbox is really low during this move, giving it really good anti-air priority. However, it has a lot of recovery on whiff, making it dangerous to throw out too often. Whiff cancel into 2D to reduce recovery, allowing a confirm into dash c.S on counter hit or 2P on normal hit when done low enough, and to keep yourself safe on block. It's possible to use a meaty 2H to catch reversal backdashes, notably Millia's.

2D
2D
GGXRD May 2D.png
Damage Guard Cancel Roman Startup Active Recovery Frame Adv.
30 Low S YRP 7 10 8 -1
  • Used for leading combos into knockdown and as a low hit in pressure and okizeme.

May does a split and extends her leg out in front of her. A low that sweeps the opponent off their feet and gives knockdown. Has lots of active frames, making it a strong counterpoke and meaty on oki. Good in pressure as a low and as a means to end a blockstring while remaining safe. On hit, you can safely summon a beach ball or an Applause for the Victim dolphin for oki. Alternatively, cancel this into Horizontal Dolphin to send them flying back and give the combo more corner carry or go for an RC combo route.

j.P
j.P
GGXRD May jP.png
Damage Guard Cancel Roman Startup Active Recovery Frame Adv.
8,8 High/Air CS YRP 5 2(2)2 9 -

Very short range but her fastest air normal. Useful for option selecting air throws and air to air blockstrings with jK.

j.K
j.K
GGXRD May jK.png
Damage Guard Cancel Roman Startup Active Recovery Frame Adv.
24 High/Air S YRP 7 6 10 -

Quite fast and more range and active frames than her jP. Also useful for option selecting air throws and for air to air block strings with j.P. It's also good in air combos in instances where you have to jump back up into the air but the opponent is too high up for j.S to hit. In these instances, j.K's rising hitbox is a good substitute. While the reverse gatling from j.S is no longer in Xrd, it is still possible to link a j.K after j.S recovers. This is extremely useful for throwing bursts by linking j.S to a throw OS j.K.

j.S
j.S
GGXRD May jS.png
Damage Guard Cancel Roman Startup Active Recovery Frame Adv.
30 High/Air SJ YRP 12 4 5 -

May extends her anchor really low to the ground. Your go-to tool for jump-ins after jumps and airdashes. Rising j.S cover May from airthrow attempts, and can be used as anti-air, especially when combined with throw OS.

j.H
j.H
GGXRD May jH.png
Damage Guard Cancel Roman Startup Active Recovery Frame Adv.
38 High/Air S YRP 12 10 15 -

Fairly slow but has a great hitbox. Great tool for controlling air space, especially with backthrow OS. Has a lot of untech frames, especially on counter hit, for relaunch combos.

j.2H
j.2H
GGXRD May j2H.png
Damage Guard Cancel Roman Startup Active Recovery Frame Adv.
34 High/Air - YRP 13 until landing 0 -
  • May's best jump in tool
  • Halts her forward momentum

May's best jump in tool. It has a great hitbox compared to its hurtbox and no recovery. Combine this with its ability to halt her forward momentum for ambiguous crossups and you have a very good jump in option. On hit, it leads into a combo. On block, it's a great way to start pressure.

j.D
j.D
GGXRD May jD.png
Damage Guard Cancel Roman Startup Active Recovery Frame Adv.
35 High/Air SJ YRP 10 12 24/5 landing -

Combo filler due to its jump cancel properties, great at building stun too. Stops air momentum and can be used occasionally to stall in the air for a short time. Used in fuzzy overhead setups as well.


Universal Mechanics

Throw
Throw
GGXRD May throw.png
Damage Guard Cancel Roman Startup Active Recovery Frame Adv.
0, 55 Ground Throw: 75250 - R 1 - - +46
  • Good defensive tool
  • Proration: Forced 65%

Due to the very fast startup of throws in Guilty Gear, May's throw is a good defensive tool in pressure situations where the opponent leaves themselves vulnerable to getting thrown. It can also be used for mixup but Overhead Kiss is usually just as good and more rewarding in these instances. After throwing the opponent, May has a lot of advantage to either set up an Applause for the Victim dolphin for oki or go for a variety of other mixups on their wakeup. If you have 50 meter, you can also get a full combo from the throw by RCing.

Air Throw
Air Throw
GGXRD May airThrow.png
Damage Guard Cancel Roman Startup Active Recovery Frame Adv.
0,55 Air Throw: 210000 - R 1 - - -
  • Great anti-air option
  • Proration: Forced 65%

May has the largest air throw range in the game (or second largest after I-no's Sterilization Method). Because May's AAs are a bit slow to come out (especially in the context of pressure), jumping up and air throwing opponents can be a very effective way to deal with jump ins at closer ranges. Jumping up and air throwing opponents can also be used in general to make opponents less jumpy if used correctly. After landing, setup Applause for the Victim for okizeme, or dash in to start pressure.

Dead Angle Attack
Dead Angle Attack
GGXRD May 6P.png
Damage Guard Cancel Roman Startup Active Recovery Frame Adv.
25 All - - 16 6 18 -10
  • Fully Invulnerable from frames 1-21
  • Throw Invulnerable from frames 22-36
  • Proration: 50%

Uses 6P animation. Pretty good horizontal range on this. Punishable on block, so do be careful when throwing this out.

Blitz Shield Charge Attack
Blitz Attack
GGXRD-R May BlitzAttack.png
Version Damage Guard Cancel Roman Startup Active Recovery Frame Adv.
Uncharged 50 Mid - R (15-48)+13 3 Hit: 11
Whiff: 20
-2
Max Charge 50 Mid - R 50+13 3 Hit: 11
Whiff: 20
-+5
  • Partial charge version causes horizontal blowback on hit, wall sticks in corner.
  • Max charge version (and partial charge on Counter Hit) crumples on ground hit, floats and wall sticks in corner on air hit.
  • Steals a small amount of Burst Gauge on hit.
  • Proration: 55% (partial charge only)


Special Moves

Mr. Dolphin Horizontal
[4]6S/H
GGXRD May MrDolphinHorizontal.png
Version Damage Guard Cancel Roman Startup Active Recovery Frame Adv.
S 35 All - YRP 5 14 6 + 5 after landing -4
  • All around good tool for neutral, pressure and combos
  • Airborne from frame 3

In combos, Horizontal Dolphin is a good mid screen combo ender when you want to go for damage and corner carry instead of oki. It can also be RCed for a bigger combo that'll increase the damage and corner carry as well. In pressure, the S version of Horizontal Dolphin can be a good blockstring ender since it knocks back May a good distance away from the opponent, making it difficult to punish. Your actual best disrespect option on defense due to being airborne and 5f startup.

H 40 All - YRP 13 20 9 + 5 after landing -5
  • Airborne from frame 3
  • Proration: 80%
  • Wallsplats on hit near corner

H version has more startup but covers more horizontal distance, sends the opponent flying back further than the S version on hit and also gives a wall stick in the corner. The wall stick is particularly useful for allowing meterless corner combos into good damage where midscreeen you would have had to RC to get the same results.

Mr. Dolphin Vertical
[2]8S/H
GGXRD May MrDolphinVertical.png
Version Damage Guard Cancel Roman Startup Active Recovery Frame Adv.
S 40 Mid/High/Air - YRP 8 20 2 + 5 after landing -9
  • Airborne from frame 4
  • Throw invulnerability from frame 1-34

During the rising section, this attack is a Mid, during the downward section this attack is an overhead. Useful as an overhead sparingly, but they are unsafe on block, or whiff it for a gimmicky low/throw. Somewhat useful to stop aerial pressure reset attempts, such as Sol's Bandit Revolver and Bandit Bringer, or Ino hover dash, due to its throw invulnerability.

H 45 Mid/High/Air - YRP 15 26 2 + 5 after landing -9
  • Airborne from frame 3

Combo filler after 2H, situational anti air. Gives hard knockdown most of the time. Spaced right and it vacuums the opponent towards May, making her classic lame loop possible. You can input 663 to keep a down charge while dashing forward, making dash HS vertical dolphin possible to punish jumps.

Applause for the Victim
41236P/K/S/H
GGXRD May ApplauseForTheVictim PK.png
Hold button to delay
GGXRD May ApplauseForTheVictim SH.png
Version Damage Guard Cancel Roman Startup Active Recovery Frame Adv.
P 20 All Y YRP 25 36 43 Total +2
  • Good for controlling space in neutral
  • Good for oki and extending pressure
  • Hold the button during summon and release it later to activate the attack.
  • Alternatively, tap the button during summon, press it again later and then release it to activate the attack.

All around great tool for neutral and pressure. In neutral, the dolphin is great for controlling space. You can hold the button and make use of the threat of being able to send the dolphin to attack at any time to discourage the opponent from doing anything, making it easy to appraoch them.

In pressure, the fact that you can hold the button to determine when the dolphin attacks gives you a lot of options for oki. You can release the button right away to send the Dolphin ahead of you before you start your pressure. This has 2 good benefits. The first benefit is that sending the dolphin ahead of you forces the opponent into blockstun and locks out their ability to do a reversal on wakeup when you start your pressure. The second benefit is that if you are already close enough to go for a mixup right away, the dolphin colliding with the blocking opponent can partially visually obscure your mixup. You can also release the button at a key point in your blockstring and take advantage of the time that the dolphin attacks to reset pressure.

In combos, if you already have the dolphin out and waiting, it can be a good way to extend a combo in places where you'd usually have to RC to get a longer combo. For example, you can do stuff like 2D > (Release Dolphin) > Continue with air combo

P version summons the hoop at ground level in front of May, making it great for oki. It's also useful for extending pressure

K 20 All - YRP 24 35 37 Total +7

K version summons the hoop up in the air in front of May, making the trajectory that the Dolphin will take great for making a wall to prevent your opponent's approach. If they're close enough, it can be useful for preventing in oki to prevent them from both jumping out.

S 20 All Y YRP 25 36 43 Total +2

S version summons the hoop at ground level about half a screen away from May. Great in neutral to make opponents with ranged options afraid to use them and against opponents standing full screen away in general.

HS 20 All - YRP 24 35 37 Total +7

HS version summons the hoop up in the air about half a screen away from May. Great in neutral for creating a wall that's hard to pass for opponent's standing far away.

Hop on Dolphin
Hop on Dolphin
Touch the Hoop dolphin during a jump
GGXRD May HopOnDolphin.png
Damage Guard Cancel Roman Startup Active Recovery Frame Adv.
50 All - YRP 13 18 0 ?
  • Proration: Forced 70%
  • Wallsplats on air hit near corner

Effectively the opposite of Force Break Dolphins from AC and +R, Dolphin Hopping is a vital combo and pressure tool for May in Xrd. Can be canceled into an airdash on hit or block with a generous window. May can also preserve her forward momentum by using an air normal on the frame the dolphin hits or is blocked, enabling a solid mixup. Any air normal will work for highs while her j.2H command normal will cause her to drop like a rock, giving a near-instant landing for lows.

Don't Miss It!
Don't Miss It!
214P/K
GGXRD May DontMissIt.png
GGXRD May DontMissIt2.png
Version Damage Guard Cancel Roman Startup Active Recovery Frame Adv.
P 40 Mid - YRP 37 ? 45 Total -
  • Great in neutral for controlling space
  • Great for oki
  • Has a hitbox and can be destroyed by certain pokes

May summons a beach ball. The ball bounces 3 times or until it hits an opponent. In neutral, it's good for controlling space. Its trajectory and the amount of times it bounces makes it difficult for characters to approach May freely once its out, giving her chance a go on the offensive.

In pressure, it can be used as oki from a 2D ender or by YRCing out of the animation. The ball makes it difficult to jump out of pressure and can also be used to extend pressure by pressuring the opponent until the ball comes down and then resetting your pressure as they block the beach ball. In a similar manner, the beach ball can also be used to extend combos. Causes hard knockdown on counter-hit.

P version has a closer trajectory and comes down closer to May.

Version Damage Guard Cancel Roman Startup Active Recovery Frame Adv.
K 40 Mid - YRP 37 ? 55 Total -

K version has a wider trajectory and comes down further away from May. With the extra 10f of recovery, this sees more use when the opponent is a full screen away.

Ball Jump
Ball Jump
1/2/3 near the ball during a jump
GGXRD May BallJump.png
Damage Guard Cancel Roman Startup Active Recovery Frame Adv.
? ? - Y ? ? - -

May uses the beach ball to do an extra jump. An interesting consequence of this is that it smashes the beach ball downwards. May's jump trajectory will change depending on which down direction is held. For instance, holding 3 will send May diagonally forward relative to her original position. This can be combined with an IAD on the opponent's wakeup for crossups or fake crossups (see Strategy for more info).

Ensenga
Ensenga?
j41236HS
GGXRD May Ensenga.png
Damage Guard Cancel Roman Startup Active Recovery Frame Adv.
30,20 All, High/Air - YRP 16 5(18)Till Landing 17 after Landing -15
  • Staple air combo ender

A new air special that mostly gets used at the end of air combos due to its ability to bring the opponent back down to the ground in a knockdown state for oki. To ensure the second hit does not OTG the opponent, you want to be slightly under them when you end a combo.

Overhead Kiss
Overhead Kiss
623K
GGXRD May OverheadKiss.png
GGXRD May OverheadKiss2.png
Damage Guard Cancel Roman Startup Active Recovery Frame Adv.
0, 40 Ground Throw: 157500 - RP 4 1 44 Total -
  • Throw invulnerabilty from frames 1-5
  • Proration: Forced 75%

OHK back to its former glory of being a quick command throw to be feared. One of May's best mixups and best combo starters. However, it has a lot of recovery on whiff, making it easy to punish. Like most command grabs, it's best used sparingly with proper conditioning.


Overdrives

Ultimate Whiner
Ultimate Whiner
63214H
GGXRD May UltimateWhiner.png
Damage Guard Cancel Roman Startup Active Recovery Frame Adv.
16, 9x31 Mid - YRP 8+1 1 31 -13
  • Full invulnerability from frames 1-9
  • Strike invulnerability from frames 10-14

Mediocre reversal with 50 meter, unsafe on block. Gives your opponent a ton of meter on hit. YRC before super flash is a good defense option to dodge meaties at only 25% meter. Also a good combo ender when the opponent's at low health due to its multi-hit nature being able to blow through guts.

Great Yamada Attack
Great Yamada Attack
236236S
GGXRD May GreatYamadaAttack.png
GGXRD May GreatYamadaAttack2.png
Damage Guard Cancel Roman Startup Active Recovery Frame Adv.
140 Mid - YRP 9+0 27 38 -33
  • Proration: Forced 65%
  • Strike invulnerability from frames 5-11

A huge whale. Hitbox does not reach low to the ground. Great combo filler after 6[H], dealing major damage and stun. Situational anti air when May's back is facing the corner due to being 0 startup after super flash at that spot. Possible to be used in hilarious "unblockable" setups, check Stategy section for details.

Ultimate Spinning Whirlwind
63214S
GGXRD May UltimateSpinningWhirlwind1.png
GGXRD May UltimateSpinningWhirlwind2.png
Damage Guard Cancel Roman Startup Active Recovery Frame Adv.
18x10 Mid - YRP 1+8 [2(12)] x9, 2 21 -4
  • Strike invulnerability on frame 1
  • Throw invulnerability during movement

Spins. Unfortunately does not have super armor. Combo filler with great corner carry. Buffer into this move to confirm whiff punishes. Possible to combo after corner HS horizontal dolphin in the corner as well.

Deluxe Goshogawara Bomber
P during Ultimate Spinning Whirlwind
GGXRD May DeluxeGoshogawaraBomber.png
Damage Guard Cancel Roman Startup Active Recovery Frame Adv.
48 Mid - YRP 11 10 24 +9

There's absolutely no reason to not do this move ever.


Instant Kill

And Then She Said... Farewell
in IK mode: 236236H
GGXRD May And Farewell1.png
GGXRD May And Farewell2.png
GGXRD May And Farewell3.png
Damage Guard Cancel Roman Startup Active Recovery Frame Adv.
DESTROY Mid - - 9+19
[5+14]
3 34 -20
  • [ ] Indicates when match point for you, opponent in Hell Fire state, and you have 50% Tension
  • Uses the animation of her 6H.
  • Full invulnerability from frames 9-30 [5-21]


Guilty Gear Xrd -REVELATOR-e
Click [*] for character's frame data
System Explanations

HUDControlsFrame DataSystem Data


Movement/CancelingOffenseDefenseDamage/ComboAttack AttributesTension/Burst GaugeMisc